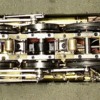
This is project I had been thinking about for a number of years now. Suggestions that 3rd Rail do one have been unanswered. I thought a 2 rail engine could be converted though I had never done one before. I acquired a basket case Sunset K5 a few years ago and was hoping I could find a 3 rail chassis to put under it. Even picked up an MTH PS1 NYC USRA Pacific for this project. While the axles lined up, the narrow smokeboxes with its narrow steamchest of the USRAs and similar Southern PS4s Pacifics didn’t fit the much larger K5 smokebox. Later found NYC Hudson steamchests would fit but but were more forward than the K5 and would have required a lot of cutting and splicing.

Start point.

image

Hence the attempt to modify the K5 chassis with big flange wheels and pickups.

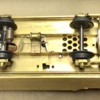
Drivers used were from a K-Line Scale Hudson. Pilot and tender wheels from various MTH passenger car trucks that had been a victim of zinc rot. Wheels were bored to accept the Sunset axles save the engine trailing truck which is from a Lionel L2a Mohawk. Couldn’t find wheels close in size the ones in the Sunset trailing truck.

After pressing the drivers on their new axles I found they were 0.040” out of gauge on the stepped axle. Cutting back the steps and the wheelsets no longer fit in the frame so .025” had to be milled from each side of the frame.

Wheels now mounted in the narrowed frame and K5 brake shoes with their new top mounts. The original side mounts were hitting the big flanges requiring new mounting locations.


C8B7623F-7034-42D4-B525-E0583ADBAA30

Next hurdle was getting the new wheels and valve gear to clear the Sunset main rod, crosshead, and crosshead guides. The K-line shoulder screw heads were milled about .025” and rod ends also thinned using a counter bore and custom pilot.
Photo shows the clearance now between the rod bolts and crosshead guide.

DD7077D6-85BC-4384-A6A5-DFB8C25A48AD

Driver flanges cleared only because the center driver is blind. Three flanged drivers would not have fit. Engine truck wheels did have to have their flanges reduced to avoid hitting the frame and front driver. May require more modification after running on various curve diameters.

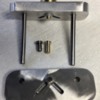
Being three rail I had to add pickup rollers. These were mounted on .062” copper clad epoxy circuit board which I have lot of from making my own circuits back in the day.

Also a 4 lobe cam and micro switches added for sound and puffing smoke.

E319B1CB-7CEE-42DE-9029-3EBC81A7641F

It took about 8 tries trying to get the drivers quartered using my new to me NWSL quarterer. I finally realized the spring loaded axle centers were not holding the wheels centered so I made my own centers to fit the wheels. These worked first try.

0B141192-623E-4C48-8E73-475AA2854281

All for now. Next up tender mods.

Pete

Attachments

Images (5)
  • C8B7623F-7034-42D4-B525-E0583ADBAA30
  • DD7077D6-85BC-4384-A6A5-DFB8C25A48AD
  • E319B1CB-7CEE-42DE-9029-3EBC81A7641F
  • 0B141192-623E-4C48-8E73-475AA2854281
  • image
Last edited by Norton
Original Post

Replies sorted oldest to newest

Thanks guys. In between the modifications, this engine required a lot of repair as well for missing parts and many that were about to fall off. My homemade resistence soldering tool has been getting a real workout. I couldn’t have done this without it.

The tender was not quite as involved. As there are no three rail Commonwealth tender trucks with 6’ axle spacing I had to use the ones it came with. It meant making them a bit stiffer by soldering the bolster to the sides and pressing on three rail wheelsets. Also had to fab a mount for a pickup roller both for power to the boards and add a third pickup to the engine rollers as they a bit close together. Mount is just some styrene.

I was hoping the two rail wheelsets would work but they would derail on my 042 switches. After replacing the wheels it sails right through no problem. I am actually surprised it would do 042 given their limited swing but it does.

04F80BDD-E814-4922-8E4A-2B8BD13EF328

The coupler is a G gauge Kadee as O scale Kadees don’t handle the uneven track on the club layout very well. It couples right up to a claw plus has a greater swing than an O scale version.

The tender came with a coal hopper which I had to cut out to make room for the boards.

AD6E34AC-205E-463A-A40C-97AC9E720BEA

An MTH ten pin tether is used here. That fit near perfectly in both the engine and tender. The coal load is a piece of styrene with the antenna wire laid on the top and covered with some of the coal the tender came with after cleaning off the old glue.

So this it where it stands today. Still a lot of testing and sorting to do before paint.

B9E62ED5-5C9E-429F-8406-F0DC61293F78

This taken yesterday and after more tuning today its seems to be running even smoother.

Pete

Attachments

Images (3)
  • 04F80BDD-E814-4922-8E4A-2B8BD13EF328
  • AD6E34AC-205E-463A-A40C-97AC9E720BEA
  • B9E62ED5-5C9E-429F-8406-F0DC61293F78
Videos (1)
IMG_0807
Last edited by Norton

Did a little more detailing today. I wanted to add a cab apron. I first tried mounting it in the traditional way on the engine but found the deck heights were off by more than I realized at first glance. The engine being lower than the tender. With the apron sitting on the tender deck it was angled up by about 20 degrees. This not due to replacing the 2 rail drivers with 3 rail as it only lowered the engine by .010”. I thought I would try mounting it on the tender. After a few tries this is the result. Not sure it will allow enough swing on the curves but I could always leave it up when running.

Hinges are Precision Scale.

EC4064F5-B06A-4736-9A5D-C90BA3D2B36677A517A9-EB54-4673-B656-39ECDDC36D6AB2D6E6F4-090D-435A-83E0-7060D431DAA5


Pete

Attachments

Images (3)
  • EC4064F5-B06A-4736-9A5D-C90BA3D2B366
  • 77A517A9-EB54-4673-B656-39ECDDC36D6A
  • B2D6E6F4-090D-435A-83E0-7060D431DAA5
Last edited by Norton

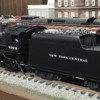
Getting close to the finish line here. Now painted and lettered. Paint is a variety of automotive one part urethanes including satin and gloss blacks (on pieces to be decaled) and a matte clear. Thanks to master painters Pat and Lou (Harmonyards and Lou1985) for teaching me how to use these paints. Decals are K4 with headlight numbers done on my laser printer.

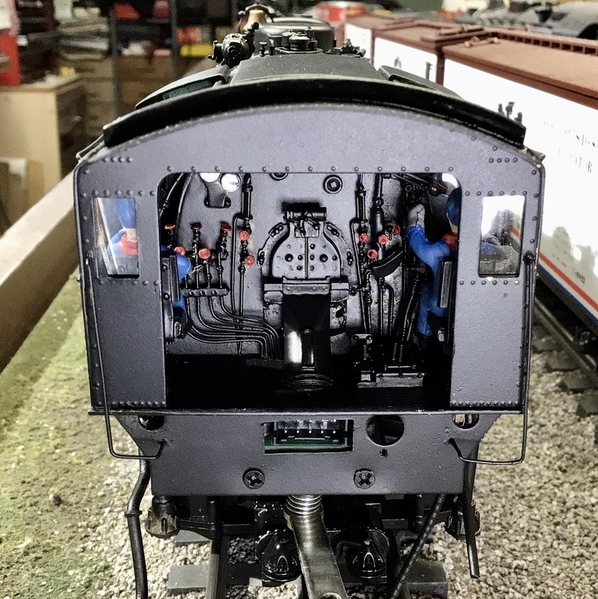
Glass cover slips used for the cab windows and figures added.

29898F0E-6AD0-4675-A8B2-8DD082F98837792F953D-3A63-416A-B5EE-9A7DE2E2D293

Pete

Attachments

Images (2)
  • 29898F0E-6AD0-4675-A8B2-8DD082F98837
  • 792F953D-3A63-416A-B5EE-9A7DE2E2D293
Videos (1)
IMG_0880

How come you didn't go with Lionel silver for the boiler? Just kidding, that is a great color Pete. At first glance in the first painted picture, I thought it was black. When I clicked it to closer view on my phone, nice grey/graphite color. What is the color though? Is it a grey or graphite?

Dave, I was going to use Lionel bright silver, then woke up from that nightmare!!!

After considering paint and knowing what a PITA it was going to be to mask off all those pipes I thought I would try pan pastels first. Ended up with a charcoal gray.

It sticks better than weathering powders and may just leave it as is. Its also easy  to control and I didn’t have to mask anything off. Just used a brush and one of their foam swabs.

Pete

@RickO posted:

Good stuff Pete!   So....where can I place my preorder?

Amazing work as usual.

Four months work here Rick. I would have to charge about 5 Vision Big Boys for  this. It satisfied my curiosity and don’t intend to do another in this fashion. One waiting (H10) in the wings will get a three rail chassis slid under it. Hopefully Legacy.

Pete
Last edited by Norton
@Norton posted:

Dave, I was going to use Lionel bright silver, then woke up from that nightmare!!!

After considering paint and knowing what a PITA it was going to be to mask off all those pipes I thought I would try pan pastels first. Ended up with a charcoal gray.

It sticks better than weathering powders and may just leave it as is. Its also easy  to control and I didn’t have to mask anything off. Just used a brush and one of their foam swabs.

Pete
It looks really great. Looking at it on my laptop now, it is very cool. Almost remind me of when Lionel was using the right colors for boilers.

How the heck did I miss this? And especially as I am currently trying to finish up my own 3RO K5 - a loco that I also have requested be offered in non-Mercury form (love the Mercury; I have one), but to no avail.

Mine is from a completely different approach and cannot compare with your efforts - wow - but it does share the Sunset boiler (so delicate). Mine's the blacksmith version.

Add Reply

Post

OGR Publishing, Inc., 1310 Eastside Centre Ct, Suite 6, Mountain Home, AR 72653
800-980-OGRR (6477)
www.ogaugerr.com

×
×
×
×
Link copied to your clipboard.
×
×