I'm a big fan of Woodland Scenics, Scenic Express, and similar senery-related vendors, but I also find it satisfying to use things I find around the house, in the yard, along the road, in a park, wherever, for scenery and structures on my layout.

Here is an example:

20220918_153747

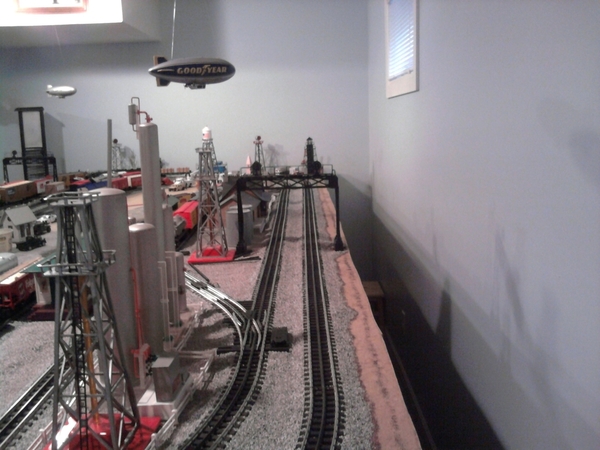
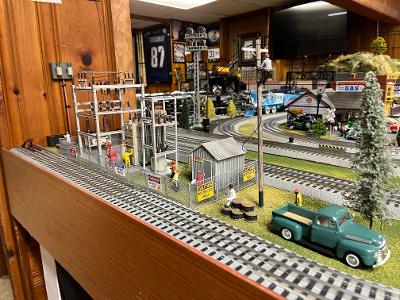
The above photo shows asphalt pebbles, which I found along the road, and which I placed loose between, and along the sides of, the rails of my hi-rail O Gauge tubular track.

I sifted the asphalt pebbles through a strainer to eliminate the dust and tiny bits of rock.

I've had this homemade ballast for over 20 years and, although it is unglued and loose, it has never gotten into the gears, or messed up the mechanism, of any of my locomotives.

I also find that this ballast helps stabilize the track.

What do you think of it?

Also, if you are so inclined, you can share on this thread the everyday stuff you have used for scenery and structures on your layout.

Arnold

Attachments

Images (1)
  • 20220918_153747
Original Post

Replies sorted oldest to newest

Cat fur! Aluminum foil! Cat whiskers!  Termite stake indicators (whatever that is)! I love this everyday stuff on a layout.

IMO, it takes a lot of imagination and creativity to see how something commonplace can enhance one's layout. The possibilities are limitless, and it also saves the hobbyist a few dollars.

My initial motivation years ago was to save money, but now I do it for the fun of it. Arnold

Last edited by Arnold D. Cribari

Here are a few:

  • Dirt. Believe it or not, one of the things we got a lot of questions about was what did we use for dirt. Something that simple. We went with a simple solution -- real dirt. Get some, sift it, and hit it with the microwave to kill anything living in it.
  • Moulding. For the bridge bents on the viaduct, I took a trip to the local home improvement box store and hit the moulding section. You can use Wainscott cap moulding to trim out buildings along the roof lines and corner moulding for -- well, corners.AngelsGateBridge01
  • Drawer Pulls. Some drawer pulls make passible roof vents. You want the older style that are turned.
  • Jewelry Chain. Jewelry chain (the cheap stuff) can be used for tie-down chain. Just paint it.
  • Bridal Veil. Makes good chain-link fence material. Just go get some from a fabric store and not your wife's cedar chest -- you'll remain healthy.
  • Coffee Stirrers. The wooden types, depending on width, make for good lumber for fences, building siding, etc. McDonalds used to have plastic ones with a thin stem and a rectangular stirring blade. Those made good railroad "signal" signs and were useful for uncoupling Kadees if you tapered the end.

Attachments

Images (1)
  • AngelsGateBridge01

Coffee grounds are not on my layout yet, but I understand that they can be the scenery material used for dirt on a layout.

I have also never used coffee stirrers, but they remind me of the Popsicle Sticks I have used for bleachers on my baseball parks  and for various other things on my layout:

IMG_0577[1)

IMG_2217

I confess, however, that those Popsicle Sticks didn't come from any Popsicles my family and I ate, but rather a box of 1,000 Popsicle Sticks that my older sister bought for me at an arts and crafts store 30 years ago when she knew I was interested in the model railroad hobby. I still have hundreds of those Popsicle Sticks left for future modeling projects.

Arnold

Attachments

Images (2)
  • IMG_2217
  • IMG_0577(1)
Last edited by Arnold D. Cribari

Coffee grounds are not on my layout yet, but I understand that they can be the scenery material used for dirt on a layout.

I have also never used coffee stirrers, but they remind me of the Popsicle Sticks I have used for bleachers on my baseball parks  and for various other things on my layout:

IMG_0577[1)

IMG_2217

I confess, however, that those Popsicle Sticks didn't come from any Popsicles my family and I ate, but rather a box of 1,000 Popsicle Sticks that my older sister bought for me at an arts and crafts store 30 years ago when she knew I was interested in the model railroad hobby.

Arnold

You can also use coffee grounds to simulate bark on hand made tree's

Here are several suggestions that can be considered. One is the use of block mix for ballast. Most areas have a cinder block manufacturing plant in themballast oldgrout 2tile grout. The blocks are made from small aggregate and after crushing, it is heat treated. I used it on some of my layout  but while the cost is almost nothing, it requires sifting. The fines can be used for dark ground cover and the large ones for any crumbling rock areas.  The second is the use of tile grout. It is great for ground cover, its cheap and very fine, and comes in many colors, and my wife bought bought me several salt shakers for applicators,

Attachments

Images (3)
  • ballast old
  • grout 2
  • tile grout

I bought a dollar's worth of gravel from a gravel pit's office to use as riprap around my last layout's lighthouse.  A dollar's worth of gravel filled a quart zip-loc bag.  I washed it in some dishwashing soap, then let it dry for a week before putting in place on the layout.  The space that appears at one point between the riprap is where the rowboat could be launched or landed.  That's real beach sand from Cape Cod around the riprap and extending along the outer loop of track's ballast.

DSC01408

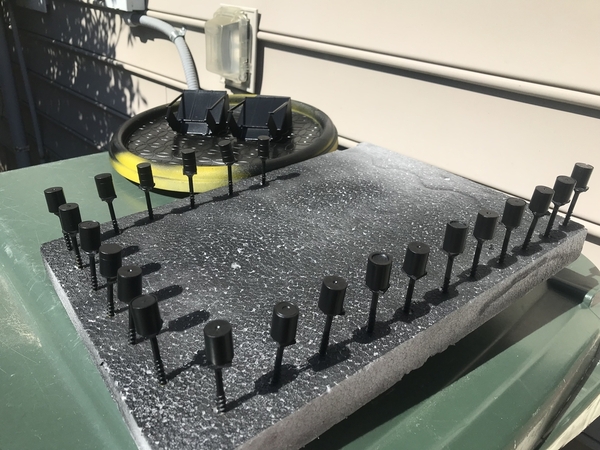
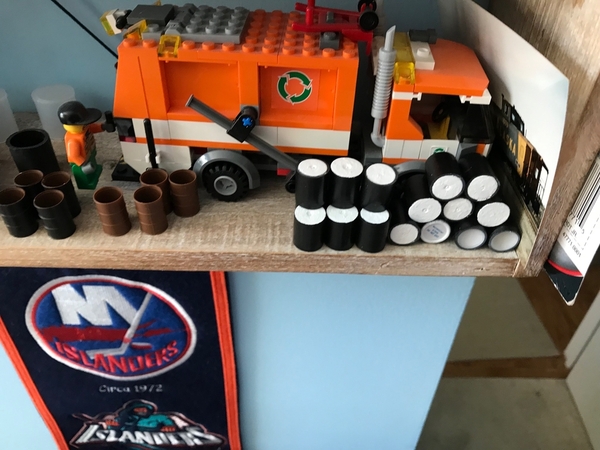
The "gas cylinders" and their platforms shown in this photo should be obvious to anyone who ever buys a model car in a box.  Those are the plastic pieces that secure the bottom of the car to the box so it doesn't shift during shipment and handling.

DSC01420

How do you like these oil storage tanks?  I made them in high school (1972-1976) using some vegetable cans, masking tape and gray spray paint.  You could probably make a taller tank in the same manner by using a Comet can.  The "dike" around the oil tanks was made from some scrap basswood I "painted" with one of those furniture finish touch-up pens from the hardware store.

DSC01432

Attachments

Images (3)
  • DSC01408
  • DSC01420
  • DSC01432

I don't have pictures since not in layout scenery mode yet, but have used a lot of things over the years from around the house.

-To create coal for my coal loader, I took clay cat litter and sprayed it with some really cheap black glossy spray paint we had around the house, made sure it all got coated, and kept stirring it to make sure it didn't get stuck together. It worked pretty well (I know, likely not scale, but still).

-To simulate a roof with standard shingles on it, I used gray shirt carboard or from smooth boxes and the like). Using an exacto no 11 blade, I carved the look of shingles. To make it look like an older roof, I sprayed it with black or dark gray spray paint, rubbed it, sprayed again, rubbed it until I had the look I wanted.

-for siding similarly, using no 11 blade carved in lines to make it look like siding. Also use a more dull blade on cardboard, scribed in "Bricks" on the surface. Sprayed it with a rust/reddish paint rubbed some off, repeat until it showed the color I wanted. The used a toothpick to put a concrete color in the 'mortar' lines.

-Created street lights out of soda straws, the arms were from bailing wire we had around the house, and some bulbs I had gotten somewhere (probably scrounged) that with a paper 'reflector', looked pretty good.

-For roads, I used a course sand over a thing layer of joint compound, worked pretty well.

-And as others have said, coffee stirrers and tongue depressors and popsickle sticks can be used for a variety of things. I built a crossing gate (static, didn't work) using stirrers and tongue depressors.

-cans of various kinds can be used as the basis for tanks and so forth.

I will have more resources now, but I kind of enjoy figuring out other things to use. Craft stores have some great things, thin pieces of wood can be used for trim for example.

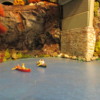
  This is a close up photo of quarry walls that I created on my layout.  I used heavy gauge aluminum foil ... crumpled it up and spray painted it ... after paint dried I attached the foil to an upper elevated surface and the bottom to the lower layout deck with a staple gun ... next I sprayed the now crumpled and painted foil with glue ... next I sprinkled scenic material on the wet glue.  The wall surrounds a supposed old quarry, that has filled with water and is now used for recreation. D384F8A0-DA69-4536-B6C9-01505A13BB17

To give some context to the above photo. 088E9674-A8DB-4369-B9D2-EF097321759033B94858-CEB4-47FD-9632-B4210C07B33D

Attachments

Images (3)
  • D384F8A0-DA69-4536-B6C9-01505A13BB17
  • 088E9674-A8DB-4369-B9D2-EF0973217590
  • 33B94858-CEB4-47FD-9632-B4210C07B33D
Last edited by trumptrain

Boy, what a fun thread! I have a few contributions as I love to use 'found objects' on the layout somewhere.

I've used washed-and-dyed gravel found at the end of my driveway for tinplate track ballast and for rock paths and the base of cliffs.
I've used roof shingles of various colors and textures for roads, paths and ballast.
I've used indoor/outdoor carpet for the foundation of my stylized layouts.
I've used various cardboard inserts for packaging (for printer cartridges and various other shipping) for mountain or hill bases.
I've used popsicle sticks for team track structures and coal boxes.
I've used dyed pipecleaners for distant hedgerows
I've used wooden skewers found in the remainder bin at a kitchen supply store for telegraph and trolley poles and fir tree forests.
I've used cut-up and colored scotchbrite pads for those same fir trees.
I've used all sorts of items (caves, hills, little castles, homes, trees, coral) for fish tanks on the layout.
I've used dyed pipecleaners glued on brown paper grocery bags for acres of farmland.
I've used fish tank gravel of various dark colours for coal loaders.
I used little houses found at dollar stores to make up distant towns.
I've hung model aircraft from the 'ceiling' of my basement.
I've used repurposed kids toys for all sorts of scenes.

With some 20 pound fishing line and three tube-like kid's bracelet spacers from a crafts store, I "flew" two die-cast blimps over my last layout.

Here's the overhead view:

Blimp flying over layout - overhead view

In the photo above, you'll see three "bumps" on the top of the blimp.  Those are the tube-like spacers you would use on a kid's bracelet.  The fishing line is threaded through the three spacers, then formed into a triangle sort of arrangement and secured to the ceiling.  The next two photos clearly show the fishing line.

Here are two side views:

Blimp flying over layout - side viewBlimp Over Oil Wells

The blimps "flew" for at least eight of the 12 years during which I built and completed my last layout.  We never had a blimp fall onto the layout, probably because I used heavy enough fishing line and ceiling hooks.

Yes, before anyone asks, that OGR boxcar dates back to their Hurricane Katrina recovery fund raising drive.

The blimps are the "banks" sold by Liberty die-cast.

Attachments

Images (3)
  • Blimp flying over layout - overhead view
  • Blimp flying over layout - side view
  • Blimp Over Oil Wells
Last edited by Pat Shediack


Blimp flying over layout - overhead view


When I saw this pic the first thing that went thru my head was the droning roar of a blimps engines, it's been a longtime since I've even seen a blimp overhead (I'm not that old, I mean like the Goodyear one!).

I remember sweeping up the dried leaves from our Mimosa tree as a kid and rubbing it thru a screen to make ground cover or painting the roofs of my houses with black paint and sprinkling it with salt from the table to simulate a gravel roof, I guess I could have used sand, but salt was easier and quicker to get as a 10-year-old.


Jerry

I use the icing container from Pillsbury Cinnamon rolls and the containers from Crystal Light drink packets IMG_0702IMG_0703IMG_0707for a variety of things including creating screens for motors in diesel engines without cab interiors.  I've printed out pictures of engineers that I paste onto the screens cut out of these.

IMG_0700IMG_0701

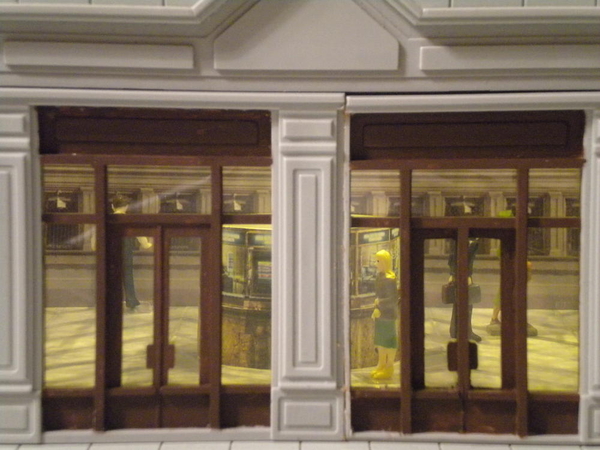
I've even used the smaller one to make my Union Terminal Information Booth modeled after the one in GCT.

METRO TERMINAL INTERIOR 2

You guys are pretty creative!

I am always looking for uses for everyday items on my layout.  Here are a few things I have come up with:

DSC02221

The trees in the above photo are made from weeds from our garden.  I dried them out, sprayed them with 3M adhesive then put them in a bag with foam ground cover.

DSC07955DSC07956DSC07957

The pavement in the above three photos is asphalt shingles turned upside down.  Some paint and weathering make a pretty convincing road.

DSC03474

I made bales of scrap metal out of aluminum foil.  I made a 1" x1"x1" box out of wood.  I pack the foil into the box and out comes a bale of scrap metal.  The junk cars are aluminum foil burnished over model cars from the layout.  The shell is then trimmed, painted and dented to produce junk cars.

DSC01359

The chain link fence is made from window screen.  I cut it diagonally and fastened it to brass post that I soldered together.

DSC01374

The watermelons are ball bearings that I painted and attached to "mohair" vines.  The tomatoes are shotgun shot that are glued to "mohair" plants.

IMG_0203

The "coal" in this coal yard is creosote harvested from the chimney of my wood burning stove.  I have also used the creosote and ash to weather various items.

DSC08317

The brush along the right side of this scene is "mohair" packing material.  An elderly friend used to work for a local manufacturing plant that packed their product in this material (back in the 1950's, if I recall) He told me it was called mohair.  He gave me several sheets of the material, which I have put to good use on the layout.  The oil tank is a piece of 2" PVC pipe.

Tom

Attachments

Images (9)
  • DSC02221
  • DSC07955
  • DSC07956
  • DSC07957
  • DSC03474
  • DSC01359
  • DSC01374
  • IMG_0203
  • DSC08317

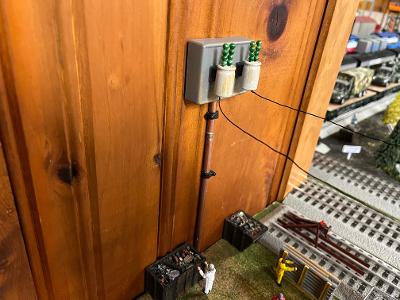
For anyone who eats at Cracker Barrel, their "Barrel Burger" comes with a wooden pick to keep the burger together and the pick is topped with a little decorative wood barrel.  The barrel is of course just about the perfect size for O gauge once the pick is cut off. You just need to make sure the wooden pick is safely put away in a pocket before the server clears the table after the meal.

Dale

Water tower made of 2" plastic pipe collars, the tank is a 2'' to 4'' plastic pipe change over, lower part wrapped in sandpaper. antenna on top is from the inside of a pizza box.

CIMG4027

All of the grain elevators are made from 4" plastic pipe and plastic fence post.

CIMG4031CIMG2467CIMG2458CIMG2460

Buildings made from plastic signs.

CIMG2415CIMG2428CIMG2482

Bridge made from HO girder bridge turned up side down and the bridge abutments are made from

real cement.

warehouse made of plywood with sandpaper on the outside.

100_1267 [1280x959)100_1268 [1280x959)

Attachments

Images (10)
  • CIMG4027
  • CIMG4031
  • CIMG2467
  • CIMG2458
  • CIMG2460
  • CIMG2415
  • CIMG2428
  • CIMG2482
  • 100_1267 (1280x959)
  • 100_1268 (1280x959)
Videos (1)
CIMG2626

I’ve used coffee on “cliff” walls, with India ink to show texture.

India ink has to be one of the oldest modeling tools around.

Coffee grounds also into the latex I used  to paint some of the layout. Worked better than the stuff the paint manufacturer sold to texture.

What I used in construction, but not scenic, were 6 inch skewers for shish kabobs. Pointed one end , you guys could do lots with those. I used for layout of the track.

For roads I plan on using a roll of roofing shingle material, but like Mark said that may be a couple of years away. But maybe not cause I’m tripping over it every time I go to the shop.

Ive used plaster cast off for shale, after dying. And landscape rocks to finish around the tunnel. Hides the gaps.

I used low expanding foam inside my tunnel. Probably should be painted tan or gray but the white makes it easy to see around the track

I’ve used kitty litter for ballast after screening and liked it but not sure I’m going to ballast or not on this layout.

I plan on using coffee stirrers for portals which has been covered. But what I like are the stirrers that have a paddle shape one end for mixing epoxy.

I used a broken measuring stick for a height gauge near a bridge.

Love the PVC pipe grain elevators. Seems like those can be made to fit a lot of different areas depending on size modeled.

Cat fur! Aluminum foil! Cat whiskers!  Termite stake indicators (whatever that is)! I love this everyday stuff on a layout.

IMO, it takes a lot of imagination and creativity to see how something commonplace can enhance one's layout. The possibilities are limitless, and it also saves the hobbyist a few dollars.

My initial motivation years ago was to save money, but now I do it for the fun of it. Arnold

well I have 1 more cat related suggestion. "Temptation mix ups cat treats)  With a little acrylic paint they make great little sax of flower, cement, or any other product that was shipped in sacks.  And your cat will like it too!

Previously posted in another thread a few years ago, but to make the inside of your tunnels look realistic and really stand out, cut a sheet of heavy duty aluminum foil (not the flimsy standard kind) to just slightly larger (1/8") than the inside height and length of each side of your tunnel walls.

Crumple up each sheet and then uncrumple, leaving each sheet relatively flat. Spray paint each sheet lightly with flat black paint so that a little of the shiny silver still shows through. When dry, glue each sheet to the inside of the tunnel walls ( I used hot glue) and trim, as necessary.

When a train goes through the tunnel, the headlight and other marker lamps shine on the tunnel walls and the crumbling effect on the aluminum sheets creates all kinds of angles that makes the interior walls look like cut rock faces with metal impurities shining through.     

Add Reply

Post

OGR Publishing, Inc., 1310 Eastside Centre Ct, Suite 6, Mountain Home, AR 72653
800-980-OGRR (6477)
www.ogaugerr.com

×
×
×
×
Link copied to your clipboard.
×
×