In my opinion, OP is doing exactly the right thing. Unless you are trying to reproduce specific materials such as cut stone, etc, I think it is a waste of effort trying to carve precise, seamless contours in pink foam. Well, with a little practice, not really. For that matter, to speed things up, you can get the contours close, then smooth over the seams with some lightweight spackling compound (available just about anywhere that carries home paints).
It is best used in 1/2" sheets to establish rough contours. Then, cover the whole thing with other materials as I described above. If you want to build a big mountain, three or four 2" thick foam sheets will go a lot faster than a whole bunch of 1/2" thick sheets.
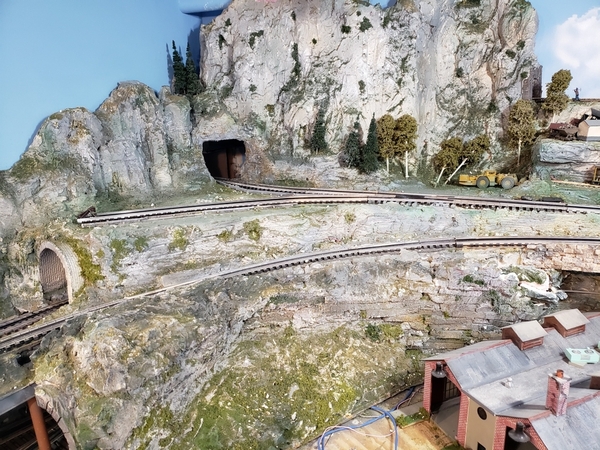
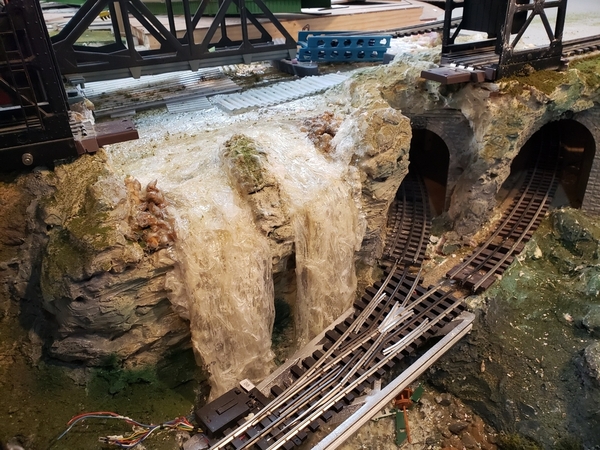
The N-gauge dioramas are beautiful, but I disagree that scale doesn't matter. N gauge requires careful sculpting of every detail. Huh??? Yeah, well, okay, we'll assume you're correct on both counts. I've included some more pictures of a couple of O-gauge dioramas that I recently slapped together. You wouldn't believe how much faster I put these together compared to my N-scale dioramas that I posted earlier.
Pink foam is great for this. In O gauge, I find that you are better off building up the terrain details additively rather than subtractive carving in most cases. I do LOTS of carving of pink foam, but it is usually to simulate stone, brick or concrete, where the details are important. Good point. But I wouldn't hesitate to use either method (additively or subtactively), whichever provides the best results (first choice) or faster results (second choice, if no difference in results quality).


Here's a few pic's of some O-gauge dioramas I put together recently. They are merely some 1" thick foam bases with some more 1" thick foam pieces glued to the tops to provide a little variation to the ground contours. The sky boards are some scrap corrugated cardboard pieces painted a sky blue color. Unlike the N-scale dioramas I posted earlier, these went together much faster since I didn't have to worry about fineness of detail that N-scale requires. ")


I use DAP clear caulk or LocTite Power Grab caulk for gluing foam pieces together. Apply the glue in a zig-zag pattern, then press the pieces together and weight down if necessary to dry. Usually overnight does it. Note: do NOT apply a big circle of glue around your zig-zag pattern of glue. Polystyrene sheets are water-proof. The outside circle of glue will dry, and whatever glue is left inside the circle will remain wet forever, as it is no different than being back inside the tube again.
I tend to use cheap, long butcher knives and steak knives (from dollar stores) and cheap, retractable, box-cutter utility knives for slicing and cutting foam pieces in the rough shaping process. With a little care and some careful work , you can actually get precise, seamless transitions if so desired. Or, you can merely get the seams close and use lightweight spackling compound to smooth over and hide the seams.
I also make use of Surform rasps and coarse foam sanding blocks for shaping the foam. This generally works best for a smoother ground surface, where one might be trying to form dirt-style hills or ditches or other land forms instead of rock outcroppings. This is where you REALLY need a good shop-vac for clean-up. Yeah, it's messy, but you only make the mess once in any particular area. There's been a lot of information posted on carving rock and stone out of foam, so I won't go into that here.
Once I get the foam shaped to my liking, I paint it with a flat, latex house paint in a suitable ground color. Interior or exterior paint, doesn't matter. Often times you can find mistints for sale wherever they mix paints, for a considerable savings in money. Most of my model railroading ground paints over the years were purchased thus.
After the ground painting, you can really go to work with various colors and shades of ground foams, rocks, pebbles, natural and artificial weeds, turfs, dirt, debris, stones, pebbles, rocks, trees, shrubs, etc. etc. This portion goes REALLY fast, just sprinkle a little bit of this and a little bit of that, until you achieve the look you're after. Secure it all down with home-made or purchased "scenery" cement (i.e., watered-down glue). You can put in roads (paved and or gravel), parking lots, buildings, track, ballast, whatever you want, really at anytime during the building process.
Well, this pretty much sums up my methods of scenery building, There really is no right or wrong way to do scenery. Just whatever works best for you and whatever produces the most pleasing effects.
Hope this helps a little more yet.