Good morning all!


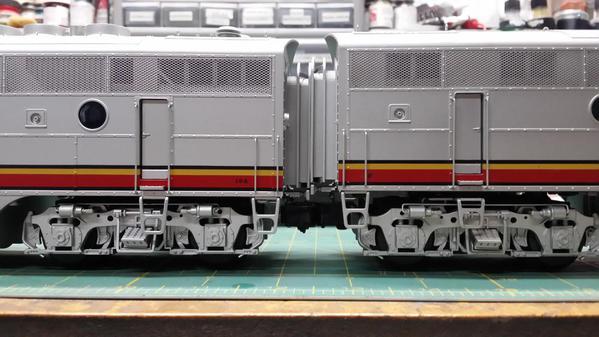
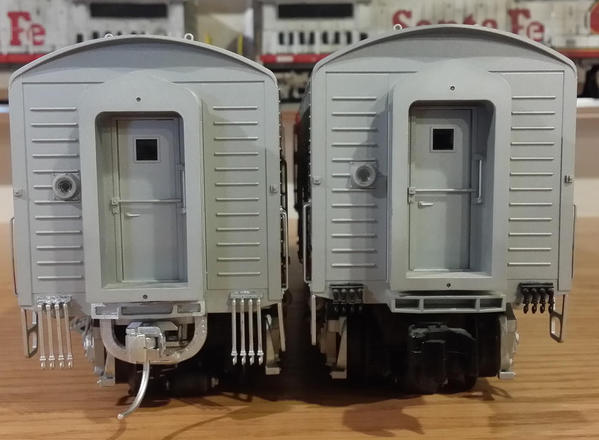
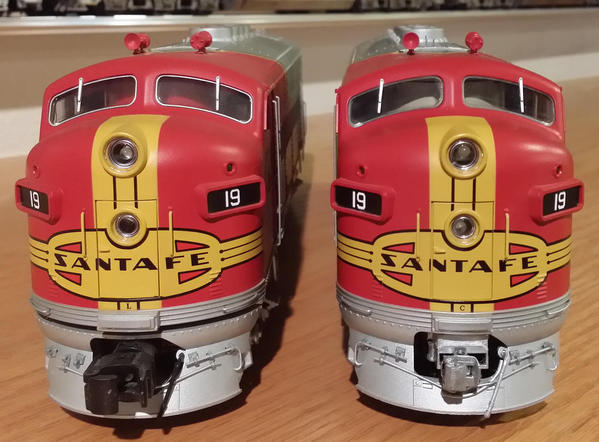
I wanted to share with you something that bothered me, and that's the Lionel high-water F units.  When coupled to my Atlas F2, it is readably noticeable that the F3 B unit is higher "in the saddle".


IMG_0368


I took the B unit apart and noticed that the frame is actually mounted to the underside of a disc at which sit atop the truck kingpins.


So with that said, I tried a super easy way to do it!


Here are the steps:


  1. Remove shell
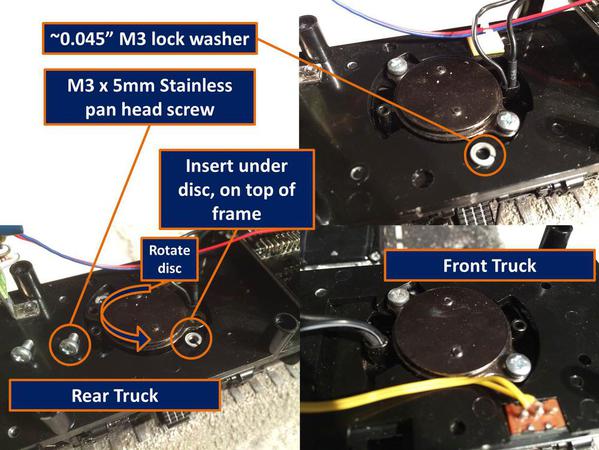
  2. With frame sitting on a flat surface, remove the two black M3 screws that sit upon the kingpin disc, and rotate it to the side.
  3. Drop a washer that's approximately the thickness that you want the shell to be lowered (I used a ~0.045" thick M3 lock washer)
  4. Rotate the disc back into place and replace the screws. (I used new, longer M3 stainless screws to be sure they seat well)
  5. Reattach shell!


Here's the steps in pictures...


Lowering Lionel TMCC F3 B-units 2


some miscellaneous photos:


IMG_0923

IMG_0926

IMG_0959

IMG_0979


Should you have any questions, please let me know!


Thanks,

- Mario

Attachments

Images (6)
  • IMG_0368
  • Lowering Lionel TMCC F3 B-units 2
  • IMG_0923
  • IMG_0926
  • IMG_0959
  • IMG_0979
Original Post

Replies sorted oldest to newest

Doug,


The Tmcc F7s have to be lowered about an eighth inch to solid mount the pilot and have everything look right .My first B unit I just cut the mounting tabs of the shell which requires the doors to be modified and non working. I think I did a tutorial on it.


I've looked at modifying the truck rings and I think they will have to be cut or ground and new center section attached. Haven' gotten back to the Fs due to the Alcos and now the steamer ERR installs. Sometime soon though.


Ron

Ok, so after someone's email, I had to go and open up my NYC F3s and investigate if my aforementioned technique would work, and it did!


All I had to do is:


  1. Remove the screws from the truck retaining ring
  2. Drop the truck
  3. Remove the steps from the truck (replace the removed screws with a 3mm flat machine screw instead of the removed pan head)
  4. Re-insert the truck
  5. Slide the lock washer in under the retaining ring
  6. Re-insert the 3mm pan head screws


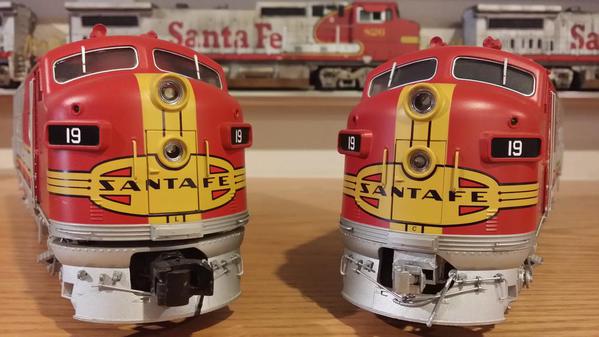
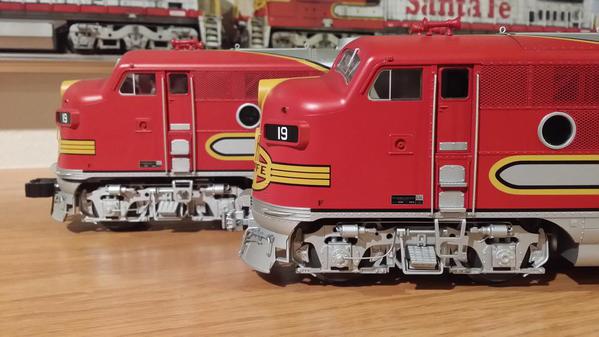
And voila! A lowered Lionel TMCC NYC F3, that now matches the height of Atlas F2... Here's some pics of it nose-to-nose with the Atlas, and back to back with the already lowered Lionel F3 B unit.


IMG_0850

IMG_0851

IMG_0852

IMG_0853

IMG_0854


Thanks,

Mario

Attachments

Images (5)
  • IMG_0850
  • IMG_0851
  • IMG_0852
  • IMG_0853
  • IMG_0854
Last edited by CentralFan1976

OK, so I did it your way with this F3 Dummy B unit. I used lock washers like you suggested, but double them up because I didn't have the same thickness as what you used. It dropped it a little bit more, and that's about as far as I can go with out clearance issues.


Also frame mounted the steps that were removed from the trucks. Actually it's a different step, but looks much better. The buffer plate under the diaphragm needs some modification as it won't allow the unit's to turn because those buffers are rigid. I'll either cut them back shorter, or remove them all together.


20150203_171430


If you look at the buffer under the diaphragm, you can see how much lower it is, and the gap caused by the truck mounted step is gone as well.

Attachments

Images (1)
  • 20150203_171430
Looks great! "Someone" did a good job! ��

Did you just use a second set of rear steps? They look better than mine, which are short.

I did have to cut back the buffer; remove, trim, and reinstall.

I still need to cut down the P&D Hobbies passenger pilot like John Sethian did, I just haven't figured out how to do it so the cut is straight.

Any ideas?
Yes I used another set of rear steps and just cut them off past the mounting hole. I had some in my parts box from an old project. Like you said, the steps that are truck mounted are too short for body mounts, but they will do in a pinch.

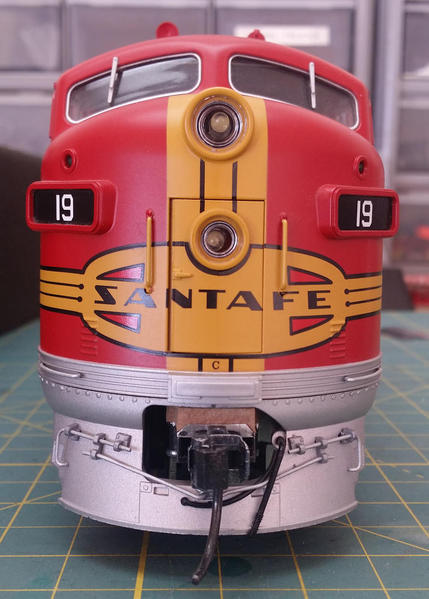
Havent decided what to do about the A unit front pilot. Maybe a P&D, maybe just use the factory Lionel pilot.

I would use my bench top sander to sand that pilot down. Thats how I got rid of the foot boards on my Legacy GP30's... 60 grit belt for the heavy duty work knocked that diecast right down. Leveling was done with an 100 grit belt.

By lowering the A unit bodies with washers, it dropped it right down on top of the pilot. No spacer needed between the body and the pilot. It does need a .040" spacer between the frame and pilots when it's mounted, just because the frame is recessed that much in the shell as you stated earlier. Body mounted steps, and a custom coupler mount for the rear of this thing and it will be time for paint touch ups and the rails.


20150205_125922

20150205_130021

This is the trailing unit, 19C, so I left the coupler stick out a little further than it should so there's more clearance when coupled to its train. The leader, 19L, will get it's coupler set back in further for better appearance.


The interior was painted tan because Lionel had it painted red from in factory. Cab lights were removed because I hate running with the lights on inside, and the smoke unit was modified and rebuilt with new batting. Still need to add all the correct length MU hoses to the rear of all the units because Lionel included the stubbies with this set. They are in the trash now.  

Attachments

Images (2)
  • 20150205_125922
  • 20150205_130021
Last edited by Former Member

LOS,


Looks fantastic... absolutely amazing!


I finished the 2nd revision for the bracket for the P&D Hobbies passenger pilot; so we'll see how they fit tonight, once the wife and kid are asleep.


IMG_0863


IMG_0865


I'm printing you the rear coupler mounts and buffer assemblies tonight, show hopefully they'll be in the mail to you soon!


IMG_0954

IMG_0956


Wish you could fix my pilot, and I could install your coupler mounts... fair trade, I think.


Thanks,

Mario

Attachments

Images (4)
  • IMG_0863
  • IMG_0865
  • IMG_0954
  • IMG_0956

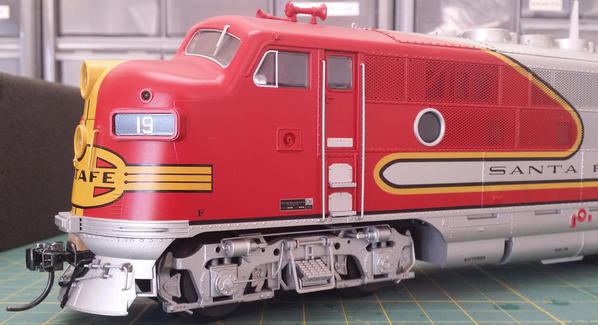
Well until you started this thread I was gonna sell my ABBA set because I didn't like the way they looked....... now they are definitely keepers. I'm actually glad to keep these because I bought them 10 years ago, and it was my 1st purchase of Lionel as an adult. This set got me back into the hobby.


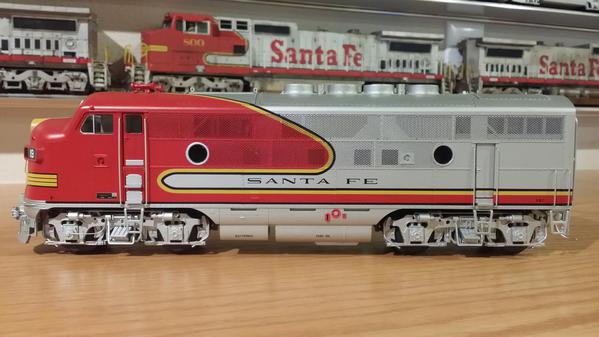
Lowered with body mounted steps. 


20150227_081725

20150227_081628


The 3-D printed coupler conversion makes this job a snap. The buffer below the diaphragm had to be shortened so the diaphragm would compress. The stubby MU hoses were replaced with full length versions. All painted silver as Santa Fe practice.


20150227_081503


Crew figures were removed from the rear unit and all lights unplugged as this 19C will be the trailing unit in this consist always. The silver "gasket" was removed from the windshield.


20150227_081840


Thanks Mario, this project wasn't even on the list until you started this  

Attachments

Images (4)
  • 20150227_081725
  • 20150227_081628
  • 20150227_081503
  • 20150227_081840

Add Reply

Post

OGR Publishing, Inc., 1310 Eastside Centre Ct, Suite 6, Mountain Home, AR 72653
800-980-OGRR (6477)
www.ogaugerr.com

×
×
×
×
Link copied to your clipboard.
×
×