
Good morning all!


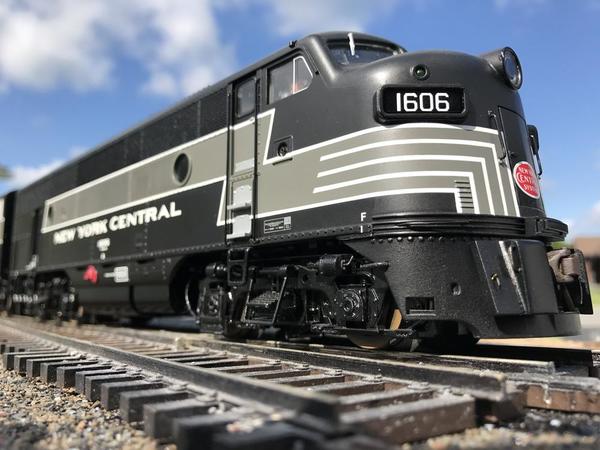
I wanted to share with you something that bothered me, and that's the Lionel high-water F units.  When coupled to my Atlas F2, it is readably noticeable that the F3 B unit is higher "in the saddle".


IMG_0368


I took the B unit apart and noticed that the frame is actually mounted to the underside of a disc at which sit atop the truck kingpins.


So with that said, I tried a super easy way to do it!


Here are the steps:


  1. Remove shell
  2. With frame sitting on a flat surface, remove the two black M3 screws that sit upon the kingpin disc, and rotate it to the side.
  3. Drop a washer that's approximately the thickness that you want the shell to be lowered (I used a ~0.045" thick M3 lock washer)
  4. Rotate the disc back into place and replace the screws. (I used new, longer M3 stainless screws to be sure they seat well)
  5. Reattach shell!


Here's the steps in pictures...


Lowering Lionel TMCC F3 B-units 2


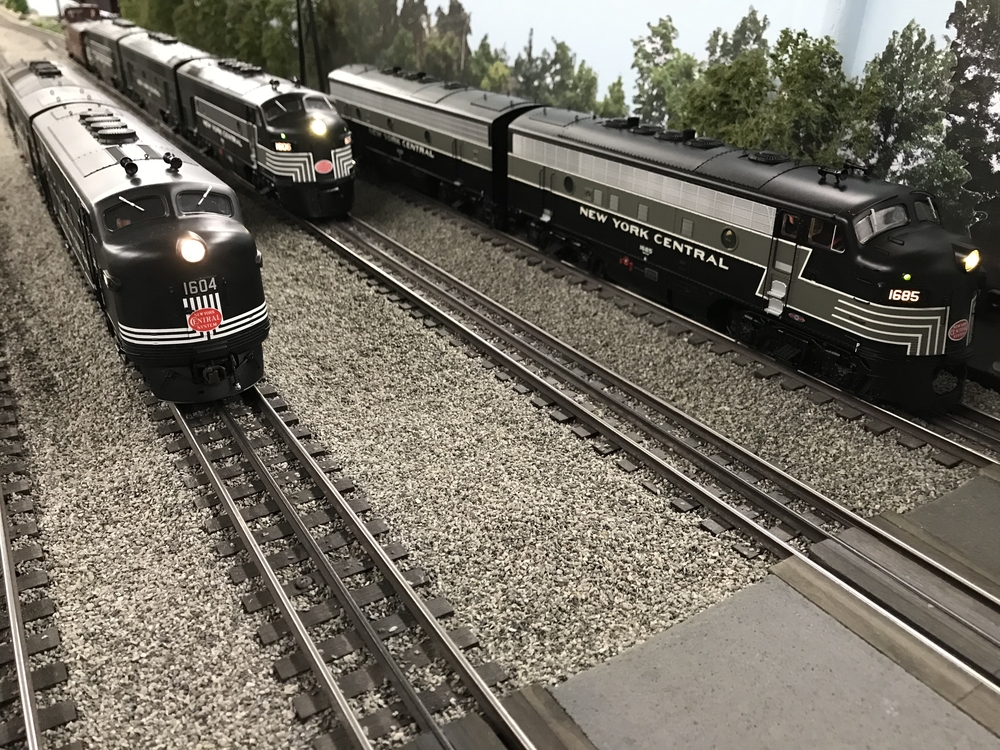
some miscellaneous photos:


IMG_0923

IMG_0926

IMG_0959

IMG_0979


Should you have any questions, please let me know!


Thanks,

- Mario

Attachments

Images (6)
  • IMG_0368
  • Lowering Lionel TMCC F3 B-units 2
  • IMG_0923
  • IMG_0926
  • IMG_0959
  • IMG_0979
Original Post

Replies sorted oldest to newest

Doug,


The Tmcc F7s have to be lowered about an eighth inch to solid mount the pilot and have everything look right .My first B unit I just cut the mounting tabs of the shell which requires the doors to be modified and non working. I think I did a tutorial on it.


I've looked at modifying the truck rings and I think they will have to be cut or ground and new center section attached. Haven' gotten back to the Fs due to the Alcos and now the steamer ERR installs. Sometime soon though.


Ron

Ok, so after someone's email, I had to go and open up my NYC F3s and investigate if my aforementioned technique would work, and it did!


All I had to do is:


  1. Remove the screws from the truck retaining ring
  2. Drop the truck
  3. Remove the steps from the truck (replace the removed screws with a 3mm flat machine screw instead of the removed pan head)
  4. Re-insert the truck
  5. Slide the lock washer in under the retaining ring
  6. Re-insert the 3mm pan head screws


And voila! A lowered Lionel TMCC NYC F3, that now matches the height of Atlas F2... Here's some pics of it nose-to-nose with the Atlas, and back to back with the already lowered Lionel F3 B unit.


IMG_0850

IMG_0851

IMG_0852

IMG_0853

IMG_0854


Thanks,

Mario

Attachments

Images (5)
  • IMG_0850
  • IMG_0851
  • IMG_0852
  • IMG_0853
  • IMG_0854
Last edited by CentralFan1976

OK, so I did it your way with this F3 Dummy B unit. I used lock washers like you suggested, but double them up because I didn't have the same thickness as what you used. It dropped it a little bit more, and that's about as far as I can go with out clearance issues.


Also frame mounted the steps that were removed from the trucks. Actually it's a different step, but looks much better. The buffer plate under the diaphragm needs some modification as it won't allow the unit's to turn because those buffers are rigid. I'll either cut them back shorter, or remove them all together.


20150203_171430


If you look at the buffer under the diaphragm, you can see how much lower it is, and the gap caused by the truck mounted step is gone as well.

Attachments

Images (1)
  • 20150203_171430
Looks great! "Someone" did a good job! ��

Did you just use a second set of rear steps? They look better than mine, which are short.

I did have to cut back the buffer; remove, trim, and reinstall.

I still need to cut down the P&D Hobbies passenger pilot like John Sethian did, I just haven't figured out how to do it so the cut is straight.

Any ideas?
Yes I used another set of rear steps and just cut them off past the mounting hole. I had some in my parts box from an old project. Like you said, the steps that are truck mounted are too short for body mounts, but they will do in a pinch.

Havent decided what to do about the A unit front pilot. Maybe a P&D, maybe just use the factory Lionel pilot.

I would use my bench top sander to sand that pilot down. Thats how I got rid of the foot boards on my Legacy GP30's... 60 grit belt for the heavy duty work knocked that diecast right down. Leveling was done with an 100 grit belt.

By lowering the A unit bodies with washers, it dropped it right down on top of the pilot. No spacer needed between the body and the pilot. It does need a .040" spacer between the frame and pilots when it's mounted, just because the frame is recessed that much in the shell as you stated earlier. Body mounted steps, and a custom coupler mount for the rear of this thing and it will be time for paint touch ups and the rails.


20150205_125922

20150205_130021

This is the trailing unit, 19C, so I left the coupler stick out a little further than it should so there's more clearance when coupled to its train. The leader, 19L, will get it's coupler set back in further for better appearance.


The interior was painted tan because Lionel had it painted red from in factory. Cab lights were removed because I hate running with the lights on inside, and the smoke unit was modified and rebuilt with new batting. Still need to add all the correct length MU hoses to the rear of all the units because Lionel included the stubbies with this set. They are in the trash now.  

Attachments

Images (2)
  • 20150205_125922
  • 20150205_130021
Last edited by Former Member

LOS,


Looks fantastic... absolutely amazing!


I finished the 2nd revision for the bracket for the P&D Hobbies passenger pilot; so we'll see how they fit tonight, once the wife and kid are asleep.


IMG_0863


IMG_0865


I'm printing you the rear coupler mounts and buffer assemblies tonight, show hopefully they'll be in the mail to you soon!


IMG_0954

IMG_0956


Wish you could fix my pilot, and I could install your coupler mounts... fair trade, I think.


Thanks,

Mario

Attachments

Images (4)
  • IMG_0863
  • IMG_0865
  • IMG_0954
  • IMG_0956

Well until you started this thread I was gonna sell my ABBA set because I didn't like the way they looked....... now they are definitely keepers. I'm actually glad to keep these because I bought them 10 years ago, and it was my 1st purchase of Lionel as an adult. This set got me back into the hobby.


Lowered with body mounted steps. 


20150227_081725

20150227_081628


The 3-D printed coupler conversion makes this job a snap. The buffer below the diaphragm had to be shortened so the diaphragm would compress. The stubby MU hoses were replaced with full length versions. All painted silver as Santa Fe practice.


20150227_081503


Crew figures were removed from the rear unit and all lights unplugged as this 19C will be the trailing unit in this consist always. The silver "gasket" was removed from the windshield.


20150227_081840


Thanks Mario, this project wasn't even on the list until you started this  

Attachments

Images (4)
  • 20150227_081725
  • 20150227_081628
  • 20150227_081503
  • 20150227_081840
LOS,

Your units look amazing, you've done a fantastic job.

This combination, that you and I have discovered, have turned these units into a scale piece that I would put up against any Atlas or 3rd Rail unit, and totally blows MTH off the map.

The Lionel unit specific Railsounds alone are step above the others. I just hope this makes others make the jump.

Thanks,
Mario
In case anyone is keeping track, this same principle can be used to lower the Legacy Sharknose units, as you can see over in the 3RS forum, started by Norm.

Mine are apart as this is posted and should be good to go. You can't lower them as far as the F3s, but enough to do what LOS did and just fix the pilot without a spacer.

Keep checking back for more updates.

Thanks,
Mario

Lowering the frames creates a small problem for the rear motor as the roof panel tabs sit right down on top of the flywheel, preventing the rear motor from spinning at all.


Nothing the Dremel tool didn't fix real quick.


20150308_110203-1


On the A units, the front motor is shorter, but the plastic bracket that sits on top of the cab interior holding the interior lights has to be removed. It won't fit under the shell now that's its so low. I took the interior lights and ran them onto the floor of the cab interior. They got a drop of glue just to hold them in place.


Also the roof fans are held in by pins, bent over inside the shell. I had to cut some of those off to get the smoke unit to sit flush against the shell roof. I thought about removing the smoke unit because of the weathering I am going to do....but I'll just turn it off I guess.

Attachments

Images (1)
  • 20150308_110203-1

The 3-D printed coupler mounting brackets on both ends of the B units, and the rear of the A units.


The outer screws hold the coupler to the mounting pad/spacer. The center screw goes all the way through the frame to eliminate the flex of the entire assembly. You could just run the 2 outer screws all the way through the frame and it would do the same thing. The sides of the draft gear box were also ground out to allow maximum swing for the coupler.


20150308_121625-1

The buffer plate had to be cut back or sanded down to the depth of the compressed diaphragms. Otherwise the diaphrams would not compress, causing derailments even on 072 curves. In order to keep them on the rails through the curves coupled this tight, you have to have diaphragms that compress, and maximum swing in the coupler box.


20150308_122346-1

20150308_122844

and the fixed pilot... I just ran the coupler moutning screws all the way into the frame.


20150308_121610-1

20150308_122505-1

Attachments

Images (5)
  • 20150308_121625-1
  • 20150308_122346-1
  • 20150308_122844
  • 20150308_121610-1
  • 20150308_122505-1
Last edited by Former Member
Good question... And no.

They're not for me, but for a friend that saw my work and wants to do the same to their poor excuse for a pilot on the their brand new FTs. 

He called and wrote MTH a at least three times each, and doesn't know if they have them, as they've nevet rwached out back to them.

Meanwhile, I already have the Legacy Railsounds board for my sharks back from Lionel and it was a week today that they got them. I didn't even pay for it yet, and they sent it to me anyway. I called and paid when I got it.

That's why I don't buy MTH. Well, one of the reasons. They're not for me.

Thanks,
Mario
Ron H posted:

Doug,


The F3 s he references are a completely different truck mounting system. For ours I'm going to fab a whole new mounting plate out of brass sheet.


Ron

Old thread, but does anyone know if Ron or anyone else has fabricated these mounting plates for the TMCC F7s?

Alternatively, I believe there is now a Legacy version of the F7.  Do they have an improved lower profile mounting plate that can be got from Lionel parts? 

It's a pleasure to re read this thread again after all this time as it really showcases what is good about the forum itself and the participation of the membership in particular. Sorry to see 'former member' in place of Doug's name as he (along with Mario, Ron H, Marker, and others) was one of the pioneers in modifying these models. Didn't realize that he was gone...  :-(

Sam, I agree  it's a good thread.  

The plate has a bowl into the bottom of which the vertical stem of the truck goes   On the tmcc the bowl is just too low.  Whereas from the parts pic above it looks possible that they made it shallower which would bring the trucks up closer to the frame.  I doubt they would have made a new casting for the frame (which is die-cast) so I am hoping it just fits in the tmcc versions and fixes the problem, but can tell just from the picture.  Although I might just try to order and take my chances . If they don't fit at least I will a have them as extra parts to try to modify to fit. 

I do feel like I have to say that while it is true that the ride height is crazy high on the tmcc f7s, I am pretty impressed with the quality of the engines.  The plate and other components are solid and make for a nice sturdy, strong, and stable locomotive (just too high compared to the prototype)  

I took a bit of a leave of absence for a few years and missed some stuff, but would like to avoid reinventing the wheel! 

pennsy484 posted:

Looks like part no. 28.  Anyone know if this fits the frame and trucks of the tmcc f7s?  And if so does it on its own lower the ride height? 

Screenshot_20181025-141733_Chrome

On some locos, you can move this plate to the top of the frame, if the bowl is large enough, to the top of the frame and get great results. 

I did do the F7s, as well...

https://ogrforum.ogaugerr.com/...ng-lionel-f7s?page=1

Thanks!

-Mario

Hi Mario. On the tmcc F7s  the bowl plate is incorporated into a larger square plate that fits into the bottom of the frame . I did try moving it to the top of the frame but the truck mounting cams won't reach so that's a no go.  I read the thread you posted, thank you for posting that.  I guess I am confused though since adding washers as with the f3s won't work for my f7s.  Sorry I am just not seeing how you lowered the F7s. (other than cutting down the posts on the shells, am I reading it r8ght on that?)  

I went ahead and ordered the part from the Legacy version, which looks to be just the bowl plate part and am going to see if I can get that part mounted to these frames somehow that produces a better height. They were like $4.50 each, so even if they don't work out the fun of the attempt justifies the price for me.  👍🏻

I am currently so happy about the color change that the height doesn't bother me as much (for now 😂), but am still goings to see what I can come up with.

Looking forward to any other assistance.

pennsy484 posted:

Hi Mario. On the tmcc F7s  the bowl plate is incorporated into a larger square plate that fits into the bottom of the frame . I did try moving it to the top of the frame but the truck mounting cams won't reach so that's a no go.  I read the thread you posted, thank you for posting that.  I guess I am confused though since adding washers as with the f3s won't work for my f7s.  Sorry I am just not seeing how you lowered the F7s. (other than cutting down the posts on the shells, am I reading it r8ght on that?)  

Looking forward to any other assistance.

You totally can use the just washer, and it will be a good start.  on my F7, I need to lower it more than just what the washer could do...

I never got the plate on top to work, but some have.

Thanks,

- Mario.

This is a fine thread that is now relevant to a project I am into. I have a B non-powered unit that I have lowered and have done the Kadee conversion. But I am unsuccessful at body-mounting the 4 inner steps that originally factory mount to the trucks. Is there a simple way to accomplish this since on one side of the frame the slide switch cut outs prohibit drilling and tapping a mounting hole?
Though made awhile back, it is still a beautiful model. I am marrying it to a 3rd rail FP7 that has the steps cast into the truck.

@c.sam posted:

Glad to see this still around. I have a Santa Fe F7 'Breakdown' unit that I'd like to lower for future use with an ABBA locomotive.  Were you guys able to successfully lower the F7's after all?

Hi Sam, I think I did. Just went to the train room to look. Couldn't find the F7 A , it's around somewhere, but found some B units.

Last edited by Ron H

14683B24-38E2-44D5-8DC5-E48E73D51FE517AEB1EA-70F8-436C-B5CC-C73ED810404DCFAEF492-C82D-4834-A87E-E539C611DF438B305210-7022-43DB-A5B5-F536DF229417AEF997D2-56AE-4095-8C5D-52D9E54B33D482F81E63-C690-4FC4-8286-E62AC056C0088A113C2C-2378-484A-9670-5C228689A667As an addendum, I’m trying to lower a 1997 F3 A-B, and the process was similar, but a few differences.  I couldn’t find anything on this site for this version so here it goes…

Once getting the pilot off the trucks, I ground away all the frame supports as well as the tops of the “pins” for the truck detail.   I also enlarged the back hole.

once everything was assembled the two screws that hold the light assembly were in the way, so I just CA glued the light assembly onto its posts

I have some very thin kadee coupler washers that  I’m going to put on the pilot to keep the trucks turning smoothly and also raised the motor with two 4mm washers (~2.1mm thickness) CA glued in place

very easy to do and I think it esthetically made a huge difference without that gap between the body and frame and getting the scale height of the overall loco spot on (3.5”)

thx for all the previous helpful comments on this thread!

Attachments

Images (7)
  • 14683B24-38E2-44D5-8DC5-E48E73D51FE5
  • 17AEB1EA-70F8-436C-B5CC-C73ED810404D
  • CFAEF492-C82D-4834-A87E-E539C611DF43
  • 8B305210-7022-43DB-A5B5-F536DF229417
  • AEF997D2-56AE-4095-8C5D-52D9E54B33D4
  • 82F81E63-C690-4FC4-8286-E62AC056C008
  • 8A113C2C-2378-484A-9670-5C228689A667
Last edited by vacuefactor
@vacuefactor posted:

14683B24-38E2-44D5-8DC5-E48E73D51FE517AEB1EA-70F8-436C-B5CC-C73ED810404DCFAEF492-C82D-4834-A87E-E539C611DF438B305210-7022-43DB-A5B5-F536DF229417AEF997D2-56AE-4095-8C5D-52D9E54B33D4

82F81E63-C690-4FC4-8286-E62AC056C008

8A113C2C-2378-484A-9670-5C228689A667

As an addendum, I’m trying to lower a 1997 F3 A-B, and the process was similar, but a few differences.  I couldn’t find anything on this site for this version so here it goes…

Once getting the pilot off the trucks, I ground away all the frame supports as well as the tops of the “pins” for the truck detail.   I also enlarged the back hole.

once everything was assembled the two screws that hold the light assembly were in the way, so I just CA glued the light assembly onto its posts

I have some very thin kadee coupler washers that  I’m going to put on the pilot to keep the trucks turning smoothly and also raised the motor with two 4mm washers (~2.1mm thickness) CA glued in place

very easy to do and I think it esthetically made a huge difference without that gap between the body and frame and getting the scale height of the overall loco spot on (3.5”)

thx for all the previous helpful comments on this thread!

Nice job!

Mario…thank for the thumbs up!  

one thing I’m now noticing is that something still looks “off” even though the overall loco scale height is correct….and that’s the fuel tank.  

the bottom, even with the lowered frame, is roughly 4mm too high off the tracks vs the scaled emd blueprint height…which makes the loco still look “high” to my eye.    

Going to see if I can design and print something to help correct that…unless you’ve come across another idea already?

also, I couldn’t find a dimension (scale or actual) for the height of the leading edge of the pilot from the rail (this is a freight F3 if that means anything)  do you know what that might be?

Last edited by vacuefactor
@vacuefactor posted:

Mario…thank for the thumbs up!  

one thing I’m now noticing is that something still looks “off” even though the overall loco scale height is correct….and that’s the fuel tank.  

the bottom, even with the lowered frame, is roughly 4mm too high off the tracks vs the scaled emd blueprint height…which makes the loco still look “high” to my eye.    

Going to see if I can design and print something to help correct that…unless you’ve come across another idea already?

also, I couldn’t find a dimension (scale or actual) for the height of the leading edge of the pilot from the rail (this is a freight F3 if that means anything)  do you know what that might be?

Well... I do have a thread on lowering the Atlas F unit fuel tanks, here: https://ogrforum.ogaugerr.com/topic/40004360285616739

I don't think it'll help us on this side, but it may give you something to shoot for as far as height off the rail.  As for the pilot, I use a Kadee coupler height gauge to measure the pilot off the rail...  the little shelf on the front is meant for trip pin adjustment, but I use the lower one for pilot height off the rail.

Thanks!

- Mario

Awesome.  Thx for that link.  I wish it were that easy for the lionel tanks…but they are one piece with the base frame.

i designed a “cap” that I think will work as a blend in and it will visually lower the base of the tank 4mm.    

Hope to print it out and test install it this weekend.  I’ll add pics and a link to the STL file onto the fuel tank thread if it goes ok!  

sorry…I mistyped.  I have the kadee gauge for the coupler.   I was trying to figure out the distance between the rail and the leading edge of the whole assembly. 8DE8B00A-3300-4739-8DD0-493EE69D0DE6

Attachments

Images (1)
  • 8DE8B00A-3300-4739-8DD0-493EE69D0DE6
Last edited by vacuefactor
Update on modifying the stock Lionel pilot height.
After installing a new part, the leading edge of the pilot dropped from 0.021" to 0.080" above the rail, putting it near the midpoint of scale accuracy (0.0625-0.125")
Additionally, the gigantic coupler opening was modified to scale size and set up to accommodate a Kadee 745 coupler + gearbox.
Both parts for the conversion were designed in Fusion360 and printed on the Anycubic Mono X.
After test fitting and grinding the parts into their final contour, all seams and irregularities were filled with uncured resin, light cured, and ground down to be flush with the existing pilot framework.
Before painting, all surfaces were sanded with 120, 200, 400, and 2000 grit to ensure a smooth surface.
In hindsight...it may have been easier just to cut off the pilot and 3D print an entirely new one vs. do these modifications, but nonetheless here's where things currently stand!
If you would like the .stl files to print so you can convert your own F3 (personal use only, please!), email me (ryantamburrino@gmail.com) and I'll get them to you. This loco is a Lionel FullSizeRender-2IMG_7862FullSizeRender-1IMG_7846IMG_7844IMG_7845IMG_7853IMG_7854IMG_7834IMG_78351997 TMCC equipped model, but I cannot see why it wouldn't work on other Lionel F3 or F7 versions.

Attachments

Images (10)
  • FullSizeRender-2
  • IMG_7862
  • FullSizeRender-1
  • IMG_7846
  • IMG_7844
  • IMG_7845
  • IMG_7853
  • IMG_7854
  • IMG_7834
  • IMG_7835

@vacuefactor, that is fantastic!  There are decades' worth of F units that could use what you've designed!

Excellent work!

Thanks,

- Mario

Thanks Mario!   Appreciate all the work you’ve done in this arena too!  

I have 4 other F3 sets…and it’s really hard to “unsee” all the inaccuracies in scale now that I know they exist…and can be fixed

anyone that wants the parts for their own models just have them get in touch…pilot conversion wasn’t hard but there’s a few nuances in installation to make it blend and not look like a fly by night patch job.

Last edited by vacuefactor

Tell me about it!  I even filled the gaps in the nose door with black epoxy so light doesn't leak through!

Wow. That pilot detail is great.  Passenger F3?    Trying to figure out when to put a coupler lift bar / air /brake / MU lines vs the pilot door.  

yes the small things make the biggest difference.  Nice when others appreciate it!

Last edited by vacuefactor
@vacuefactor posted:

Wow. That pilot detail is great.  Passenger F3?    Trying to figure out when to put a coupler lift bar / air /brake / MU lines vs the pilot door.  

yes the small things make the biggest difference.  Nice when others appreciate it!

There were a lot of detail changes on the NYC through its order history...  First, the FTs and F2s were delivered with freight pilots, and then starting with 1606, the F3s and first orders of F7s were delivered with passenger pilots, although they were not used for passenger service. 

The passenger pilots had the coupler cut bars behind the pilot, but the levers were on the side of the pilots, just below the "F"...

AFter a while, the doors were removed and the passenger pilots were left open, like your pilot.

L-to-R; F2s, F3s, F7s...

Be careful; it's a slippery slope!

Very nice array showing the differences.  Beautiful work!  

Since the one I’m doing is a freelance loco, I’m not tied to history except for the history I make up

however, my layout will be set in 1958, so I’m guessing the short line railroad will have likely purchased / got a deal on an older mid-40s f-unit (to stay in budget of course)…and am anticipating the pilot to look like the one on your F2 when done.  

the fuel tank “cap” I made for the lionel locos came out well too.  Should have it painted this week and will post it when done.

Well, to round out the thread, here's the fuel tank drop....

Wanted to lower the fuel tank 4mm to have it be in scale and eliminate the "highwater" look, but, unfortunately, the Lionel tank/frame are one solid assembly so I couldn't modify it easily like with adding the spacer you did for the Atlas unit.

One option was to glue a printed/styrene block section to the base, but the two screws that held the electronic boards in place showed through underneath and the base wasn't flat. Additionally, the sides of the existing tank were slightly tapered, so it wouldn't have lined up and looked funky.
Ended up designing a "cap" with interior tapered walls to place over the tank with recessed screw holes to hide the screw heads and make them do double duty...both hold the "cap" on and keep the electronics boards in place.
I'll sand the seam and feather the "cap" in better, then repaint the frame...but, for tonight, I'll call it good enough.
"Before" and "after" tank heights in the pics below!
IMG_7874IMG_7875IMG_7866IMG_7868IMG_7876

Attachments

Images (5)
  • IMG_7874
  • IMG_7875
  • IMG_7866
  • IMG_7868
  • IMG_7876
Last edited by vacuefactor
Update....rear end of A unit conversion.
Mario...your bracket would have worked for the Kadee, but there was no way to also get a scale diaphragm in place too...so...
Had to completely "gut" the rear of the loco with both from the frame and body.
After designing, printing, and modifying several versions of the conversion bracket, I'm pretty happy with the final result 🙂   
Fortunately it will hold for the modification of the rear of the stock Lionel F3 A-unit and both sides of the B-unit.
I decided to add underframe piping to "hook up" to the P&D air line castings, and installed a magnet into the glad hand for eventual linking to the B-unit's line.
Have a few thoughts for creating linked MU lines, but that's for another day!
For now, though, I'm calling it a night.
At this point, the scale height conversion of the frame, pilot, rear end, and fuel tank is finally complete.
Comments, thoughts, oIMG_7953IMG_7954IMG_7952IMG_7891IMG_7886IMG_7888IMG_7887IMG_7955IMG_7956IMG_7949IMG_7950IMG_7951r questions are definitely welcome!

Attachments

Images (12)
  • IMG_7953
  • IMG_7954
  • IMG_7952
  • IMG_7891
  • IMG_7886
  • IMG_7888
  • IMG_7887
  • IMG_7955
  • IMG_7956
  • IMG_7949
  • IMG_7950
  • IMG_7951
Last edited by vacuefactor
@vacuefactor posted:
Update....rear end of A unit conversion.
Mario...your bracket would have worked for the Kadee, but there was no way to also get a scale diaphragm in place too...so...
Had to completely "gut" the rear of the loco with both from the frame and body.
After designing, printing, and modifying several versions of the conversion bracket, I'm pretty happy with the final result 🙂   
Fortunately it will hold for the modification of the rear of the stock Lionel F3 A-unit and both sides of the B-unit.
I decided to add underframe piping to "hook up" to the P&D air line castings, and installed a magnet into the glad hand for eventual linking to the B-unit's line.
Have a few thoughts for creating linked MU lines, but that's for another day!
For now, though, I'm calling it a night.
At this point, the scale height conversion of the frame, pilot, rear end, and fuel tank is finally complete.
Comments, thoughts, or questions are definitely welcome!
IMG_7953IMG_7954IMG_7952

That is a dramatic improvement, and extremely well engineered; congrats on the work that you've done!

Thanks!

- Mario

Add Reply

Post

OGR Publishing, Inc., 1310 Eastside Centre Ct, Suite 6, Mountain Home, AR 72653
800-980-OGRR (6477)
www.ogaugerr.com

×
×
×
×
Link copied to your clipboard.
×
×