Turn your phone sideways for better photos. Upright is pretty much only good for selfies 
Also I think a shot from directly overhead will be best. I know it eats data, but the more photos the better. Also after one loads and you get "success", a new line and checkbox appear mid-box "insert large size" check that. Some phones don't open thumbnails at the bottom. (also at the bottom of thumbnail box in blue, a second chance to insert large/med/sm. If you edit, you can insert, reload, add,etc.
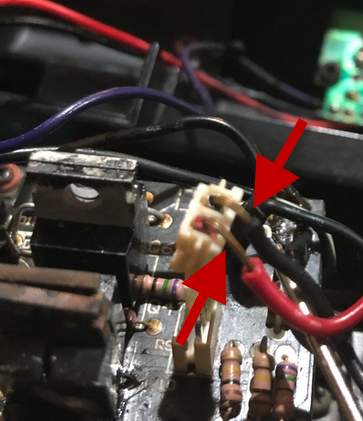
That wire looks kinda cooked to me too; I can't Dyspute that 😂 It's wrinkles stick out like a sore thumb. It might be ok, soldering melt, or overtaxed by the issues at hand.
Is that sw. for smoke on/off, or program/run? (it is your lock out too. throw it to pgm. while loco is in Ñ and you go nowhere, but other features may work. If fwd when thrown, always fwd. etc.
Start by unplugging and/ or turning off smoke. Tackle running 1st and then worry about smoke later.