


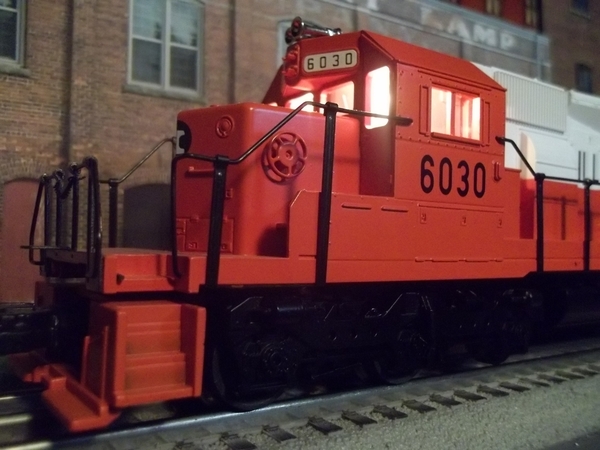
Bob, The U boat looks very nice!
STINKY 1, looks much better. Amazing what a few things will do to a scene to make it better.
Mike, my basement layout sits at about 41 inches off the floor. The wife is short but if by chance she comes down to see the layout I just pick her up so she can see everything. Other wise she looks like the old Kilroy was here figure LOL.
Bob, nice collection of D & H. My third favorite road. Sorry CP and CN are one and two.............Paul
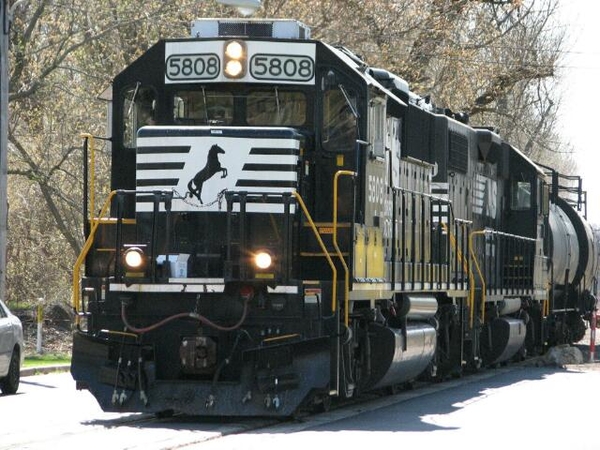
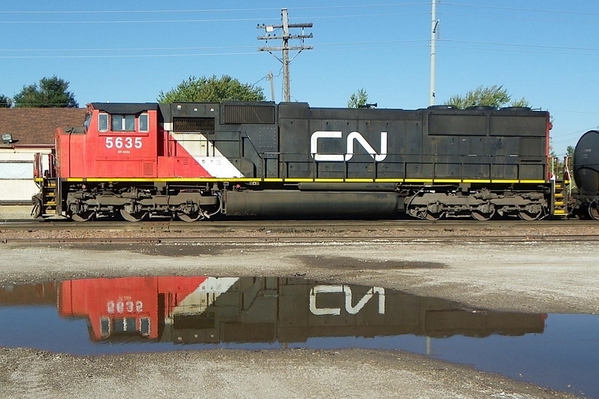
here you go Paul... #2 and #1...


Attachments
Images (2)


Thanks guys- D&H is rapidly becoming one of my favorites too. The color scheme is great!
Bob

Attachments
Images (1)

mike g. posted:Before you all get excited wait till the last 3 pictures! But I took out the items to take picture and realized the bench height was to high for me! So after taking pictures I spent the night lowering the bench height and redoing the bridge! I hope you all enjoy!


Mike, now that you lowered the bench/bridge, will you still be using 1x4 or 2x4 cross members on top of your L-girders for attaching risers for elevations changes and overhang extensions which are helpful to produce interesting contours? Dave

PS: What was the old bench height to the top of your L-girder that you felt was too high? FYI: My lowest elevation to the top of the roadbed is 42" off the floor.
Attachments
Images (1)
decoynh posted:mike g. posted:Bryan, that sure looks great!
Lee Nice work on the box cars!
John, looks wonderful! One down and how many more
Very nice commercial for your favorite brew!
I hope you don't regret lowering the table when it comes time to do the wiring. I still have eight buildings and 6 streetlights to wire because my layout is only 36" off the floor. Heck, you could have gotten some sheet rocker stilts to work on top. Oh well, enjoy the Coors & the train. I hope that you have the RailKing cold train too. Erics Trains has a video of it.

Thanks mike
trumptrain posted:Took a few photos for the Team Track Tuesday thread while running trains tonight. Had great fun!!


I like that KB my grandpa had 2 a KB6 dump truck and a KB7 road tractor
RSJB18 posted:WOW
A couple days away from this thread and passenger cars are filling up, subway's are getting wired, layouts are getting ballast, and there's enough Coors Light on the West Coast to keep Mike happy for a long time.
keep up the great work everyone.
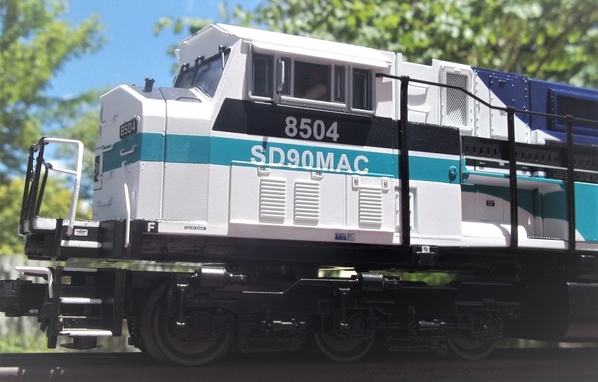
I was able to find a few minutes to finish getting my D&H U-boat running. Gotta love these old MPC units, nice and simple, clean the E-unit and motor and off it went. Just in time to pull the set of Rail King D&H passenger coaches that I bought over the weekend (more pix to follow).
Bob
Bob here you go I took this pic of a D&H hopper hiding in a pool of chassis’s last year thought you would like it


Attachments
Images (1)


 I started working on this old AHM pola flatcar Converting it into a 40 foot piggyback car this is what I have done so far enjoy the pics
Attachments
Images (5)

Hi Matt, I plan on trying to get all the wire ran for the layout before I put the top on! That will only leave me drops to hook up, and with being a shot guy I don't see a problem. The bench was at 43" and I lowered it to 36".![]()
Bob, the D & H engine sure looks fabulous!![]()
Darlander, I still plan on using 1 x 4 but between the L girders for the cross members. I know it defeats the purpose of L girders, but it gives me the height I want! The top was 43" and lowered it to 36" which hits me right at the hips which fells like a good working height for me!![]()
LEE DRENNEN, looks like you have a great start to a great plan! Keep us posted!![]()
Thanks mike I will
RSJB18 posted:WOW
keep up the great work everyone.
I was able to find a few minutes to finish getting my D&H U-boat running. Gotta love these old MPC units, nice and simple, clean the E-unit and motor and off it went. Just in time to pull the set of Rail King D&H passenger coaches that I bought over the weekend (more pix to follow).
Bob
Nice, Bob.
Ahhh ughah... Ahhh ughah... Dive... dive... dive... Sorry - couldn’t resist.
Glad to see them back on the road.
Mark, Soon you be having fun putting people in your passenger cars. I grind the bottoms of the figures to create as much flat surface as possible for the glue to adhere the figure to the flat seat.
The Amtrak Vista Dome is finished. Like the Observation, it also took 38 People for the Dome and main floor. The Vista Dome is like the Wabash Dome that is lower than the new Union Pacific Dome cars. I had to grind down 1/4" of vertical walls to allow the Dome Floor to hang lower than deigned. The Dome Floor rests on top of the upper edge of the window glass now. The screws are not tightened, or the Dome Roof will be pushed out of the car. Been there, done that. Ouch.
The car is drying before I close it up and give it a run. Here are some pictures of the people on board.
Sincerely, John Rowlen
Attachments
Images (8)


Nice work John! I love how you just keep plugging away night after night! You are for sure a man on a mission!![]()


Attachments
Images (7)


More progress on the Polar Express gi-raffes! ;-)
https://ogrforum.ogaugerr.com/...44#80973530144444944

Attachments
Images (1)
John, It looks like you masked the floor off so you could spray paint the seats brown. Am I correct? I can't remember if you mentioned any of that. Yes, I can see where the people will need trimmed down some to fit in the seats convincingly.
Brian, That is lots of CP! I liked the old gray scheme so much better than the red. Of course I don't like red period. ![]()
Mitch, Glad to see the PE Gi-raffe project is nosing ahead! ![]()
Paul, we need the word for "dive" in German! I looked it up, and got confused, they seem to use different words for the different ways we use our word "dive". Probably a good idea.
Bob, DH had a great scheme.
Mark,
I never mask when I paint. You are looking at two to three coats of paint on the seats and six coats of flat white on the table tops. The blue interior of the Amtrak and CSX cars demand an extra coat of paint. Masking always bleeds for me, even with the 3M blue blocking tape. The old-fashioned way of painting is the best method. It is time-consuming, but that is part of the hobby's relaxation therapy. That and shipping engines back to Lionel for repair. My second Vision Line GG1 is going back to service for stalling and tight gears. It will not start up in forward and poops (not a typo) my ZW-L breaker. I love this hobby.
Oh, the front coupler on my Vista Dome just fell off, broken, no good, throw the car away. Buy another. Hope it isn't broken too. I love this hobby.
The front coupler on my Observation keeps opening. I hope Lionel has parts. Last month they did NOT. I love this hobby.
My CSX #9999 FH40P was supposed to get new air hoses that were broken off the back of the NEW engine. Service waited seven weeks for parts from China, and then sent it back with the broken air hoses glued back on, but slightly crooked. I love this hobby.
Pictures of Observation included. The coach is next. Can't wait.
Sincerely, J-J-John R-R-Rowlen
Attachments
Images (10)


Above pictures are of the Vista Dome. I am a little off my game. I am getting ready to call Lionel Service or whatever they are calling themselves today.
I love this hobby.
Sincerely, John Rowlen
John Rowlen posted:Above pictures are of the Vista Dome. I am a little off my game. I am getting ready to call Lionel Service or whatever they are calling themselves today.
I love this hobby.
Sincerely, John Rowlen
At least you are maintaining your sense of humor John. Very nice work on all of your cars BTW.
Bob
Maintaining a sense of humor, or going crazy, Bob! ![]()
Yes, I know about Lionel parts and service. Roll the dice! ![]()
John, I agree with Bob, you are keeping a sense of humor. Why shouldn't I have thought that a guy who just painted 1000 people wouldn't paint a few seats and tables? I agree about masking, I always have trouble too. Thank you for answering my question.
I have been after a few issues with MTH, but nothing worth bringing up.
Brian, enjoyed the pics of 2 and 1 and the other Canadian engines. I am with Mark I like the older paint schemes for CN an CP better. And going a step further with three being the D & H for me the TH & B and Ontario Northland are 4 and 5 for me followed by South Buffalo Railway and Buffalo Creek as 6 and 7. I knew I said I was going to work on my control panel but for the past few days I as going through all my limber to see if I had enough to do it befor buying more lumber. I do so I can start laying it out tomorrow. Tonight I worked on my building. I put another coat of everything on so in the morning I think it should be a go to satart adding the roof and then all the signs. Pics of the building so far..............Paul


Attachments
Images (7)
Paul, Yes my favorite railroad, Western Maryland had sharp graphics on the steam locomotives, whether the round herald or the fireball. While I would probably prefer something a bit more colorful on diesels, I do not like the late WM era circus scheme. So, the black with the Fireball will have to do. The B&O had a nice two tone paint scheme, but all the diesels I ever saw before Chessie were dark Navy blue.
It doesn't matter what you said you were going to do next, you found the right thing to do for this given day. The building is looking good!
Apples55 posted:RSJB18 posted:WOW
keep up the great work everyone.
I was able to find a few minutes to finish getting my D&H U-boat running. Gotta love these old MPC units, nice and simple, clean the E-unit and motor and off it went. Just in time to pull the set of Rail King D&H passenger coaches that I bought over the weekend (more pix to follow).
Bob
Nice, Bob.
Ahhh ughah... Ahhh ughah... Dive... dive... dive... Sorry - couldn’t resist.
Glad to see them back on the road.
LMAO 🤣🤣🤣🤣🤣🤣🤣
THANKS PAUL
Having finished the Chinese laundry, except for sign, l tackled a box of sticks kit for an ore tipple, by T.P. Fleming. Due to interruptions, it is almost done. It is a lot easier to build these from scratch with scribed sheet wood, as l have, as plans and parts ID are not perfect. However, since no prototype is ID'd either, creative modeling is in order.
.
Mark Boyce posted:Paul, we need the word for "dive" in German! I looked it up, and got confused, they seem to use different words for the different ways we use our word "dive". Probably a good idea.
Wow, Mark... I thought English was perverse!!!
After an online search, I think the appropriate verbiage would be “U-Boot untertauchen”. By the time they got through that mouthful, I think they’d be “zunk” ![]()
![]()
![]()
Paul, ha ha, yes I agree!!
Hi Guys, I am so tired right now all I can say is there sure is a lot of great work being done here! I hope to catch u better tomorrow! Everyone have a great night!![]()
You too, Mike!!
Do you see a CheifSt.in Michigan? Eh Mark? ![]()
Dive? As in a dive bar? Or an action? By a person?
And we have trains mixed in?
I'm on a kick of recalling childhood German lately. This is almost too easy really, German name on the loco to sweeten it, (and Michgan designed)... "Shay Winery".
Schwienary (schweinery?) dishonesty, greedy, "piggy", dirty, and sloppy actions.
Diner? ....Bald's Pork Franks....
Hog & Dog biker bar ....for Schwienhund, similar but more a personal putdown than object or place.
eine and sau sounds, are bases for "dirty, underhanded, and foul, distasteful, rotten, unwanted," etc..etc.

Attachments
Images (1)


Attachments
Images (8)


What have I done lately? Not very much. Other than experimenting with some different types of layout shots for something hush-hush for now (if it comes to pass, you'll all know about it), I haven't done much.
Two weekends ago, we had the breaker that controls the wall outlets in the train room and two other rooms go out, and we had to fix that when we had the time, so no trains for a few days (turns out, thankfully, it seems to have been the breaker itself).
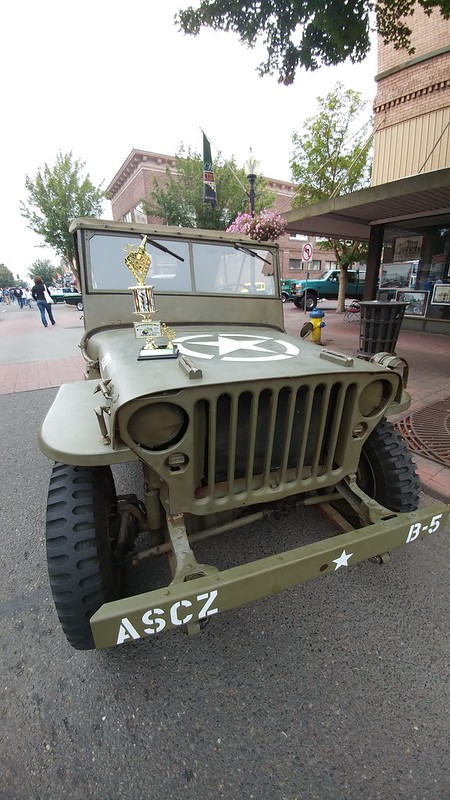
Last weekend, there was the final (local) car show of the summer that I take my WW2 Jeep to. That lasted all Saturday. At least I got an award, something which rarely ever happens for military vehicles at these shows (now I need to find a place to put this thing other than stuffing it into a box somewhere)...
The following day, it was chores and doing stuff my wife wanted. Since then, at the office it's been all overtime every day and that'll go into the holiday weekend (annoyingly, I'm well caught up but they can't/won't differentiate between those who are caught up and those that aren't).
Last night, I ran a passenger consist from one end to the other and did some switching, which is about all I've done.
Some train time is still better than nothing Lee.
congrats on the award for the Jeep. How a Willys couldn't win every time is beyond me.
Bob
very NICE Jeep Lee ![]()
Thanks, Bob and Brian!
Bob, if you go to a car show, you'll see there's a strong emphasis on the shiniest and most modified stuff you can get. I'm not into that, I'm all about preserving something as it was. My favorite 'shinny' cars at those shows are the ones that look closest to stock. I can appreciate the effort that goes into a hot rod, but I'll always decry losing the historical 'fabric' of the original vehicle.
My layout, as many of you here already know, is an extension of my love for history. Almost everything I'm into eventually intersects at the WW2 years. Even my love for the space program, which really got started by the Germans launching A4 (V2) rockets at Antwerp and London. I got this Jeep when I was still in the army due to my love for history, not quite so much that my primary focus was a love for old vehicles.
Lee, great nighttime shot. Also congrats on winning a trophy. The jeep looks good. Tonight I put a black wash on the building. So tomorrow I can start working on th roof and signs. And since I found enough lumber for the control panel I can start cutting the pieces out. Pics..............Paul


Attachments
Images (7)
RSJB18 posted:Thanks guys- D&H is rapidly becoming one of my favorites too. The color scheme is great!
Bob
I agree D&H livery is gorgeous. Wasn't there a D&H thread a while ago? We could resurrect it or start a new one and then see D&H trains galore.
Arnold
RSJB18 posted:Thanks guys- D&H is rapidly becoming one of my favorites too. The color scheme is great!
Bob
I agree D&H livery is gorgeous. Wasn't there a D&H thread a while ago? We could resurrect it or start a new one and then see D&H trains galore.
Arnold
Nice win Lee! Way to go. That sure is one great looking Jeep! I sure miss driving mine in the corps!![]()
Paul, The building is coming right along! Looking very nice!
Thank you everyone for your kind words and support as I finish my Amtrak cars. I am almost done. I finished the Coach car and am about to open the baggage car. The doors open on this Baggage car and should contain postal sorting racks, luggage racks and a toilet. I purchased Woodland Scenics Baggage Workers, Freight, Depot Workers and more Bicycles to put in the car.
Here are both interior and finished through-the-window pictures of the Coach car. This is the 54th passenger car completed since February 26, 2018. All of the work was done at night as I acted as care-giver for an elderly family member. My next project will be remodeling my den into a downstairs bedroom, next to a current little bathroom. As we grow older, we must adapt to new challenges.
Sincerely, John Rowlen
Attachments
Images (12)


Attachments
Images (1)

John , sounds like you can see the light at the end of the tunnel! Great work!![]()
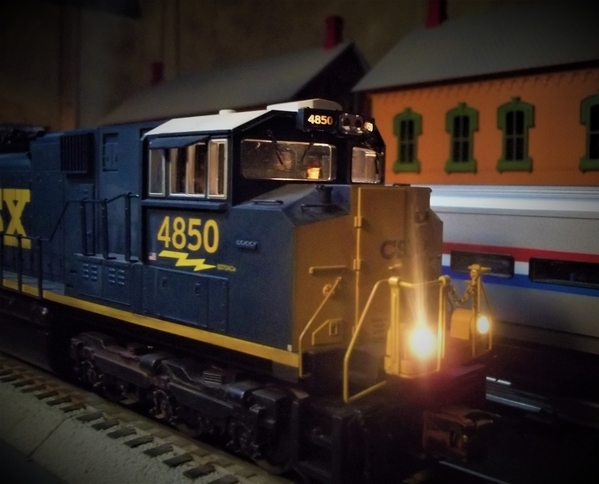
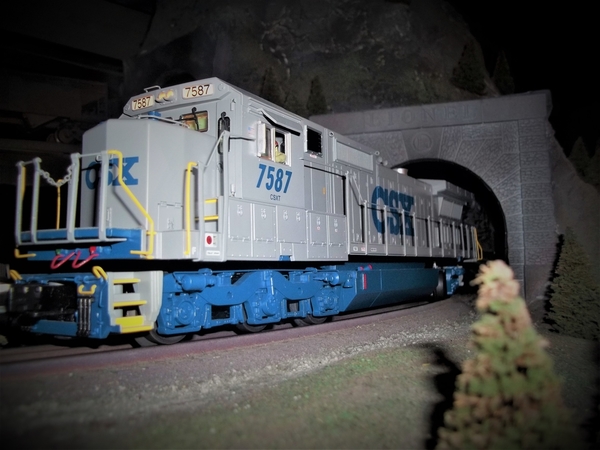
Nice CSX Engine there Brian!![]()
John Rowlen, your cars look so great and each one appears different due to your exacting placement of figures. If only Amtrak ridership were as you portray, they’d be making money hand over fist!
I was going to paint the window and door frames by hand but I found a can of green spray paint I had from a number of years ago doing trees. And it was still good. Made a make shift table out of the recycle can. Once the paint dries I can work on the building some more. Pics...............Paul


Attachments
Images (3)
John, Yes we are helping elderly family members. Always something new!!
Paul, I agree, spray paint whenever you can.


Attachments
Images (2)


Videos (1)

John Rowlen posted:Thank you everyone for your kind words and support as I finish my Amtrak cars. I am almost done. I finished the Coach car and am about to open the baggage car. The doors open on this Baggage car and should contain postal sorting racks, luggage racks and a toilet. I purchased Woodland Scenics Baggage Workers, Freight, Depot Workers and more Bicycles to put in the car.
Here are both interior and finished through-the-window pictures of the Coach car. This is the 54th passenger car completed since February 26, 2018. All of the work was done at night as I acted as care-giver for an elderly family member. My next project will be remodeling my den into a downstairs bedroom, next to a current little bathroom. As we grow older, we must adapt to new challenges.
Sincerely, John Rowlen
John, your passengers are nothing short of magical. I think everyone here is in awe both of your attention to detail and of your execution of it.
No doubt your new downstairs bedroom will be as meticulously thought out as your passenger cars. Adapt and thrive!
Pete
The Amtrak Baggage car is finished. The light at the end of the tunnel has just been seen.
Here are pictures of the interior and an additional set of pictures through the Baggage Doors. I did a wet-blend of Testor's "Sand", "Insignia Yellow, "Dark Earth", and "Earth Red" on the car floor. The paint is applied with a 1/4" brush, in one direction, one color overlapping the others, in the above order, using the same brush. The effect is intended to look like wood plank flooring.
There will be other passenger cars in the future, hopefully a Union Pacific "Challenger" set, down the road, through another tunnel, hopefully with a light at the end of it too.
My next paint brush will be a mop, not applying, but picking up, as I clean the area to be made into a main floor bedroom and bathroom. For the next few weeks, if I hear a "whistle", it will be the tea kettle.
Sincerely, John Rowlen
Attachments
Images (15)


Very effective floor, John! The baggage car interior looks great!!!!
Paul, the windows are looking very nice! I too like to use spray paint when I can!![]()
John, the baggage care looks wonderful! I am sorry that you have to do clean up, but it will give you a nice break so you wont burnout!![]()
As for me everything is on hold! My clutch went out in my truck and that is going to take $1000 that I am going to have to pull out of thin air! Wish me luck! LOL![]()
Ohhh! That isn't good news Mike! ![]()
Mark Boyce posted:Ohhh! That isn't good news Mike!
Your telling me! Plus 2 weeks without my truck, just the wife's car and my golf cart! LOL![]()
Oh that's right; the golf cart!! She will say you can ride the golf cart down to work at the store while she drives the car! ![]()
Working on weathering some Pennsy Stone Block retaining walls... I bought some flexible ones for a wide radius curve beneath the station on the lower level, and made a mold so I could make some out of Hydrocal for a 4 foot straight section adjacent to the station...
First 2 photos are after priming hydrocal gray and painting with 5 different colors mixed.
Photos 3 & 4 are after the burnt umber & burnt sienna wash was applied, but still wet
Photos 5,6 & 7 after everything dried this morning in the sunlight.


Attachments
Images (7)
Lee, I’m with you with your liking of cars that are kept stock. I was never into customizing even with my 1/25 scale models I used to build.
Haven’t done much on what layout I do have other than add a new MTH Ferromex ES44AC engine to my DCS roster.
Larry
WOW! Chris A, that's the best weathered stone I have ever seen. It's better than my own work with stone features. Totally realistic! Wow. And WOW again. I'm learning from you just by looking at those photos.
FrankM
Chris, You did a great job weathering those stone walls and portals! I even see some weeds on top of the portals!
Chris,
Thank you for sharing and providing complete instructions for the steps used to paint and then weather the stone walls. Thank you. They look great, as all of your items that you shared do. Outstanding.
Sincerely, John Rowlen
Chris, great job on the retaining walls. Nice mix of colors and thanks for the step by step. When you applied the wash were the pieces laying flat or did you have them standing letting the washes run down...........Paul
Frank M and Mark, thanks. I have been wanting to try and emulate that really dark brown stone look for a long time.... Most of my prior efforts not too good.... This time I found one or two photos to work from and took some time picking out the 5 colors that seemed to get me in the "ballpark". Think I finally got a result that I am pleased with.... Yes Mark, I chose to pull the portal out of the hillside that it was mounted in, so it would match the hydrocal walls that were going to be installed next to it....(we had put some scrubby vegetation up there to blend into the hillside). The photo below shows what it looked like before I removed it, heavy blue/gray overtone....

Attachments
Images (1)
Very nice Chris! What wonderful work you do! I just love waiting to see what your going to do next, as there is so much to learn from you! Keep up the great work and I will be watching for what is next!![]()
Paul, and Mike G: thanks. Paul, the answer is kind of both.... I applied most of the wash with the wall at 45 degrees, so I wouldn't end up with huge puddles in the deep recesses, then as soon as got to the bottom, I laid them down flat and put them out in the sun to accelerate the drying process....
For reference purposes: the 6 colors I put down on a piece of glass I use as a pallet for painting the block walls: All inexpensive acrylic latex paints from the craft store....
Burnt Umber, burnt sienna, Khaki, Pewter gray by Apple Barrel, Mississippi Mud by Americana, and Charcoal made by Ceramcoat....
Note: the "painting" was more of "stamping" method to apply irregular blotches.... never really dragged the stiff short bristle brush across the blocks...
The wash was made with the Burnt Umber, Burnt Sienna craft paints and I also added the Woodland Scenics Burnt Umber Liquid Pigment Dye used and sold for coloring plaster/hydrocal cast rocks... Equal parts of the three pigments, and then at least 50% water to 50% pigment.
Chris, thanks for the info. That sure is a lot of colors. How did you come up with the formula. You did this all on hydrocal. By chance did you do it on Pennsy walls from Scenic Express..............Paul
Paul, you can probably do without the Mississippi mud color, and minimal Pewter gray..... I tended not to put down any of the colors "straight", mixing them slightly before stamping on the glass....and then stamping several times till I got the blend on the blocks I thought I needed. In a few select spots where I went back an added the more vibrant colors to create some differentiation, with predominantly khaki and burnt sienna.
Yes I did 3 sections of the stock Woodland Scenics flex foam walls and 6 of the narrow splicing/joining sections from Woodland Scenics. The flexible walls are being mounted with magnets below the station level. I have a sub-control switch panel there that built on a "drawer that slides out".. and I want it hidden for photos, but accessible if I am operating in that area....
After the wash coats I can barely tell the difference between the cast hydrocal replicas and the originals from Woodland Scenics..... I am working on mounting them today and will post some photos tonight when they're in place.
John Rowlen, thanks I missed your kind words when I last posted !

Happy snaps from today's Frisco Festival!
https://ogrforum.ogaugerr.com/...co-festival-9-1-2018
Mitch
Chris- the walls look great. I did a similar process with acrylics. They are very easy to work with and if you mess up something- just wait till it dries and try again.
Mike- sorry to hear about the clutch. I couldn't get away with driving a golf cart around my town. The NY cops don't appreciate it. We do have several at the College I work for. Great way to get around campus. Of course my favorite use of one is with my clubs on the back. ![]()
John R- another great looking car! Same to you Lou (I like the hood ornaments too)
Ran some trains yesterday for SWSat. Otherwise still on outdoor chores and honeydo lists.
Bob
Thanks Bob, it was bound to happen, its a 1999 dodge ram 2500 with a cumins diesel . First think to to bad after 197,865 miles!![]()
Wow 200,000 miles! Not bad at all Mike.
Last night I ran trains, minor repair to coal hopper, and enjoyed every moment!![]()
Last few days I straightened out the devastation on my layout, including toppled trees and structures, caused by 3 tornados (my daughter's 3 cats) during the summer. LOL
It has been a week of experimentation. Here's a crude attempt at, well, let me explain.
Plastic painted equipment to simulate stainless steel just doesn't look realistic. So, I thought I'd play with heating duct tape, since it's aluminum, and cover over the painted surfaces. First victim was this MTH 18" coach. The contours were simple enough on the roof but the fine lines on the sides and complexity of the door areas were real learning experiences. Each roof panel is individually cut to size and laid on, taking care to adhere them straight and unwrinkled. I then burnish each piece to lay them flat and remove any slight wrinkles or air bubbles.

Only the window strip and lower skirt remain painted here. the horizontal siding is comprised of a number of full length strips, which makes application much easier to perform. The door area is one piece of tape, worked from the inside out in a way that bends the aluminum to smoothly shape it around details.

Next, I tried it on a typical PW Lionel observation. All the materials and tools involved lay beside the car. Close examination shows a less than perfect finish here, a result of many small details and compound curves. Some of those imperfections can still be worked out with careful burnishing. On the other hand, the end result relies heavily on the smoothness of the surface you're covering, just like painting.


Bruce


Attachments
Images (3)


I boo-booed..instructions not clear on this ore dump..l would have designed support timbers as one piece, not two (so kit would fit smaller box?), Had to remove and redo bottom supports. Miracle!: legs are all still level. Plus: found an old Western Scale Models ore bin gates kit so will see if they can be made to work as better and different detail than stripwood ones. Putting some of the bin liner timbers in was like building a ship in a bottle, with tweezers, and no third hand.
Hmm, old test layout torn down & headed to the burn pile, but I will take advantage of today's warmth & breeze to paint some track.
I think I'll be glad I did come this winter.
P51..congrats on glomming a trophy! Local vintage car shows, like for trains, have disappeared. A friend is deep in hot rods, with all the icons: '32 and '40 Ford, '57 Chevy, etc. I hold my tongue here as well as there, as l am for preserving history, not painting graffiti on covered bridges.
Bruce, there are modeling foils in various metal finishes and graining, made specifically for doing that too. You burnish gently with a stiff paintbrush. Thinned glue, etc.. Repairs; glue, burnish and wipe, like a gilder. I have an envelope on it if I can find the thing.
At Frisco Fest yesterday, I noted the lack of rear marker lights on the Gi-raffe Express caboose. So, when I got back to the shops, Fortescue J. Gi-raffe and Freddie Flamingo got to work with some GG1 marker lights from the parts box:

A little drilling and fitting later:

(The red glow is from the lighted bumper on the shop track.)
Mitch
Attachments
Images (2)
Looks great Bruce!! That takes patience and determination
Adriatic
Using a proper silver leaf process would likely have produced better results, conforming tighter to the small details. And the time spent might have been reduced by using a commercial kit. This was only a practice in making do with the materials at hand. I keep a roll of this tape around the house for a multitude of chores besides sealing duct work. I'm just another Canadian infamous for finding new uses for duct tape. Thanks uncle Red! ![]()

Bruce, unless someone is moving as fast as the train, no one will ever see the wrinkles! Great work, I like it!![]()


 Well I’ve had this on the bench for several years I started it at my brothers house in Kansas City Where I stretch the frame and added two tanks from the honest John kit. I painted and built it in 1995 though anyway I brought home and then I set it aside until the day. The above pictures was when I was working on it in Kansas City, the top ones are what I got done today. I’m not going to be using the radiator as pictured the radiators were in the back of the engine so I’m going to attempt to try that Enjoy the pics
Attachments
Images (10)

brwebster posted:Adriatic
Using a proper silver leaf process would likely have produced better results, conforming tighter to the small details. And the time spent might have been reduced by using a commercial kit. This was only a practice in making do with the materials at hand. I keep a roll of this tape around the house for a multitude of chores besides sealing duct work. I'm just another Canadian infamous for finding new uses for duct tape. Thanks uncle Red!
Tim who? Wahat?, Allen-wrench, what?. "No time for tools with Red Green" ![]()
You did better than I expected for sure. Ive used a few miles worth. I'd call it a keeper myself, I just thought you might be unaware of the foils.


Looks great Chris!!
Very nice Chris. Very creative way to hide the controls.
Nice job Chris, If you would have not pulled out the control panel I would have never known it was there! What a great idea to hide things!![]()
Thanks Mike and Mark.
Give it a try if you have the chance. Minor parts like the kick plates on cab units make an easy, quick enhancement. Totally reversible if you mess up or don't like the overall effect. When carefully beginning to remove by lifting an edge with a pointed exacto you'll see how well it adheres,even more so once you can grasp the foil and pull it off.
Bruce
WOW Chris !! looking GREAT ! ![]()

really nice scene ! like it !
Attachments
Images (1)

Mark, Mike G, BRIANSILVERMUSTANG and RSJB18, thank very much for kind words, and thanks to all those who hit the Like Reply button. It's been a journey working on this centerpiece part of the layout scenery, but I am glad I didn't take any shortcuts. I wasn't feeling that way last night !! Definitely makes be want to add more "scenery" below the lower track level in some other areas so the scene doesn't end at the hard edge of the table. Paul 2: you had asked a couple of days ago, if any of the weathering was done to stock Woodland Scenics block walls. The narrow joiner sections plus the 3 full size sections below and in front of the station are stock WS foam parts.
Chris, great job on that scene! You have a very good eye for creating and detailing. Very nicely done.
Art
A little gi-raffe maintenance this morning. The ca. 1960 actuators are prone to some shrinking and cracking as they age. I repair this using a small plate of styrene, so:

Once the Testor's cement dries in a few hours, I'll unclamp and trim around the edges. I've repaired 2-3 actuators in the same fashion over the years.
Mitch
Attachments
Images (1)
I have been working every day on my layout and have been getting a lot done. I hope to post some pictures soon, but need to keep at the task at hand.
My towns of Spencer and Ruthven are nearly complete, but then I have felt that way for quite awhile now. But there is always just a few more things that "have to get done" before I can say that. All the building placements are finalized, streets are finished, and street lights are installed, but not lit yet. All buildings are lit. Track is 95% ballasted in this area.
My Spencer Packing Co. building is completed and just needs final landscaping and accessories. Back drop buildings scratchbuilt and placed. Grass and trees mostly done, street signs 50% done.
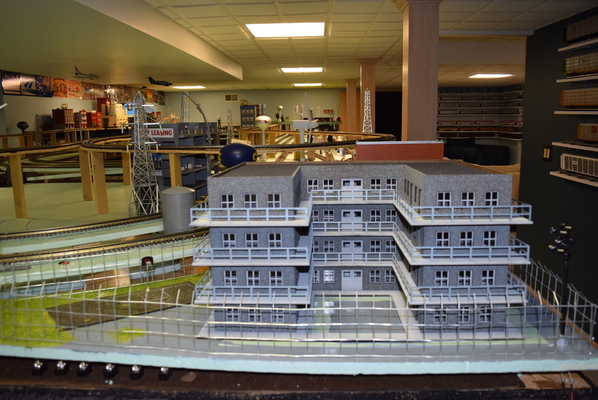
Shifted to my downtown Chicago area behind my Union Station. Have all the high-rise buildings completed and retaining walls done. Began ballasting track on the upper line last night. Have to light the buildings by routing the wires down conduit between the station tracks. Also completing the streets in this area.
Completed two major missing pieces of fascia that make the layout so much more complete looking. Worked on gluing pieces of Masonite on the backs of my fascia joints so they have a smooth finish.
Art
Art, by the sounds of it you have completed quite a bit. Look forward to pics, after you get done what needs to get done.........Paul


Attachments
Images (19)


I didn't really like the path that led to the back door of one of my stations. So yesterday, I ripped out a path, relayed in real dirt from the area that I'm modeling, and added some static grass along each side. I think it looks much better than it did before, and these little projects are making the layout look one little bit more realistic at a time.
Here's the before and after...


Attachments
Images (2)
briansilvermustang posted:
Uff Da...
TedW posted:briansilvermustang posted:
Uff Da...
OOPS! That doesn't look like a manufacturing defect to me. Could alcohol be involved? HMMM!
I went and found a few gremlins on my main lines that I had been struggling with. Seems one of my relays had gotten flipped, not sure how or why but it did. I kind of felt like I was looking for a needle in a haystack but at least I found it.
I also found a loose solder joint that was causing a dead spot. At least now trains can run, both directions on my railroad.
p51 posted:I didn't really like the path that led to the back door of one of my stations. So yesterday, I ripped out a path, relayed in real dirt from the area that I'm modeling, and added some static grass along each side. I think it looks much better than it did before, and these little projects are making the layout look one little bit more realistic at a time.
Here's the before and after...
great work. I use real dirt on my layout also because to me....nothing looks like real dirt like "real dirt". I have a layout photo in the current issue of OGR.


Chris, slow and easy as they say! Get it the way you want it so you are happy!![]()
ART, sure sounds like you have been busy, I cant wait to see the up coming pictures!![]()
Mitch, it sure is nice you are able to do simple repairs yourself! Great idea!![]()
Brian, I swear you must have one of every engine ever built! I am jealous !![]()
Lee, You sure cant beet real DIRT! Looks great!![]()
LOU1985, Great work on the cars and such a nice wonderful little video's!![]()
It was a very hot day, so I stayed inside and painted a few more (48) Seated People. My new paints arrived on Saturday, and I tried a violet with flat white added. It gave me one more color variation for the people's clothes.
Oh wait, I'm supposed to be working on another project: bedroom remodeling. I must be procrastinating when I paint. I have boxed up all the Preiser 65602 people and I am ready to begin major cleaning --- unfortunately with minor energy.
Sincerely, John Rowlen
Finished building problem, jinxed, ore tipple. Murphy's Law applied applied. Put first paint coat on after fitting chute door is and their borrowed hardware (from another kit). Should build a shaft house kit to serve it and call it Murphy's Jinx Mine.
briansilvermustang posted:WOW Chris !! looking GREAT !
really nice scene ! like it !
Chris,
This is one heck of a project and scene. The retaining walls are amazing. You are creating a masterpiece before our eyes. Thanks for posting.
Dave


Attachments
Images (13)


gandydancer1950 posted:p51 posted:
great work. I use real dirt on my layout also because to me....nothing looks like real dirt like "real dirt". I have a layout photo in the current issue of OGR.
Thanks! The funny part is once the glue dried, the surface cracked in several places (very thin cracks). I actually like how it looks, as I model the summer time and it could be an area that had dried too fast after a rain previously. I don't think I'm going to fix that.
I matched paint to that dirt when I was making the scenery original (you should have seen the look at the gal at Home Depot's face when I asked her if she could match it, though she said it was far from the strangest thing she'd had to match). When I had the scenery forms done, I painted everything but the track in that color, using it partially as an adhesive for the gravel and ground foam. Once I was done with the ground foam and such, I ripped up a few spots to put down real soil from the area. I also got a few small rocks, which I also placed into the scenery as well. My parents got me the jar or dirt/pebbles, from Dad's childhood home less than a mile from where the railroad would have run (if it'd existed in real life).
As for the magazine photo, you mean Run 300 – AUG/SEP 2018, right? I have a photo in that issue as well.
mike g. posted:
Lee, You sure cant beet real DIRT! Looks great!
Thanks, Mike!
p51 posted:gandydancer1950 posted:p51 posted:
great work. I use real dirt on my layout also because to me....nothing looks like real dirt like "real dirt". I have a layout photo in the current issue of OGR.
Thanks! The funny part is once the glue dried, the surface cracked in several places (very thin cracks). I actually like how it looks, as I model the summer time and it could be an area that had dried too fast after a rain previously. I don't think I'm going to fix that.
I matched paint to that dirt when I was making the scenery original (you should have seen the look at the gal at Home Depot's face when I asked her if she could match it, though she said it was far from the strangest thing she'd had to match). When I had the scenery forms done, I painted everything but the track in that color, using it partially as an adhesive for the gravel and ground foam. Once I was done with the ground foam and such, I ripped up a few spots to put down real soil from the area. I also got a few small rocks, which I also placed into the scenery as well. My parents got me the jar or dirt/pebbles, from Dad's childhood home less than a mile from where the railroad would have run (if it'd existed in real life).
As for the magazine photo, you mean Run 300 – AUG/SEP 2018, right? I have a photo in that issue as well.
mike g. posted:Lee, You sure cant beet real DIRT! Looks great!
Thanks, Mike!
Lee it's Run 301. And if you get the digital version there are a few more photos at the end of the issue.
Lee, you have a way of making a scene that was very good and make it even better. Chris, one word awesome job. Today I got my order from Plastruct. They had a few things that will work on the top of my silos that I myself didn't want to mess with trying to make from scratch. Now if I could only get some layout time in instead of outdoor work. Pics............Paul


Attachments
Images (2)
gandydancer1950 posted:Lee it's Run 301. And if you get the digital version there are a few more photos at the end of the issue.
Oh cool! I don't subscribe to it (my wife goes a little bonkers when I pay for subscriptions as she thinks I subscribe to too much stuff already but doesn't notice if I buy issues individually). I'll keep an eye out and will likely buy a copy as OGR is pretty easy to find here (even a local Wal-Mart carries it).
paul 2 posted:
Lee, you have a way of making a scene that was very good and make it even better.
Thanks, that means a great deal! I'm at a point where I am looking at very small portions of the layout and asking myself, "Does this make sense?" When it doesn't, things get changed.


 I finally got a turnout switch in over the long weekend
Attachments
Images (3)
This is not today. I have just had a chance to post "Matter's Mill", which will be renamed, and Gray's Elevator, an AMB kit for a grain elevator, which was named. Matter's Mill was bashed from an undershot wheel to an overshot one, and a flume was added, and other details were tweeked. Gray's Elevator got its hoist house moved to the center of the roof, and other tweeks.
Attachments
Images (7)
")


Lee, congratulations on the new siding on your layout!!
Colorado, the elevator and mill look great!
Mark Boyce posted:Lee, congratulations on the new siding on your layout!!
Colorado, the elevator and mill look great!
Thanks mark this is my first O scale layout it’s been a lot of fun maybe soon I can get some landscaping done so it won’t be naked
Lee Dennen, congrats on your turn out! One leads to two and so on! LOL Keep her going!![]()
COLORADO HIGHRAILER, Looks very nice, its always nice to kit bash something into what you really want!![]()
mike g. posted:Lee Dennen, congrats on your turn out! One leads to two and so on! LOL Keep her going!
COLORADO HIGHRAILER, Looks very nice, its always nice to kit bash something into what you really want!
Thanks Mike and yes I have another one to use
Fantastic job on the mill and elevator.


Attachments
Images (8)


Took advantage of an off day from work (heat index day) to start working on my next project...prison scene.
A couple of photos of how everything is starting to take shape. (Mostly dry fitted) Still have to put wire on the posts, barb wire (I ordered a week ago) for the top, static grass, workout area, and then populate.


Attachments
Images (3)
Ran my new favorite train...![]()


Attachments
Images (2)
Bryan in Ohio posted:Took advantage of an off day from work (heat index day) to start working on my next project...prison scene.
A couple of photos of how everything is starting to take shape. (Mostly dry fitted) Still have to put wire on the posts, barb wire (I ordered a week ago) for the top, static grass, workout area, and then populate.
Bryan, it's looking pretty good. it was a hot day for your school to be open. Just think how those people in that prison will think it's 100 degrees in those cells. But I'd watch out, that third floor is awful close to the fence. Those guys will be able to jump the fence and hop a train. Tom SR.
Bryan, it is looking good. The fence works well with the building . Nice you had a day off to do it. I have not been able to work on mine because someone who shall remain nameless when he stopped to pick up his shirts texted me to say my grass needed cutting and the yard was looking shabby so I have been doing yard work all week so far and too tired when done for trains LOL..........Paul
Thanks Paul, and the best part is I just got the mail and surprise a package with my barbed wire was in there. I know we talked about it since it was advertised for military dioramas and didn't have a scale on it but it looks perfect for o scale. Don't feel too bad I have to get my lawn cut tonight.
Ted, Nice photographs of your new favorite!
Bryan, Yes, the prison looks good. And hot too. I mowed grass Friday and Saturday; twisted my back, and had to wait until Tuesday to see the chiropractor. It's getting better, but I'm waiting until it's cooler to mow. BTW, I don't have a rider.
Brian, some nice pictures of the Northern Pacific!![]()
Bryan In Ohio, Great work on the fence, cant wait to see the finished pictures! Also great looking layout in the background!![]()
Mark, Paul, Bryan I haven't mowed the lawn in about a month and a half! Mark I am sorry you threw your back out. Maybe you need a rider! LOL![]()
Thank you Mike. Actually I must have done it moving two boards into Dad’s shop. Funny, I’ve been moving his stuff all summer cleaning out the garage, basement, shop, and it’s basement. I brought a bunch of lumber Home for my layout. A week earlier I put the ladder up to patch the roof of the two story house. Never had any problems then. You just never know, the smallest twist can do it,
I know Mark, I have had it happen just getting out of bed . Then on the floor for a week!
I finished adding working class lights to my Lionel RDG FM TrainMaster. The project took a lot longer than I'd expected, because as it turned out, the Evan Designs LEDs I bought for the purpose were far, far too bright for class lights. I had to figure out a way to dim them before they looked the way I wanted them to.
Bryan in Ohio posted:Took advantage of an off day from work (heat index day) to start working on my next project...prison scene.
A couple of photos of how everything is starting to take shape. (Mostly dry fitted) Still have to put wire on the posts, barb wire (I ordered a week ago) for the top, static grass, workout area, and then populate.
Bryan that's one cool building. I think I see a theme here coach. Seems like I see opportunity to play ball all around the layout, even for the freedomless, lol.
Dave


Attachments
Images (5)


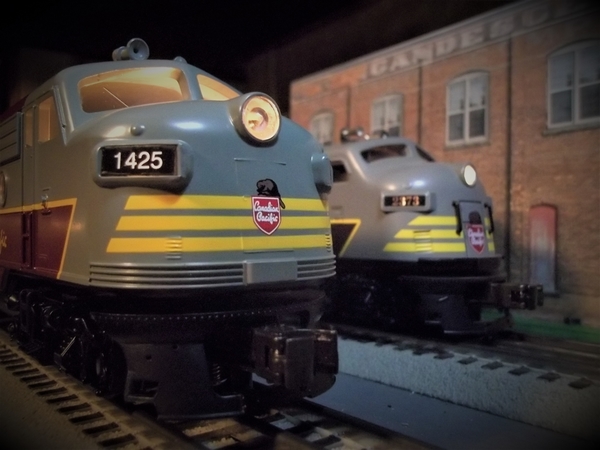
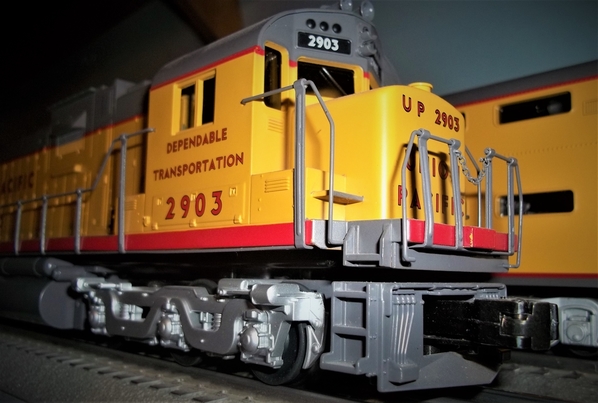
Received my MTH D&H coaches yesterday. The set includes a baggage, coach, observation and Vista Dome. Hope to get them on the track tonight.

Gonna put them behind this

unless a PA-1 ALCO should happen to fall into my lap ![]()

Attachments
Images (2)


Today I am building a Railway Express Agency building to go at the entrance to my Chicago Union Station. I bought a used Ameritown factory kit at the last DuPage show for $5 and had planned to make a packing plant model out of it, but I need an REA building first. The building had been poorly put together so I just pulled it apart and will use the six modular panels in a straight line and make new sides and back for it.
I was researching REA and found that they were the nation's largest package delivery service for most of the time from 1918 until they went out of business in 1975. When passenger trains died with Amtrak, so did REA. I thought this would be a perfect business to be located close to my busy passenger station.
Menard's announcement of new REA cars and trucks was great timing for me.
Art
last week .now
.now 
first section cleared, getting ready for next phase of deconstruction.
Getting ready to build another layout based on the Tehachipi loop
Attachments
Images (2)
Jushavnfun, Wow! what a difference! Tehachipi Loop! That sounds like a great idea to me! What will the diameter of the loop be? I will look froward to seeing what you do.
I believe I can do 96" with a 3% grade.
plan on the right is what I'm trying to do, based on a feature in model railroad mag, done in n scale, so we'll see.
Attachments
Images (1)
lee drennen posted:I finally got a turnout switch in over the long weekend
Great work, Lee!
Jushavnfun posted:last week.now
first section cleared, getting ready for next phase of deconstruction.
Getting ready to build another layout based on the Tehachipi loop
Must feel liberating to clear the decks and to have a clear vision of what you want to build next!
As a newbie, and bereft of a layout so far, I am spending my time taking apart motors, E-Units, switches, and their components from junk I bought.I just renovated a 675 steamer that was rusted solid. The motor now runs beautifully, so I turned to the E-Unit, cleaned it up, rewired all the contacts, then hooked it up to the motor and it lay there, inert like my ex wife on our honeymoon. Now I had cleaned a lot of rust off all the parts (on the E-Unit, not my Ex) and the only thing I could figure was that the coil was compromised by corrosion. So with the kind advice of one of the seasoned experts on this forum I tested the coil by placing leads on the contacts on either side of the switch...nothing. I took another old E-Unit from my bone pile and tested that coil. BINGO, the pawl pulled in. There was joy in Mudville! So I remade the junk E-Unit with the good coil, being attentive to the finger contacts, and cursing the inventor a component that requires 3 hands to fix. Then I wired the working Unit to the motor and placed it on a segment of powered track and felt like I invented fire when the wheels spun.
Now you fellows did all this many years ago. It is all new to me. I have the electronic training of a History major, so I know alot more about the Visigoths than Volts, but that's changing.
Bob, Nice looking D&H coaches! They will look great on your layout!![]()
Jushavnfun, all I can do is agree with Mark, WOW!![]()
Pete, Its always nice to get some old forgotten stuff up and running again, Congrats!![]()


Attachments
Images (6)


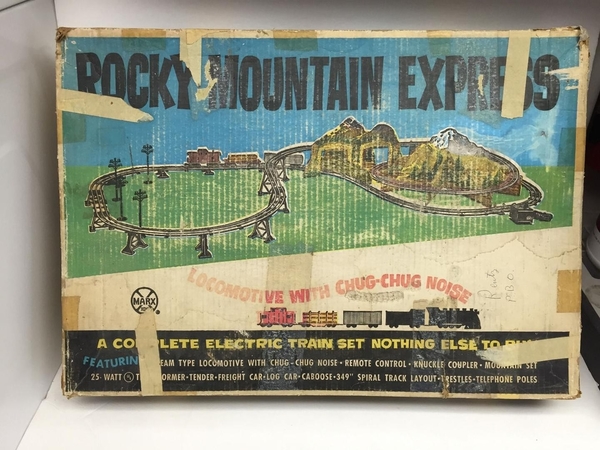
Not my layout but I saw this on another railroad blog I follow. Neat old advertisement that I thought I would share here. The prices are amazing.
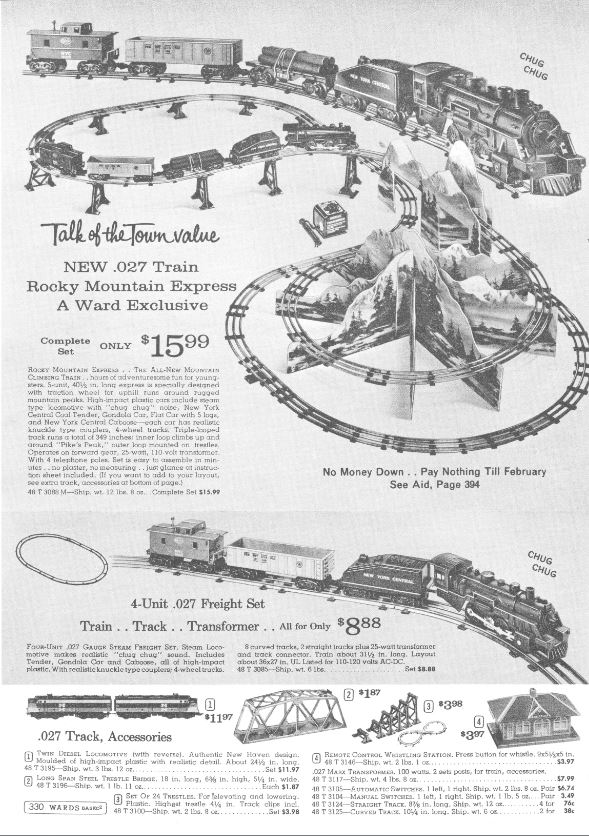

nmp... just read about it too... ![]()
Attachments
Images (1)

briansilvermustang posted:
Hey Bob, go figure, Brian already has it! LOL![]()
hello Mike, looks like Bob and I had the same breakfast reading material... ![]()

Attachments
Images (2)


Brian- looks like you follow Al's blog too ![]()

Attachments
Images (1)

Inspired by the Electric Avenue thread, I'm pulling bits from the parts box for my RDC-to-Silverliner train conversion.
The options are: traditional pantographs (left), scale pantographs (right);

Trolley poles;

Or simply hook Fortescue to the overhead and call it good. ![]()

I have three scale pantographs on hand which would cover the three car train, but they look a little oversized. I'd have to source three traditional size pantographs (the one in the pic was 'borrowed' from a GG1) or six trolley poles (these were 'borrowed' as well) if I went that route.
Somehow, I don't think Fortescue would care much for his ossicones (not horns!) being wired to the overhead.
Thoughts?
Mitch
Attachments
Images (3)
RSJB18 posted:Brian- looks like you follow Al's blog too
LOL so do I and I didn't know you go by Rob! LOL
must be his alius over there... ![]()
Mitch - Fortescue would work. Seeing his "cones" sparking would be cool. Although PETA might not like it.
jim pastorius posted:Mitch - Fortescue would work. Seeing his "cones" sparking would be cool. Although PETA might not like it.
People For Eating Tasty Arthropods? ![]()
https://wgme.com/news/local/pe...d-in-brunswick-crash
As for overhead devices, Fortescue, being made of solid plastic, has a fair amount of resistance to any idea involving him being used as a pantogi-raffe. ![]()
Mitch
My first attempt at twisted trees
Attachments
Images (1)

mike g. posted:RSJB18 posted:Brian- looks like you follow Al's blog too
LOL so do I and I didn't know you go by Rob! LOL
Easy there guys..... It's actually Bob or Bobby (CEO's choice), my mother always called me Robert. You can call me anything you like, just don't call me late for dinner ![]()
M. Mitchell Marmel posted:Inspired by the Electric Avenue thread, I'm pulling bits from the parts box for my RDC-to-Silverliner train conversion.
The options are: traditional pantographs (left), scale pantographs (right);
Trolley poles;
Or simply hook Fortescue to the overhead and call it good.

I have three scale pantographs on hand which would cover the three car train, but they look a little oversized. I'd have to source three traditional size pantographs (the one in the pic was 'borrowed' from a GG1) or six trolley poles (these were 'borrowed' as well) if I went that route.
Somehow, I don't think Fortescue would care much for his ossicones (not horns!) being wired to the overhead.
Thoughts?
Mitch
Gee Mitch- Fortesque has been a faithful companion/ assistant. Don't think he would take to kindly to being a live wire. ![]()
RSJB18 posted:mike g. posted:RSJB18 posted:Brian- looks like you follow Al's blog too
LOL so do I and I didn't know you go by Rob! LOL
Easy there guys..... It's actually Bob or Bobby (CEO's choice), my mother always called me Robert. You can call me anything you like, just don't call me late for dinner
no worries 'bout being late for dinner,
just ring the dinner bell when your hungry... ![]()


could call it... the "Chessie SYSTEM " ![]()
![]()
Attachments
Images (2)


M. Mitchell Marmel posted:Inspired by the Electric Avenue thread, I'm pulling bits from the parts box for my RDC-to-Silverliner train conversion.
The options are: traditional pantographs (left), scale pantographs (right);
Or simply hook Fortescue to the overhead and call it good.
I have three scale pantographs on hand which would cover the three car train, but they look a little oversized. I'd have to source three traditional size pantographs (the one in the pic was 'borrowed' from a GG1) or six trolley poles (these were 'borrowed' as well) if I went that route.
Somehow, I don't think Fortescue would care much for his ossicones (not horns!) being wired to the overhead.
Thoughts?
Mitch
Mitch;
It’s not that the scale pantographs are oversized... it’s just that your cars are undersized ![]()
![]()
If I were going to engage in applying inappropriate appendages to innocent RDC cars, I would vote for the traditional sized pantographs.
And I am shocked, shocked (for the second time this week, I might add) to find that you would suggest barbecuing Fortescue!!!
And now back to our regularly scheduled commentary...
imagined I had a layout...
holiday layouts coming soon!
briansilvermustang posted:RSJB18 posted:mike g. posted:RSJB18 posted:Brian- looks like you follow Al's blog too
LOL so do I and I didn't know you go by Rob! LOL
Easy there guys..... It's actually Bob or Bobby (CEO's choice), my mother always called me Robert. You can call me anything you like, just don't call me late for dinner
no worries 'bout being late for dinner,
just ring the dinner bell when your hungry...
could call it... the "Chessie SYSTEM "

Picked up the Menards Material handling facility. I bought it on a whim that I could use it as a coal loader. I thought the height would work but it is a tad too high. If I want it to possibly work I would have to take down the section of Masonite I put up on the back of the stairs in that area and paint the back of the stairs blue. I think it would fit then. I would rathe use it as a coal loader. But what's nice about the building is its versatility. .....meaning it will work anywhere. So I placed it on a siding in another area. I learned from experiance, be careful handling the railings they are fragile. I'll play with it some more after dinner. Also I saw on the shilling carton it was one of 3000. Pics.....................Paul


 Pics.....................Paul
Attachments
Images (5)
Apples55 posted:It’s not that the scale pantographs are oversized... it’s just that your cars are undersized
If I were going to engage in applying inappropriate appendages to innocent RDC cars, I would vote for the traditional sized pantographs.
Agreed! Any suggestions as to where an impoverished-but-honest modeler might lay hands on same? ![]()
And I am shocked, shocked (for the second time this week, I might add) to find that you would suggest barbecuing Fortescue!!!
It's not barbecue, it's pantogi-raffe! ![]()
paul 2 posted:Picked up the Menards Material handling facility. I bought it on a whim that I could use it as a coal loader. I thought the height would work but it is a tad too high.
But what's nice about the building is its versatility. .....meaning it will work anywhere.
The size and color give me an idea. How about here?
Make a dandy guard tower!
Mitch
My nephew and I cleaned track and then ran a MTH railxar and the Lionel Commadore,
Jan
PS. It had been awhile and took a lot of eblow action.
RSJB18 posted:mike g. posted:RSJB18 posted:Brian- looks like you follow Al's blog too
LOL so do I and I didn't know you go by Rob! LOL
Easy there guys..... It's actually Bob or Bobby (CEO's choice), my mother always called me Robert. You can call me anything you like, just don't call me late for dinner
No Problem Robby! From now on I will just stick with Bob! LOL![]()
Paul, that sure is a great looking building! I agree the way it looks you could use it for almost anything! Even an Airport Tower! LOL![]()
Took the day off, ran some trains, took some pictures and videos of them with my smartphone, and posted and replied like crazy on this Forum!
It was a very good day.
LOL, Arnold
Jushavnfun posted:last week
.now
first section cleared, getting ready for next phase of deconstruction.
Getting ready to build another layout based on the Tehachipi loop
This morning before work I took off the layout and put these in to storage. 
then I started deconstructing this section 
I'm off tomorrow so I'm gonna take this apart to get ready for new layout  all under the watchful eye of my job supervisors.
LOL😂😂😂😂😂😂
Attachments
Images (4)
Once again WOW!![]()
M. Mitchell Marmel posted:Apples55 posted:It’s not that the scale pantographs are oversized... it’s just that your cars are undersized
If I were going to engage in applying inappropriate appendages to innocent RDC cars, I would vote for the traditional sized pantographs.
Agreed! Any suggestions as to where an impoverished-but-honest modeler might lay hands on same?
Mitch
So sorry, buddy, but all my traditional sized pants are firmly attached to a pair of traditional GG1’s and an EP5 (all unadulterated!!!). The only things I have in my parts box are a heap of Fastrack switch controllers from all my command control switches.
Well, I missed a lot!
Yes it figures Brian would have one of this layout kits! LOL
Bob, I’ll still call you Bob!
Mitch, interesting project on the new Gi-raffe Electric.
Paul, That is an interesting compact loader you got from Menards. It looks good there.
The grandchildren are spending the night. At grandpa’s house we run trains at bedtime.


Wait there is more…………
We read train books at bedtime. I like “Railroad Hank”.

Gary
Attachments
Images (3)


Former Member
sorry mitch, fresh out of pantographs
I still think those gi-raff horns would work
trainroomgary posted:The grandchildren are spending the night. At grandpa’s house we run trains at bedtime.
…..Gary
OMG. They are so charming in their very apparent desire and determination to behave just perfectly so they can continue to enjoy the gift of being with you and your trains. Outstanding! It feels like a privilege, to me, to share in those photos with you, sir. Thank you. There is the very heart of our hobby.
FrankM
Trainroomgary, Sure looks like there was fun had by all! These are the moments that one remembers for a life time!![]()
beardog posted:sorry mitch, fresh out of pantographs
I still think those gi-raff horns would work
Or flamingos! ![]()

Fortescue: Okay, hold it! Perfect!
Freddy: ...I dunno about this.
![]()
Mitch
Attachments
Images (1)
trainroomgary posted:The grandchildren are spending the night. At grandpa’s house we run trains at bedtime.
Wait there is more…………
We read train books at bedtime. I like “Railroad Hank”.
Gary
Gary your a cool grandpa.

Attachments
Images (1)

Gary, it is always good to see the possibility of future hobbists in the making but even better when they are family. Today for the first time in many days I am spending time on the layout. I think Mother Nature actually felt bad for me having to work outside and has said she will make it rain for the next few days. I started off in the brewery area drawing a line at the building tops so I could add black paint to where the building fronts will be. I was not planning to do any back lighting. I should be able to add the second coat in a bit and then I can move onto something else. Pics................Paul


Attachments
Images (4)
Moonson posted:trainroomgary posted:The grandchildren are spending the night. At grandpa’s house we run trains at bedtime.
…..Gary
OMG. They are so charming in their very apparent desire and determination to behave just perfectly so they can continue to enjoy the gift of being with you and your trains. Outstanding! It feels like a privilege, to me, to share in those photos with you, sir. Thank you. There is the very heart of our hobby.
FrankM
Gary, As usual I thought it couldn't be said better than they way Frank says it! But then I did have an addition. You sir are the absolute prototype of what a train oriented grandpa should be!! Having two daughters and no sons, I was never able to get any traction with the girls and trains. To them, it's "Padre's hobby." (No we aren't Catholic, we are Reformed Presbyterian. The younger daughter has called me Padre ever since she took Spanish in junior high school) We have no grandchildren yet, and Grandma (Mrs. B) has been buying train stuff at thrift stores ever since the first of our daughters hit college. I have a whole assortment of plastic trains (parts missing of course), books, DVDs, stuffed animals in RR attire, hats, bookbags, etcetera, etcetera!! But you are the one who is giving lessons on how to train up a child! Pun intended!! ![]()
Paul, looks like you got a good start! Make sure you post some pictures when the building fronts are in place! Oh by the way, that's what rain gear is for! LOL![]()
Today am weathering the ore chute. Am interested in postings above about bashing an RDC. Have accumulated shells to bash shorties into a scale length RDC-3, not RDC-1 or 2, but 3. Have worried which available shells are scale in width? Length will involve cutting and splicing. This on, but way down, my to-do list.
Mike, been raining all day here but I don't need raingear in the basement LOL. It actually feels good to get things accomplished again. I got the second coat of black on and painted around the corner because I will down the road be putting a building there. While the paint was drying I went back to my Downtown Deco building I had been working on and added the signs. After dinner I glue in the doors and windows. Also glued the plastic in for the roof. When that's dry I can glue the black paper to it, add the chimneys and a roof sign for the Tabacco shop. I laid a flat against the black to see how it will eventually look. But I think before I start gluing them in place I am going to see if Michaels carries thin clear plastic which I can cut into strips and glue them on the back side of the windows. Pics............Paul


Attachments
Images (7)
Finished deconstruction of layout . Took remaining accessories and put them in storage, lCleaned track, Took up 300' gargraves track & switches, sorted by style, pulled & sorted wire connection, took of and organized landscaping, ran shopvac to remove ballast, and put a coat of paint over table so I can start new Tehachipi loop layout next week.
This will be my 9th layout design in 23 years. This is what Ireally like to do is design and build layouts.
5:30am
noon. 
3 PM 
Go west young man.....
Attachments
Images (3)


 Got some landscaping done today started working on my coal yard
Attachments
Images (10)

Well I was moving along pretty good. Working on the building. Got most of the front doors and windows in. Glued the black paper down to the roof. Was going to glue in the back doors and I can't find them. I don't know if I had a senior moment. I thought I painted everything. Now I can't find them. So I went back over and started playing with the fronts to get the best combination. Tomorrow I'll look for those two doors. And with that I figured that was it for the night. Pics..............Paul


Attachments
Images (3)
Jushavnfun, That is fast work! Looking forward to seeing the build start.
Lee, looking good!
Paul, That industrial siding looks great!!
I was looking for a place to display my 3530 Generator car since it doesn't look good on the wall display with the pole laying down. I found a spot between the bridge and the spur serving the Seaboard coaler and gantry crane. At one time I wanted to make this a working spur but just couldn't fit a switch in.
So I roughed in a dead spur. The Generator car is more or less trapped there unless the track crew comes along and installs a switch. I powered the spur from the accessory transformer.
My vision was that the Generator car could be supplying light to workers on the bridge. I'm a little disappointed in that the searchlight doesn't give off much light. I think the car may need some adjusting, it appears that the sound vibrator may be drawing to much. The other thing that bothers me is that the searchlight head has no movement up or down, so I cant point it up at the bridge.
Bob. I had mine adjacent to first responders scene cleaning up hooked oil car spill

the light isn't bad in the dark, with a magnet on the base maybe stick it vertical on a metal beam.
Attachments
Images (2)
Mark Boyce posted:Jushavnfun, That is fast work! Looking forward to seeing the build start.
Lee, looking good!
Paul, That industrial siding looks great!!
Thanks mike
Spent yesterday pulling a carpet cleaner around our house (gotta keep the CEO happy!). Raining outside today so the lawn will have to wait till later this week ![]()
![]() . Maybe I can get some train time in today. I'd love to get my new D&H set cleaned up and on the tracks. I opened one up yesterday, they have full interiors but no passengers. Guess I need to pay a visit to John Rowland.......
. Maybe I can get some train time in today. I'd love to get my new D&H set cleaned up and on the tracks. I opened one up yesterday, they have full interiors but no passengers. Guess I need to pay a visit to John Rowland.......![]()
Lee and Paul- things are looking good.
Justhavinfun- Your screen name sums it up. 9th layout in 23 years WOW! goes to show that this hobby has many different aspects that each of us enjoys in our own way. Some guys build their master piece and that's it. I think I lean towards your side of the tracks though.
Bob (pennsyfan)- maybe you could hide some lights around the car that will shine up on the bridge. Or- you could put a string of lights across the bridge, like construction work lights, and run the wires to the generator. Check out these guys https://www.modeltrainsoftware...r-cool-white-strings
Sounds like a challenge I would enjoy.
Bob
Paul, It took me awhile to figure out why you were painting the wall black and when I seen the flats in place I was like DUH! LOL The flats and the Downtown Deco building are looking really nice, you have come along way with both! I sure hope you find the rear doors! If not you could always board them up like in the old days! ![]()
Jushavnfun, You sure move fast! We can tell you are a man on a mission and better stay out of the way! Good luck on the new layout and like Mark I cant wait to see it come along!![]()
Lee, The coal yard has a nice start to it! Keep plugging away, slow and easy as it goes! LOL![]()
Bob, Sorry you had to clean carpets yesterday! I had to sit out in our Gazebo with the wife, a fire, friends, a nice cold Coors Light, and Tank the inspector. Just because I have nowhere to go and truck is still in the shop for a new Clutch. No new building material for bench work, so it sounded like a good plan for Saturday!![]()
Sunday it will be Seahawk's & the bronco's![]() Oh and the wife is making Fresh Apple pie as I post here at 6:53AM!
Oh and the wife is making Fresh Apple pie as I post here at 6:53AM! ![]()
mike g. posted:Bob, Sorry you had to clean carpets yesterday! I had to sit out in our Gazebo with the wife, a fire, friends, a nice cold Coors Light, and Tank the inspector. Just because I have nowhere to go and truck is still in the shop for a new Clutch. No new building material for bench work, so it sounded like a good plan for Saturday!
Sunday it will be Seahawk's & the bronco's
Oh and the wife is making Fresh Apple pie as I post here at 6:53AM!
Sounds like a nice day Mike. Send some pie east when its done ![]()
trainroomgary posted:The grandchildren are spending the night. At grandpa’s house we run trains at bedtime.
Wait there is more…………
We read train books at bedtime. I like “Railroad Hank”.
Gary
Gary,
The epitome of being a grandfather, you got it! My grandmother was the one who provided the trains but engaging didn't happen except for the occasional, "Grandma come watch the train". After a few times around the oval I think her pretend excitement was over but loved her for giving me that time.
You sir are the full package, I can't imagine the excitement those two little ones have when they are with grandpa. Thanks for posting.
Dave
RSJB18 posted:mike g. posted:Bob, Sorry you had to clean carpets yesterday! I had to sit out in our Gazebo with the wife, a fire, friends, a nice cold Coors Light, and Tank the inspector. Just because I have nowhere to go and truck is still in the shop for a new Clutch. No new building material for bench work, so it sounded like a good plan for Saturday!
Sunday it will be Seahawk's & the bronco's
Sounds like a nice day Mike. Send some pie east when its done
Here you go Bob! LOL
Attachments
Images (1)
Yummm!!!! That sure looks good Mike. Cut me a piece I am booking a flight right now LOL..........Paul
Finally got the late August videos I made for making hills, mountains and terrain with expanding spray foam and low loft batting up on Youtube... Tried to edit them and combine into one video, couldn't figure out how to do it, so they are posted as 4 separate videos labeled: Review since 2017 video, plus Parts 1 through 3 of the current build.... They are on a Playlist together...
Here are the Youtube links.
https://www.youtube.com/watch?v=D9gdSkZSXBQ
https://www.youtube.com/watch?...hcvqzk6N4&t=685s
https://www.youtube.com/watch?v=eS0U1vYYK7c
https://www.youtube.com/watch?v=H8xUgGVSOKA&t=4s
For anybody not familiar with this project, here are a couple of progress photos of the 8 foot section from start to where it is currently..
")


Attachments
Images (4)
")
Thanks Chris! I will be watching them later with a piece of Apple Pie, after the Seahawks Game!![]()
Paul, save your time, by the time you got to the airport it will be gone!![]()
Chris, great videos of how to. Very interesting way to do scenery differently. A question about that foam. I noticed you have a a good deal of time to work the foam. After you let it set up and applied the paint I noticed that there was still play in the foam. Does the foam eventually become hard so if you use this process will trunks of trees and evergreens stay upright???. Thanks Paul
Jushavnfun,
Yea I thought about sticking it the ironwork, but then I was thinking about making a higher base to put it on. I like your application. I haven't been online awhile so I missed the reason for your complete ripout. I've been at this 3 years, I can't imagine starting over. This generator car idea was just another brain fart that took me away from the task at hand of installing uncoupler magnets.
Bob,
Thanks for the extra lighting ideas and the link. First I want to check the lamp sizes and make sure that they are correct. Then I'll pull out the meter and make sure that the track is getting what it should be.
I cranked the Z up to 20 + volts and still didn't get a great output.
Add Reply
Sign In To Reply
