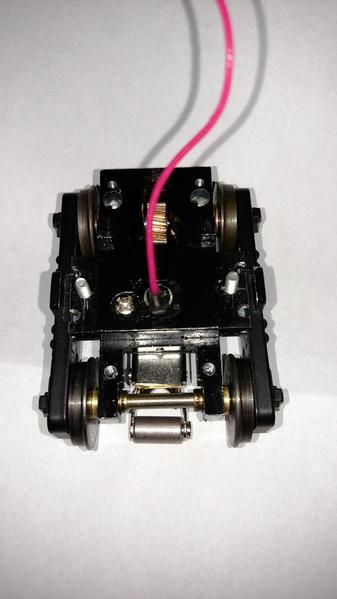
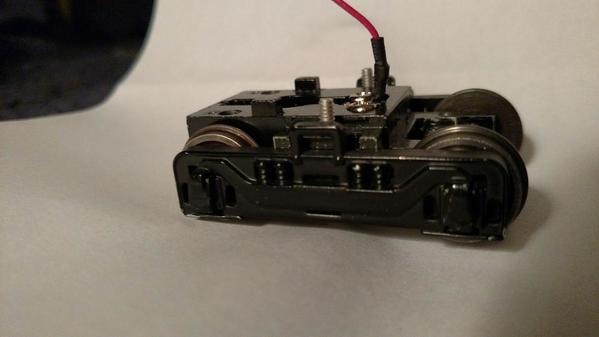
Joe that came out great. Modifying the handrails really makes a difference as well as the more pronounced added grab irons. Your right about making the spacer. Lot's of trial and error. I have one more engine to do. I just picked up another RS1. A NYC. Almost thinking of bringing a master to a local CNC machine shop and seeing what it would cost to make a batch of them out of aluminum. My earlier efforts are good enough to get the job done. But could have been better around the step area. The other thing is. The NYC has stripes applied to the chassis and the pilot. When the spacer is placed between them. Not sure how it's going to look or how to fix it just yet.
Joe,
That Lehigh Valley unit looks great! I have a photo of n=one in Bob Yanosey's book, "Lehigh Valley in Color" that looks almost just like that.
Malcolm
Dave C. & Malcolm, thanks for the compliments!
Dave, I like your aluminum idea...at least until Mario gets around to designing pilot spacers for EVERY engine on the market...LOL!! Making them out of plastic stock would be fairly simple if it weren't for those dreaded (and very delicate!) fingers or wings that form the top of the steps!
I can see where the pilot stripes on your NYC RS1 will present a challenge. How are your masking/painting skills? Re-painting/re-striping the entire pilot may be the best way to go.
Malcolm, I have that LV book too! A matching LV caboose to go with my "new" engine is next up on my 3-rail scale "to-do" list. In fact I already started on it yesterday.
Joe, with the spacer in place. I'd probably have to paint the spacer white. Then add the black. The thing is. I'm not even sure the stripes on the chassis and the pilot would even form a continuous straight line. I'm thinking of painting over the white lines on the chassis and just going with the stripes on the pilot. Thinking that may look better than a sloppy paint job or a break in the lines. The only other option is decals. If they make them for that application.
Yes the aluminum is some work. One mistake and an hours work goes in the trash. A friend who is into model planes had a large aluminum sheet in one of his kits with parts cut into it. You just broke them free and cleaned them up with a file. The same format I think would work doing this. The aluminum works great at least on the RS1. Drill 4 holes and tap 2 of them. Do these correctly and at least it will work. All the filing and trimming is basically to make it look good and access the body mount screws. It's a fairly popular engine and there may be some interest in doing a small run. I found a local shop that does the design work as well as the machining. Looking at a dummy now that I hope can be bought cheap. For nothing else than to present the idea to them with a blank chassis so they can see the end result of the work.
Next up for 3RS'ing is an MTH Premier Lehigh Valley "Northeast-style" caboose to match my recently-completed Baldwin VO-1000 switcher. I started this project yesterday, and as you can see in the photos below, have made some good progress already.
The car has been completely disassembled, the underside has been painted (Rust-Oleum Camo Brown), the "claw" couplers have been removed from the truck assemblies and the Kadees have been installed.
This is a fairly recent MTH offering, so it came with Kadee mounting "studs" molded into the underside of the car body and end platform/step assemblies. All I had to do is add the appropriate number of spacers (I use the ones from MicroMark) to achieve the correct coupler height. Next up is installation of some brake line hoses, and then weathering of course!
Attachments
Joe nice work on the LV VO1000. Love the weathering job. Looks like most of the pics in my LV books. Great work!
Here's my latest contribution, just weathered this MTH Chessie gon, went light with it because of the shop date of 10/79. I base my weathering off of those numbers for the most part tho it doesn't always hold true. The load is handmade concrete wire remesh rolls. Just used some window screen material and banded them with 2 single strands of copper wire. I'm pretty thrilled with how it came out.
Attachments
Attachments
Ben Snyder posted:
Nice, Ben! How difficult was it to mount the Kadees onto the tank car's frame? Maybe you can take a photo of the underside so we can see how you mounted them?
Thanks for the complements on my Baldwin switcher project. Much appreciated! And nice job on the Chessie gon and wire remesh rolls, too! Glad that you're contributing to this thread.
Thanks for the compliments Joe. The tank cars aren't too hard. I actually think the newer ones with the mounts are more difficult if that makes sense. Here's what I did to these cars, I have 7 MTH tankers done this way. Only one has broken so far but in all fairness I was being a bit rough with the train.
I made a shim from sheet plastic that was as big as the area in the frame that is hollow. Scrape the paint from the frame and cement the shim to the frame, don't forget to angle the edges of the shim at the end to match the frame. Thick epoxy or gel super glue works too.
After the glue is dry I just drilled and tapped the shim itself as it's plenty thick. Then paint the assembly to match. Later weathering hides all this anyway. Here's another view of the weathered ELCOR car.
When you have the whole car dissambled it's also a good time to paint the ridiculous silver railings, they look so much better black.
I'll keep posting in this thread as long as it's here as it's a much more focused thread for those of us who model this way. I'm glad you started it.
Attachments
Here's yet another car I just finished. Atlas 50' plug door. I have a pic of this very car in nearly this condition. Learning lots of new techniques as I go and kinda starting to enjoy this.
Attachments
Attachments
Did this new Atlas F7 over the weekend. Yes I know it needs a coupler - I'm working on a solution that allows me to keep the fixed pilot and navigate 036 (it does currently with the coupler removed)
Attachments
Some great looking work being showed.
Mike, that second picture. At first glance it looks like a real photo. The only thing giving it away is the 3rd rail. Really nice job, with just the right amount of weathering.
Made a little more progress last evening on the MTH Lehigh Valley caboose. Did some detail painting, installed the brake line hoses/glad hands and applied a clear, flat finish to get it ready for weathering.
Attachments
Looking good Joe, can't wait to see the finished product!
Here's 2 more cars I just weathered.
These hoppers were some of the first Chessie repainted. If they looked anything like this it's no wonder. This one looks like it's eluded the paint shop for quite some time.
Attachments
Attachments
Finished the LV caboose today. Looking forward to pairing it up with the recently-completed Baldwin switcher!


