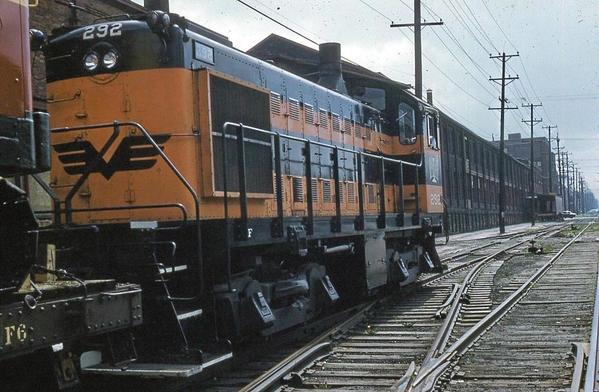
MTH just released another batch of Alco S2s and I though it was time to paint one in B&LE.  The pilots are fixed and new railings will be made but I couldn't resist running around a bit.  

These have very nice detail and a killin' sound file.  Check them out at your local dealer.

Dave

IMG_3665IMG_3663IMG_3660IMG_3659IMG_365813247809_1052694624818841_4322888205236329284_o 

Attachments

Images (6)
  • IMG_3665
  • IMG_3663
  • IMG_3660
  • IMG_3659
  • IMG_3658
  • 13247809_1052694624818841_4322888205236329284_o
Original Post

Replies sorted oldest to newest

Great job, Dave.  Looks fantastic!  I haven't attempted yet to make full-length handrails, so forgive me if this is a silly question.  Are the new handrails on the ends of the front and rear pilots made from one piece of wire that is fed through the V-shaped deck stanchions, or are they two separate pieces, one for each side?  If the latter, did you leave the original short, straight wire at the top of the "V" in place?

Last edited by CNJ #1601

Joe,

The hand rails are one piece, bent in place.  I use .030" TIG welding rod.  It is copper coated steel which is nice if you have to solder.  Some of the pilot stanchions are rolled to accept the railing and some are drilled so you might have to adjust them a bit or slightly open the hole.  I then drill a small hole in the bottom of the pilot to accept the bottom portion of the railing.  It takes a little practice to get them right but it is not too difficult.

I hope this helps.


Dave


David Minarik posted:

Joe,

The hand rails are one piece, bent in place.  I use .030" TIG welding rod.  It is copper coated steel which is nice if you have to solder.  Some of the pilot stanchions are rolled to accept the railing and some are drilled so you might have to adjust them a bit or slightly open the hole.  I then drill a small hole in the bottom of the pilot to accept the bottom portion of the railing.  It takes a little practice to get them right but it is not too difficult.

I hope this helps.


Dave


How about making a kit Dave?

jonnyspeed posted:
David Minarik posted:

Joe,

The hand rails are one piece, bent in place.  I use .030" TIG welding rod.  It is copper coated steel which is nice if you have to solder.  Some of the pilot stanchions are rolled to accept the railing and some are drilled so you might have to adjust them a bit or slightly open the hole.  I then drill a small hole in the bottom of the pilot to accept the bottom portion of the railing.  It takes a little practice to get them right but it is not too difficult.

I hope this helps.


Dave


How about making a kit Dave?

Pliers, drill bit and welding rod....hmmm...lol

David Minarik posted:

Joe,

The hand rails are one piece, bent in place.  I use .030" TIG welding rod.  It is copper coated steel which is nice if you have to solder.  Some of the pilot stanchions are rolled to accept the railing and some are drilled so you might have to adjust them a bit or slightly open the hole.  I then drill a small hole in the bottom of the pilot to accept the bottom portion of the railing.  It takes a little practice to get them right but it is not too difficult.

I hope this helps.


Dave


Thanks for the explanation, Dave.

David Minarik posted:

Joe,

The hand rails are one piece, bent in place.  I use .030" TIG welding rod.  It is copper coated steel which is nice if you have to solder.  Some of the pilot stanchions are rolled to accept the railing and some are drilled so you might have to adjust them a bit or slightly open the hole.  I then drill a small hole in the bottom of the pilot to accept the bottom portion of the railing.  It takes a little practice to get them right but it is not too difficult.

I hope this helps.


Dave


I straightened or replaced many hand rails and stanchions on the real ones, along with cut levers. Nice work, looks like the real thing.

Don

David, that paint job looks incredible! Great job! If you didn't say so I would have thought it was factory MTH paint. 

When I did my first PS3 upgrade the boards had a diesel switcher type sound set in them and the sound set was awesome. It was such a good sound set that it was a shame to change it out. I wonder if that is the same sound set you have. 

Thank you very much for explaining how to do the handrails. I would have never thought of using tig welding rod. Great idea! 

Last edited by Hudson J1e
Hudson J1e posted:

David, that paint job looks incredible! Great job! If you didn't say so I would have thought it was factory MTH paint. 

When I did my first PS3 upgrade the boards had a diesel switcher type sound set in them and the sound set was awesome. It was such a good sound set that it was a shame to change it out. I wonder if that is the same sound set you have. 

Thank you very much for explaining how to do the handrails. I would have never thought of using tig welding rod. Great idea! 

I use TIG rod for most of my railings.  It is very cheap, compared to brass, and solders up very well.  The .030" is hard to find sometimes but it is out there and 5lbs lasts for years. (and you can weld with it!)

Dave


Last edited by David Minarik
David Minarik posted:
Scott T Johnson posted:

Fantastic work Marty. And one of my favorite MTH engines.

Just don't take it apart. Ugh!

????

Sorry for the confusion David. I was referring to the time I took the shell off of my Premier S2. It was not fun trying to get it off or get it back on.

Add Reply

Post

OGR Publishing, Inc., 1310 Eastside Centre Ct, Suite 6, Mountain Home, AR 72653
800-980-OGRR (6477)
www.ogaugerr.com

×
×
×
×
Link copied to your clipboard.
×
×