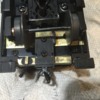
The subject of my next locomotive project is Virginia Blue Ridge Railway 2-8-0 #6, formerly Southern Railway #385 (preserved at the Whippany Railway Museum and a sister to the 401 at Monticello Railway Museum).  I don't want to run afoul of copyright so you'll have to search for a pic yourself.  There's literally nothing close in O scale, so this one is going to be interesting.  The idea came to me because I had picked up the boiler shell of a Lionel mogul, and realized how close it was in overall dimensions, dome and running board placement to the Southern H-4.  If only there was an eight-wheel driver chassis with 57" drivers and the correct counterweights...  Well there is, the Weaver PRR C1 0-8-0 (56" drivers = close enough).  As luck would have it I found that loco sans tender for a good price, and it appears the motor should fit inside the mogul shell without major modifications.  (I plan to list the Weaver boiler shell and cylinder casting on the For Sale board, if anybody's interested.)  Here's what I started with (that's the mogul cylinder casting in front):

DSCN2358

So far I've stripped incorrect details from the boiler shell, shortened the smokebox and running boards to match the prototype, and ground down the chassis and cylinder casting so they'll mate properly when I JB Weld them together at a later date:

DSCN2645DSCN2694

I've been amassing a pile of parts from various different locos that I hope will work on this Franken-loco.  One of the next steps will be to figure out how to attach a pilot truck to the chassis - after I find one.  I expect this one is going to take a while, but I'll post updates here when I can.

Attachments

Images (3)
  • DSCN2358
  • DSCN2645
  • DSCN2694
Original Post

Replies sorted oldest to newest

Progress is coming on lots of little parts.  I had a four-wheel lead truck from a Lionel 4-6-0 that I modified:

DSCN2695DSCN2696

The cylinder saddle now fits well, so I was able to test-fit the valve gear parts I got from the Lionel Mikado Jr.:

DSCN2765

Doesn't look bad, however the main rod is a little too short so the piston rod comes out of the cylinder at 9:00.  Thought I had that figured out - oops!  This is an interesting problem.  I may need to use parts from a different loco, and the Lionel PRR H9/H10 comes to mind.  If anybody has one, could you measure the length of the main road from center on the crankpin to center on the crosshead?

Attachments

Images (3)
  • DSCN2695
  • DSCN2696
  • DSCN2765

Crisis averted - for now, anyway.  I decided to try to use the parts I have by lengthening the main rods, cutting them and splicing in a little bit of scrap diecast with JB Weld.  Much to my surprise, it came out pretty well and seems to have plenty of strength.  Once I cover the whole thing with NeoLube it should blend right in.

DSCN2776DSCN2779

You can see that I also drilled a new hole farther out on the radius rod to effectively lengthen it - luckily there was some overlength.  Next step is to figure out how to mount the valve gear hanger on the frame, them put everything together and see if it works.

Attachments

Images (2)
  • DSCN2776
  • DSCN2779

A big part of this project has been figuring out exactly how to fit the parts together so they'll work. I hacked apart the crosshead guide braces from the Mike Jr., and put them back together to match the overall geometry.  With the main rods lengthened, I was able to do a rough test-fit of the entire valve gear.  It's a real juggling act - if the valve gear hanger is too far forward, the eccentric rod isn't long enough, but if it's too far back the valve rod isn't long enough.  Once I get it figured out I'll have to cut a notch in the frame to rest the valve gear hanger in.

DSCN2806

Still looking for a footboard pilot - anybody have one? 

Attachments

Images (1)
  • DSCN2806

Probably the biggest area of compromise with 3-rail steam loco models is around the pilot truck.  Our huge flanges require pilot truck wheels to be too small, and the spacing between them and the cylinders and the pilot too great.  This usually leads to the unprototypical "front porch", or elongated pilot deck.  Since this model will only have to work on my layout, it needs to be able to get around O64 curves min.  Here you can see how I drilled a hole where I figured was correct and screwed in the truck I bashed:

DSCN2825

This puts the pilot wheels closer to the cylinders than they are on most 3-rail models:

DSCN2827

Turns out I cut my figuring really close, maybe a little too close.  Here's the chassis on an O64 curve:

DSCN2828

You can see how the flange and/or wheel surface might touch the cylinder with any kink in the curve.  I have two options: mount the truck farther forward, or slightly grind down the part of the cylinder head that touches.  I think I'll probably go for the latter, but ran out of time for today.  Till next time...

Attachments

Images (3)
  • DSCN2825
  • DSCN2827
  • DSCN2828

I've made some progress in a few key areas.  The Lionel mogul has the smokebox split below the running boards, so having removed those running boards I needed to replace the lower half of the smokebox.  I carefully formed a piece of sheet brass around my fine assortment of mandrels (garden spade, rake, and broom) until it was the right diameter, and JB Welded it in place.  It'll attach to the saddle with a screw up through the bottom.

DSCN2850

Meanwhile, I had to modify the rear of the frame to interface with the shell below the cab.  It now sits at the correct height at the rear, and I need to shim the front end up just a bit to be level.

DSCN2866

It appears the motor and flywheel fit in the shell - just barely, although I can't test it running yet.  I have to rig something up to be able to use the screw holes in the rear of the shell so it'll stay together, then it's on to completing the running gear.

Attachments

Images (2)
  • DSCN2850
  • DSCN2866

Reached a couple of milestones with this project.  Was finally able to build up the valve gear and adjust it for smooth operation.  The boiler shell can now be screwed to the chassis, so here's how it looks now:

DSCN2916

I pinned the radius bar to the bottom of the expansion link, so the valve gear actually moves as it should in forward:

Now, you electronically-minded types can help me out.  There appears to be plenty of room to put the ERR board in the boiler (I don't plan to add sound or a smoke unit).  The boiler shell already has a run-program switch wired in as well as a connector for the handrails as an antenna.  I plan to use an 18v bulb for the headlight, and no marker lights.  Would an ERR board alone do the trick, and any reason why it shouldn't be in the boiler?

Attachments

Images (1)
  • DSCN2916
Videos (1)
DSCN2920_x264

First off, let me say that I don't think you're getting enough attention in this thread - this is a fantastic build and I love following it.

As for your ERR board location - are you using a Cruise Commander, or a normal ERR board (without cruise)? I ask because the Cruise Commander has a large heat sink on it that should be mounted directly to a chassis, possibly limiting your mounting options. Other than that, I do not see any reason to not just mount the board in engine.

What I will say is that it is probably a good idea to have a wire tether running between the engine and tender - that way you have electrical pickup across a greater length. It also allows you to put sound in the tender. If you decide to do this, then it really doesn't matter where the board sits, the tether is there anyway.

~Chris

Thanks for your reply, Chris.  I'd like to have cruise, because the motor is way too fast even at low voltage.  Don't think the board could be mounted to the loco chassis.  I was hoping not to have to mount a connector below the cab, as there isn't much room.  Is there another way to get the heat sink you need on the board?

The heat sink comes as part of the board, with a tapped hole in the bottom of it for mounting. It doesn't necessarily need to be mounted to the chassis, but it should be mounted to a larger piece of metal and the chassis is probably easiest as the interior of the boiler is round. Since it appears you're not afraid of metalwork, you could probably make a bracket to hang it off the interior of the boiler shell.

I do recommend securing it to something metal though - it will get hot as the engine runs. I have a Weaver RS-3 with a plastic frame that I installed a cruise commander in, and all the heat sink is mounted to is a white metal weight that came with the engine - the engines shell around the heat sink gets warm after 10 minutes or so of use. Not enough to do damage to the shell, but I wouldn't want to have the heat sink all by itself either.

~Chris

Getting what YOU want .. using what can be found, how l got my GW 2-8-0. Please post completed SR consolidations together, as my dad fired an SR 2-8-0 before "graduating" to Mikados (#4526) , and l have a photo of the consol but number is not visible.. Did you find a pilot?  I found a junkbox full of heavy cast bronze/brass  pilots, including several different step pilots, while scrounging for bashes. These are heavy old castings, but "O", and l just used one for a project.

Chris - Thanks for the tip.  I may be able to fasten a metal bracket to the chassis for the ERR board.

Gunrunner John is definitely the guy for this stuff.  If I can't figure it out myself I may well send it to him to do the electronics!

Colorado - Thanks for looking.  I did find the right pilot, from Stevenson's SP 0-6-0.  When it's done I'll be sure to post a photo with my other SR 2-8-0, and also the Ms-4.  Southern steam sure is handsome!  You're right - if your interests are even slightly off the beaten path and you want a reasonably correct model, this is the only way to get what you want.

It's been a while, but progress is back on track.  Sent it out to Alex M. for the ERR job, who was just as good as everything I've read on here.  Now it runs much better, and ready to start going back together.  In the first photo you can see how I attached the pilot.  The pilot itself is a Stevenson casting, and the deck is fabricated from the running boards I cut off the shell and JB Weld.  I took pains to minimize the gap around the pilot wheels, but still allow them to swing freely.

DSCN3410

The freshly painted cylinder block went on next.  VBR #9 always had a crooked drifting valve, so mine does, too.  Here you can also see mods I made to the handrails

DSCN3413

I had to lower the tender frame, so next is to get it fitting well in the shell again, and figure out how to mount the kadee (why is that so hard on tenders?).  Then pretty much everything else will be cosmetic.

Attachments

Images (2)
  • DSCN3410
  • DSCN3413
Last edited by 49Lionel

Love threads like this. Just outstanding work and fabrication. The hard part putting Kadee’s on tenders is the offset that’s needed. Your good with brass. I just use some 1/2” wide and make soldered together T shaped bracket. Drill and tap  2 56 threads to secure the Kadee. Drill 2 more holes and mount the tenders floor. On the one pictured. I added some extra brass to frame the coupler better.

1D212EEE-7141-4610-9759-7F3991358127D22034BD-E94B-45CD-B95C-FDA47ED26DED1212B094-EC12-4329-A034-B41AAA9122D3

Attachments

Images (3)
  • 1D212EEE-7141-4610-9759-7F3991358127
  • D22034BD-E94B-45CD-B95C-FDA47ED26DED
  • 1212B094-EC12-4329-A034-B41AAA9122D3

I ended up doing something very similar with the coupler.  It had to attach to the frame, but had to extend back far enough to clear the shell (just like Dave C. above).  I didn't have any brass thick enough to screw into, so I used a few pieces of sheet brass and made a sandwich with JB Weld.  2 screws to hold the coupler box to the bracket, 2 screws to hold the bracket to the frame, and voila - it's nice and solid.  For the first time I was able to couple it up to a train and get some loaded test runs.  Mechanically and electrically it seems AOK, so now it's time to paint and letter the tender.

DSCN3495DSCN3497

Attachments

Images (2)
  • DSCN3495
  • DSCN3497

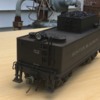
Finally made some more progress to show y'all.  The tender is from the Lionel mogul, and I decided to use it more or less unmodified.  However, I didn't like how it rode too high on the trucks.  The stamped metal frame had indentations that the trucks were mounted on, so I flattened it out with a mallet.  That made the frame too wide, so... after much grinding and adjusting, it fits in the shell again and I like the height better.

Since I wasn't modifying the shell I hoped I'd be able to simply strip off the numbers like I usually do.  Well, I don't know what they used on these, but nothing that usually works would take them off without removing the base paint.  I decided to sand them down, and just overspray the affected areas.  I also wanted to add a load of real VBR coal, so I ground down some of the cast-in coal load so it would fit.

DSCN3543

I oversprayed the disturbed areas black, painted the deck oxide red and the handrails yellow as per the prototype.  VBR lettered their equipment with what looks like a stencil, and I couldn't find any decals like that.  So, I used a block font (Clover House dry transfers) and drew black lines with a pen to simulate the stencil look.

DSCN3568DSCN3570

i was initially going to bury the antenna in the coal load, but I decided instead to coil it up on the deck, as though it was a hose of some sort.  Works for me!  Now, it's time to wrap up the locomotive.

Attachments

Images (3)
  • DSCN3543
  • DSCN3568
  • DSCN3570

Great project, wish I would have seen it sooner

For your front pilot wheel you can use a scale flanged wheel if you are not running on Lionel's  tubular rail .

Some times you can find an older 2 rail wheelset that had taller flanges than newer O scale flanged wheels.

I did a weaver PRR h10 2-8-0 this way and it runs on O45 atlas track  and I could shorten the pilot deck. It looks much better.

Last edited by Dave Funk

She's on the rails!  Everything went together fairly smoothly, and my planning payed off - everything fits!  It runs well, and seems to be getting better as it breaks in.  I think it captures the look of VBR 6 pretty well - the mogul boiler shell wasn't going to be perfect, but it's way closer than I could have gotten otherwise.  I used Valejo acrylic satin varnish (except for where you can see I masked), which gives a nice finish, and Neolube on the rods.  Happy to answer any questions you have - hope this encourages some of you to undertake something similar!

DSCN3902DSCN3911

Attachments

Images (2)
  • DSCN3902
  • DSCN3911

Awesome build!! I can't wait to get to a point where I can undertake this sort of work.

Do you know if scale pilots work on three rail track? I wonder if they would look goofy on a locomotive/car with the other wheels having tall flanges. I also wonder how they would do through switches and whatnot.

I love your idea of using the antenna as a hose on the tender. That's a good move! Very clever and very effective!

Add Reply

Post

OGR Publishing, Inc., 1310 Eastside Centre Ct, Suite 6, Mountain Home, AR 72653
800-980-OGRR (6477)
www.ogaugerr.com

×
×
×
×
Link copied to your clipboard.
×
×