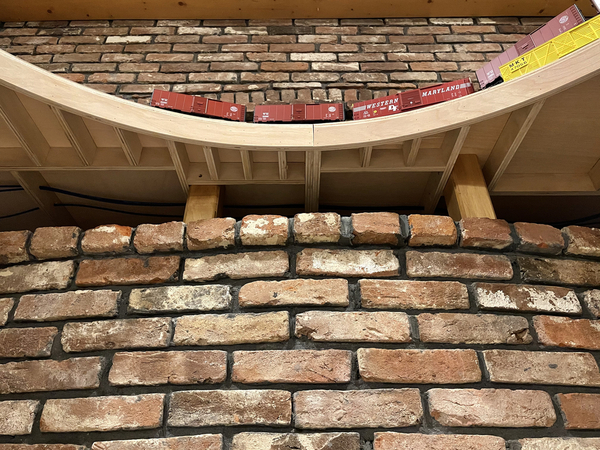
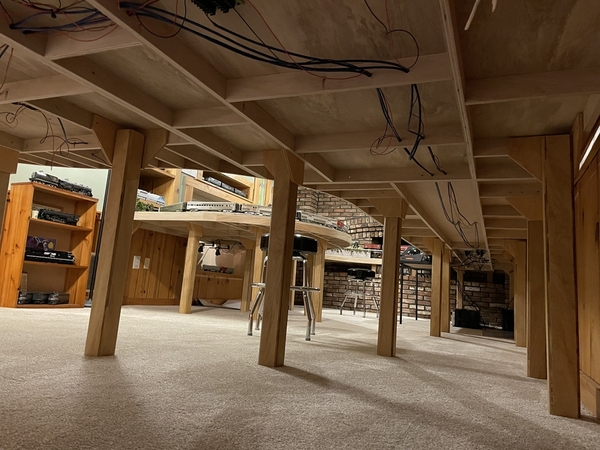
I have been following along with many folks here on this forum and decided to share my layout with the broader group. This project began as a floor layout in my basement. As my family grew, I started to realize that my trains were in danger sitting on the floor. This past year, with all of the extra time at home, I was finally able to commit to getting layout benchwork built. The project started with one goal: Get the trains off the floor.

The layout dimensions are roughly 27'x12'. There is a Blog detailing the benchwork construction below.

Train Table - Part 1

Train Table - Part 2

Train Table - Part 3

Train Table - Part 4

As with most things, the layout has now become my top hobby and creative outlet. My layout combines several elements. I have some areas where I am playing around with more detailed scenery. This is all a work in progress so more updates will be posted as things progress. You can also follow my shenanigans on my RBP Trains Youtube channel https://www.youtube.com/c/RBPTrains/

Enjoy!

Attachments

Images (1)
  • Chris' Track Plan
Last edited by Chris1985
Original Post

Replies sorted oldest to newest

I created a POV video of the layout a few weeks back. This gives a little more perspective on the track plan.

We start the journey on the outer main line before the tunnel. We transfer to the inner main to turn the camera around then transfer back to the outer main. We head down the line to make a pass by the engine shed. We continue on and then switch through the Claire rail yard where we change direction again next to the Big Rock Candy Mountain. We then head back to the starting point. Enjoy!

Very nice, Chris. I very much enjoyed the video in your first post. Well done! Can I asked what you used to shoot and edit it? Did you use a gimbal for the tracking shots? I assume you used a tripod fro some shots. I just made my first train video and it was a lot of fun.

Last edited by Will

Thanks @mike g.! I have been following your build and getting ideas from you so don't stop now!

@Tranquil Hollow RR Thank you! When I was designing, I really wanted to be able to move a train anywhere on the layout and to be able to switch directions.

Thanks @Will! I am pretty new to the whole YouTube thing so my gear is limited. I have a tripod/ring light for static shots and I use a gimble for motion shots. I record and edit on my iPhone 12. The POV video I did required my older Sony AVCHD camcorder which did I nice job. As my video hobby grows with the trains, I will probably find myself looking at nicer cameras and recording gear! I agree that the videos are fun to create!

Thanks @Aem7s4lyfe! Appreciate the support. I love the AEMs as well! When my wife was in Grad School, I rode many of them via Amtrak on the weekends to visit her in NYC.

Last edited by Chris1985

Chris 1985, this is amazing, your nice video, your great layout, excellent track work, and your table is excellently crafted. Congratulations on getting into this hobby at a young age, you will see so many new innovations in the next few years as this Hobby is changing with the times, Legacy command, (not real sure about DCS command)  Lionels Voice Control, everything backwards compatibility, the best is yet to come. I will check out your channel. You might show us more pictures of your fathers layout to. Thank you again. Happy Railroading Everyone

@Chris1985 posted:

@Mallard4468 Thanks for watching! I really wanted to title my channel as Chris Trains but it was taken so I used "RBP Trains". RBP was the name of a fictitious production company that my brother and I created as kids.

The link to my YouTube channel is here: RBP Trains

And what are the chances that two young guys named Chris would both have O-gauge railroading channels?

@Chris1985 posted:

Thanks @mike g.! I have been following your build and getting ideas from you so don't stop now!

@Tranquil Hollow RR Thank you! When I was designing, I really wanted to be able to move a train anywhere on the layout and to be able to switch directions.

Thanks @Will! I am pretty new to the whole YouTube thing so my gear is limited. I have a tripod/ring light for static shots and I use a gimble for motion shots. I record and edit on my iPhone 12. The POV video I did required my older Sony AVCHD camcorder which did I nice job. As my video hobby grows with the trains, I will probably find myself looking at nicer cameras and recording gear! I agree that the videos are fun to create!

Thanks @Aem7s4lyfe! Appreciate the support. I love the AEMs as well! When my wife was in Grad School, I rode many of them via Amtrak on the weekends to visit her in NYC.

Nice!! I literally grew up with the AEMs.  My elementary school sat adjacent to the Northeast Corridor.  I lucked out in my 4th grade year because my classroom windows faced the NEC without any obstructions, so I would see the AEMs racing back and forth.

@leapinlarry, truly appreciate the kind words. I am definitely excited to see how the operating tech evolves over the next several years. It is an interesting and exciting time to be in the hobby and I am grateful to be part of the community. I will be sure to share more photos and videos of Dad's layout. He is the person who got me interested in this hobby and continued/ continues to make it exciting.

@Mallard4468 I was thinking the same thing when I was trying to name my channel!


@Aem7s4lyfe I would have had to repeat 4th grade if I got to watch trains from the window all day! That is awesome!

Thanks @mike g.! I have a bunch of structures coming this week so things are going to get a little more interesting. Not looking forward to more wiring!

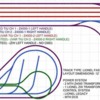
Curve radius: O72 Outer Main, O60 Inner Main, Yard has all O72 switches, elevated lines are mostly O36. The switches that connect to the crossover are O72 as well so I can turn all of the engines around in the event that I want to change direction on the outer main line. Some of the turnouts have O36 switches on the inner main for engine/ car storage

I was inspired by your town area and realized mine is missing some life. Working to resolve that!

@Chris1985 posted:

Thanks @mike g.! I have a bunch of structures coming this week so things are going to get a little more interesting. Not looking forward to more wiring!

Curve radius: O72 Outer Main, O60 Inner Main, Yard has all O72 switches, elevated lines are mostly O36. The switches that connect to the crossover are O72 as well so I can turn all of the engines around in the event that I want to change direction on the outer main line. Some of the turnouts have O36 switches on the inner main for engine/ car storage

I was inspired by your town area and realized mine is missing some life. Working to resolve that!

Thanks Chris, I reread your table blog this morning and no matter how many times you read it, it is still amazing! We have about the same size room. Mine is 24'x12', that's one of the reasons I like your layout and track plan so much!

Hi Chris,

Just took a look at your first video:  Wow!  just Wow!  Terrific!

Video was crystal clear !

Really loved the water scene under the bridge and the wooden trestles.

So many questions, but if you have a minute, here's just 3:

1. The black and gray bridges...MTH?

2. The wooden cabin...a kit? what brand?

3. What state are you in?  I'm in central NC . . .

Congratulations on a wonderful layout!

John E.

@Chris1985 posted:

A few folks asked about Dad's layout. I created a new thread to highlight his layout and will post updates there. Enjoy!

Trains With Dad - Danny's Layout

Chris.....your Dad's layout is fantastic.......I see he has 1983 Lionel New York Central 20th Century Ltd set.....I do, too. It's a great one to have!

Keep the Video's coming....they are great!

Peter

Another entertaining and informative video, Chris. I shows that good video production is just as important as content to keep eyeballs happy. I made my first edited train video this year and it's a lot of fun to shoot and try to make something out of them. ( I don't want to hijack your thread, but I'll send a link if you are interested)

I also saw your hobo reference. Did you watch some Stobe the Hobo?

Thanks @Alex M!

@mike g. thanks! I am terrified of doing a real product review as the online wolves will come after me for missing details. I like keeping it short, sweet and high level!

@Tranquil Hollow RR, thank you! That is what I was going for so I am glad it came through in the video.

Now onto figuring out how to review power and control on the layout without a 10 minute shot of my transformer....

In the meantime, I made a short Channel Trailer that came out pretty well. Enjoy and Happy St Patricks Day!

Last edited by Chris1985

Thanks @BOB WALKER! There has been quite a bit of analysis of the Menards piece here on the forum. I had a blast with that engine and have still been enjoying it. I even took it into my local hobby shop so they could get a closer look. I was interested to see how Menards approached this in a similar way to the Lionchief products. I am curious to see what is next for them in this market.

Chris

Real Nice layout. Like the curve  support structure.

As a former engineer, I just could not use the trestles to just support the FastTrack as you did.

This was my issue with using the older Lionel trestles to support old Lionel Track.  My question was: What supports the track from trestle to trestle?; the track itself? Ordinarily, from a trestle to a trestle there would first be some sort of support structure; beams or a truss; then on top of that would be the track. FastTrack like any other track when used above a surface looks more real with a support structure under it. It's tricky to do under curved track.

I guess I could imagine that the material under the FastTrack is some sort of concrete slab that spans the trestles but its much too thin proportionally for the spans.

Alan

@Chris1985 posted:

It only took a year, but I finally pulled the photos from the benchwork construction process into a video. Enjoy!

No homasote?  No 2x4s?  No 3/4" decking?  Oh, the humanity!

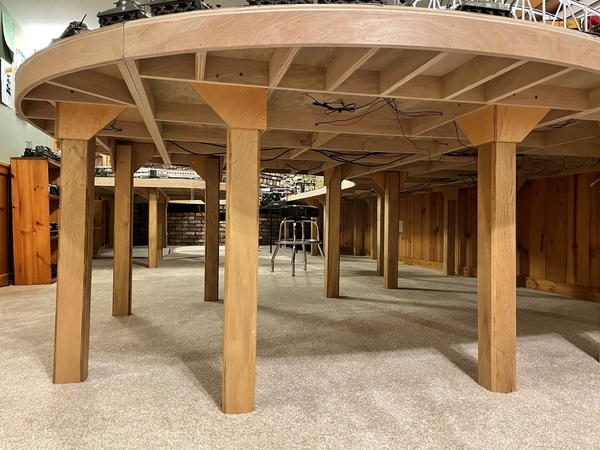
Well done, and thanks for sharing.  While erring on the side of caution for well-documented reasons, it's not overbuilt.  I particularly like the thoughtful use of 3/4" plywood for the framework - allows for the use of less material without sacrificing strength.  The curved edges are nicely done. 

Chris - that was an enjoyable video, thanks for sharing. I like the track plan and "kid-friendly underside of the layout" planning...I thought I was the only grown man who tries to hide under the layout

I am also a fan of curved benchwork; the curves enable a larger track plan to fit into a room more aesthetically as your video clearly shows. I also had a carpenter-friend help me build my curved sections...without his help I'd likely still be working on it.

HPIM1180

Attachments

Images (1)
  • HPIM1180
@Mallard4468 posted:

No Homasote?  No 2x4s?  No 3/4" decking?  Oh, the humanity!

Well done, and thanks for sharing.  While erring on the side of caution for well-documented reasons, it's not overbuilt.  I particularly like the thoughtful use of 3/4" plywood for the framework - allows for the use of less material without sacrificing strength.  The curved edges are nicely done.

LOL

I agree, the layout is well built, but no wasted material.  I too like curved edges, but admit I am not up to that challenge.

Add Reply

Post

OGR Publishing, Inc., 1310 Eastside Centre Ct, Suite 6, Mountain Home, AR 72653
800-980-OGRR (6477)
www.ogaugerr.com

×
×
×
×
Link copied to your clipboard.
×
×