Thanks to all! Pat… you're putting those high expectations on me again. I'm not a young man you know. Have some sympathy for the aged...

Stephen Milley has already cut the new walls and they're in the mail. I like his level of service!

My wife just told me, "There's probably other mistakes you've made…" She's nothing if not encouraging. She keeps me grounded. And believe me, I do need grounding… regularly.

Well… Stephen is quick! The new walls with the correct tabs came today. I tried them on and everything lines up as it should. I did get the alignment right just as long as I drew them on the correct side of the building.

EH Walls with Tabs 1EH Walls with Tabs 2

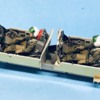
Just as a status, I'm almost finished with the Thundercheif's cockpit. The Eduard Photo-etch and the resin pilots and flight seats really make a neat installation. There's some touchup painting needed on the pilots.

F-105G Cockpit With Pilots

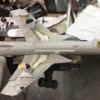
F-105G Rear Panel Fin

Till next time...

Attachments

Images (4)
  • EH Walls with Tabs 1
  • EH Walls with Tabs 2
  • F-105G Cockpit With Pilots
  • F-105G Rear Panel Fin

Mark, its concrete… so I will maybe use the Rust-o-leum texture paint. I used that on the retaining wall and the tunnel portals. It does a good job of impersonating concrete. That will mean the building will have to be glued together, painted, and then all those windows installed. The nice thing is that the window design will have a self-adhesive flange on the back that will be easy to insert. Famous last words. One thing I do know is "no texture paint on the inside or the windows will not stick!"

Hey gang!

Between building the Thud, seeing our #2 granddaughter in a Penn State Theatrical play "To Kill a Mockingbird", visiting Philly, catching cold on the way home, I've done nothing on the Engine House, yet… except for two things. I bought the other major materials needed (except for the gantry track and scratch-build gantry materials) and the roof details. I did buy the 3/4" sq piece of milled pine that will form the bulk of the roof support pilasters, and I bought this today.

New Belt 4%22 Belt Sander

It's been going on and off sale at Harbor Freight for a long time. I could have used it on the Woodbourne Gallery to do that end bevel, and will really needed for sanding all the diagonal cuts on the gantry/roof supports. I'll probably have buildings going forward that will benefit from a sander with a bit more capacity. It was on sale for $64. I bought some extra belts and discs for it. It's my father's day present.

Meanwhile, the Thud also hasn't seen work for almost 3 weeks, but I did get some interesting things done.

I separated the tail pipe from the jet engine proper so I'm able to display the engine outside the plane while still having an exhaust for the overall model. I finished piping the engine right before the trip. The piping is .5mm solder. Pipe straps are wine-bottle foil. I scratch-built the brass engine work stand as a model of an Air Logic 3000A jet work stand with a freelanced retainer system.

F-105G J75 Engine Piping 1

Most of the piping runs are fictitious since I had only one picture of a J-75 showing any piping at all. Some of the valve boxes are scratch-built also. All the molded on pipe work was scraped off the model.

F-105G J75 Engine Piping 3

So that's the report. I update periodically just to let y'all know I'm still around.

Attachments

Images (3)
  • New Belt 4%22 Belt Sander
  • F-105G J75 Engine Piping 1
  • F-105G J75 Engine Piping 3

Thank You!

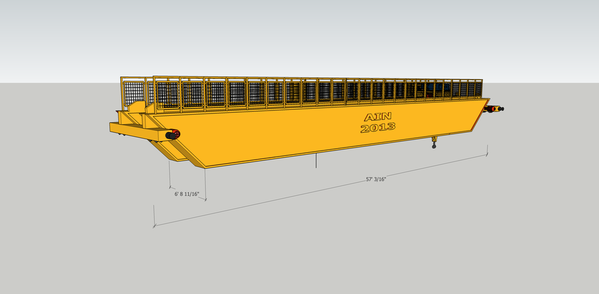
With a nasty cold left over from the trip, I haven't been in the basement to do any work for almost 3 weeks, so I was working on the computer starting to design the scratch-built gantry crane. The railings on the design are too complex for an o'scale build being a wire rod lattice in a square frame, so I'm designing a perforated piece that I'll get Real Scale Trains to laser cut out of laser board.

Gantry Dimension

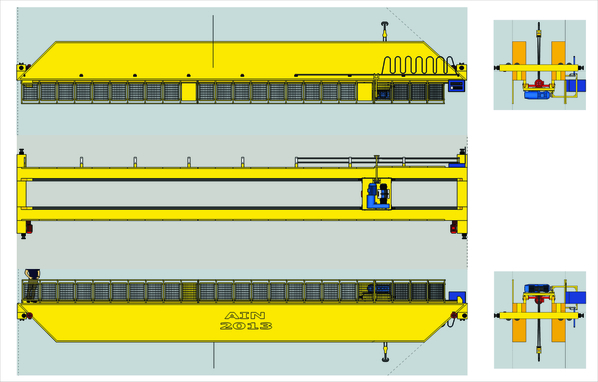
The bulk of the structure will be ABS/Styrene sheet. It scales about 15" long which means I need oversized sheets if I want to go the full width without a seam. Each main frame is a big box structure that will be very rigid when built. It will not be an operable model although it will be movable. I can't afford the micro-motors I would need to make a working crane. I imported the views from SketchUp into Coreldraw and scaled it to match the actual width.

I'll make my working drawing directly over these images. You can see the width of the box frames in the end views. The other views are upside down so they keep the proper right/left orientation.

Gantry 3-View

And here's the railing drawing. It will be a three-layer sandwich. They're very delicate, but I think Stephen's laser will do the job.

Gantry Railing for LC

So even though I'm not actually building I am designing.

Attachments

Images (3)
  • Gantry Dimension
  • Gantry 3-View
  • Gantry Railing for LC

Thanks Pat! I am well now, but last week got interrupted with a funeral trip to Portland, OR for a dear friend who passed suddenly. We had one day notice and then had to get a plane ride. 

I decided to take a different approach to the gantry. I drew up the details and then decided that the hoist mechanism didn't seem to be robust enough for a 100t lift so I enlarged just the hoist system 1.5X and then separated out the hoist machinery from the hoist frame. I then cleaned up these drawings to ensure they were "Solids" by SketchUp definition. I exported them to an STL file and then shipped it off to Shapeways. For $38.00 I got beautiful 3D hi-res objects.

The original drawing that I obtained from SketchUp's 3D Warehouse had fins on the motors. I didn't think the 3D printing would resolve this, so I re-drew them to be plain. As it is, the 3D printing would have handled those fins perfectly. Live and learn.

GH Layout Upper

Here's how I re-drew them.

Hoist Layout 2

The original drawing scaled out to have the motors not even a foot in diameter. When I enlarged them, it seemed more in sync with a gantry hoist of the size I'm building. The original drawing had the end bell hollow with actual fans in them. This was overkill and wouldn't 3D print anyway so I re-drew them to be solid shapes.

Here's how they turned out. The flats on the circular components are due to my setting of how many faces I wanted SketchUp to draw when making circles. If I do this again, I'll use a higher setting. For this use, it will be fine since you won't even see this assembly unless you remove the engine house roof. I do plan on making it removable.

EH Gantry 3D Print 1EH Gantry 3D Print 3

The fins on the winch really did print well. 

EH Gantry 3D Print Ribs

I guess I could have had Shapeways 3D print the entire gantry hoist, but that felt like cheating. The frame will be soldered brass, and I think I'm going to make the roller assemblies out of brass also. 

Increasing the hoist size meant expanding the width of the main gantry frame, but I'm going to keep the beams the same width. Also the laser cut railing will be the same height as it was before. I'm only enlarging the hoist machinery not the proportions of the rest of the machine.

The 3D printing saved me a lot of hassle in modeling all those interconnected parts. The level of detail is amazing. This isn't your garden-variety filament additive machine. This clearly was a laser-resin machine which has much higher resolution. I originally wanted Walt Gillespie at Rusty Stumps to do it, but he said that he needs to add a lot of bracing and it would make it harder to do. He suggested Shapeways and they use a wax support system which dissolves away. Proof in the pudding.

Still working on the F-105G, but continuing to get my ducks lined up for the engine house build.

The Thunderchief was really a huge airplane being almost as long (60 ft) and heavy (37,000#) as a B-17 with 3X the firepower. All the flight surfaces are on and all the filler is added. I'm adding all the little bits that go onto the fuselage. I still have to add details to the main landing gear and finally epoxy them into place since they're brass. 

F-105G Status

Until next time...

Attachments

Images (6)
  • Hoist Layout 2
  • GH Layout Upper
  • EH Gantry 3D Print 1
  • EH Gantry 3D Print 3
  • F-105G Status
  • EH Gantry 3D Print Ribs

Work continues on the Wild Weasel, but I'm continuing to line up my resources for the engine house. Today I received the laser cut Gantry Railing from Real Scale Models. Stephen was very prompt and I got them three days after I ordered them. They're quite delicate, but the rail will be three layers. The lattice work forms the middle layer. They're self-stick so gluing won't be an issue.

EH Gantry Laser Cut Railings

Meanwhile the Thud is all masked and ready for the paint shop. It will be three tone Southeast Asia camo scheme.

F-105G Ready for Paint 1

And underneath… Wheel wells are other big spaces are plugged with wet paper towels. Bottom gets painted first with a very light gray (almost white), then I will mask the bottom and do the next lightest color and so on. SEA color schemes apparently had "soft edges" meaning the masks need to be held off the surface just a bit so the air brush results in a fuzzy edge.

F-105G Ready for Paint 2

With the progress I'm making on the jet, it should be done in a week or two and then onto the engine house.

Attachments

Images (3)
  • EH Gantry Laser Cut Railings
  • F-105G Ready for Paint 1
  • F-105G Ready for Paint 2

Thanks Mark!

Speaking of the Thud… I realized today that when using the dual Shrike load out on the outer pylons you need to fasten them to said pylon with some adapters that are not used when using the Shrike singly. I had glued two of the four I needed together, but then thinking they weren't needed, threw them in the trash yesterday. I spent 45 minutes today sifting through that pile of refuse looking for these two small assemblies. I ended up finding one! Where the heck could the other one had gone? I searched the floor thinking that maybe I missed the trash bag with one of them, but no, nada, nothing! So I ended up spending the entire afternoon scratch-building a new one.

F-105G Adapter Fin

I needed to glue them all one since they're all bottom color and needed to dry solid before I handled the model during painting. When painted, most people won't know it's homemade.

F-105G Shrike Adapter Install

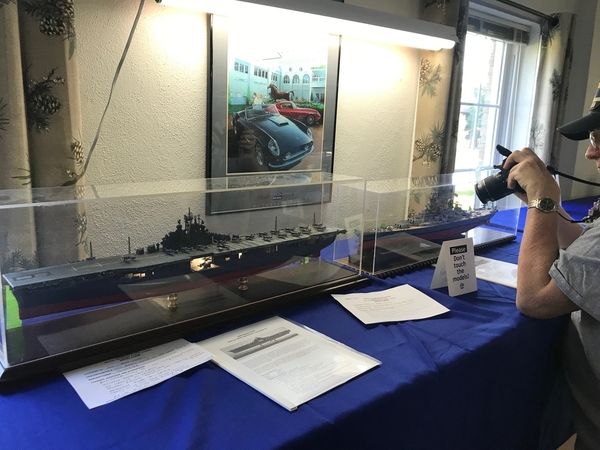
And I entered my Essex and Missouri in the Military Modelers Club of Louisville (of which I am now a member) in their annual Invitational Model Competition and won Gold for the Mo, Silver for the Essex and Best Ship award. I got them there and home without any injury. I am eclectic model builder.

MMCL 2019 My Ships

Have you seen the videos of the UP 4014 under steam? If not, you must go on YouTube and check it out. There are at least four that I found. The fact that UP was able to take a park derelict of the largest steam engine ever built and make a fully functioning, like-new beauty in a little over five years is remarkable. It was brought to their shops in November 2013 and was running in May 2019. Remarkable!

https://www.youtube.com/result...=up+4014+update+2019

Enjoy! Makes me want to get one for my pike. I never was a Big Boy fan, but seeing a living breathing one makes me want one…especially if they can now sample the actual sounds of the running engine.

Attachments

Images (3)
  • F-105G Adapter Fin
  • F-105G Shrike Adapter Install
  • MMCL 2019 My Ships

The F-105G was finished today. You know what that means? Yes! I'm going to start on the engine house either tomorrow or Friday. First have to clean the shop up like I do at the end of each project. I know, I know… terrible work habits.

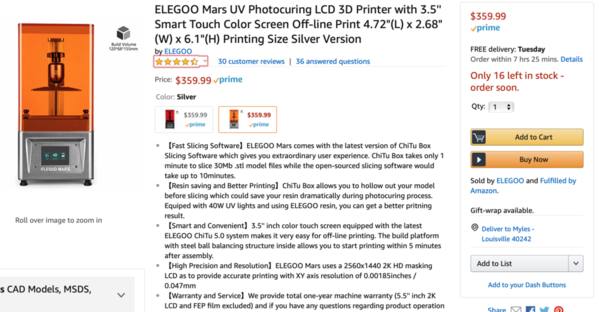
The plane was a challenge since it was an old Trumpeter kit with bad fits, ejection pin marks, old decals that wanted to decompose, etc. But I perservered. The model was built on commission for an old friend. For my "commission" he was going to buy me another model that I wanted. But, just recently, I've been introduced to a new UV LED 3D printer that's under $400 and has a 10 micron layer resolution. That's 10X finer than the filament additive machines, which, at 100 microns, simply aren't fine enough for 1:48 scale stuff. 10 microns is! It uses a proprietary resin and the machine is Chinese, but that's no surprise. It used a masked LCD to do the exposure instead of a laser which is used on the much more expensive resin printers. They start at $3K and go up… way up. But for the kinds of things I want to do, this little machine could pay for itself in 10 models. I paid $40 to Rusty Stumps for those five little appliances and another $40 to Shapeways for the 3D printed Gantry crane machinery that I'm going to use for the Engine house. I downloaded the 3D slicing software that goes along with this printer and my gantry machinery would have cost $0.72 worth of resin. My son says, "for the investment of $360 how can I go wrong?"

Here's the F-105G. Note: I hadn't glued the canopies in position when I took the pics. I did that later this evening.

F-105G Fin 1

The pitot tube on the nose is all metal with a music wire core. The kit's was terrible and fragile. This one is strong and could be used as a weapon.

F-105G Fin 4

Upon landing F-105s used just the two side dive brakes. The top one would foul the parachute that is ejected from a panel behind the rudder. And the bottom would possibly strike ground.

F-105G Fin2

The J75 afterburning turbojet was a nice model in itself which I super-detailed with piping.

F-105G Fin3

The aircraft is outfitted with four Shrikes and two Standard HARMs. Both are anti-radiation missiles with the Strike's range being 10 miles and the Standard HARM's at 120 miles. Shrikes were tough because they got the Wild Weasel plane awfully close to the enemy, and they didn't pack much punch being a converted Sparrow air-to-air missile.

F-105G FIn5

Here's the Amazon page with that nifty printer. The work it can produce is quite remarkable.

Screen Shot 2019-06-09 at 1.49.03 PM

So stay tuned. Railroad work will commence apace.

Attachments

Images (6)
  • F-105G Fin 1
  • F-105G Fin 4
  • F-105G Fin2
  • F-105G Fin3
  • F-105G FIn5
  • Screen Shot 2019-06-09 at 1.49.03 PM
Last edited by Trainman2001

Thanks! I'll go one better. Here's the actual listing in Amazon. I read a lot of reviews and they were very positive. They all said "Verified Customer" and I don't know how much Amazon polices their reviews. I've reviewed many products and it seems legit to me. The fellow I built the Thud for is paying me in cash instead of another model and my daughter said they'll make up the difference for my birthday present. So keep alert! At some point I will be posting some direct experience with this product. I've already been noodling all of things that I could do with this. It opens up a lot of possibilities. If you can draw it, you can make it.

3D Printer Listing

Attachments

Images (1)
  • 3D Printer Listing
Last edited by Trainman2001

Thanks fellows! I too hadn't heard about this kind of printer before. I'd been waiting until something besides a string printer was available at the lower price points. This machine is limited to the nature of the products it can produce. Since you're restricted to the kind of resin, it probably can't make functional machine parts. But… for my use, I want it to make model parts and those are generally not heavily loaded (if at all).

This day is the official start of Engine House construction. What I dreaded is site preparation and it is proving somewhat challenging. I did perfect the "excavation" of the foam sheeting, but it's still tedious. I will describe in more detail. And I think there's a Plan B lucking around. Read on...

Before I did anything I measured and marked where the building was going. I had to remove all the ballast in this area. It's amazing how tenacious ballast glue can be, except when you really want it to.

EH Ballast Clean 2EH Site LayoutEH Site Prep Ballast Clean

Some background: In order to simulate buried yard tracks I did two things: 1) raised the median ground level between the tracks with hydrocal so the ground was level with the track ties, and then ballasted, and 2) used 1/2" pink insulation board around the yard perimeter to raise the entire ground level. This worked okay, but now presents a problem. The rail height in the engine house floor should be just a bit proud of the floor level, but as it stands now, if I just laid the floor on the foam board, the floor is over a 1/16" over the rail tops and that doesn't work. 

EH Floor Height Problem

I first tried removing the 1/8" of foam by using a sharpened broad putty knife. The results were ragged, poorly controlled and would not do the trick. I also had to use a hammer and chisel to chip out the excess Hydrocal. Hydrocal is tough!

EH Site Prep Rt Side Start

I then remembered that I have a hot-wire styrofoam cutter and put it to use. Quickly, I realized that I needed a way to control depth, so I cut a block to give me the 1/8" cutting depth. It doesn't get very hot and is very slow.

EH Site Prep Hot Wire Depth Control

At first I set the block height to have the green (turquoise?) handle sit on the block, but it was hard to hold it there. Then, by luck, the width of the block was perfect when I sat the tool on it's brass clamps. It was very slow going! An even with the depth control the contours were a bit uneven. 

EH Site Prep Rt Side Progress 1

I was pulling the cutter with the hot wire trailing behind. The variability was due to the wire bending outwards as I pulled it along. Later, I plunge cut at the far end of the cut and pushed the block into the hot wire stabilizing the work. You can see that the right side of the trench is more regular than the left. I knocked off any high spots with a nice sharp blade from a Jack Plane. The bright area at the left end is chipped out Hydrocal.

EH Site Prep Rt Side 2

Another view. I also have to remember to remove material from the underside of the machine show which is in the foreground in this image.

EH Site Prep Rt Side 1

This side was the easy side since it was facing an aisle. The opposite side will have to be done bent over the layout. That being said, I had another thought at dinner "Plan B". It would be much easier and more precise to simply cut out the entire piece of foam, and then shim up from the layout base to the correct height. Since the depth I want is 1/8" and the foam is 1/2", I need to shim up 3/8" and the trench will be the correct depth and very regular providing a solid base for the building. I'm going to do that. I have some 1/8" Masonite, so I would laminate it up to 3/8" and use that.

Tonight, for Father's Day, we're going to the Kentucky Center for the Arts and seeing "Hamilton". My wife and daughter convinced me to listen to the sound track first since the Hip Hop style of delivering the lyrics really would be a challenge to hear just one time.

And Sunday is Father's day, so I hope the day exceeds the expectations of all those fathers and grandfathers out there.

On Monday, I'll do Plan B.


Attachments

Images (9)
  • EH Ballast Clean 2
  • EH Site Layout
  • EH Site Prep Ballast Clean
  • EH Floor Height Problem
  • EH Site Prep Rt Side Start
  • EH Site Prep Hot Wire Depth Control
  • EH Site Prep Rt Side Progress 1
  • EH Site Prep Rt Side 2
  • EH Site Prep Rt Side 1
Last edited by Trainman2001

Myles, yes I was thinking along the lines of your plan B as I was reading about the hot wire tool attempt.  I was actually wondering if you wanted to remove all the ballast to just rip out the whole ballasted track and base and start the whole area over with new base, track and all!  I know you being there, and your knack for problem solving, you will find a workable solution that will make for a great looking engine house floor!

Happy Fathers' Day as well!

Thanks Mark!

I'm in the process of thinking how this beast will actually go together and was having trouble wrapping my head around how the floor was going to attached to the walls. On my SketchUp drawing, the floor extended out to the edge of the walls thereby being glued on the bottom. And in some of my earlier cutting plans, this is just the way I designed it. Then I looked at the latest set that Rail Scale used to cut the project and found that the floor width has it sitting BETWEEN the walls like the roof pieces. This is a complication!

It means that the inside pilasters have to be glued one floor-thickness up on the wall or else I would have to notch the floor a zillion times to snuggle up to the wall and pilasters. It's not a problem as long as I realize I have to do this. I will trace the floor thickness line on each wall piece and use it as a guide for glue up.

I'm really relieved that I know that taking out that foam will provide a truer surface for the building.

Another complication that I HAVE accounted for is the multi-part floor that has gaps built in to clear the tracks.

It's so easy to forget about some of the engineering issues when you're buried in the design. At least that's my problem. I've said this before… I'm a good industrial designer, but not-so-hot as an architect.

Myles, as others that see your work say, “your craftsmanship is Amazing “, I totally agree. Your theme, Continuing Saga, is so appropriate, your buildings, your airplanes, your ships, your new Crane, and now your Engine House, Your a Crafterholic, new word to describe you, TRAINMAN2001.....Your the Best.....Keep posting your nice work in progress, it’s neat to see. I will also let you know when we are coming to your area, it’s time for a trip to see Kevin at “The Roundhouse”. Happy Railroading...


A modeler "jack of all trades" (and skills).  You would sound to be working projects 24/7, but then post that life gets in the way!  Any Louisville prototype enginehouse you are modellng?  With the history you unearthed to build that "Loovull" distillery, maybe you would scare up some good photos of local breweries.  I did some research on them during the Atlas reefer boom, and there were several in town, with cellars for beer casks purported to be located just out and north of main gate of Cave Hill Cemetery, at junction of Broadway and Bardstown Road.  A hurried search of the area did not find evidence, but was reported in a "beer" history book.

Thanks to all! It gives me great satisfaction that other can appreciate the stuff I get involved with. Glad to see everyone back reading the Saga. For a Father's Day treat I got to work on the project on a Sunday. Let me know when you're coming in town and I'll be sure to let you visit. I don't like building all this stuff just for me to look at. Re: WAB, I really like the time I'm saving by not having to shrink all my images to meet their image requirements. As it is, I do crop a lot of my images and add usable file names, but it bugged me to have to shrink them below 2k per. When I post onto Fine Scale Modeling forum, they go a step further and ask to have pictures put up on an image sharing site and then link into the post. I've been using Post-Image. It's free, fast and handles pictures full-size, but it's another extra step. I like OGRR's site since there's no image BS that you have to contend with.

Plan B worked perfectly. It took just a few moments to remove the foam especially since I didn't spent much time originally gluing it all down. You'll notice that some plaster had to be removed on the lower left. I wised up on this too, and used a carbide router in a Dremel to get rid of it. I also removed material at the rear so the reinforcing doubling needed to ensure a strong joint will have a place to go.

EH Foundation Excavation

I had to scrape the tops of the ties clean of all ballast since it's the bearing surface for the floor pieces. This was tedious, but not difficult. The ballast laying in the between-tracks spaces is not a problem since it's below the floor's bottom. I will have to have between rail strips to fill in the rest of the floor. I can probably cut these myself out of 1/8" masonite since I'd like them to be a continuous piece and not have to splice them. The floor pieces will sit on the spike heads and I'll probably have to remove any ballast that will impinge on the floor fillers.

EH Tie Bearing surface

I test fit the floor pieces and they fit nicely. At least I got those field measurements correct when I did the laser cutting drawings. I took careful measurements of track width and spacing. It would have been a mess if I missed this. I toyed with the idea of cutting a inspection pit, but it would be really tough. I've seen guys that have done this and it does add interest, but I'd have to cut through ties, roadbed and then that OSB subroadbed. Then you need to string a taught piece of copper wire to substitute for the center power rail. A lot of work that nobody will see, especially when a massive loco will sit on top of it.

EH Floor Fit 2

The floor is so many pieces because Stephen Milley's laser cutter is limited to 24" wide. The joints don't have very much surface area so they're all going to have splice plates glued to their bottoms. I'm making sure that the splints don't get in the way of anything.

Another breakthrough: Instead of fussing around ripping multiple pieces of 1/8" Masonite to pack out the foundation to support the floor, I measured the space and cut some blocks that will support the floor. Very simple, very easy. The engine house's weight will be distributed evenly over these "pilings", almost prototypically.

EH Foundation Block Concept

I needed to glue the floor pieces together. For a flat, impervious work surface, I've coopted the blank left over when t Corian counter tops are installed. There's always a chunk created when they cut out the hole for a sink. Corian is dead flat, almost like a surface plate. It isn't attacked by any of the solvents we use in model making. CA will stick to it, but I remove it by using a razor scraper. None of the plastic melting solvents do anything to it. And I needed a big flat surface to do the floor and wall mating ritual.

I put down some thin polyethylene film to prevent the work pieces from sticking to the Corian. I designed different-sized keyed notches into the floor pieces to prevent confusion as to which part went where.

All I got glued today was the first joint holding the two rear side pieces together. I used a single Ross wooden rail tie as the splice plate (I did the gluing with the pieces upside down) and used a straight edge and some weight to keep everything aligned while it dried.

EH Floor Glueup Start

I had to cut some relief spots to clear two feeder wires so the floors sat down tight to the rail edges. I used a router with Dremel to make the cuts.

EH Feeder Wire Relief

I shimmed up the outer edges of the remaining floor pieces and took this picture. They're not glued yet. I just wanted to see how it actually fit together. It's a really long engine house.

EH Floor Arrangement

While the glue was drying I continued cutting all the foundation blocks. The six blocks sitting at the left will support the machine shop. I still have to cut and remove the foam base, but I'm not doing that until I can build the main structure and add the machine shop to get the exact cutting line. I have to decide sequence to put on the foundation blocks. I'm thinking that I'll put them on after the floor and main building are joined. I build all my structures so they're removable. This implies that the blocks could be glued down to the bedrock now and the engine house will just sit on them. This view also shows the relief cuts I needed at the rail ends for the splice plates. The picture also shows the 1" of rails that I needed to remove for the floor to fit. Massive bumper stops need to be glued to the rear of the floor to stop trains from blasting though the back wall.

EH Foundation Blocks

Changing my strategy to Plan B plus foundation blocks really saved me a lot of time and aggravation. Additionally, this building will actually sit a little below the grade line and be in the landscaping as a real building should. As I noted before: the site prep had concerned me for months. I just wasn't sure how it was going to play out. I just dug in an figured it out on the fly.

After the engine house, the next planned structure is probably going to be the coal mine into the side of Mount Juic. I've designed this building and it will be a less challenging laser project. It's not too massive and could also be built old school.


Attachments

Images (8)
  • EH Foundation Excavation
  • EH Tie Bearing surface
  • EH Floor Fit 2
  • EH Foundation Block Concept
  • EH Floor Glueup Start
  • EH Feeder Wire Relief
  • EH Floor Arrangement
  • EH Foundation Blocks
Last edited by Trainman2001

I forgot to press "Post" last night. So here's yesterday's work. Today's will be a separate post.

***************************************************************************************

Thanks folks! Have a ton of images today due to doing several different things concurrently. Titebond needs a good 1/2 hour before you can de-clamp. To fill this time I started working on building the side walls and other sub-assemblies that aren't critical path sensitive. Speaking of critical path, maybe I should put together a Gantt Chart to get my sequencing down before.

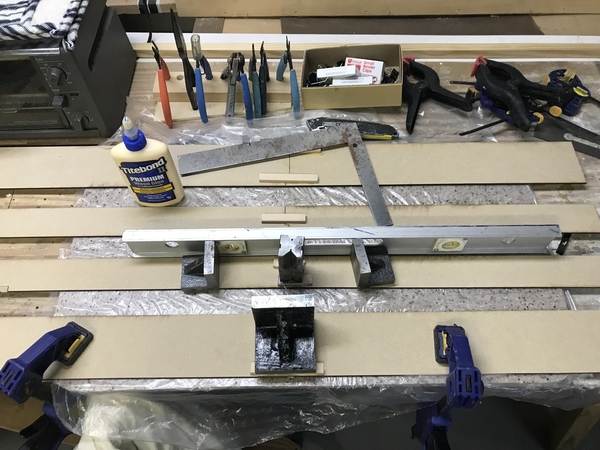
It starts with finishing up gluing all the pieces of the floor put together. Straight edge and weight was used to keep it aligned. I put this one up before breakfast. I thought I had spaced the splints to clear the foundation blocks. Turns out that it did need to be trimmed in the mid area to clear, and then more taken off on the outer edges to clear the track ties. More about this shortly.

EH Floor Glue 1st Extender

I did the remaining pieces with the next section being done after breakfast, and then parts 3 & 4 done concurrently when I started my work session later. For the outside piece I clamped it to the table with some Quickie Clamps since other weights were occupied with the next thing I did.
EH Floor Glue Progress

While the floor was drying, I glued on the foundation blocks for the engine house proper. Each had weight applied to hold it until the Titebond dried.

EH Foundation Block Glue

While all this was drying, I started building the gantry crane main girder and traveling rails.

I'm using 3/4" Plastruct I-beams for the crane girders. Three pieces butt glued together was more than enough to go the engine house's full length. I used 0.040" styrene cut in the Duplicutter to the I-beam's web width using Tamiya solvent cement to serve as splice plates. I may added some rivet decals or NBWs depending on hour nutty I want to get on details that will be functionally invisible.

EH Crane Girder Glue

The floor was now fully dry (although) I did bend and break the rear joint that needed regaling (this time with super-glue), and I used it to size the girders. Meanwhile, I realized that I didn't get MDF pieces cut to fill the inter-rail spaces. There wouldn't be any ballasted track visible inside a concrete engine house. I think I'm going to get Stephen to cut these for me since they're so accurate and be of the same material.

EH Crane Rail Girder Trim

I scavenged the rail from some left over Atlas O track. I separated the track from the ties with a MicroMark details shaving chisel and a small hammer and cut the plastic "spikes" on one side thereby releasing the rail.

EH Crane Rail Scavenge

Using the RSU, I soldered four sections of rail together which, coincidentally, matched the girder length almost perfectly. Won one! I could only find four regular rail joiners and had to use two oxided ones for the center rails. I had to use a wire brush to get rid of most of the oxide since it's not solderable. I used the soldering block and T-pins to attempt to hold it all straight, but still had to bend and tweak it a bit so the rails were nice and straight. The front rail is soldered and the rear waiting to be soldered.

EH Crane Rail Fabricate

I'm using J-B Weld to glue the rail to the girder. I clamped the assembly to the work surface and it will cure overnight. Tomorrow, first thing, I'll glue up the second girder/rail assembly.
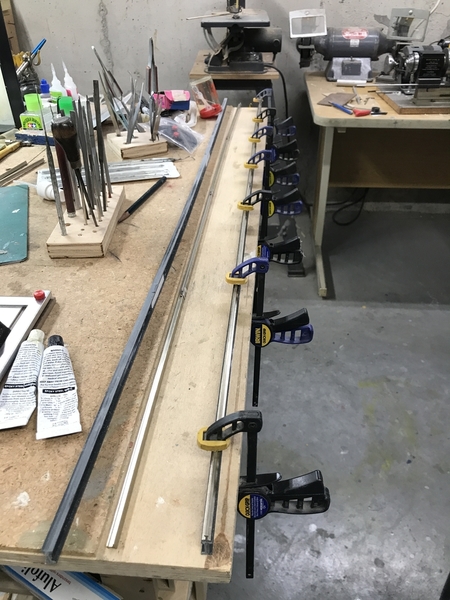
EH Crane Rail J-B 2

The rail fits the I-beam nicely.

EH Crane Rail J-B 1

Finally, I started to build the composite buttresses. I had some templates cut while cutting the pilasters. I'm using 3/4" square pine millwork laminated to the pilaster to form the gantry girder supports. Then another extension on top that will support the roof trusses. I thought I had enough material to cut all 16 crane supports and the 32 roof truss supports, but only had enough for the crane supports. I made a trip to Lowe's tonight to pick up another 8 foot piece of 3/4" stock. I did a quick chamfer on the upper edges with the 1" belt sander to dress up that end.
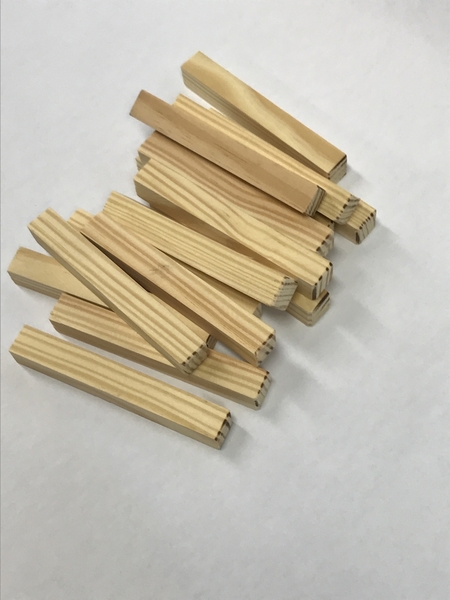
EH Crane Buttress

After the floor was removed from the work table, I glued the two halves of the left side together and the inside pilaster which starts the reinforcement process. The joint ultimately gets sandwiched with an outside pilaster so it will be a very strong joint. These pieces too were clamped directly to the table to hold while drying.

EH Main Wall Lft Join

I measured the material width with the digital caliper and scribed that distance to the bottom edge of the inside walls parts. I went over this with a pencil and straightedge to highlight it. I glued one of the center and the two end pilasters in place. I figured to add a gantry support block skipping every other pilaster with one more at the center since I have an odd number of pilasters so it didn't divide evenly.
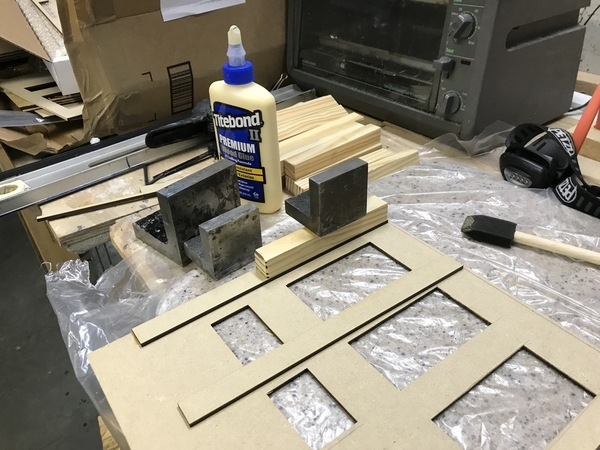
EH Gluing Crane Buttress

I also scribed centering lines to show where the pilaster go between each window.

The last things I got to today were gluing two gantry support blocks on the ends ensuring that they are perfectly flush with the edges and just had a terrible thought writing this…. The end pilasters need to be one thickness back from the edge since the end walls go between the outer walls. Now I'm going have to break the glue joint. Dang! That ****es me off. 
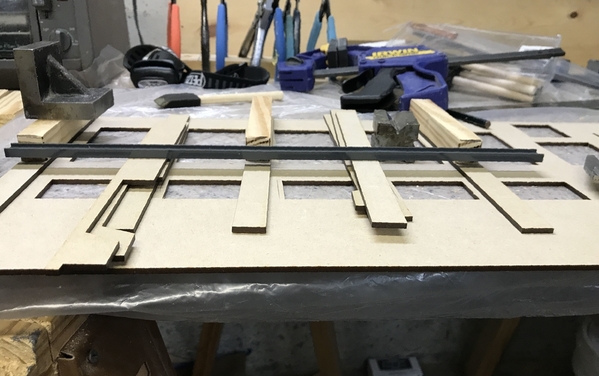
EH Testing the Crane Rail Positon

Again, writing this journal clears the mind. I just went down to shop, took my plane blade and a hammer and pried the errant glue-job off. Glued joints are often stronger than the substrate. In this case, one pilaster came off, the other got wrecked. I hope I have extras. 

Here's the corrected position, although not glued. I'll do that tomorrow. You know they say measure twice, cut once. Should also add a corollary: Think twice, glue once. This isn't the first time I've had this problem of forgetting which end goes inside which edge. I've done it in design and here I did it in execution.

EH Pilater in corrected positon

I tried some engines on the floor and wanted to see if I wanted to put a work platform between the inner tracks would be feasible. Here's what it looks like. A walk could fit, but doubt it would have any railings. It's barely wide enough for a person to stand sideways. I'm thinking that the only work platforms will go on the outsides. Any other opinions?
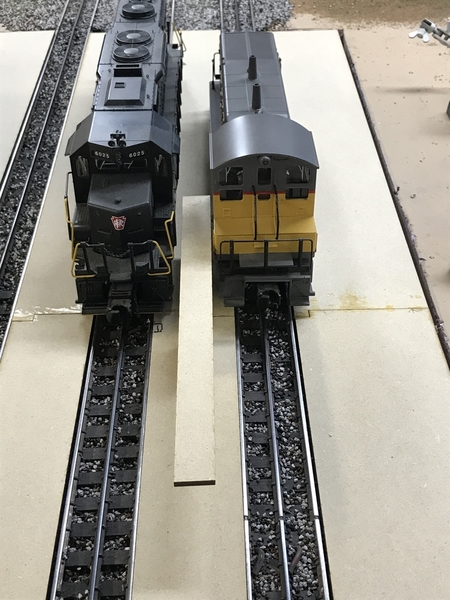
EH Platform Design

Attachments

Images (15)
  • EH Floor Glue 1st Extender
  • EH Floor Glue Progress
  • EH Foundation Block Glue
  • EH Crane Girder Glue
  • EH Crane Rail Girder Trim
  • EH Crane Rail Scavenge
  • EH Crane Rail Fabricate
  • EH Crane Rail J-B 2
  • EH Crane Rail J-B 1
  • EH Crane Buttress
  • EH Main Wall Lft Join
  • EH Gluing Crane Buttress
  • EH Testing the Crane Rail Positon
  • EH Pilater in corrected positon
  • EH Platform Design
Last edited by Trainman2001

Add Reply

Post

OGR Publishing, Inc., 1310 Eastside Centre Ct, Suite 6, Mountain Home, AR 72653
800-980-OGRR (6477)
www.ogaugerr.com

×
×
×
×
Link copied to your clipboard.
×
×