I have a MTH block signal with a 3 light (red, green and yellow) single head.  Unlike other MTH 3 light signals that have three wires colored red, green and black, this one has five wires colored red, green, black, yellow and white.  I don't have the instructions so I'm guessing the red and green wires correspond to the red and green lights, the black wire is the common ground, but what are the yellow and white wires for?

Thanks, Chad

Last edited by ckono
Original Post

Replies sorted oldest to newest

Yep, the p/n or a photo would be helpful.

Another guess based on some other mfrs products might be...

Red and Black wires...power and common (basic light power)

Green/White/Yellow...'triggers' for the three lights

If this block signal would be used in conjunction with a series of additional block protection signals along a route, the 'trigger' wires might be associated with subsequent lights for sequential protection.

But I agree with Jon... Can't place this as an MTH product.  Not sure it is even an Atlas item.

Photos?

Last edited by dkdkrd

Well, if you don't have the box, I'm guessing you bought this signal second-hand.  MTH signals are sold with a timer and detection function such that when a train is "detected," the signal changes from green to red and then, based on the timer, changes back from red to yellow to green.  I have attached a copy of the MTH 30-11013 PRR signal wiring directions that identify the hook-up and operating procedure for most MTH signals, although I did find one (another PRR signal) with four wires caused by a small additional function included with the signal.

Ergo, I believe that what @dkdkrd implied above is correct.  Some previous owner "modified" the signal original wiring for more prototypical operation.  Without that modification info, it's going to be very difficult to get your signal working the way MTH intended.  Heck, it might even be impossible unless you can replace the detection and timer circuits.

Chuck

Attachments

Last edited by PRR1950

What you have 30-11036.  Here is a link to the instructions.

https://www.mthtrains.com/site...ction/30as13902i.pdf

Since the instructions only show 3 wires, and you bought it second hand, we have to assume that someone modified this signal.  This isn’t necessarily a bad thing but you are going to have to take it apart to see how those extra 2 wires are connected.  OR, just ignore them and use the original 3 wires.

That is the 3-light signal that had a PCB in the base.  The PCB had three power wires, black (ground), red for the red light and green for the yellow and green lights.  When the red and black wires are powered, the red light will shine, when the green and black wires are powered, the yellow light will shine for 10 seconds, then switch to green.  The wires coming from the signal connect to the PCB.

Those signals had unreliable PCBs and it looks like it was removed. The bulbs are either grain of wheat or LEDs and requires the PCB to correctly power them.

@ckono posted:

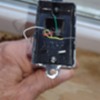
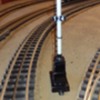
Here's photos of what I have:

Looks to me that the bottom board may have failed at some point, or he did not want the automatic color change. He may have wanted the signal to hold the position. Either way get yourself a AA Battery with a holder and pigtails. Use it to power up each led/bulb, the AA will not blow anything but have enough juice to light them.

Let's not blame Chad for the current condition of his signal; he bought it that way and, without instructions or explanations from the person who "modified" it (for whatever reason), he's just asking for help in getting it to work in some usable fashion.  Hooking any wires up to batteries may make the lights shine, but who just wants signal lights to shine on their layout?

Now, if you'd like to offer a diagram of how using your battery suggestion with other electrical hook-ups that make the signals "operate" when a train passes, that might be appreciated.  However, I don't think that is possible without the signal in your hands so that you have some chance of figuring out each wire's purpose, right?

@PRR1950 posted:

Let's not blame Chad for the current condition of his signal; he bought it that way and, without instructions or explanations from the person who "modified" it (for whatever reason), he's just asking for help in getting it to work in some usable fashion.  Hooking any wires up to batteries may make the lights shine, but who just wants signal lights to shine on their layout?

Now, if you'd like to offer a diagram of how using your battery suggestion with other electrical hook-ups that make the signals "operate" when a train passes, that might be appreciated.  However, I don't think that is possible without the signal in your hands so that you have some chance of figuring out each wire's purpose, right?

You don’t need a wiring diagram to check what wire goes well with a AA battery with holder and pigtails. Start with the black wire and put power to one side I would use negative then take the other wire and start touching the color wires and see if they light. If they don’t try reversing it

Many LED's probably wont light with a single AA cell.  I'd use a 9V battery with a 1K resistor in series, that will light any common LED.  The fact that the PCB is obviously missing means they're probably just bare LED's in there.

Good point, I was leaning to bulbs…as I thought it was mentioned. I have a 9v with resistor and alligator clamps for testing.

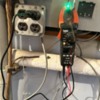
I did this totally on a whim while looking for a suitable (??) 5VDC power source. Attached you will see one of the ruder pictures I've ever taken of an LED dwarf signal hooked to a USB travel charger. It's 10:00PM and I'm in my skivvies.

The chargers are 5VDC and I have found them to work well for remote LEDs in buildings, or for testing things. Simple hack the end of an old phone or camera cord, eliminate the green and white, and away you go. I made a working block signal for my desk at work and it's been plugged into a desktop computer USB outlet for over a year. No resister! Unfortunately, I don't have a picture of it. May be somewhat unorthodox but it's been working!

The clamp on the Amprobe is just holding the LED so I could take a picture.  

Attachments

Images (2)
  • IMG_8625
  • View recent photos
Last edited by endless tracks

Add Reply

Post
This forum is sponsored by MTH Electric Trains

OGR Publishing, Inc., 1310 Eastside Centre Ct, Suite 6, Mountain Home, AR 72653
800-980-OGRR (6477)
www.ogaugerr.com

×
×
×
×
Link copied to your clipboard.
×
×