
First, I'd like to say, I'm new the Lionel 3 rail family. My brother and I had a 3 rail Marx set when we were kids many years ago. I graduated to N-Scale. But, when the eye sight started to go, so did the N-Scale. My dad had an American Flyer UP 4-8-4 since he was a kid. I did finally get that and that is when I get to re-live my childhood. He would periodically get it out and set it up and allow us to play with it. But, it's only been since last fall I purchased the Lionel LionChief Polar Express for Christmas, that is when I was bitten by the 3 rail bug.

I re-watched a DVD I have on steam trains, it has the history of the Chessie Steam Special on it. I remember this train coming through my home town back in Ohio before I joined the Coast Guard and moved away. I always liked the paint scheme and I'm a steamer fan at heart. So I did a search on eBay and found the Lionel Chessie T-1. I wanted an S-Gauge, but no luck.

I purchased this engine for $200 plus shipping. I got it and immediately took it apart and found some discrepancies.  The front boiler to chassis screw was missing, the firebox light was broken and red lens was missing, and I wasn't sure if the smoke unit worked or not.

So after placing an order to Lionel for some parts, I made a couple of modifications. This is were we take off. Hopefully the pictures and small video work.

I contacted Lionel Support for the diagrams and part numbers for the Chessie. I found that the smoke unit was no longer available.

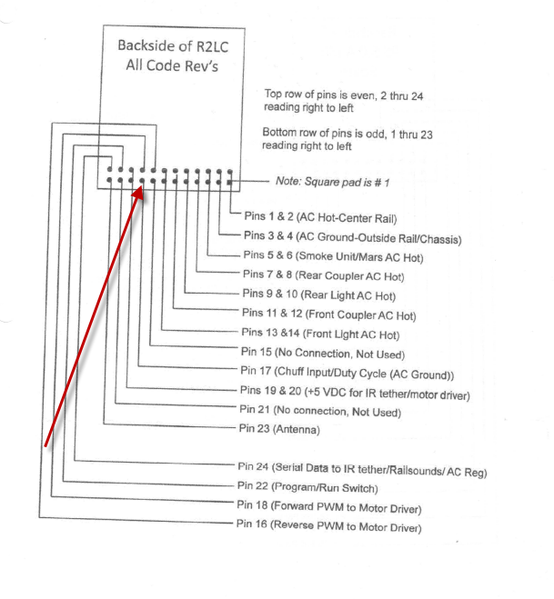
I asked for the L-3 drawings, and received the L3A ones. These are for the NYC 4-8-2 Mohawk 6-18064. Looking at these drawings, This must be for an early TMCC system. But I did notice that most of the hard parts were the same but with different part numbers.

DSCN2308

Above is the 2 smoke units side by side. The green one is the OE smoke unit P/N 610-8006-200. This is no longer available. The silver one is the new one P/N 610-8064-200. These are the same. But the tops of the smoke units are slightly different. You can see that there is a hole in the vertical element support. I'm thinking this was put in to help with the problem of too much smoke fluid blocking off the air flow. So, I put one in the OE smoke unit, this is a 1/8" hole.

DSCN2309

Next I enlarged the hole for the smoke stack. This I enlarged to the diameter of the stack at the opening. You can see the differences below. I was going to block off the hole for the steam chest but decided to leave it open for now. Then, I removed the 27 ohm smoke element and installed an 18 ohm element P/N 691RS18OHM. I got a new smoke piston since the OE one was sloppy in the bore. The new one is better but not much.

DSCN2310

On the first test run of the smoke unit I noticed that the smoke lever was lifting up in the right saddle. So I made a couple of "caps" and JB Welded them to the supports. I didn't scrape off the paint so these should be fairly easy to pop off if I need to. The smoke lever now stays were it's supposed to.

DSCN2311DSCN2312

The last modification I did was to replace the front lamp and use an LED. If anyone is interested contact me and I can provide a drawing of circuit. You can see the light in the video.

After I got the engine reassembled, I shot this short video, I'm not to impressed with the smoke unit and piston, because there is a bunch of smoke coming from under the boiler due to the sloppy piston. I used an American Flyer 8B transformer to test run the engine, the CW-80 is on it's way. Since there is no load on the engine, the voltage is very low. You can see the amount of smoke pouring out of the engine.  I have considered trying to convert this engine to a fan driven smoke unit and TMCC using the Mohawk part numbers. But I not familiar with any of this technology and don't want to spend the money for it, currently.


Here's the link for the video.


Attachments

Images (5)
  • DSCN2308
  • DSCN2309
  • DSCN2310
  • DSCN2311
  • DSCN2312
Last edited by Jayhawk500
Original Post

Replies sorted oldest to newest

No video here with Win7 or Win10.  However, I can open it and view it if I download the video and open it with VLC Media Player, don't know why Windows Media Player chokes on the video.

For videos, I upload them to YouTube and then link to them, that seems to work much better in forums.

BTW, pretty good smoke for a puffer, nice job.

Last edited by gunrunnerjohn

If you need to find more information on the Lionel T-1 look up the Lionel number 18006 as the Chessie engine is an exact copy of the Reading Lines T-1, just has a different Lionel part number and paint job to the best of my knowledge. In real life the Chessie System either bought or rented the Reading Lines T-1 2101 and re-painted it for the Chessie System and gave it a tune-up or minor overhaul as well.

Lee Fritz

phillyreading posted:

If you need to find more information on the Lionel T-1 look up the Lionel number 18006 as the Chessie engine is an exact copy of the Reading Lines T-1, just has a different Lionel part number and paint job to the best of my knowledge. In real life the Chessie System either bought or rented the Reading Lines T-1 2101 and re-painted it for the Chessie System and gave it a tune-up or minor overhaul as well.

Lee Fritz

Any chance of getting a link for the 18006? The paperwork I have doesn't have any of the wiring with it?

Thanks in advance.

Chris

gunrunnerjohn posted:

Speaking of the 18006, I have one of those that I upgraded with all my stuff, ERR Cruise and sound, Super-Chuffer, Chuff-Generator, etc.   I used an MTH fan driven smoke unit, smoke like it's on fire.   For a couple of meets, it was my Super-Chuffer demo locomotive at York.

JOhn, I have the Reading and Chessie T-1 but with the AC motors. Want to update mine for me with TMCC/Railsounds, smoke unit and chuffer? :-)

Mine was a royal PITA, the tether was the sticking point.  They don't have any place to feed the tether out logically, so I decided to put it on the apron below the cab floor.  That spot is about 1" of SOLID DIECAST!  I must have worked on that at least an hour with a Dremel and a carbide bit to hog out a big enough hole to put my 10-pin tether connector, I'm not doing another one of those any time soon!

ZWPOWER13 posted:
gunrunnerjohn posted:

Speaking of the 18006, I have one of those that I upgraded with all my stuff, ERR Cruise and sound, Super-Chuffer, Chuff-Generator, etc.   I used an MTH fan driven smoke unit, smoke like it's on fire.   For a couple of meets, it was my Super-Chuffer demo locomotive at York.

JOhn, I have the Reading and Chessie T-1 but with the AC motors. Want to update mine for me with TMCC/Railsounds, smoke unit and chuffer? :-)

If, I go down that road, I'm theoretically thinking that the AC Commander will fit in the engine and the RailSounds in the tender. The fan driven smoke unit would be later. But then again, I typically a gluten for punishment, so I may stuff everything in the tender and "hog out" a hole for the connector. If I do, I'll post up how I do it. I also noticed that the  NYC 4-8-2 Mohawk 6-18064 has a IR link on the draw bars. If we put a set of the Mohawk tender trucks on the Chessie tender, power would be from the track and not the engine.

John, You have a source and part number for that 10 pin connector?

I've attached the 2 drawings for the Mohawk.

Chris

Attachments

Last edited by Jayhawk500

Thanks for the info John. I did a cost comparison with purchasing what I would need from the Mohawk and what Elec RR costs. It's about half. So I need to bridge the gap between the tender and engine. Its too bad that the existing harness on the engine has too fine of wires to supply the smoke unit. Does anyone know the manufacture of the tether connectors on the engine?


So I decided to pull the trigger and go all in with TMCC on this 4-8-4...As I stated  above I was able to get a Cab-1 system. It was sold as is and all I know for now is I need an antenna for the remote, should be fairly easy.

I had a Lionel fan smoke unit I bought to modify my Berkshire Jr Polar Express, but this mod would be sooo much easier. I did change out the smoke element to an 18 ohm for the PE, but since I want to add the Super-Chuffer I'm going to go with a 20 ohm as per GRJ. It was hard to strip the chassis down for the first time, but I saw how easily it was assembled, so I felt a little more at ease. I took some careful measurements prior to removing the OE smoke unit so I would be able to put the fan driven one in it's place. I still need to remove the smoke lever from the chassis but that'll be super easy. I had to file down the area directly below the fan motor for clearance. I also plan on adding a switch to shut off the smoke unit fan and element when I so desire or...  when I'm told to do so by the Boss.

DSCN2320

Part of the modification to the smoke unit besides the element, is that I cut the trace on the PCB separating the fan circuit from the element circuit. Part of the order I placed for the fan unit was extra connectors. So I added one strictly for the element. You can see the cut trace in the bottom right hand corner. I will also be enlarging the air hole to 3/16" when I change out the element. Just so you know...The stack is a sand blasting nozzle I had laying around. It fit in the smoke hole, so with some drilling out the nozzle hole and grinding the outside, I got it to fit up inside the boiler smoke stack. Since the boiler smoke stack is painted gray, I painted the smoke unit stack gray to match, inside and out.

DSCN2319

The smoke unit bracket is from an old grill I once had. This is a piece of stainless I was able to cut and use. I had to file down the LTI, Inc. on the front of the steam chest to get the bracket to slide between the mount for the OE smoke unit and the steam chest. One screw and nut holds the bracket in place. Sorry don't have a better picture.

DSCN2317

This is with the boiler on the chassis. The smoke unit stack plugs in nicely to the boiler stack and the paint matches. Its the perfect height too.

DSCN2321DSCN2322

Next up will be the tether and plug for mating the tender and engine together. That should be arriving any day.

Attachments

Images (5)
  • DSCN2320
  • DSCN2319
  • DSCN2317
  • DSCN2321
  • DSCN2322
Last edited by Jayhawk500
gunrunnerjohn posted:

Yep, they already provided the traces to the connector.   I normally route the motor directly to the Super-Chuffer through a 2-pin connector.  Then I use the smoke unit connector for the heater.  This allows you to unplug the smoke unit and take it out for maintenance, you know that will be required at some point.

John, From what I'm reading, You bypass the circuitry for the fan motor and go directly to the S-C?

Spent the best part of the day re-designing the smoke unit to make it more clean looking. I removed the diode, Cap., and transistor which all were part of the 5v regulator for the fan motor. I received my 20 ohm resistors today, and bought a SPDT switch so I could isolate the smoke unit if the Boss gets agitated. Because of the way the headlight bulb is mounted on the boiler front I had to cut off over half of the switch handle. I also enlarged to air hole to 3/16". The smoke unit is ready to go. Now I need to get the rest of the electronics.

DSCN2327

DSCN2328

DSCN2329

Attachments

Images (3)
  • DSCN2327
  • DSCN2328
  • DSCN2329

No problem.  For reasons only known to ERR, the AC Commander got a duplicate antenna connection instead of the chuff switch input.  However, the chuff input to the R2LC is on pin-17 of the socket.  Instead of the chuff input, just tap into it there, it is the same as the other ERR products chuff input.  Wire it just like my diagram of the Cruise Commander with the exception of this one change.

Attachments

Images (1)
  • mceclip0

Jayhawks, great work on your mod. John can correct me on this if I'm wrong but thinking you have AC motor on this loco; believe the chuuf generator is designed for D.C. Motor with a flywheel for the LED reader; I had to use a reed switch magnet assy from. ERR to generate a chuff for my 18006 and 18009; mounted the assy on a tender truck; ERR manuals show to mount a reed switch.  Some folks have swapped to a D.C. Motor mod; did that also but I found the gear box is geared for an AC motor; did not work well for me; bottom line check with GRJ; he is a wizard on these upgrades. Falcon70

gunrunnerjohn posted:

No problem.  For reasons only known to ERR, the AC Commander got a duplicate antenna connection instead of the chuff switch input.  However, the chuff input to the R2LC is on pin-17 of the socket.  Instead of the chuff input, just tap into it there, it is the same as the other ERR products chuff input.  Wire it just like my diagram of the Cruise Commander with the exception of this one change.

Falcon70 posted:

Jayhawks, great work on your mod. John can correct me on this if I'm wrong but thinking you have AC motor on this loco; believe the chuuf generator is designed for D.C. Motor with a flywheel for the LED reader; I had to use a reed switch magnet assy from. ERR to generate a chuff for my 18006 and 18009; mounted the assy on a tender truck; ERR manuals show to mount a reed switch.  Some folks have swapped to a D.C. Motor mod; did that also but I found the gear box is geared for an AC motor; did not work well for me; bottom line check with GRJ; he is a wizard on these upgrades. Falcon70

Thanks for the info John. We'll make 'er happen.

Falcon70, I still have the a.c. motor. As per John (I've picked his brain a lot already) in another thread, The chuff generator won't work with the a.c. motor. No fly wheel.

I'll be doing everything by ERR instructions.

Here's an update as to where I am currently with upgrading my Chessie Steam Special.

I have the ERR AC Commander installed in the forward part of the tender. I am using the MTH tether and 10 pin connector GRJ suggested. But I opted to modify the board to get it to fit in the original place on the tender. I opted to put the RailSounds board on top of the R4LC board. You can see in the second picture that I tried to put it on top of the speaker, but I couldn't get the body on. I plan on adding clips to the coal load so I can make the load removable.

DSCN2334DSCN2338DSCN2339

I wanted to have a coil coupler on the tender so I got a Mohawk Hudson truck and modified the frame to fit. I think I'll hook this coupler to the "Front" couple on the Commander board, because I want to use the rear one for the Aux tender.

DSCN2340

I removed the 6v constant voltage regulator that was used for the front headlight and firebox light. In its place I added the Super-chuffer to the engine and wired everything in. You can see the grain-o-wheat bulb for the cab light. I also added a small circuit I got off eBay for a flickering firebox. I have the LED hanging behind the motor in between the brushes.

DSCN2335DSCN2336DSCN2337

More to follow tomorrow.

Attachments

Images (7)
  • DSCN2334
  • DSCN2338: AC Commander & RailSounds
  • DSCN2339: MTH 10 Pin Connector
  • DSCN2335
  • DSCN2336: Super-Chuffer & Flicker board
  • DSCN2337: Firebox LED
  • DSCN2340: Modified frame to accept Mohawk truck

Here's the continuation of yesterday's post.

Here's an inside view of the tender with the body on. As I said yesterday, my plan is to add clips to the coal load in case I have to get to the volume control.

DSCN2343

I started on the Aux Tender yesterday as well. The first thing I did was remove the IR sensor and drawbar from the front truck assembly. To make up the space I added a washer in place of the drawbar. I had a manual coupler that was sent to me by accident from Lionel. This is exactly the correct length I needed to attach to the front truck and the distance looks to be correct. 

DSCN2344DSCN2346

You can't see it but where the coal conveyor would be I cut out the opening for the 4 pin plug and PCB I removed from the Chessie tender. My plan is to somehow use the original 4 wire tether and connect the two tenders. I'll probably end up drilling a hole as low and centered as I can on the OE tender body. This is only going to be for operating the rear coil coupler and the rear backup light.

Now, I have a few questions for anyone who wishes to answer...

1. The Mohawk tender originally has/had the railsounds in it. Since I removed the IR sensor and drawbar, Is there a way of operating this system via the horn and whistle buttons on my CW-80 transformer (conventionally) since I can't use my TMCC remote to activate them? Also, Does the IR board have to be installed for it to operate?

2. In the photo below, there are 2 lights on the rear of the Aux tender. Is the upper one a constant "on" and the lower one a MARS light?

chessie-steam-special-s1-aux-tender-farmer-002-1200x


Thanks in advance. This is all the updates to this point.

Attachments

Images (4)
  • DSCN2343
  • DSCN2344
  • DSCN2346
  • chessie-steam-special-s1-aux-tender-farmer-002-1200x
Last edited by Jayhawk500

Chris,

In regards to the Mohawk tender's RailSounds, is it the 1.0 version from the 1990 or the 3.0 version from 1998?

John will probably correct me if I'm wrong, but the 3.0 version probably just needs hot, ground, and serial data wire connections to a TMCC receiver. You could use the ERR dummy locomotive controller board to function that RailSounds board.

phillyreading posted:

If you need to find more information on the Lionel T-1 look up the Lionel number 18006 as the Chessie engine is an exact copy of the Reading Lines T-1, just has a different Lionel part number and paint job to the best of my knowledge. In real life the Chessie System either bought or rented the Reading Lines T-1 2101 and re-painted it for the Chessie System and gave it a tune-up or minor overhaul as well.

Lee Fritz

Ross Rowland owned the 2101 having purchased her from a scrap dealer in 1975.  He restored her for use on the American Freedom Train.   When the Chessie Steam Special and the later Safety Express were brought about Chessie and Rowland entered into an agreement to run these using 2101.  Hence 2101 was used until the roundhouse fire in 1979 damaged her beyond repair.  Ross cosmetically restored her to her AFT colors and a traded her for C&O 614.  614 powered the Safety Express until they realized that the 614 was garnering more attention than the Safety Express. 

Mikado 4501 posted:

Chris,

In regards to the Mohawk tender's RailSounds, is it the 1.0 version from the 1990 or the 3.0 version from 1998?

John will probably correct me if I'm wrong, but the 3.0 version probably just needs hot, ground, and serial data wire connections to a TMCC receiver. You could use the ERR dummy locomotive controller board to function that RailSounds board.

It's the 1998 version 6-18064 not the 6-18009. From what I read from the instruction manual for the engine and tender the whistle and bell will still activate as in conventional mode using the buttons on the transformer. Just no tower or crew talk. So, unless I remove the baffle for the speaker I have no room in the tender for anymore trons.

Latest update on my Steam Special. I believe I have finished all the necessary wiring. I have the coil coupler and rear light on the AUX Tender connected to the 4 pin connector. I then took a leap of faith and drilled a hole in the back of the Chessie tender. Its barely larger than the diameter of the tether wire. Then I connected the tether to the AC Commander for the rear coupler and rear light. Although this wasn't the ideal situation for the tether wire, this was the only way to make this work. If I came from under the frame the rear coupler would have hit the wire preventing it from negotiating the curves.

DSCN2350DSCN2351DSCN2352DSCN2353

I am now up to the point of programing the Cab 1 to the engine and seeing if everything works as advertised. Our first car show of the season is this coming Saturday. I have lots of Honey-Dues that have to get done in the next few days, But I'm going to try and get this thing programmed this week. With everything modified this is now an engine and dual tender combo. Painting of the Aux tender will happen sometime this summer. I have the paint, I just need to get a good quality airbrush.

Much thanks to GunRunnerJohn for his electronic and wiring advice. Also, much thanks goes to C&O Allie for his help with answering questions about his Aux Tender. More to come hopefully later this week.

Thank you to the rest of you that provide kind comments. Its greatly much appreciated.


Attachments

Images (4)
  • DSCN2350: Tether connected to Aux Tender
  • DSCN2351: Tether from main tender
  • DSCN2352
  • DSCN2353
Last edited by Jayhawk500

I was able to run the engine yesterday for the first time. It is a learning process for someone like me that has never used TMCC. Once I got the Cab 1 figured out, I was able to test all the functions. The only Oops was the headlight and reverse lights were backwards. I double check my wiring with the directions for the AC Commander and it was correct. The directions has the 2 lights backwards. But swapped the wires for the lights and everything works as advertised. Super-chuffer is awesome! With the body on the engine, it looks like the prototype when puffing. I'll try and get a video up by the end of the week.

I found out the RailSounds in the Aux tender will not work by itself conventionally. But, this is no big deal. Don't need it. Might just sell everything internal. Its much heavier than the Chessie tender.

Last edited by Jayhawk500
gunrunnerjohn posted:

Odd that the headlights are backwards, but I'd check the documentation again.  I just wired up two of the AC Commanders, and the lighting matches the documentation for me.

This is the instructions I used. I put a binder together with all of the necessary paperwork. Maybe I just read it backwards.

Attachments

Files (1)
AC Commander Inst.
Last edited by Jayhawk500

That's the same version of the document I use for the AC Commander.  All of the similar ERR TMCC boards use the same mapping for the lights and smoke on the 7-pin terminal block.  Note that the AC and DC commander differ only in the first two pins next to the antenna.  For some odd reason, they removed the chuff input and duplicated the antenna connection on the terminal block.  Of course, that moved the PGM/RUN switch connection, an unneeded duplication and omission.  However, in all cases for all of these products, from pin 3 common through pin 7 feature, the mapping is the same.  Since this is hard-wired on the motherboard from the R2LC, it's pretty inconceivable to me that the two light outputs could be reversed.  I've installed dozens of these boards, multiple copies of any specific type.  That's always been true for all of them for years.

AC Commander I/O Connections

Cruise Commander I/O Connections

Cruise Commander Lite I/O Connections

DC Commander I/O Connections

Attachments

Images (4)
  • mceclip0
  • mceclip1
  • mceclip2
  • mceclip4
Jayhawk500 posted:

I didn't get an answer from anyone on my earlier post. So hopefully the second time is a charm.

In the picture below, there is 2 lights on the back of the tender. The upper one appears to be "on" steadily. Is the lower one a MARS light or a flashing white light. I'd like to mod my Aux tender to match. Thanks in advance.chessie-steam-special-s1-aux-tender-farmer-002-450x

Why not try and contact Ross Rowland for the information you are looking for?  The present website he has for C&O 614 is co614.com

My guess would be that whoever made the decision to double up on the backup lights did it for the extra visibility it created.  Good luck with your quest.

I need a little help from you all... Referring back to my video after I completed the mods, Does anyone know the color name of the gray paint on the front of the boiler? I have all the other colors to repaint the aux tender, but I'm adding class lights to the boiler front and I need to touch up the gray paint.


Also, I never got a reply back from Mr. Rowland or anyone from co614.com.

Thanks,


Last edited by Jayhawk500
gunrunnerjohn posted:

On many models, one is a backup light and one is a marker.  I don't know about the real thing...

Back in the days of steam backup and marker/classification lighting varied depending on the railroad.  Very few roads that I know of had built-in marker/classification lights on the back of tenders or even used them at all.  The only road I can think of that had tenders with built in classification lights was the Pennsy and those were the ones used on the Duplex engines and the long distance tenders that the J’s used.  I feel that the model train manufacturers have perpetuated a myth of sorts by including them on almost every steam engine they offer.  Most all tenders were equipped with classification light brackets on the rear in the event the engine's use might require them.  The backup light was used for reverse running and switching out freight cars when the engine was in use on a local which served industrial sidings.  Some were built into the rear of the tender while others were bracket mounted on the tank top. 

I have just completed steps 1 and 2 of the repainting for the transformation of the Mohawk tender 6-18064 into a Chessie Steam Special Aux tender 2101-A, like C&O Allie's. Prior to repainting the rear, I filled in the holes and depressions where the marker lights were with Scotch weld. Then I repainted the rear black and have the Chessie Yellow on the sides using the Scalecoat brand of paint. Next up will be the B&O Royal Blue on the upper part of the tender just below the coal bin. Once that's dry, I'll paint the GN Empire Builder orange for the 2 stripes. I'm taking a day to let the paint cure before moving on to the next color. I'm using a laser level on the engines tender to figure out where I need to apply the 3M Fineline tape to separate the colors.

DSCN2359DSCN2360DSCN2361


 I had an epiphany last night realizing I could have done a lash-up with the engine and aux tender after watching a YouTube segment about the UP Aux Tender on EricsTrains. I wish someone would have enlightened me to using a Mini Commander EX to control the rear coupler and backup light before I drilled the hole for the tether wire. But live and learn, right?

Since this tether hole is small, I should be able to fill this in and paint it so it's not too noticeable. The Mini EX was shipped this morning and should be here any day. 

More to follow....

Attachments

Images (3)
  • DSCN2359
  • DSCN2360
  • DSCN2361
Last edited by Jayhawk500
Henry J. posted:

Chris,

I am looking forward to seeing your finished product. 

When I have time to improve my skills, I hope to be able to do the same as you and Allan have done.  I also hope to be able to do the tender up as it appeared behind AFT #1.

Thanks for posting your progress!

No problem. Even though I'm a total novice to the 3 rail community, I do have history posting progress reports online for projects I've done on classic cars. My only hope is someone will be able to benefit  from what I post for any project they may be working on. If there's something someone needs me to explain, or how I did something, just let me know.

Henry, I just looked at your profile...and like you I spent 24 years in the Coast Guard as a  HH-3F Avionicsman, C-130 Avionicsman, and then finally a HH-60J flightmech. All the while, fixing avionics equipment, being a Primary QA Inspector, right seat qual'd for startups on test flights, and then finally, being hired back as a civilian Fire Chief where I once few out of on SAR cases. You might say I have the CG in my blood now. I now have a total of 32 years of service to the same organization.

Last edited by Jayhawk500
Jayhawk500 posted:
Henry J. posted:

Chris,

I am looking forward to seeing your finished product. 

When I have time to improve my skills, I hope to be able to do the same as you and Allan have done.  I also hope to be able to do the tender up as it appeared behind AFT #1.

Thanks for posting your progress!

No problem. Even though I'm a total novice to the 3 rail community, I do have history posting progress reports online for projects I've done on classic cars. My only hope is someone will be able to benefit  from what I post for any project they may be working on. If there's something someone needs me to explain, or how I did something, just let me know.

Henry, I just looked at your profile...and like you I spent 24 years in the Coast Guard as a  HH-3F Avionicsman, C-130 Avionicsman, and then finally a HH-60J flightmech. All the while, fixing avionics equipment, being a Primary QA Inspector, right seat qual'd for startups on test flights, and then finally, being hired back as a civilian Fire Chief where I once few out of on SAR cases. You might say I have the CG in my blood now. I now have a total of 32 years of service to the same organization.

Chris,

Thanks for your service!!!  I actually hit that mark myself back in February.  Each year it gets a little tougher to keep at it.   But hey, it pays the bills!

I really enjoy posts that show what people in our hobby are capable of doing. And you are doing a great job!

Again, I can't wait to see the final product!

Enjoy!

I just finished the upper portion of the body in the B&O Royal Blue. It is much darker than what is in the picture. The camera changed the hue. The middle picture is more the correct color.

DSCN2362DSCN2363

See the blues do match. Can't say much for the yellows though.... The Aux Tender is a hair brighter. I'm hoping the orange will tone it down a bit. But then again we're comparing 24 year old colors to freshly painted colors.

The orange is next tomorrow.

DSCN2364

Attachments

Images (3)
  • DSCN2362
  • DSCN2363
  • DSCN2364

So, what does everyone think.... Is the rear of the tender the same color as the upper portion below the coal bin? I can't decide if it's black or the B&O Royal Blue. To me it looks blue, but please weigh in. I emailed the guy taking care of ThemeTrains.com in hopes he is still in contact with the person who took the picture.

chessie-steam-special-s1-aux-tender-farmer-002-450x

I looked at the burned out tender and the lower rear light was removed. But, then again the tender looks pretty rough.....

I have opted not to put a second light on the rear. I do have the gearbox and hand brake wheel to go on the back.

american-freedom-train-consist-2101-001a-aux-tender-indiana-01-700x

Attachments

Images (2)
  • chessie-steam-special-s1-aux-tender-farmer-002-450x
  • american-freedom-train-consist-2101-001a-aux-tender-indiana-01-700x
Last edited by Jayhawk500
C&O Allie posted:

Chris,

Great job!  I suggest you put the tenders on a piece of track in case the flanges are different size.  I realize on mine I did not make my orange stripe thick enough (did not take it down far enough) now that I see your pictures above.

Also, great use of a Laser!

Thanks for the "likes" and the kind comment. Point taken on the having the tenders on the track. I usually have them sitting on a piece of 30" Fastrack.  I did it this way, so I could "bend" the cars slightly so the laser was more easily seen for the camera. I'm too lazy to dig out a few pieces of curved track.

Just a quick update....I got the GN Empire Builder orange on yesterday. I have some touching up to do since the rivets on the body kept the tape from sticking. But, overall I very pleased with the progress thus far.

DSCN2370DSCN2371


I'm going to mount this on the left rear side of the Aux Tender.  As of right now the wheel turns. Hopefully I can get it mounted, painted, and keep it turning. After all, we'll need to set the brakes periodically.

DSCN2372

I removed the wire tether between the 2 tenders and reconnected the rear coupler and light in the engines tender.  I did get a bread board mounted to the chassis in place of the old motherboard, in anticipation of the Mini EX arriving from ERR.

DSCN2373

More later....I have a couple of projects I need to finish today.

Attachments

Images (4)
  • DSCN2370
  • DSCN2371
  • DSCN2372
  • DSCN2373
Last edited by Jayhawk500
Jayhawk500 posted:

Just a quick update....I got the GN Empire Builder orange on yesterday. I have some touching up to do since the rivets on the body kept the tape from sticking. But, overall I very pleased with the progress thus far.

DSCN2370DSCN2371


I'm going to mount this on the left rear side of the Aux Tender.  As of right now the wheel turns. Hopefully I can get it mounted, painted, and keep it turning. After all, we'll need to set the brakes periodically.

DSCN2372

I removed the wire tether between the 2 tenders and reconnected the rear coupler and light in the engines tender.  I did get a bread board mounted to the chassis in place of the old motherboard, in anticipation of the Mini EX arriving from ERR.

DSCN2373

More later....I have a couple of projects I need to finish today.

Looks Great!

Jhainer posted:

That is really cool I always have loved the Chessie steam special. I have the ac motor version that I would like to upgrade to ERR and a DC motor. but have no idea where to start and I heard of timko does conversions but know nothing about them.


I got a Timko motor a few years ago for my AF 4-8-4. Got it off of Ebay. It was a simple unscrew, replace, and re-screw, attach wires. Our Steam Specials should be the same way since they use a driveshaft to couple the motor to the gearing. Once again, being new to the 3-rail community, I didn't know any better. I would have done the ac-dc motor conversion and ordered the ERR DC Commander kit. The ERR system is straight forward. There's YouTube videos on how to do it. The only problem is, if you want to add "more stuff" to the engine, (i.e. fan driven smoke unit, Super-Chuffer) then you need to increase the size (number of wires) of the tether wire like I did. I used the 10 wire tether from MTH, think I have 2 wires left.

I can honestly say I'm learning as I go.

Jhainer posted:

That is really cool I always have loved the Chessie steam special. I have the ac motor version that I would like to upgrade to ERR and a DC motor. but have no idea where to start and I heard of timko does conversions but know nothing about them.

Such a deal I have for you.  I have one of these that was stripped for upgrade.  It has the Timko DC motor and an MTH fan driven smoke unit all mounted and ready for the electronic upgrade.  It was painted and it's all black right now and unnumbered, but you could swap your boiler and tender shell and be ready for the TMCC upgrade.   You could even sell the all black one with the AC chassis.

The Mini EX arrived today. Already installed and ready to program. This thing is tiny!  The program switch didn't come with push on connectors, so I  soldered to the pins on and heatshrinked.  I'll be using the long antenna due to the metal cover for the coal bin, unless I can find some sheet ABS and mold it. Anybody have some ultra thin ABS?  Decals are next on the agenda.

DSCN2378DSCN2379

Hand brake was installed over the weekend. Now I need to get it painted up.


DSCN2377

Attachments

Images (3)
  • DSCN2377
  • DSCN2378
  • DSCN2379
Last edited by Jayhawk500

Here's the latest installment for today.

I'm always a bit apprehensive to try new things, ie. (make decals). This whole process is very time consuming. I'll list what I used at the bottom of this post. But here's the left side of the tender and I couldn't be any more pleased with the results. A huge Thank You to C&O Allie for providing the WORD document so I could make the decals. These were exactly the right size for this Mohawk Hudson Tender. I did have to use the Horse vs. train race from one set and the "Chessie Steam Special" from another set, to get what I was looking for. There were 2 sets on the same page.

But what surprised me was the tender number and the gallons for the rear of the tender. I didn't realize the reason Allan had those numbers and words with a black background. So, I removed the black background and just tried printing the numbers and words in yellow. I had everything ready to apply and I put them on and you couldn't see anything. Hummmmm...So I pulled those off before they set up and went to the sides. SUCCESS!  The sides look great! Both sides are exactly the same. THANK YOU ALLAN!

DSCN2380

Now, back to the rear of the tender. I printed out some more numbers and letters but with the black background... I did everything the same as before. To get the quality of printing I was looking for, I used the photo setting in the printer properties and BEST image quality. I printed this decals twice allowing the ink to dry in between printings. 

But on the first reprint, I don't think I left the ink dry long enough and when I sprayed the bonding spray, the yellow numbers and letters turned orange. So, now I'm on my second reprinting and I'm going to let the ink dry until I get ready to turn in for the night and then spray. That way they'll be ready for tomorrow. I sprayed 2 light coats to seal the ink, allowing the bonder to dry in between coats.

This is what happened on the first reprint after bonding.

DSCN2385

And this is what I'm waiting on to dry. This is before bonding.

DSCN2386

Oh, almost forgot the hand brake is now painted.

DSCN2387

This is what I used to make the decals. I bought these off of Amazon. Best of all, these are Made in USA. I'm very happy with this product from Testors. This decal paper is for inkjet printers ONLY. I've used 2 of the 6 sheets in this process.  You need the Bonder Spray to prevent the ink from washing off when you soak the decals. As I stated in my last posts, I'm always learning, and sometimes I use more product than necessary to do the job.

DSCN2381DSCN2382DSCN2383


Attachments

Images (7)
  • DSCN2380
  • DSCN2381
  • DSCN2382
  • DSCN2383
  • DSCN2385
  • DSCN2386
  • DSCN2387
Last edited by Jayhawk500
Jayhawk500 posted:

Here's the latest installment for today.

I'm always a bit apprehensive to try new things, ie. (make decals). This whole process is very time consuming. I'll list what I used at the bottom of this post. But here's the left side of the tender and I couldn't be any more pleased with the results. A huge Thank You to C&O Allie for providing the WORD document so I could make the decals. These were exactly the right size for this Mohawk Hudson Tender. I did have to use the Horse vs. train race from one set and the "Chessie Steam Special" from another set, to get what I was looking for. There were 2 sets on the same page.

But what surprised me was the tender number and the gallons for the rear of the tender. I didn't realize the reason Allan had those numbers and words with a black background. So, I removed the black background and just tried printing the numbers and words in yellow. I had everything ready to apply and I put them on and you couldn't see anything. Hummmmm...So I pulled those off before they set up and went to the sides. SUCCESS!  The sides look great! Both sides are exactly the same. THANK YOU ALLAN!

DSCN2380

Now, back to the rear of the tender. I printed out some more numbers and letters but with the black background... I did everything the same as before. To get the quality of printing I was looking for, I used the photo setting in the printer properties and BEST image quality. I printed this decals twice allowing the ink to dry in between printings. 

But on the first reprint, I don't think I left the ink dry long enough and when I sprayed the bonding spray, the yellow numbers and letters turned orange. So, now I'm on my second reprinting and I'm going to let the ink dry until I get ready to turn in for the night and then spray. That way they'll be ready for tomorrow. I sprayed 2 light coats to seal the ink, allowing the bonder to dry in between coats.

This is what happened on the first reprint after bonding.

DSCN2385

And this is what I'm waiting on to dry. This is before bonding.

DSCN2386

Oh, almost forgot the hand brake is now painted.

DSCN2387

This is what I used to make the decals. I bought these off of Amazon. Best of all, these are Made in USA. I'm very happy with this product from Testors. This decal paper is for inkjet printers ONLY. I've used 2 of the 6 sheets in this process.  You need the Bonder Spray to prevent the ink from washing off when you soak the decals. As I stated in my last posts, I'm always learning, and sometimes I use more product than necessary to do the job.

DSCN2381DSCN2382DSCN2383


Chris,

Not a problem - the decal job looks great!  Seeing you do your tender brings back memories of my daughter and I doing mine.  I really love that this hobby is something people can share with each other.  

Thank you to you both for the kind words! For some reason the system isn't allowing me to reply to your posts.

I have a 6"x12" .060 thick sheet of ABS coming for the cover on the coal bin. So, besides putting all of the grab irons and handrails back on I'm pretty much will be done with the tender. I did try and spray the decals for the rear of the tender last night. The black still bled into the yellow turning it orange somewhat. I do have another plan...I'll post it up if it works.

Until next time...


Chris,

Try spraying 2-3 coats of the bonder on the black decals.  I made mine pretty thick to prevent the bleeding.  I also didn't leave the decal in the water too long when applying.  I had it in there for 15-20 secs and then let it sit until the decal started sliding off the backing with just a little pressure.

Okay, The print shop was a failure. Letters were too small for the printer. So I resorted back to the decals. I put the first decal on and the 16000 GALS. WATER disappeared on the black body. But yet, I can see them on the paper...DUH, I'm using clear decal paper. I should be using white decal paper so the yellow numbers and letters stand out. So, Back to Amazon....to get the correct paper.

Sorry its taken so long to get this post up. Life has gotten in the way, I bought my dream car so a total frame off restoration is in order. Now I have to paint the house and rebuild a deck before winter. Yeahhhhhh.......

But I did get the white decal paper the other day and I got the rear decals made. I'm not too impressed with the white paper, but it is what it is. I think I should be able to put a small amount of paint around the edges to hide the fact its a decal. I just wish the clear would have worked instead.

DSCN2413 

This could be my last post until the summer is over. Thanks again to GunrunnerJohn and C&O Allie for their help thus far. Thanks to everyone else for the kind words over the past few months.

Please remember to be fire safe this summer. Looks to be a mild fire season in the PNW. Hope everyone one else has a mild fire season too.

Attachments

Images (1)
  • DSCN2413

It was a long summer and things are finally starting to calm down. I was able to finish up, (sort of), on the boiler front by adding number boards. GRJ was once again very helpful in getting my brain back on track with getting the LED's wired. After some trial and error, I settled on a 8.2K ohm resistor for controlling the brightness of the number boards. These boards are connected directly to track power and won't dim like the headlight will. I still have to clean up the boiler front and repaint my mistakes. Unfortunately, when working with just a naked eyeball, things get a bit skewed. I got the boards a little crooked. I wanted to add the front marker lights, but I have to rethink some things first. I may re-do the 2101's again. I don't like how they turned out.


Here's the finished product, sort of.....


DSCN0030

DSCN0031

Attachments

Images (2)
  • DSCN0030
  • DSCN0031
Last edited by Jayhawk500

Thank you to you both. Your way too kind. Yes, The number boards will stay where they are. 

At some point I'll try to get the marker lights on. I have a flying eagle I was going to put on top of the headlight housing (from the freedom train days, besides, I like it) , but I believe with marker lights, number boards, and new bell, it would be a bit crowded. What do you think?

DSCN0032


Attachments

Images (1)
  • DSCN0032
Last edited by Jayhawk500
Jayhawk500 posted:

Thank you to you both. Your way too kind. Yes, The number boards will stay where they are. 

At some point I'll try to get the marker lights on. I have a flying eagle I was going to put on top of the headlight housing (from the freedom train days, besides, I like it) , but I believe with marker lights, number boards, and new bell, it would be a bit crowded. What do you think?

DSCN0032


Chris - yes, it should fit and will look good.  Your eagle has a lower profile than mine did, so it should fit with no problems since I was able to put mine on.

Okay, I ordered 2 - 2mm clear  Marker LED's from Lionel awhile back. Just recently I was looking to see what resistor I wanted to add to the LED's to determine the brightness. Low and behold the clear LED's are green when voltage is applied.  My question is, Is this normal?

DSCN0033


Also, Does anyone know if the markers on the real 2101 had a green bulb or was it clear?  The pictures I have of the engine has clear lenses on the marker lights. But I don't know what color the lamps were. If they were green I good to go. If not I need to figure out something else.

 I have just place an order to Precision Scale for some pilot parts and a new headlight. We'll have to see how that works out. Stay tuned.

Thanks in advance.

Attachments

Images (1)
  • DSCN0033
Last edited by Jayhawk500

Marker (aka classification) lights were a rotating 4 sided affair that contained green, red, amber and clear lenses.  If and when they were used the color chosen would indicate what type of train it was.  Some railroads chose to use colored canvas or metal flags which served the same purpose.  I believe (tho I am not entirely sure) that the clear light indicated an unscheduled train which might have been what a steam fan trip would be classified as.  Reading that the lights you received from Lionel were not as described doesn't surprise me.  You can always tint the bulbs with thinned nail polish when you decide on a color.  You can see these in the attached image. 

Attachments

Images (1)
  • 9401
Jayhawk500 posted:

Okay, I ordered 2 - 2mm clear  Marker LED's from Lionel awhile back. Just recently I was looking to see what resistor I wanted to add to the LED's to determine the brightness. Low and behold the clear LED's are green when voltage is applied.  My question is, Is this normal?

DSCN0033


Also, Does anyone know if the markers on the real 2101 had a green bulb or was it clear?  The pictures I have of the engine has clear lenses on the marker lights. But I don't know what color the lamps were. If they were green I good to go. If not I need to figure out something else.

 I have just place an order to Precision Scale for some pilot parts and a new headlight. We'll have to see how that works out. Stay tuned.

Thanks in advance.

Chris,

I believe they were white, but don't know for sure.  On mine, I made them white (with grain-of-wheat bulbs).  The new Lionel version and the MTH version both have green.

Jayhawk500 posted:

I did in fact order 2 more LEDs from Lionel. Both of these were green in color when voltage was applied. Yet the description says clear. Yes, it's a clear lens, but a green LED. So I'm just going to go with the green for the class lights since I can't get the clear ones I really need.

I hate to say it but, with Lionel's track record for inaccuracies, I'm not surprised.  I feel that GUNRUNNERJOHN has the right idea when ordering small parts like the LED's.  Go to a trusted manufacturer / supplier.  When all is said and done I hope you post a video of the finished engine in operation.  I admire your work and patience. 

Allegheny48, yes I'll be putting up a video when I get things the way I would like them. I have an order in to Precision Scale and the front of my T-1 will look a little different before the winter is over. I like what Wowak has done with his and others, so I'm going to copy some of his work too. My biggest problem is finding the correct color of gray for the boiler front. I think the Testors Master series paints will work, they have quite a few different grays. I just realized today how much blue is in the gray, hopefully I can make something match.

Stay tuned, there will be more to follow.

I made a  little progress with the boiler front lighting. I was able to get all the lighting into a single header, and made up a small PCB to limit all the wires internally. These lights are connected directly to track power. I turned off the bar light from over head to take these pictures, these LEDs are not as bright as they seem. I'm going to touch up the gray paint as best as I can and move ahead. Once painted I'll put in the class light lenses.  Sorry for the poor quality picture, but I think you can get the idea.  I'm still waiting to receive my hard parts from Precision Scale.

DSCN0001DSCN0003 

Attachments

Images (2)
  • DSCN0001
  • DSCN0003
Last edited by Jayhawk500

I got to looking at photos of the real 2101 and realized that Lionel didn't finish the paint job on the vermillion orange stripe on the cab. They had stopped the stripe at the forward edge of the cab. So I busted out the airbrush and, Got 'er Done! I painted the whole stripe, Not just the cab. After the paint fully cures I have to clean up a couple of spots where the paint ran under the tape but it's no big deal. My hard parts showed up today from Precision Scale. So that process will start shortly. Stay Tuned.

DSCN0001DSCN0003chessie-steam-special-s1-2101-farmer-001-1200x

I also hired an Engineer and Fireman to run the engine in my absence.

DSCN0004

Attachments

Images (4)
  • DSCN0001
  • DSCN0003
  • DSCN0004
  • chessie-steam-special-s1-2101-farmer-001-1200x
Last edited by Jayhawk500

Kudos to you, sir.  You have done a magnificent job with a sharp eye to the details.  You will have a one-of-a-kind engine when you are done.  Maybe you can decorate your newly acquired engineer figure to resemble Ross Rowland.  He would be proud.  Also, the front end lighting effects are spot on in my opinion.  Keep up the good work and I am looking forward to a video of the finished engine. 

I've followed this project from start to finish, and compared it to the real McCoy, and Sir, I give you an A+ on your effort, and the finished product.

Also an A+ to all of those helpful suggestions...

I'm having Frank Timko do an engine swap on a Lionel 6-18000 0-6-0 Switcher for me soon, and I think you will like the deal that Gunny offered you, and will save  you some bucks...................................Just Sayin!

I've spent all morning working on the "cow catcher". As I said, my hard parts came yesterday and I couldn't wait to get started. I'm a little impatient on waiting for the scotch weld to dry, but All-in-all I believe I captured the front of 2101 pretty well. I still have to connect the lift bar to the coupler, but the links are there. (Once again waiting on the glue to dry.)

The photos are in progression as I put this all together. Shame on me...The lighting in my computer room is very poor, which is another reason for the time consumption.

I ground off the hokey front coupler Lionel had on there.

DSCN0005

I eyeballed and hand drilled the holes for the stantions.

DSCN0006

Glued on the stantions and the new front coupler.

DSCN0009

.020 Stainless Safety Wire creates the lifting bar.

DSCN0010

Hand made the center yoke assembly and added the lifting pin. This took some time.

DSCN0012

Added the front air hose w/ valve.

DSCN0013

Hand formed the lift bar to resemble the real thing.

DSCN0014

Links added to the coupler. Just need to attach to pin, somehow.

DSCN0015

Below are pictures of the real deal. Think I nailed it..... Just need some paint after I get the links connected to the pin.

chessie-steam-special-s1-2101-sharp-001-1200xFront


Attachments

Images (10)
  • DSCN0005
  • DSCN0006
  • DSCN0009
  • DSCN0010
  • DSCN0012
  • DSCN0013
  • DSCN0014
  • DSCN0015
  • chessie-steam-special-s1-2101-sharp-001-1200x
  • Front
Last edited by Jayhawk500
Allegheny48 posted:

Kudos to you, sir.  You have done a magnificent job with a sharp eye to the details.  You will have a one-of-a-kind engine when you are done.  Maybe you can decorate your newly acquired engineer figure to resemble Ross Rowland.  He would be proud.  Also, the front end lighting effects are spot on in my opinion.  Keep up the good work and I am looking forward to a video of the finished engine. 

Brandy posted:

I've followed this project from start to finish, and compared it to the real McCoy, and Sir, I give you an A+ on your effort, and the finished product.

Also an A+ to all of those helpful suggestions...

I'm having Frank Timko do an engine swap on a Lionel 6-18000 0-6-0 Switcher for me soon, and I think you will like the deal that Gunny offered you, and will save  you some bucks...................................Just Sayin!

Thank You Both for the kind words. Stay Tuned, more to come.

Jayhawk500 posted:
Allegheny48 posted:

Kudos to you, sir.  You have done a magnificent job with a sharp eye to the details.  You will have a one-of-a-kind engine when you are done.  Maybe you can decorate your newly acquired engineer figure to resemble Ross Rowland.  He would be proud.  Also, the front end lighting effects are spot on in my opinion.  Keep up the good work and I am looking forward to a video of the finished engine. 

Brandy posted:

I've followed this project from start to finish, and compared it to the real McCoy, and Sir, I give you an A+ on your effort, and the finished product.

Also an A+ to all of those helpful suggestions...

I'm having Frank Timko do an engine swap on a Lionel 6-18000 0-6-0 Switcher for me soon, and I think you will like the deal that Gunny offered you, and will save  you some bucks...................................Just Sayin!

Thank You Both for the kind words. Stay Tuned, more to come.

You should for sure make the engineer look like Ross Rowland.   Great job man.  Super fun project to watch.   

jeremy ferrell posted:
Jayhawk500 posted:
Allegheny48 posted:

Kudos to you, sir.  You have done a magnificent job with a sharp eye to the details.  You will have a one-of-a-kind engine when you are done.  Maybe you can decorate your newly acquired engineer figure to resemble Ross Rowland.  He would be proud.  Also, the front end lighting effects are spot on in my opinion.  Keep up the good work and I am looking forward to a video of the finished engine. 

Brandy posted:

I've followed this project from start to finish, and compared it to the real McCoy, and Sir, I give you an A+ on your effort, and the finished product.

Also an A+ to all of those helpful suggestions...

I'm having Frank Timko do an engine swap on a Lionel 6-18000 0-6-0 Switcher for me soon, and I think you will like the deal that Gunny offered you, and will save  you some bucks...................................Just Sayin!

Thank You Both for the kind words. Stay Tuned, more to come.

You should for sure make the engineer look like Ross Rowland.   Great job man.  Super fun project to watch.   

Your the second one to suggest that I paint Mr. Rowland into the picture. After all, If it wasn't for him, 2101 might have been scrapped, and I wouldn't be doing this now.  It just may happen....Time will tell.

Thank you too for the kind words.

Last edited by Jayhawk500
Jayhawk500 posted:

Its been suggested that I paint Mr. Ross Rowland into the picture. Can I get confirmation that he is in the BLUE coveralls?

chessie-steam-special-s1-2101

It is too difficult to tell since the image is very low resolution.  When Ross pulled throttle on C&O 614 he always wore blue coveralls, an engineer's hat and a red bandana.  He also sported red gloves in those years and used clips on his pants cuffs (similar to what cyclists use) probably to prevent them getting caught on something.  So, if your engineer figure has overalls that should pretty much cover it.  Some of my O scale steamers have Woodland Scenics engineer figures.  They are beautifully cast and painted though a bit pricey.  One is even cast with his left arm in position to grasp the throttle.  The attached images were from videos.  Keep in mind this was almost 10 years after he ran 2101. 

Attachments

Images (2)
  • rr1
  • rr2
Last edited by Allegheny48

This is the final product, minus the paint of course. I just needed to be patient and wait for the scotch weld to cure before trying to connect the link to the coupler.

DSCN0025

As I mentioned in my last progress update, This is the leap of faith I was referring too. Up to this point its still completely reversible. It'll have an LED for the headlight just like before. I had to shorten it to get it to fit inside the can. I'm hoping that there will be enough light through the side hole for illuminating the side numbers.

DSCN0024

I called Big Discount Trains in Jersey and have some "Smoke Box Gray" paint coming. If it's a match, Great! If not...I'll be repainting the whole front end of the engine, That way everything matches. So Stay tuned...More to follow.


Attachments

Images (2)
  • DSCN0025
  • DSCN0024
Jayhawk500 posted:

This is the final product, minus the paint of course. I just needed to be patient and wait for the scotch weld to cure before trying to connect the link to the coupler.

DSCN0025

As I mentioned in my last progress update, This is the leap of faith I was referring too. Up to this point its still completely reversible. It'll have an LED for the headlight just like before. I had to shorten it to get it to fit inside the can. I'm hoping that there will be enough light through the side hole for illuminating the side numbers.

DSCN0024

I called Big Discount Trains in Jersey and have some "Smoke Box Gray" paint coming. If it's a match, Great! If not...I'll be repainting the whole front end of the engine, That way everything matches. So Stay tuned...More to follow.


Chris,

Looks great!!  On your headlight, you might want to lower it a little - in the pictures on Page 3 of this topic, the headlight was lowered on the CSS to be centered on the door - it looks like yours above is a little high.  Lowering it will also make room for your eagle.

Again, great work on the engine - can't wait to see the final product!

gunrunnerjohn posted:

You might consider a surface mount headlight at the rear of the headlight housing.  I use those when I upgrade steamers with my Super-Chuffer for the Rule-17 lighting, I need an LED headlight.  They put plenty of light out through the number boards.  I just glue the the 3528 size LED to the rear of the headlight housing.

Thanks John. I'll look into it.

Jayhawk500 posted:
gunrunnerjohn posted:

You might consider a surface mount headlight at the rear of the headlight housing.  I use those when I upgrade steamers with my Super-Chuffer for the Rule-17 lighting, I need an LED headlight.  They put plenty of light out through the number boards.  I just glue the the 3528 size LED to the rear of the headlight housing.

Thanks John. I'll look into it.

Would Rule 17 (now known as Rule 5.9.1+) actually apply to an older steam locomotive?  Dimming of a headlight in the presence of an oncoming train would have been manually done by one of the engine crew members.  Just asking.........

gunrunnerjohn posted:

You might consider a surface mount headlight at the rear of the headlight housing.  I use those when I upgrade steamers with my Super-Chuffer for the Rule-17 lighting, I need an LED headlight.  They put plenty of light out through the number boards.  I just glue the the 3528 size LED to the rear of the headlight housing.

John, Can you make a suggestion on the LED. Digi-key has thousands. I found one, but I think it'll be too bright.

Looking at Digi-key P/N 1416-1931-1-ND.

https://www.digikey.com/produc...16-1931-1-ND/5909378

Last edited by Jayhawk500

I use some generic warm white LED's, email me your address and I'll put a few into an envelope and send them to you.  You will have to solder to them, and I use Liquid Tape to insulate the connections, then put it inside the headlight housing and glue it to the rear.  I typically use fine #28 or #30 wire to wire them.  To light them, the components required are dependent on what electronics you're driving them with.

gunrunnerjohn posted:

I use some generic warm white LED's, email me your address and I'll put a few into an envelope and send them to you.  You will have to solder to them, and I use Liquid Tape to insulate the connections, then put it inside the headlight housing and glue it to the rear.  I typically use fine #28 or #30 wire to wire them.  To light them, the components required are dependent on what electronics you're driving them with.

Email sent. I'm using your Super-Chuffer. Thanks for the help.

Last edited by Jayhawk500
Jayhawk500 posted:
gunrunnerjohn posted:

I use some generic warm white LED's, email me your address and I'll put a few into an envelope and send them to you.  You will have to solder to them, and I use Liquid Tape to insulate the connections, then put it inside the headlight housing and glue it to the rear.  I typically use fine #28 or #30 wire to wire them.  To light them, the components required are dependent on what electronics you're driving them with.

Email sent. I'm using your Super-Chuffer. Thanks for the help.

Consider this Customer Support.

gunrunnerjohn posted:
Jayhawk500 posted:
gunrunnerjohn posted:

I use some generic warm white LED's, email me your address and I'll put a few into an envelope and send them to you.  You will have to solder to them, and I use Liquid Tape to insulate the connections, then put it inside the headlight housing and glue it to the rear.  I typically use fine #28 or #30 wire to wire them.  To light them, the components required are dependent on what electronics you're driving them with.

Email sent. I'm using your Super-Chuffer. Thanks for the help.

Consider this Customer Support.

SWEET! You Sir, are truly a Gentleman and a Scholar.

Throwing out a question....

The ERR AC Commander is void of the bridge rectifier and appears the same in every other aspect to the DC Commander. Other than swapping out the Pullmor motor and installing a DC can motor from Timko, and installing a bridge rectifier on the AC commander board, what other changes need to be made? I know the field wire needs to be removed as well.

The reason I ask is, I really don't like the noisy Pullmor motor, and I've read that the can DC motor will have more torque and smoother operation. Is this true? This engine is not a gear driven engine. The motor is connected using a driveshaft.

No can do, the AC Commander has different code to manage the different type motor, they are not interchangeable even with the added bridge rectifier.  They used the same PCB, but you'd have to have the code changed as well.  Since only Lionel can change that code, and I really doubt they'll be willing, just buy a Cruise Commander.

The DC can motor that Timko uses isn't a very large motor as it wouldn't fit inside the shell, so I would question the torque improvement.  However, it does make a much nicer running unit, I have one upgraded with the Timko motor and fan driven smoke.  Given the fact that it has no traction tires, I figure the wheels will slip before the smaller motor runs out of torque.

Attachments

Images (1)
  • mceclip0
Last edited by gunrunnerjohn
gunrunnerjohn posted:

No can do, the AC Commander has different code to manage the different type motor, they are not interchangeable even with the added bridge rectifier.  They used the same PCB, but you'd have to have the code changed as well.  Since only Lionel can change that code, and I really doubt they'll be willing, just buy a Cruise Commander.

The DC can motor that Timko uses isn't a very large motor as it wouldn't fit inside the shell, so I would question the torque improvement.  However, it does make a much nicer running unit, I have one upgraded with the Timko motor and fan driven smoke.  Given the fact that it has no traction tires, I figure the wheels will slip before the smaller motor runs out of torque.

Thanks for the reply John. I was just asking...I'll stick with the AC motor for now and see how it does once I get it back together.

I'm basically at a standstill with the mods until I get the necessary paint for the smoke box and boiler front. The smoke box gray was wayyyyyy to dark. It was more of a battleship gray. Plus I need to find a hobby shop that carries brass stock so I can make some more detailed parts.

Last edited by Jayhawk500

Just a quick update and not much else to add. I'm still waiting on my second bottle of gray paint to arrive. In the mean time, I drilled the hole in the headlight and did some filing on the eagle I wanted to mount. It may not be exactly like to real McCoy, but its very close. Other than that...I have to wait for the paint to show up.

DSCN0004


Stay tuned! More will definitely follow.


P.S. Ift's (see) funny, I've corrected this post 4 times...The Pendleton and Pepsi is kicking in.......


P.S.S.  I did make reservations for the wife and I  to ride The Holiday Express in Portland Or. on Dec.3rd. It'll be pulled by the  SP Daylight Special # 4449 all lite up in Christmas lights. Pictures will follow.

Attachments

Images (1)
  • DSCN0004
Last edited by Jayhawk500
gunrunnerjohn posted:

I use some generic warm white LED's, email me your address and I'll put a few into an envelope and send them to you.  You will have to solder to them, and I use Liquid Tape to insulate the connections, then put it inside the headlight housing and glue it to the rear.  I typically use fine #28 or #30 wire to wire them.  To light them, the components required are dependent on what electronics you're driving them with.

I received your LEDs today. Thank You Very Much!


Good Morning All and Happy Thanksgiving.

I spent half a day trying to get one of the iconic items (the Handrail/flag stantions) for the Chessie Steam Special completed. The problem I had was, It would be in the way of the cooler on the front of the Loco. So, I opted to move the "cow catcher" forward about 1/4". This allowed me access to the forward handrail that the stantions were welded too. I did this by removing the 4-40 screw underneath, adding a longer 4-40 screw, Then using 3 nuts (one on each side and one centered underneath) I was able to get the correct spacing I needed. I laid in some scotch weld under the cooler and screwed the assembly back together and I allowed that to set up.

DSCN0005

DSCN0006


So, while that was setting up and curing, I proceeded to build the forward handrail and stantions out of 3/64" brass tubing. Once I got it this far, I needed to make small adjustments to get everything to line up with the handrail holes. I had to drill a third hole in the center for the center brace.

DSCN0007

When the scotch weld was setup enough I removed the 4-40 screw and nuts. I then put more scotch weld in the gap as a filler on each side  (one at a time, had to stand it on end). Once the scotch weld was setup enough (about 3/4 hardness) I was able to use a razor blade and cut the scotch weld flush, This saves hours of sanding. I used blue masking tape to hold the scotch weld in place until it setup. If it didn't tune out like I wanted...I just added more to it until I got a smooth finish.

DSCN0008

I got the handrail finished, and painted it silver (could be white, hard to tell) like the real loco. I plan on getting the front painted black this weekend. If all works out, I'll get the gray mixed up and hopefully get the boiler front and boiler painted as well. I'm going to be mixing Smoke Box Gray and Primer Gray in the Scalecoat ll. I opted for the Eire Lackawanna Gray, but didn't, in hindsight I should have went with it.

DSCN0009

If you wondering what the white thing is on top of the cooler...It's the tool box. I used part of a Home Depot paint stick, cut and sanded to size, then added 2 each  .020 wire handles. If this is in the way of the headlight, it will be disappearing and not returning.

So, This is where I am currently. There will be more to follow from this weekend.

I want to wish everyone a very Happy Thanksgiving. Please be safe in your travels today.

Chris

Attachments

Images (5)
  • DSCN0005
  • DSCN0006
  • DSCN0007
  • DSCN0008
  • DSCN0009
Last edited by Jayhawk500
86TA355SR posted:

Excellent work, love to see someone doing modeling in this day of instant gratification.  Can't wait to see more.

i have an FEF modification I need to take the time to do a thread on. Thanks for the reminder.

Thank You so much!  I just wanted to add, I too am looking for that instant gratification. But, I also know, good things come to those who wait.

I was waiting on the wife and daughter to get out of bed to get Thanksgiving started. So I went ahead and painted my engineer to resemble Mr. Ross Rowland. I hope I depicted him in the proper way, Minus the glasses of course. His jeans could have been a shade lighter, but I couldn't find the correct shade. This was the closest.

DSCN0002

ross2

Attachments

Images (2)
  • DSCN0002
  • ross2
Last edited by Jayhawk500
Jayhawk500 posted:
86TA355SR posted:

Excellent work, love to see someone doing modeling in this day of instant gratification.  Can't wait to see more.

i have an FEF modification I need to take the time to do a thread on. Thanks for the reminder.

Thank You so much!

I was waiting on the wife and daughter to get out of bed to get Thanksgiving started. So I went ahead and painted my engineer to resemble Mr. Ross Rowland. I hope I depicted him in the proper way, Minus the glasses of course. His jeans could have been a shade lighter, but I couldn't find the correct shade. This was the closest.

DSCN0002

ross2

An excellent job on both the smokebox front and the engineer figure.  Ross would be proud.  I admire your patience and expertise.  It's far beyond what I could do in modeling work and detailing.  I enjoy seeing your progress with this engine.  Happy Thanksgiving to all. 

I'm going to be delayed in get a post up for this weekends work on the boiler front. The Matte black paint I had was uber thin and was un-usable.  The Scalecoat Black I had was glossy, Neither of which is what I wanted. I did get the Smoke Box Gray and Primer Gray from Scalecoat mixed as close to the correct proportions as possible. What worked for me was 10 drops of Smoke Box Gray and 7 drops of Primer Gray. But I multiplied everything by 10 to get the quantity I needed with some touch up paint for later. I did paint the boiler and the front so everything matched.

Below is the glossy black that is labeled "Black" on the bottle. I'm not overly pleased with the glossiness of the paint. What I am please with, is how this front end turned out. I still have some minor touches to add, but for the most part its complete.

DSCN0003DSCN0004

Stay tuned, Until next time.....

Attachments

Images (2)
  • DSCN0003
  • DSCN0004
Last edited by Jayhawk500

Need a question answered pleased.

On classification lights...I know that the lens facing forward is illuminated. Are the lenses to the side also illuminated? Or is there a shroud on the inside of the lamp that blocks the light from the sides?

I'm getting ready to put the lenses in my classification lamps and I need to know whether or not to paint the inside of the lens black to block the light from the side.

Thanks

Jayhawk500 posted:

Need a question answered pleased.

On classification lights...I know that the lens facing forward is illuminated. Are the lenses to the side also illuminated? Or is there a shroud on the inside of the lamp that blocks the light from the sides?

I'm getting ready to put the lenses in my classification lamps and I need to know whether or not to paint the inside of the lens black to block the light from the side.

Thanks

All the types of Pyle-National class lights that I have seen, were illuminated to both sides, i.e. in-board and out-board, in addition to the lens facing forward. The glass color slides inside the light assembly are placed in front of the bulb so that all the viewable lenses show the same color ( green, or red). Simply moving the lever on the rear of the class light changes the color from white (no color slide in place) to green or red.

Hot Water posted:
Jayhawk500 posted:

Need a question answered pleased.

On classification lights...I know that the lens facing forward is illuminated. Are the lenses to the side also illuminated? Or is there a shroud on the inside of the lamp that blocks the light from the sides?

I'm getting ready to put the lenses in my classification lamps and I need to know whether or not to paint the inside of the lens black to block the light from the side.

Thanks

All the types of Pyle-National class lights that I have seen, were illuminated to both sides, i.e. in-board and out-board, in addition to the lens facing forward. The glass color slides inside the light assembly are placed in front of the bulb so that all the viewable lenses show the same color ( green, or red). Simply moving the lever on the rear of the class light changes the color from white (no color slide in place) to green or red.

Thank you for the reply. That helps tremendously.

While rereading Gene Huddleston's Allegheny, Lima's Finest I found some interesting text on page 78 regarding marker lamps.  "Marker lamps were seldom illuminated on C&O freight locomotives, for with double track and automatic block signals on all the subdivisions over which the H-8's operated, no distinctions had to be made in class of train, except for passenger.  If an H-8 pulled a scheduled passenger, troop or hospital train during the War, illuminated markers (metal flags by day) were displayed to indicate section.  On the Virginian, markers were displayed on every class AG dispatched over the road.  Coal trains were usually run as extras (white flags) but could be run as of scheduled freights."  it would be interesting to learn how the C&O regarded the use of marker lamps on their passenger steam locomotives if it differed from freight engines and how the different colors displayed indicated which section of said train was being operated. 

gunrunnerjohn posted:
Jhainer posted:

That is really cool I always have loved the Chessie steam special. I have the ac motor version that I would like to upgrade to ERR and a DC motor. but have no idea where to start and I heard of timko does conversions but know nothing about them.

Such a deal I have for you.  I have one of these that was stripped for upgrade.  It has the Timko DC motor and an MTH fan driven smoke unit all mounted and ready for the electronic upgrade.  It was painted and it's all black right now and unnumbered, but you could swap your boiler and tender shell and be ready for the TMCC upgrade.   You could even sell the all black one with the AC chassis.

John what are you asking for it ?


It will be a week tomorrow since I put up a post. I must say I very pleased with the results up to this point in detailing an early 1990's vintage Lionel (LTI) locomotive. I'm not finished by any stretch, I still have to put my engineer and fireman in. I have to reorder the lenses for the class lights. I have green instead of clear and I still need to put the lens on the headlight. I also added the headlight wiring conduit. The other un-noticeable thing I did was paint both boiler handrails black. These were originally stainless steel. I still need to add the numbering to the headlight.

The boiler front was definitely trying my patients. I had broke off the left class light  and it was difficult at best to get it back on, lined up and square. All the while keeping the alignment for the LED hole in the bottom.

I do believe the gold eagle does bring a little of the Freedom Train in, even though I don't have any of that paint scheme on the engine at this time. (We'll see for the future.) I'm slowly finding pictures that the boiler and cab were painted blue. But with 40+ year old photography it's hard to tell between blue and black given the angles and lighting. This too will come in the future.

I still have touching up to do, paint wise. I don't have a hobby shop close by and none of the stores sells the Testors model paint. But as I said in an earlier post I headed to Portland to ride the SP Daylighter #4449 this Sunday, I'll get some then.

DSCN0013

          I think I did good.

26619282061_afb906db45_b

I looked to see if the front coupler on the engine would line up... If it were the correct size....It would.

DSCN0008

I tried taking some pictures under LED bulbs on my kitchen bar, Unfortunately these lights ruined the pictures. I did get two pictures and a video. I forgot to add smoke fluid to the smoke unit and by the time I got done filming the video it was starting to burn and smell up the house. But with my luck the video didn't turn out. I'll try in the morning and use YouTube.

DSCN0010


The next project is to get my layout set up for Christmas and run this beast. I'm sooooooo excited. I have 7 Lionel Steam Special passenger cars to put behind it.


Stay Tuned. More will come!


Attachments

Images (4)
  • DSCN0008
  • DSCN0010
  • DSCN0013
  • 26619282061_afb906db45_b
Last edited by Jayhawk500
Jayhawk500 posted:

It will be a week tomorrow since I put up a post. I must say I very pleased with the results up to this point in detailing an early 1990's vintage Lionel (LTI) locomotive. I'm not finished by any stretch, I still have to put my engineer and fireman in. I have to reorder the lenses for the class lights. I have green instead of clear and I still need to put the lens on the headlight. I also added the headlight wiring conduit. The other un-noticeable thing I did was paint both boiler handrails black. These were originally stainless steel. I still need to add the numbering to the headlight.

The boiler front was definitely trying my patients. I had broke off the left class light  and it was difficult at best to get it back on, lined up and square. All the while keeping the alignment for the LED hole in the bottom.

I do believe the gold eagle does bring a little of the Freedom Train in, even though I don't have any of that paint scheme on the engine at this time. (We'll see for the future.) I'm slowly finding pictures that the boiler and cab were painted blue. But with 40+ year old photography it's hard to tell between blue and black given the angles and lighting. This too will come in the future.

I still have touching up to do, paint wise. I don't have a hobby shop close by and none of the stores sells the Testors model paint. But as I said in an earlier post I headed to Portland to ride the SP Daylighter #4449 this Sunday, I'll get some then.

DSCN0013

          I think I did good.

26619282061_afb906db45_b

I looked to see if the front coupler on the engine would line up... If it were the correct size....It would.

DSCN0008

I tried taking some pictures under LED bulbs on my kitchen bar, Unfortunately these lights ruined the pictures. I did get two pictures and a video. I forgot to add smoke fluid to the smoke unit and by the time I got done filming the video it was starting to burn and smell up the house. But with my luck the video didn't turn out. I'll try in the morning and use YouTube.

DSCN0010


The next project is to get my layout set up for Christmas and run this beast. I'm sooooooo excited. I have 4 Lionel Steam Special passenger cars to put behind it.


Stay Tuned. More will come!


My Gosh!!! The engine is stunning.  You've done a magnificent job recreating Ross Rowland's 2101.  I also enjoyed the brief videos.  Painting the handrails certainly made the engine appear more realistic.  I have heard that, with early Rail Sounds, the engine's handrails often worked as an antenna.  One quick question regarding the aux. tender.  This may have been discussed earlier but I don't remember.  Was removing its coal load and replacing it with a simulated steel plate ever considered? 

Kudos to you sir.  I wish I had your patience and modeling skills.  Please keep the pictures and videos coming when time permits. 

Allegheny48 posted:
Jayhawk500 posted:

It will be a week tomorrow since I put up a post. I must say I very pleased with the results up to this point in detailing an early 1990's vintage Lionel (LTI) locomotive. I'm not finished by any stretch, I still have to put my engineer and fireman in. I have to reorder the lenses for the class lights. I have green instead of clear and I still need to put the lens on the headlight. I also added the headlight wiring conduit. The other un-noticeable thing I did was paint both boiler handrails black. These were originally stainless steel. I still need to add the numbering to the headlight.

The boiler front was definitely trying my patients. I had broke off the left class light  and it was difficult at best to get it back on, lined up and square. All the while keeping the alignment for the LED hole in the bottom.

I do believe the gold eagle does bring a little of the Freedom Train in, even though I don't have any of that paint scheme on the engine at this time. (We'll see for the future.) I'm slowly finding pictures that the boiler and cab were painted blue. But with 40+ year old photography it's hard to tell between blue and black given the angles and lighting. This too will come in the future.

I still have touching up to do, paint wise. I don't have a hobby shop close by and none of the stores sells the Testors model paint. But as I said in an earlier post I headed to Portland to ride the SP Daylighter #4449 this Sunday, I'll get some then.

DSCN0013

          I think I did good.

26619282061_afb906db45_b

I looked to see if the front coupler on the engine would line up... If it were the correct size....It would.

DSCN0008

I tried taking some pictures under LED bulbs on my kitchen bar, Unfortunately these lights ruined the pictures. I did get two pictures and a video. I forgot to add smoke fluid to the smoke unit and by the time I got done filming the video it was starting to burn and smell up the house. But with my luck the video didn't turn out. I'll try in the morning and use YouTube.

DSCN0010


The next project is to get my layout set up for Christmas and run this beast. I'm sooooooo excited. I have 4 Lionel Steam Special passenger cars to put behind it.


Stay Tuned. More will come!


My Gosh!!! The engine is stunning.  You've done a magnificent job recreating Ross Rowland's 2101.  I also enjoyed the brief videos.  Painting the handrails certainly made the engine appear more realistic.  I have heard that, with early Rail Sounds, the engine's handrails often worked as an antenna.  One quick question regarding the aux. tender.  This may have been discussed earlier but I don't remember.  Was removing its coal load and replacing it with a simulated steel plate ever considered? 

Kudos to you sir.  I wish I had your patience and modeling skills.  Please keep the pictures and videos coming when time permits. 

Thank You for the kind words.

The handrails were not antennas. This was a conventional setup engine. Yes, I did post way earlier about the metal cover for the Aux Tender. That is one of the items that I still need to do. I was going to use ABS, but since I've been working with it for the rear cab bulkhead, I think I'll just grab a piece of scrap aluminum from work and form my own. It'll be pretty straight forward.

Last edited by Jayhawk500
C&O Allie posted:

Chris,

Looks great!!  Are you going to paint the front of the steps on the pilot assembly white as was done on the prototype?


gunrunnerjohn posted:

Lookin' great, that's a far cry from what it started out as!

Gentlemen, Thank you both!

Allan, yes I will be painting the front steps. This is one of the reasons I need to go into the city today. No one here sells model paint anymore.

Allegheny48 posted:

My Gosh!!! The engine is stunning.  You've done a magnificent job recreating Ross Rowland's 2101.  I also enjoyed the brief videos.  Painting the handrails certainly made the engine appear more realistic.  I have heard that, with early Rail Sounds, the engine's handrails often worked as an antenna.  One quick question regarding the aux. tender.  This may have been discussed earlier but I don't remember.  Was removing its coal load and replacing it with a simulated steel plate ever considered? 

Kudos to you sir.  I wish I had your patience and modeling skills.  Please keep the pictures and videos coming when time permits. 

Allegheny,  early RailSounds does not require an antenna.  TMCC and Legacy do require an antenna and some locomotives do use the hand rails. I like to use the handrails if the receiver (R2LC, etc) is in the loco. J

The wife and I drove to Portland on the 3rd and as promised here are the pictures of the SP Daylight X4449. From what I understand, this is one of the last GS4's still running. It is maintain by the dedicated volunteer folks at the Oregon Railroad Heritage Foundation. But...I've been known to be wrong at times. Sorry for the poor quality of the pictures. These were taken right at dusk, just after the 4 PM run.

DSCN0014

DSCN0015DSCN0016DSCN0017DSCN0018DSCN0019DSCN0024DSCN0025DSCN0026DSCN0027DSCN0028DSCN0030


Attachments

Images (12)
  • DSCN0014
  • DSCN0015
  • DSCN0016
  • DSCN0017
  • DSCN0018
  • DSCN0019
  • DSCN0024
  • DSCN0025
  • DSCN0026
  • DSCN0027
  • DSCN0028
  • DSCN0030
Last edited by Jayhawk500
Jayhawk500 posted:

The wife and I drove to Portland on the 3rd and as promised here are the pictures of the SP Daylight X4449. From what I understand, this is one of the last GS4's still running. But...I've been known to be wrong at times. Sorry for the poor quality of the pictures. These were taken right at dusk, just after the 4 PM run.

DSCN0014

DSCN0015DSCN0016DSCN0017DSCN0018DSCN0019DSCN0020DSCN0021DSCN0024DSCN0025DSCN0026DSCN0027DSCN0028DSCN0030


I believe you are correct.  4449 was restored by Doyle McCormick for the Freedom Train back in 1975.  This Christmas train beats CN's hands down!  IF memory serves me correctly Portland was home to the now closed Organ Grinder Restaurant where one could eat surrounded by a 47 rank Wurlitzer pipe organ.   Jonas Nordwall played there for a number of years.  Dennis Hedberg owned the establishment. 

Hello Jawhawk500.  Happy New Year to you and yours.  This morning I ran across an Ebay auction for the 2101's auxiliary tender (former NYC Mohawk) in HO scale.  It clearly shows the top piece fabricated to cover the former coal bunker.  I thought this might be of interest to you.  Looking forward to seeing more progress pictures of your 2010. 

HO Key Imports NYC Mohawk Brass Freedom Train Custom Auxilliary Tender for AFT1 | eBay

Allegheny48 posted:

Hello Jawhawk500.  Happy New Year to you and yours.  This morning I ran across an Ebay auction for the 2101's auxiliary tender (former NYC Mohawk) in HO scale.  It clearly shows the top piece fabricated to cover the former coal bunker.  I thought this might be of interest to you.  Looking forward to seeing more progress pictures of your 2010. 

HO Key Imports NYC Mohawk Brass Freedom Train Custom Auxilliary Tender for AFT1 | eBay

Happy New Year to you too. Thanks for the heads up. I've ran into a road block with the Chessie. I had to send the R4LC back to ERR. My fan quit working and the rear tender light was on constantly. I had to lengthen the draw bar so the tether and plug would clear the engine going around a curve. Pictures will follow when I do the next update.

Thanks for the link.

Last edited by Jayhawk500

It's been a month+ since I last posted an update on my CSS. As with everybody, Christmas and life sometimes gets in the way.

I had a problem with my ERR mods for my CSS engine/tender. At some point during my modifications, I had lost some wires due to cold solder joints. I sent my R4LC to ERR because I suspected it as failing 'cause the smoke unit wouldn't produce any smoke. ( Ken is awesome with customer service.) The fan worked fine, just no smoke. I double checked all my connections and everything now works as it should. The other thing I had to do, was completely erase the programing in the CAB-1 and reprogram it. I had at some point lost the link between the engine and Aux tender. But that is all now been rectified.

The other thing I had to do was, lengthen the draw bar on the engine by 1/2". As it was the plug for the tether was hitting the corner of the engine as it would go around the curve. I'll get a picture of that up shortly.

I did find time yesterday to paint the engines tender. The sides of the tender went from engine black to B & O Blue. Now it matches the aux tender as it should. I found more pictures (albeit) very few of the engine tender. If I can make it work, the rear of the tender will see some improvements.

DSCN0014DSCN0015DSCN0016

Attachments

Images (3)
  • DSCN0014
  • DSCN0015
  • DSCN0016
Last edited by Jayhawk500
ES44AC posted:

Will the locomotive be getting B&O blue? 

I'm still up in the air on that one. Most of me says yes...But the other side is telling me no. Mainly because I can't get the proper 2101 and T-1 for the side of the cab. I would love to modify the top of the boiler, to add the proper steam whistle. The only other thing that would have the "cool" effect is to have a smoking steam whistle. I also need someone to tell me what's printed/painted on the side of the sand dome. I cant read it.

Last edited by Jayhawk500

As promised, Here's the draw bar I had to make. I still need to paint it, but it works great. The tether plug just misses the hand rail on the cab.

DSCN0019

Made this little video this afternoon. As of right now, other than painting the draw bar it's complete up to this point.

I have trouble embedding the thumbnail for videos. If someone could help me that would be awesome.

Attachments

Images (1)
  • DSCN0019
Last edited by Jayhawk500
C&O Allie posted:

Chris,

Nice video.  The letters on the sand dome are "SLCA".  On my MTH version, it is "S.L.C.A".  On the Lionel, it is just "SLCA".  I don't know which is correct.

Thanks Alan. The wife got a little upset....It smokes up the house pretty good. I have to see if I can turn down the intensity some.

Now that I know what it is, I can see it...S.L.C.A.   MTH is correct.


Last edited by Jayhawk500
Jayhawk500 posted:

The wife and I drove to Portland on the 3rd and as promised here are the pictures of the SP Daylight X4449. From what I understand, this is one of the last GS4's still running. .

There is only one GS4 left and by default is the only one running. There is a GS6 on static display at the Museum of Transportation in St. Louis.     J

Observation Car Modification w/ CSS Drum Head


I've been searching for a CSS drum head for some time and I finally found one, through Tomar Industries in Pasco Wa. Here's the link: https://tomarindustries.com/drumheads.htm    The drum head is listed in the "Miscellaneous" section.

My observation car is the Baby Madison style and the rear railing is just the right size for the drumhead. This is a rather simple mod and I forgot to snap a couple of pictures near the end of the process. Tomar provides very straight forward instructions on how to assemble the drum head. The rest of this I just had to figure out on my own.

DSCN0003

Step one was to epoxy the white LED to the inside of the drumhead. There is no need to paint the inside since this is cast metal product and reflects the light well. The LED comes attached to coated copper leads about 8 inches long. Red is positive and blue is negative. Once the epoxy set up I made sure the wires weren't crossed and sealed the hole with another drop of epoxy.

DSCN0010

Next up was the white diffuser lens. Here, a very thin application of epoxy around the perimeter of the drumhead. I aligned the edge of the lens to the bottom, so I wouldn't have to trim the lens and deal with cutting the LED wires. I placed the drumhead face down, then applied a bit of pressure to get a good seal. The CSS lens is to the left in the picture. The process was the same, you just have to make sure the lens is orientated and centered correctly. I had it on backwards, but noticed it right away and changed it. Sorry I don't have a finished pic.

DSCN0015

So as you can see, this is no where near what the original one was. I just clipped off the melted spot on the back of the railing and removed the old Chessie System sign.

DSCN0013

DSCN0012

This is the original Drum Head.

chessie-steam-special-s1-drumhead-randall-c-aldrich-1200x

This is also one of those no picture moments. Once I had the outer lens glued on and trimmed down, I painted the drumhead with Scalecoat II Matte black paint. When I epoxied the drum head to the railing I had to scrape off some paint to get the glue to stick as per the instructions. I placed enough glue on the drum head so it would ooze up and around the railing.The instructions say to use paper to form the trim that goes around the sign, but I opted not to do that and I will at a later time I'll paint an aluminum trim ring around the sign. I then filed a small notch in the floor of the car for the wires, I didn't want to pinch them in the fear for breaking them. I drilled a #50 or .070" hole just behind the screw hole that secures the interior to the car body. I then ran the wires inside and put a drop of epoxy to hold them in place.

DSCN0017

The kit comes with a full wave rectifier and a 2200 ohm 1/8 watt resistor. The red and black wires go to the track power (AC), the resistor goes to the + side of the rectifier. The red LED wire to the resistor and the Blue wire to the negative side of the rectifier.

DSCN0014

You can see where the wires come into the body. I left them full length, cause I didn't want to strip the coating off the wires. Once everything was soldered, I heat-shrinked everything. Epoxied the rectifier to the floor and routed the wires as to not interfere with the interior.

DSCN0018

I reinstalled the interior and re-assembled the observation car.  Below is the finished product. This LED is 3 volt and you can ops check the LED while going through your process by using 2 "AA" batteries. If I would have known the LED was soooo bright, I would have put in a higher resistance resistor to dim it down some. As you can see, the drum head is so bright, you can barely see the Chessie Steam Special. It really does add a sense of realism to the car. 

DSCN0019

Thanks for looking.

Until next Time...


Attachments

Images (10)
  • DSCN0003
  • DSCN0010
  • DSCN0015
  • DSCN0013
  • DSCN0012
  • chessie-steam-special-s1-drumhead-randall-c-aldrich-1200x
  • DSCN0017
  • DSCN0014
  • DSCN0018
  • DSCN0019
Last edited by Jayhawk500
Strummer posted:
Jayhawk500 posted:
Strummer posted:

I only just now discovered this thread and I think this project ranks right up there with the best. Wonderfully done!

Mark in Oregon 

Why Thank You Mark! Where about's are you in Oregon? I'm where Goonies was filmed.

About 2 hours away from where "Animal House" was filmed... 

Mark in Oregon 

I'm sorry. I actually don't know where that movie was filmed. I would venture to guess in Eugene near the college???

Chris has tasked me to do the Pittman swap on his CSS, the locomotive arrived just the other day....first thing to do is compare this model to the many Lionel 6-18009, & 18064s I’ve done. Although the CSS and the Mohawk share the same chassis, the similarities stop there. Studying the model and having a good plan is key before any cutting. Not going to make a hacked up mess...the boiler shell although close to the Mohawk, will require a slightly different approach to fitting the Pittman up inside it’s tight boundaries. The rear trailing truck pivot points are also slightly different than the Mohawks, so motor mount placement, and angle will critical to ensure an OE outward appearance. Laid out in the pictures are the parts needed to do the swap....the flywheel will have to be turned down to fit, and will be forward mount...After I measure for mounting angle and distance from the back of the chassis to clear the boiler shell.....let the cutting begin!..........Pat0D94DC79-3C17-4139-97E6-FE49B6BE5F77C93334F1-F7C2-475E-8E9D-690AC6F43F9D

Attachments

Images (2)
  • 0D94DC79-3C17-4139-97E6-FE49B6BE5F77
  • C93334F1-F7C2-475E-8E9D-690AC6F43F9D

Not everything in the shop is peaches and cream, Chris’s locomotive came in with this slight shipping damage, I say slight but any damage if enough to make you puke up your shoes......so more collision work to ad to the growing list of wreck repairs...we couldn’t leave my man Chris go up under the bus, so careful heating, careful movement, slowly, repeat, this is the end result, no cracks or breaks...2F31138A-3254-4A62-A0C1-62974964D04B9D5913A7-0AE4-44C0-9F13-760FAEF6AB925A204CCA-15EB-4A60-9EC0-05C0E38C8096

Attachments

Images (3)
  • 2F31138A-3254-4A62-A0C1-62974964D04B
  • 9D5913A7-0AE4-44C0-9F13-760FAEF6AB92
  • 5A204CCA-15EB-4A60-9EC0-05C0E38C8096
harmonyards posted:

Not everything in the shop is peaches and cream, Chris’s locomotive came in with this slight shipping damage, I say slight but any damage if enough to make you puke up your shoes......so more collision work to ad to the growing list of wreck repairs...we couldn’t leave my man Chris go up under the bus, so careful heating, careful movement, slowly, repeat, this is the end result, no cracks or breaks...2F31138A-3254-4A62-A0C1-62974964D04B9D5913A7-0AE4-44C0-9F13-760FAEF6AB925A204CCA-15EB-4A60-9EC0-05C0E38C8096

OH FANTASTIC! Thanks Pat!

Update for today on the CSS .....after figuring where things are going to land, and measuring for what little space I have to work with, here is the final configuration for the motor mount. Wound up in pretty good shape with a 10 degree pitch on the motor, so shaft alignment won’t be an issue, biggest win is I’ll clear all my pivot points for the rear trailing truck OE mounts. The trick on the CSS is to add some material to the washer to slightly raise its center point on the chassis. (Fortunately, I have a nice mig welder) I’ve made a nice clearance valley to get a flywheel forward mount. Next step is to fabricate the rear body mount and set up, and physically set the body back on the chassis and establish OE ride height.........Pat81FA768D-C980-4057-AA9E-A06E0768854D49C00A9D-DC1A-428B-9A1B-06ECD69ABDDFCEA7D5C8-98EC-402D-A5F0-29227F1B1B72EEC3CC5F-1CDF-4E4C-877E-E702240F5ADB

Attachments

Images (4)
  • 81FA768D-C980-4057-AA9E-A06E0768854D
  • 49C00A9D-DC1A-428B-9A1B-06ECD69ABDDF
  • CEA7D5C8-98EC-402D-A5F0-29227F1B1B72
  • EEC3CC5F-1CDF-4E4C-877E-E702240F5ADB

Pat I'm amazed by your conversions.  And I agree 100% this is a MUCH more appropriate motor than what Timko is using.  That little Mabuchi RS-385 is a downgrade IMO.

You seem concerned about matching the angle of the existing worm shaft coming out of the gearbox.  I guess I don't understand the extent of your concern... there's a dogbone shaft that couples the motor to the worm shaft through ball-and-socket type universal joints.  This arrangement will tolerate quite a bit of misalignment without excess noise or loss of torque, if the "pins" on both balls rotate in the same plane.  Some folks try to set them at right angles to each other, but that's not correct and could lead to noise or wobble. 

Other folks here on the Forum connect the motor and worm shafts with #0 Toyota flexible vacuum hose, which would also tolerate some degree of misalignment.

Maybe a bit off-topic but I have the first issue MTH Reading T-1 (20-3130-1, circa 2004.)  As far as I know, this locomotive was all-new tooling and didn't share its chassis or hardware with another model.  Yet, imagine my surprise when I opened it up for the first time, and the motor mounting angle is grossly different from the angle of the shaft coming out of the gearbox!  MTH's factory design has a serious misalignment!!  Like Lionel's, it has a cardan shaft connecting the motor to the worm shaft, so the operation isn't affected much, if any.  But it sure doesn't look pretty!!  I've never seen a later issue T-1 (i.e., 20-3249-1) with the shell off, but I would be surprised if this issue was ever corrected.

So I guess I have two questions: (1) Why do you try so hard to align the motor with the worm shaft when any reasonable alignment would work just fine; and (2) do you or anyone else here know whether the motor-worm shaft alignment was corrected in later releases of MTH's Reading T-1??  Thanks so much for sharing your hard work!

Last edited by Ted S
Ted S posted:

Pat I'm amazed by your conversions.  And I agree 100% this is a MUCH more appropriate motor than what Timko is using.  That little Mabuchi RS-385 is a downgrade IMO.

You seem concerned about matching the angle of the existing worm shaft coming out of the gearbox.  I guess I don't understand the extent of your concern... there's a dogbone shaft that couples the motor to the worm shaft through ball-and-socket type universal joints.  This arrangement will tolerate quite a bit of misalignment without excess noise or loss of torque, if the "pins" on both balls rotate in the same plane.  Some folks try to set them at right angles to each other, but that's not correct and could lead to noise or wobble. 

Other folks here on the Forum connect the motor and worm shafts with #0 Toyota flexible vacuum hose, which would also tolerate some degree of misalignment.

Maybe a bit off-topic but I have the first issue MTH Reading T-1 (20-3130-1, circa 2004.)  As far as I know, this locomotive was all-new tooling and didn't share its chassis or hardware with another model.  Yet, imagine my surprise when I opened it up for the first time, and the motor mounting angle is grossly different from the angle of the shaft coming out of the gearbox!  MTH's factory design has a serious misalignment!!  Like Lionel's, it has a cardan shaft connecting the motor to the worm shaft, so the operation isn't affected much, if any.  But it sure doesn't look pretty!!  I've never seen a later issue T-1 (i.e., 20-3249-1) with the shell off, but I would be surprised if this issue was ever corrected.

So I guess I have two questions: (1) Why do you try so hard to align the motor with the worm shaft when any reasonable alignment would work just fine; and (2) do you or anyone else here know whether the motor-worm shaft alignment was corrected in later releases of MTH's Reading T-1??  Thanks so much for sharing your hard work!

If I can get near perfect alignment, I’m sure gonna try for it. Call it OCD, or whatever, but “that’s close enough” doesn’t register in my rule books....I’m not trying real hard, the rulers and angle finders do the work for me. The angle is slightly off anyways, I’m aware that these can take some angle and be “ok”. Truth is too, I really enjoy the challenge, so making it perfect is just fine by me!....as far as the MTH model goes, I have no idea, I’ve never been inside one those models, new or old.....many, many moons ago, when I started in the automotive field, I had a shop supervisor, who was also my mentor, said “do it right or don’t touch it” those words stuck to me like glue all these years.............Pat

harmonyards posted:
John23 posted:

That Pittman looks larger than the DC motor that Timko uses.  Will you have to remove the backhead?

No, they fit in there pretty good, it’s tight, no room for a rear mount flywheel, but it will clear the back head..........Pat

I had Timko convert one for our club to can motor & TMCC, & was pretty underwhelmed with its performance.  Your conversion looks impressive.  I have my own T-1, still original.  Do you do these on a regular basis for others?

John23 posted:
harmonyards posted:
John23 posted:

That Pittman looks larger than the DC motor that Timko uses.  Will you have to remove the backhead?

No, they fit in there pretty good, it’s tight, no room for a rear mount flywheel, but it will clear the back head..........Pat

I had Timko convert one for our club to can motor & TMCC, & was pretty underwhelmed with its performance.  Your conversion looks impressive.  I have my own T-1, still original.  Do you do these on a regular basis for others?

Yes I can, but be forewarned, it is a very invasive job.....as you can see, I literally lop off the back of Chris’s loco...and the shell will have some hogging too....I do keep outward appearance stock. As long as y’all are aware of that, email is in my profile, and we can go from there as far as pricing and what not............Pat

Add Reply

Post

OGR Publishing, Inc., 1310 Eastside Centre Ct, Suite 6, Mountain Home, AR 72653
800-980-OGRR (6477)
www.ogaugerr.com

×
×
×
×
Link copied to your clipboard.
×
×