Many years ago when I built a layout, I used a rubber-like roadway product that was probably an 1/8" thick and came with various pieces that could be fitted together to create a whole roadway system. I'm now building a new layout and only see products that are paper thin. 

Does anyone know where i might find the type of the thicker roadway I remember? Any tips would be welcome.  Thank you.

Chris Dunn

BTW, I know about materials for making roadway from scratch, but I'm looking for actual finished roadway. 

Last edited by Chris Dunn
Original Post

Replies sorted oldest to newest

If you go to Harbor Freight, they sell a black rubber-like tool box shelf liner in rolls. One side has ribbing but the flip side is smoother. The advantage of having it in long rolls is that you do not have all the joints and can cut it to any configuration you want. Parking lots are easy because of the width too. It of course does not have center lines on it, but you said you did not need them for your application. This stuff is thinner than using foam board or Masonite so it does not have to be blended for the height on a table top layout. I bought some but have not used it as I am going to use Super Streets for roads first. 

Paul Goodness

Chris Dunn posted:

Thanks for all the help. Dave, I'm going to give the craft store materials a try. Can't go wrong with that price, and I like the flexibility. For my small layout, I don't really need markings, but what are paint markers?

Marker pens filled with a type of paint......they are available in white, yellow....all colors....but will show well on black surface. In Hobby Lobby they are in the plastic model and art depts. Test marker before you use them a lot. 

I used cork road bed, painted with top coat, a little weathering, and lined with a white out roller for center and stop sign/traffic light stop lines.  Much easier to apply...and it looks very convincing, as the texture of the road bed gives the white out a broken worn effect and looks like a real road with wearing out marker lines'... 

I am considering using this roll of black Anti-slip tape for my roadways.. it is 4" wide and a gritty texture .. .. look pretty good, adhesive back. before I jump into using it does anyone have any feedback  .. good or bad? I want to be a little careful when cutting it as I don't want any loose surface grit to get anywhere near the drive wheels etc of any engines and migrate to the grease on gear sets.

Also .. I have unrolled a few feet and have not seen or felt any loose grit .. at 4" wide and 65-1/2 feet .. it is pretty inexpensive (e-bay)


Attachments

Images (1)
  • mceclip0
Last edited by Larry Martin

Larry, there are so many options for roads.  Melgar's recommendation is a good one. However, If you really want to try the tape, I would recommend placing it on top of some foam board, chipboard, or roadbed cork.  It will look more realistic as the road will have some height  and not be completely flat. All roads have  what is called a crown.  meaning the center of the lane is raised, so water runs off to the shoulder.... The finished product of O scale roads depend on how much time and effort one applies.  Many use spackle,  Arizona models has a real cement powder that works great.  I think any experienced modeler will agree that exploring the many techniques of making roads, and finding the method that works best for you and your layout'....  Good Luck...

 If you want to see some pixs of roads I've made, send me an email...... 😃

@MELGAR posted:

I suggest a product called "taskboard material" which can be purchased in sheets 1/16-inch thick. It is an ultralight wood fiber board that is easy to cut, glue in place and color with acrylic paints. It has a perfect texture to simulate concrete or asphalt roads.

MELGAR

Melgar where can you find this “task board material” sounds like a very good idea? I have some of the Harbor Freight stuff for my tool box and think it may be a little to think but also sounds like an interesting idea. 

Last edited by RJT

Here is my recipe. 3mm hardboard cut to size. Then covered with a thin layer of Sculpt-a-mold, let dry and sanded smooth. Finally painted with acrylic paints using a few colors mixed together and lightly sanded (220 girt) when dry to bring out some detail and variation. I did the same at the rail crossings and filled in the gaps with Sculpt-a-mold.

Donald

IMG_0585IMG_0586IMG_0587 

Attachments

Images (3)
  • IMG_0585
  • IMG_0586
  • IMG_0587


Although placing a roadway in front of a round-house is interesting as it uses what would be wasted real estate, it seems that it would interfere with the really nice setback ( a very nice use of space in front of a roundhouse.)  you have in front of the turntable; where multiple engines would like to poke out  and be seen.

With the curved road, you limit the poke-ing out. IMHO.


I used 1/8" wood sheets (4x4) and once I had what I wanted what I wanted, I painted it in 2 coats.  The first was the Rust-Oleum black textured spray paint to get the road surface.  Then once that was dry, I spray painted over it with the black color I wanted for the road (dull black).

IMG_8484_zps866e0e16IMG_8494_zpsf13d1844

Then I used the same board painted gray for the sidewalks to fit in with my station/crossing guard .

20180126_180610

I used the same type of setup in my city but using 1/8" MDF with the roads painted to match my superstreets track and gray for the sidewalks.

846591090_Station 08_zpsuyeckeq9_53870

Attachments

Images (4)
  • IMG_8484_zps866e0e16
  • IMG_8494_zpsf13d1844
  • 20180126_180610
  • 846591090_Station 08_zpsuyeckeq9_53870

I am considering using this roll of black Anti-slip tape for my roadways.. it is 4" wide and a gritty texture .. .. look pretty good, adhesive back. before I jump into using it does anyone have any feedback  .. good or bad? I want to be a little careful when cutting it as I don't want any loose surface grit to get anywhere near the drive wheels etc of any engines and migrate to the grease on gear sets.

Also .. I have unrolled a few feet and have not seen or felt any loose grit .. at 4" wide and 65-1/2 feet .. it is pretty inexpensive (e-bay)


I picked some up.  I thought it was a bit  too "gritty"IMG_6730

Brendan

Attachments

Images (1)
  • IMG_6730
@GVDobler posted:

I saw a movie and the person was trying to learn how to paint a bowl of fruit. The apples always just looked like circles. If your roads look like a strip of something you put there, it's kinda the same thing. Roads are not a perfect surface with no variation in color.

The artist gene is missing from my DNA

I hear you about the artist gene .. as a mechanical engineer, I have my layout running pretty flawless .. lots of auto zones, photo-eyes etc to control train movement .. but when it comes to scenery .. I know what I would like in my mind, but not quite sure that I have the inner talent nor the patience .. a little disappointed in myself in that aspect, but I am trying.

@sidehack posted:

I've used several types of material to make roads, one was using floor tiles turned upside down as shown. They can be toned down with talc powder or cement dust and easy to work with. Used 1/8" masonite (or hardboard) for the cement area.

13layout_3433

I kind of really like your approach on both the roadways and cement areas and is worth looking at.  I don't see me having the talent to go full blown realism, but I would like to meet somewhere between nothing and outstanding drop-dead realism

@RJT posted:

Melgar where can you find this “task board material” sounds like a very good idea? I have some of the Harbor Freight stuff for my tool box and think it may be a little to think but also sounds like an interesting idea. 

Dick Blick, has taskboard, and it is priced just right'..,.I purchased several very large sheets.  I use  it for scratch building.  Haven't tried it for roads...

Over the years, I've seen many techniques, from using spackling compound, to painted 1/8" hard board, to piled up sand and dirt, to asphalt roofing paper (we use this for asphalt roads). All work well, but the level of crafting varies. Don "Industrial Models" Smith used spackling for his street-running industrial switching layout to a very impressive level.

2009126155627_98

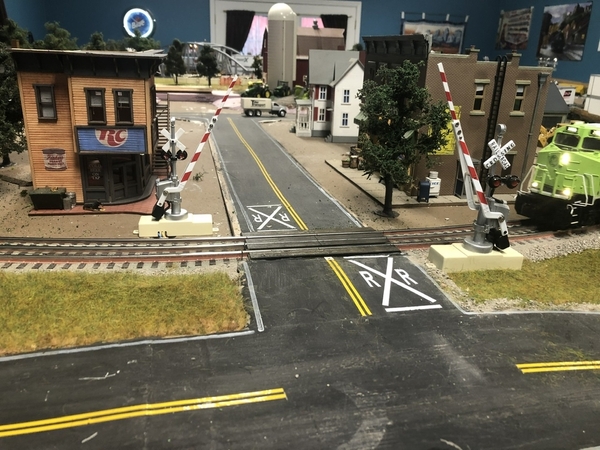
It really depends on what the road is going to be doing with respect to the track or building bases. For MTH buildings, you need a 1/8" base road to compensate for the "sidewalks" surrounding the buildings. For grade crossings, you need to deal with flangeway clearances and have it low enough for the rail heads to make good contact.

I used asphalt roofing paper for a project layout.

2013-03-31 12.06.282013-03-31 12.05.28

Attachments

Images (3)
  • 2013-03-31 12.06.28
  • 2013-03-31 12.05.28
  • 2009126155627_98

Here is a few of my different versions:  First is 1/8th " cork,  painted with acrylic color pavement. weathered with pan pastels. white glue painted jet black for road tar patch..

DSC_0880


This PVC (AKA) Foamy, no paint, white chalk weathering, and white out roller stripes..

P1020385


This is 2 Home Depot large paint mixer sticks glued together.  Covered with spackle and covered with jet black fine ballast solidified with white glue.  I did want a grainy look'...  Forum member, Toledo Ed, invented the ballast for black top..


P1020211

Close up, distance shot

P1020207 Ed's roads


This is actual cork road bed for under the tracks.  Painted with Woodland Scenics Topcoat'  WHen I built these roads, I was unaware of all the other methods available.  I also used Rust Oleum textured stone paint for certain areas.  It looks like actual cement/concrete roads. As soon as I can find those pixs, I'll post it...

SAM_0142

Attachments

Images (5)
  • DSC_0880
  • P1020385
  • P1020211
  • P1020207 Ed's roads
  • SAM_0142
Last edited by Quarter Gauger 48

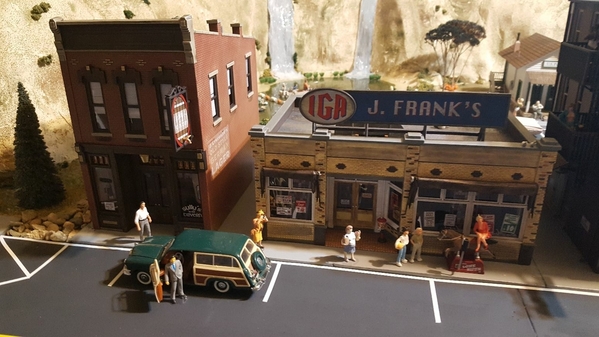
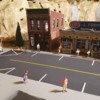
The responses to this topic have offered many great options.  After some investigation and suggestions from forum members, I ended up using a product mostly described as "Foamies." The product is basically a sheet of colored foam.  The product is available in numerous colors, but I  went with black.  The product accepts a flat acrylic "pavement" color paint well.  For stripping, I decided to use 1/8" auto pinstriping.

I approached the thickness choice in two ways.  For North Main Street lined with MTH buildings, I used a 5mm with a 3mm over it to bring up the height of the road to bring the building curbing more in scale.  For South Main Street at the opposite end of the table, I used 3mm for the road, and placed the Woodland Scenics structures on a 6mm "Foamie" sheet (12" x 12") to create the curbing effect.  I painted the 6mm sheets a concrete gray...looks great bordering the flat black roads.  The 5mm sheets l bought came in a 12" x 18" sheet;  the 3mm sheets in 12" x 18"; and the 6mm sheets in 12" x 12."

I'll post pics of the new South Main Street area located below the mountain range, with two rivers running into Spring Lake, as soon as the finishing touches on the area are complete.  The lake area may bring some likes  Here are the North Main Street pics first.  Hope you all had an enjoyable summer...


City 27City 42City 62Dealer 11


Attachments

Images (3)
  • City 27
  • City 42
  • Dealer 11
Last edited by Capetrainman

Quite a while ago someone recommended a product called ice and water.  It is an underlayment material used in the construction industry.  It comes in rolls about 3 feet by about 40 feet it was about 1/8 inch thick.   I was able to get a partially used roll at a lumber yard for no cost,  It has a very fine gravel surface and a tape on the back which sticks to the table.  It is easy to cut with a razor knife and does not require a lot of seems.  I put lines on with a yellow paint marker.

Marty

Attachments

Images (1)
  • roadway

Ted

Nice ideas here, the cork looks good as well as the others, in life all roads look a different depending on how old they are, what part of the country and what material was used to make them.

Your scenes are always well done.

Marty, I remember that now, were used to prevent ice buildup and leaks, your roads do look great.

Last edited by sidehack

The responses to this topic have offered many great options.  After some investigation and suggestions from forum members, I ended up using a product mostly described as "Foamies." The product is basically a sheet of colored foam.  The product is available in numerous colors, but I  went with black.  The product accepts a flat acrylic "pavement" color paint well.  For stripping, I decided to use 1/8" auto pinstriping.

I approached the thickness choice in two ways.  For North Main Street lined with MTH buildings, I used a 5mm with a 3mm over it to bring up the height of the road to bring the building curbing more in scale.  For South Main Street at the opposite end of the table, I used 3mm for the road, and placed the Woodland Scenics structures on a 6mm "Foamie" sheet (12" x 12") to create the curbing effect.  I painted the 6mm sheets a concrete gray...looks great bordering the flat black roads.  The 5mm sheets l bought came in a 12" x 18" sheet;  the 3mm sheets in 12" x 18"; and the 6mm sheets in 12" x 12."

I'll post pics of the new South Main Street area located below the mountain range, with two rivers running into Spring Lake, as soon as the finishing touches on the area are complete.  The lake area may bring some likes  Here are the North Main Street pics first.  Hope you all had an enjoyable summer...


City 27City 42City 62Dealer 11


Paul, your roads look great too... nice and neat'... Plus you have a very well placed assortment of vehicles...!!

My roads are made from three layers

1)  .040 Styrene sheet, cut to the shape of the road.  (I use cardboard to make templates)

2)  1/16" thick black foam craft material. Available in 9 x 12 sheets from Craft Store or Amazon

3)  Durhams Water Putty, tinted with black craft paint.

Glue the foam to the styrene with 3M 77 or other contact cement. Apply the Durhams on top of the foam.  Trowel smooth with a toungue depresser.  When it is just about set, trowel a slight crown in the road

Add lines with Automotive Pinstripe tape

Weather to taste

I realize this approach involves more steps than most,  But it does have some advantages

a)  To my eye it looks very realistic

b)  The road is easily made to follow any curve, and it can easily follow any change in elevation

c) The Durhams is extremely durable:  Easy to vacuum, shows no tire marks, impossible to scuff, can even withstand a dropped tool, car, etc

d) When you lay down the road, it will bend. This causes cracks.  They will look quite real.  Because they are.  Even if the Durhams cracks, it stays bonded to the foam base.  But as a bonus, you can chip the Durhams away at the cracks, revealing the underlying black foam which looks just like a tar repair:

1710

1711

1812

2311-A

 DSCN4756BU3


Attachments

Images (5)
  • 1710
  • 1711
  • 1812
  • 2311-A
  • DSCN4756BU3
Last edited by John Sethian

Took a different route for the new South Main Street on the layout.  I continued to use "Foamies" for the roads with a coat of flat black paint applied.  I used 3 mm 12 x 18 Foamies for the roads and placed the buildings on 6 mm 12 x 12 Foamie pads painted gray to create a sidewalk.  The lighting in the pictures is too bright and tends to make the mountain area lighter in color.

Lake 1

Lake 2

Lake 3

Lake 4

Lake 5

Attachments

Images (6)
  • Lake 2
  • Lake 3
  • Lake 3
  • Lake 4
  • Lake 5
  • Lake 1
Last edited by Capetrainman

Took a different route for the new South Main Street on the layout.  I continued to use "Foamies" for the roads with a coat of flat black paint applied.  I used 3 mm 12 x 18 Foamies for the roads and placed the buildings on 6 mm 12 x 12 Foamie pads painted gray to create a sidewalk.  The lighting in the pictures is too bright and tends to make the mountain area lighter in color.

Lake 1

Lake 2

Lake 3

Lake 4

Lake 5

Looking good Paul'.. I like the parallel parking spots'... .🎅🏻  

Add Reply

Post

OGR Publishing, Inc., 1310 Eastside Centre Ct, Suite 6, Mountain Home, AR 72653
800-980-OGRR (6477)
www.ogaugerr.com

×
×
×
×
Link copied to your clipboard.
×
×