
So I almost got everything wired up for my super chuffer and chuff generator and got my new MTH smoke unit to replace the K-Line GS4 mechanical smoke unit.  Still need to make a bracket to get it mounted correctly to replace the fried smoke unit which is what started this adventure. So I ordered these 22 ohm resistors and will break off the ceramic coating and install.  I assume I just desolder the 2 there and replace with one of these?

Attachments

Images (1)
  • 0B17C3ED-710F-4731-AE16-27FB8D65FD57
Original Post

Replies sorted oldest to newest

It will work as G says but a 22 ohm 2 watt resistor will get even hotter assuming this will hook up to a RxLC. Using a lower wattage resistor of the same resistance value puts a greater strain on the resistor vs putting a lower ohm value which puts a greater strain on the triac driver. Cheaper and easier to replace. I used to use the same 5 watt resistor you picture but have switched with even better results.

Try yours though, they are easy enough to swap out.

Pete

For the K-Line stuff with the small puffer, I make these out of 1/16" fiberglass.  They mount the MTH steam smoke unit at just the right height using the existing puffer mounting posts.  I have to taper the posts on the smoke unit to clear the screw, but it works out perfectly.  Somewhere in the forum I posted a picture of the assembly, but I don't know where right now.

Attachments

Images (1)
  • mceclip0

Looks like I came to the right post finally.  I need help with the smoke unit also.  My Railking 1996,  #5445 MTH Dreyfuss Hudson was smoking for the last 20 years and finally gave out.  I took it apart and found the the wick was embedded into the resistors.  This is a fan driven unit.  I checked the fan and the voltage is good as well as the resistance and there of course is power to the unit.  Other than that the good resistor in it reads 16 Ohms so I would think that the burned out one is the same????   So do I need a 16 Ohm but what wattage resistor?????  I plan on replacing both of them.   Also can it have the ceramic coating on it or do I need to break it off ??????  Here in Michigan all the train shops and the electrical shop I use are shut down right now so I am SOL.  Next questions are: Can I use pink insulation as wicking or do I need to use oil lamp wicks cut to size?????  Does the wick touch the resistors or stay tucked into the chamber away from the resistors??? 

Sorry lots of questions but I need to fix this unit, wife bought me the engine back in 95 for out 25th wedding anniversary and I want it fixed and running this year.

I deal a lot with Brasseur Trains up in Northern Michigan and looking at his parts list for this unit it appears he might have the parts in stock but I can't get to him right now with the virus visiting us here in Michigan.

Including a pic of the smoke unit.

Attachments

Images (2)
  • 100_2857
  • 100_2861

I've used this one with good results, I use a wire wheel on my Dremel to remove the ceramic powder coating.  Light touch and go across the resistor in line with the windings.  Given the price, get a few extra in case you screw one up.

16 Ohm Resistor at Digikey

The wick should be FIRMLY in contact with the smoke resistors.  I use the braided wick for these, the pink insulation doesn't last long as a rule.

Last edited by gunrunnerjohn
@Kboruss posted:

I guess I will have to find that post.  Not sure how that would work with the configuration of this k-line GS-4 mechanical puffer.

The one K-Line engine with a piston unit like that,  I placed the fan smoke unit in the shell. The smoke unit stack was modified for a snug fit in the shell stack and a spring was epoxied to the frame to help hold it in place when the shell was mounted.

Pete

@Norton posted:

The one K-Line engine with a piston unit like that,  I placed the fan smoke unit in the shell. The smoke unit stack was modified for a snug fit in the shell stack and a spring was epoxied to the frame to help hold it in place when the shell was mounted.

Pete

Thanks.  Yeah I made a bracket last night out of some stock metal to have it sit in the front shell to give me the correct height.  That’s a good idea with the springs.

Here's my "standard" mount for brass locomotives.  Since the boiler is round with no bottom opening, I stick the spring to the smoke unit.  The threaded funnel gets a brass stack extension added to extend it.  I put the smoke unit in, then screw the stack extension into it while in the locomotive, that keeps the smoke unit sitting there and also allows it to be removed for service.

Attachments

Images (1)
  • mceclip0

Thanks for the reply, John. I was afraid I had hijacked this thread and wouldn't get noticed. ERR kit installed is cruise commander plus large steam sound. The engine is a Lionel 6-18025 that has been previously modified with a large DC can motor and fan driven smoke unit and MTH PS2 electronics. That MTH system was dead, so I replaced it with ERR. This isn't my first ERR install, but it is the first time with a fan driven smoke unit involved. I have used the reed switch connected to pins 2 and 3 for chuff in and will connect the smoke unit to pin 7. But I don't know how to connect the fan motor.

Don't use the MTH smoke unit until you change it's resistors!  Currently, it has two 16 ohm resistors in parallel to make 8 ohms.  That will cook the R4LC triac in a flash.  You need to swap those out for one 20 or 22 ohm resistor for best results. 

The smoke fan control is the very reason I designed the Super-Chuffer II, and getting 4 chuffs/rev was the push to design the Chuff-Generator.  There are other schemes to get chuffing smoke, but I think mine is the most elegant solution.

Click on graphic to enlarge

Super-Chuffer II Installation Diagram

Attachments

Images (1)
  • Super-Chuffer II Installation Diagram
Last edited by gunrunnerjohn

Since we are on the topic of resistors I was wondering about the Resistor needed to switch the cab light to an LED.  I think I saw in super chuffer 2 instructions a 470 ohm resistor for LEDs, but if I am using a 3 v LED rated at 20ma i came up with 750ohm resistor when calculating.  Does Ohms law change with wiring DC LEDS with AC?  I think I read somewhere to also install a blocking diode as well for LEDs.  Would this be connected after the resistor? 

Ohms law does not change, but the effective voltage out of the triac is probably less then what you are using in the formula.  Lionel and atlas used about 1K ohm and diode when running items off track power.  You can try your resistor and see how you like the brightness.  Diode location in the circuit is not important.  Just proper orientation.  G

Since you're only seeing half the waveform, the average current is only half of the current that would flow using 18 volts RMS through a resistor.  The Super-Chuffer has a diode and a FET to control the cab light.  The 470 resistor is the correct value.  No need for a diode, I've already provided that on the Super-Chuffer output for the cab light.

I use incandescent bulbs for the cab light a lot of the time.  It's the one place that I feel the incandescent does a better job than the LED, it gives you a wide dispersal of the light.  For the incandescent bulb, you can use anything from 12V through 18V rated bulbs, again it's only receiving half-wave power.  The lighting circuits for the R2LC/R4LC also provide half-wave power in command mode, and Lionel used 12V rated bulbs for TMCC lighting for years.

Last edited by gunrunnerjohn

Well, except in conventional when Lionel triacs pass full wave.  Hence there are higher rated bulbs used later.  But the expectation is your not running full speed at 18V in conventional, especially the early non cruise engines.

Experiment and see what you like.  My answer was for using outputs off the R2LC, vice John's super chuffer.  Having converted a lot of Lionel and Atlas to DCS I saw what was coming out of the engines.  I know John has too.   Marker and LED HL can also be wired parallel or series which can make a difference in size of resistor too.  G

A few LED lighting wrinkles.

If you're wiring LED's direct to the R2LC or R4LC outputs, you need to include a .01uf capacitor across the lighting output to ground to trigger the triac or your LED with either flicker or not light at all.  The ERR Commander products already has these built in (except for the CC-Lite), so you don't need them for those.  If you are installing LED lighting in a plain TMCC locomotive, you have to add the caps.  Again, for my Super-Chuffer, I have a headlight input from the TMCC, in order for the lighting input to work properly, I have also included the .01uf capacitor on the Super-Chuffer.

Another wrinkle with LED lighting and straight TMCC is the fact that the polarity in command mode is reversed for the R2LC-07 from the R2LC-08 and later versions.  Just another little detail to keep you on your toes.  Finally, if you're adding LED lighting to the old LCRU or LCRU2 equipped locomotive, you're in for a real treat.  The headlight polarity will randomly change on startup to positive or negative, so you have to accommodate either polarity.

Almost enough to make your head spin.  I went with a full ERR cruise commander that I had, and just finished wiring up with a Super Chuffer and Chuff generator.  Figured since I am doing a complete overhaul might as well go with LEDS.  Will keep the cab light as 12v incandescent since I do want the wider disperser of light.  Oh also adding a ngineering Mars simulator that I have on order.  Fun times.  Learning a lot.

I figured I would need a regulator board but not sure which one if coming off headlight output from ERR cruise commander.  Thought about this, but much bigger and run it off track power.  Could adjust dc output with variable control to MaRs simulator but looking for the best option.  I am just winging it here. Lol

https://www.ngineering.com/n2596-specs.htm

do u might have a link to a smaller regulator board?

Well, that's huge and massive overkill for running the MARS simulator.  I seriously doubt you'd fit that in the locomotive!  It's over 2" long, an inch high, and almost an inch wide.  I have the same power module in my parts box, just used a couple to light some dummy locomotives.  You can also get them on eBay for around $4, I had a few of them before they got used in various projects, I have one left.

I'd suggest sky-wiring something like this together, this is the circuit for the little board I posted previously, it has plenty of power for the tiny MARS board.  For this application, like I said, I'd use the 78L08 8V three-terminal regulator.  This at least has a chance of fitting in your locomotive.

For this design, the WHEELS lead would go to the lighting output and the ROLLER lead would go to frame ground.  This is because in command operation the lighting output is negative in respect to frame ground.  As long as you keep the outputs isolated from the frame and just feed the MARS simulator board, all is well.

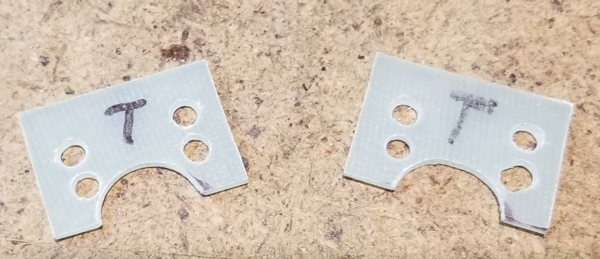
Have fun soldering to the MARS simulator board, they are pretty small.

Attachments

Images (1)
  • mceclip0
Last edited by gunrunnerjohn

You weren’t kidding John, That MARs simulator board is tiny! So having trouble finding a DC Regulator board like u have on eBay.  U don’t have a link?  I am a bit confused on trying to do my own circuit wiring. So need a 22uh inductor, D1 Diode (?), 78L08 8V three-terminal regulator, and a few polarized fixed capacitors?  This should be interesting shopping trip at Mouser or Digi-key.  I am sure I will probably order the wrong things.  Just a novice here.

Well, you won't find that little regulator board on eBay, I made that one for myself.  You can dispense with the 1uf capacitor as a rule, it's there to provide stability of the 3-terminal regulator.  It's frequently omitted, I just put it there as good design practice.

Here's the BOM from the hip, all of this is easily sourced.

  • 22uh inductor (25ma or greater current rating)
  • 1N4003 Diode
  • 100uf (or larger 35V Cap
  • 78L08 3-terminal regulator (TO-92)

Follow the above diagram and you should have an 8VDC supply.

Or you can send me an email and I'll sell you that little module ready to go.

Yep, the "ROLLER" lead has to have positive going power, for the lighting outputs in command mode, that would be ground.  Note that anything on the output of the power supply MUST be isolated from chassis ground.

You do not want to interrupt the headlight input on pin-3 of the Super-Chuffer, that comes directly from the TMCC package.  You just tap into that to also power the supply for the MARS light.  In addition, you don't need the 22uh choke if you power it from the headlight output and not track power.

Add Reply

Post

OGR Publishing, Inc., 1310 Eastside Centre Ct, Suite 6, Mountain Home, AR 72653
800-980-OGRR (6477)
www.ogaugerr.com

×
×
×
×
Link copied to your clipboard.
×
×