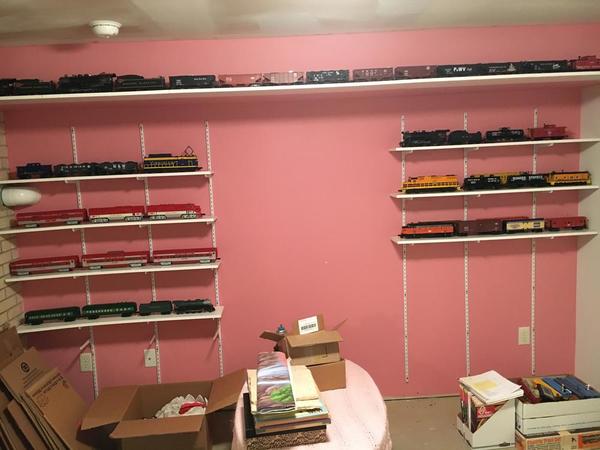
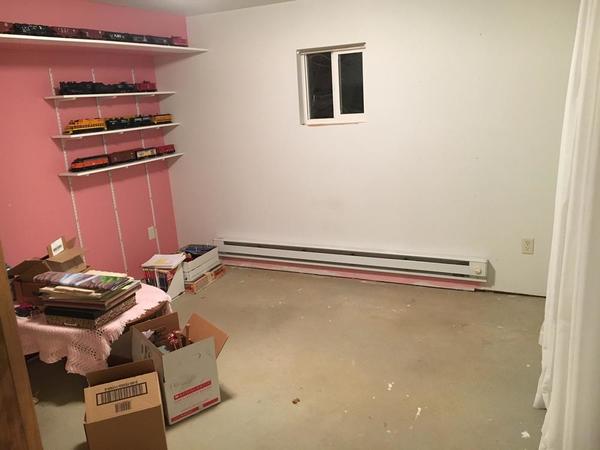
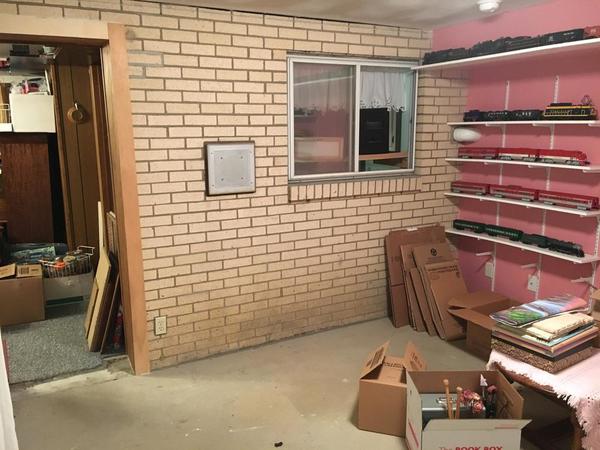
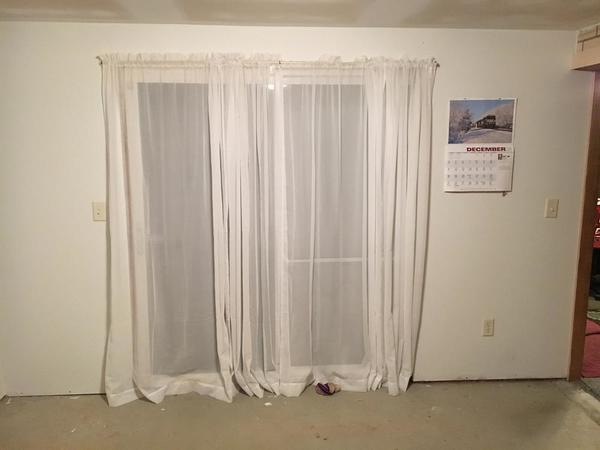
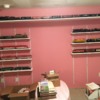
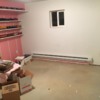
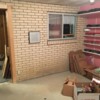
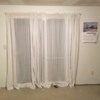
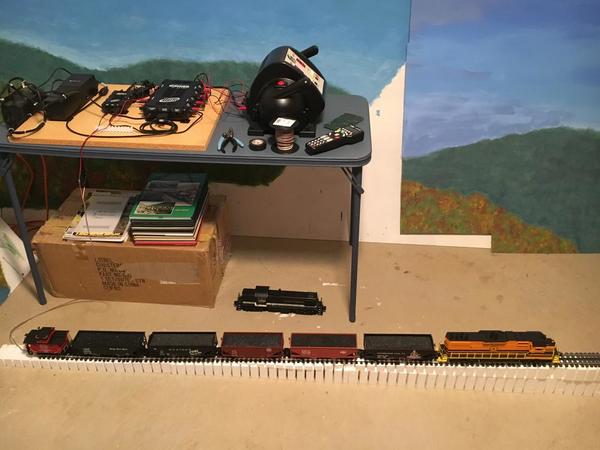
As I have mentioned on other topics, our last daughter married in September, leaving us empty nesters.  Just a week ago, I helped her and our son-in-law move the rest of her things out of an 11’ 6” x 11’ 4” basement room she had been using as an art studio.  This will be my layout room.  While I have built layouts in HO and N scales, this will be my first in O gauge, not counting the temporary 4x8 temporary layout that has our Christmas theme and my Ceiling Central RR in a similarly sized room diagonal to the new layout room.

I have hesitated starting a topic of my own layout design as I have been struggling getting some thoughts down on what I am looking to accomplish and realistically look at obstacles and how to address them.  First, this is the most room I have ever had for a layout since my first back when I was about 12, but I never built in O gauge, so there are definite restrictions.

I envision this layout depicting the Appalachians, as I have observed in my home state of Pennsylvania and states of Virginia and West Virginia, where I have lived in the past.  It seems I like anything that was around before I was born in 1956, so steam to diesel transition era works.  I am not sticking to a year or decade.  If there is a car or engine I like that is a bit newer, it will be on the layout.  Here are some things I want to include:

  1. A small town
  2. Some mountains
  3. I want a look of the trains going somewhere, but realize I may have to rely on imagination in a room less than 12 x 12
  4. Coal trains and operating accessories
  5. Logging trains and operating accessories
  6. Mixed freight
  7. Passenger trains
  8. An area of operating accessories for future grandchildren which could be at a lower level than the rest of the track.
  9. There are more I will add as they come to mind or as you ask questions.

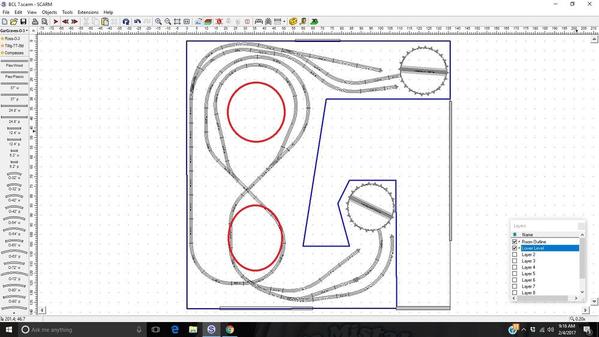
Some thoughts on how to accomplish this in such a small space.  As the preliminary SCARM diagram shows. There is a sliding glass door on the right-hand wall as you enter the door from the rest of the basement.  I need to keep full access to it.  My thoughts have been a ‘U’ shaped layout with the open end of the ‘U’ facing the door.  There are 2 windows as well.  I do not want to be stretching across the layout, but may have to have turnback loops at the ends of the ‘U’.  To accommodate my Premier N&W J 611, Weaver Gold Edition B&O Cincinnatian, and their consists, I think I would have to include a loop around the room.  My thoughts have been to put that at the highest level, with lift-out bridges at the opening of the ‘U’.

These are initial thoughts that have been with me for a good while.  It is time to put them out there for anyone who wishes to participate to ask questions, give suggestions, or just chat in general.  At the outset, I want to thank everyone who contributes in any way.  I want to get this close to what works best for me, because I do not want to count on doing heavy rebuilding at a later age.  At 60, I realize I could be hampered in the heavier construction sooner than I would hope.

Last edited by Allan Miller
Original Post

Replies sorted oldest to newest

Mark

From your description, it seems that you have an ambitious plan ahead.  What type of track are you planning to use?  If you decide to go with tubular, I may be able to help you with some pieces, turn-outs and miscellaneous stuff.  Also, when it come time for construction, and you need help, I would be happy to be of service.   I've got lots of tools and love to build stuff.  


I don't know what the minimum curve radius is for your Weaver cars, but I would suggest a single-track "hi-line" on fills and trestles like the P&WV/N&W as an O-72 or O-54 loop around the back of the layout (along the walls) with a siding to run your passenger trains and a through freight. To make the trains seem like they're going somewhere, make a backdrop that conceals a small 3 or 4 track staging yard. Maybe disguise the end of the backdrop with tunnels. Below the grade of the hi-line, you can have a point-to-point coal mine and timber road that interchanges with your hi-line. The coal road would probably have a maximum radius of O-42, and weave beneath the hi-line. If I have a free day later this week, I'll try to mock it up on SCARM. 

Also, if you need any help, let me know, and I'll see if I can find some time on a weekend. 

Last edited by pittsburghrailfan
Trainlover160 posted:

Nice Mark, Looking forward to pic updates. I would be careful though with that wall heater, and would keep layout legs and boxes at a safe distance.

Joe Gozzo

That is for sure Joe!  We actually never turned it on the whole time our daughter had her studio.  The house we had when the girls were toddlers had them,  I found a stuffed animal next to one and it's fur was scorched.  I have a convection heater for the coldest weather.

Bob Severin posted:

Mark

From your description, it seems that you have an ambitious plan ahead.  What type of track are you planning to use?  If you decide to go with tubular, I may be able to help you with some pieces, turn-outs and miscellaneous stuff.  Also, when it come time for construction, and you need help, I would be happy to be of service.   I've got lots of tools and love to build stuff.  


Bob,

Thank you very much!!  I agree it is ambitious.  I think it will need more than one level.  I plan to use GarGraves and Ross on the main running areas, but may use tubular on sidings or a little yard for accessories.  Stay tuned to keep up to date,  

pittsburghrailfan posted:

I don't know what the minimum curve radius is for your Weaver cars, but I would suggest a single-track "hi-line" on fills and trestles like the P&WV/N&W as an O-72 or O-54 loop around the back of the layout (along the walls) with a siding to run your passenger trains and a through freight. To make the trains seem like they're going somewhere, make a backdrop that conceals a small 3 or 4 track staging yard. Maybe disguise the end of the backdrop with tunnels. Below the grade of the hi-line, you can have a point-to-point coal mine and timber road that interchanges with your hi-line. The coal road would probably have a maximum radius of O-42, and weave beneath the hi-line. If I have a free day later this week, I'll try to mock it up on SCARM. 

Also, if you need any help, let me know, and I'll see if I can find some time on a weekend. 

Dan,

I certainly like the way you are thinking!  The P&WV/N&W is an example I did not think of, since I am more familiar with railroads to the North.  That would call for some cool trestles indeed!  I will have to search for some photos.  I agree, the Weaver cars say they will take O54, but recommend O72.  They work on O54, but I have tried everything on O72 on the patio, and that is defiantly better.  One thing that helps viewing is being inside the curve instead of outside.  Yes, O42 would work for the coal road, weaving under the high line.  I have an MTH Premier H9 consolidation, a Premier 0-8-0 switcher, K-Line Pennsy A5, some F3 and F7 sets, 2 RS1 units; all scale.  I like 2-bay hoppers, shorter log cars, and 40-foot boxcars.  

Thank you very much!!!

My rebuild is going to be a similar size, roughly12-1/12 x 11=1/2 along with a complete redo of the basement into and I hate this word, "mancave". I was originally planning a full blown take no prisoners layout but since I need to isolate the trains from our cats a sealed off train room was the way to go. It's tough tho having a blank canvas and a million ideas, I wish you luck and look forward to what you come up with.


Jerry

For your main line I would definitely go with 072 curves.  If you use any tubular track I have a big box of almost new in the attic that is yours to use. The first thing I would do is tunnel through the wall in to the basement !!  My layout is about  11 1/2 ft square so space is at a premium.  I would use backdrops and false front buildings. accessories are neat but take up a lot of room.  I have a big opening in the middle for access, would love to use the space but the access is too nice to lose. Do you plan point to point, loops or both ??

baltimoretrainworks posted:

My rebuild is going to be a similar size, roughly12-1/12 x 11=1/2 along with a complete redo of the basement into and I hate this word, "mancave". I was originally planning a full blown take no prisoners layout but since I need to isolate the trains from our cats a sealed off train room was the way to go. It's tough tho having a blank canvas and a million ideas, I wish you luck and look forward to what you come up with.


Jerry

Hey Jerry!  I don't like the term 'man cave' either!  Walk out basement to the patio isn't really a cave anyway!  I know I have more ideas than room. Thank you, and good luck to you too!

jim pastorius posted:

For your main line I would definitely go with 072 curves.  If you use any tubular track I have a big box of almost new in the attic that is yours to use. The first thing I would do is tunnel through the wall in to the basement !!  My layout is about  11 1/2 ft square so space is at a premium.  I would use backdrops and false front buildings. accessories are neat but take up a lot of room.  I have a big opening in the middle for access, would love to use the space but the access is too nice to lose. Do you plan point to point, loops or both ??

Jim,

Thank you!  This room was part of an addition my in-laws put on so there is a brick and block wall to the next room.  My wife made a suggestion that I go through the door into the family room and connect onto the Ceiling Central RR, which was also her suggestion.  I thought it wouldn't work because everyone would hit their head, but looking or it, I could put a bridge in the upper right corner of the door and connect on.  If so, I would have to get a track up very high in the new room.  The other side of the brick wall window is the laundry area, and it won't work to run tracks out there.

i would like to do a loop to loop to make it look like the trains are returning, but may end up settling for loops only.

I think your plan is already a lot better than I could come up with. I am not much of a track planner, others here are much much better. I have been fiddling with an addition to my layout for about 1.5 years now and I don't think I am any closer than when I started. I think you have a much better idea of what you want as well. I also struggle with that part.

Looks like you also have some friends willing to lend a hand near by. I think it's good just to have them stop by and offer suggestions too. I think the natural brick wall is kind of neat too. Might be neat if you could work that into the layout some how, it would be something different than most. Just a thought...

Anyway, I wish you luck and I will be following along.  

Mark Boyce posted:
 The other side of the brick wall window is the laundry area, and it won't work to run tracks out there.

The first thing I thought was take it through the window and then I read it was your laundry room.   Could you take it right out the window and right back into the room?  It may give you more room for accessories.   

I like the idea of the larger curves on the bottom line and sharper curves on the second level.

Ever think about a point-to-point option for a third line?

Tim,

The washer, dryer, and stationary tub are right beyond the window, and that is all the wider the room is.  Yes, I could go out about a foot and a half at the most, as I already have a shelf there where I mounted the convection heater for my daughter when she used the room for an art studio.

Point to point third line?  I have thought a third line may be something at a low level where kids could run less expensive trains.  I have also thought of getting a Shay or Heisler someday to go into the mountains for logging.  Point to point could work for that.  Good point to bring up!!  Thank you!


Good to see the creative juices are flowing Mark. I would recommend that if you want to add operating accessories, figure out where they will go first. They take up a lot more space than you think. I like the multiple lines also. Gives you a place to showcase your collection and someplace to "play". A point to point with industries may be a good way to include the accessories you want. Maybe add a by-pass siding or two on the main lines so that you can have multiple trains ready to go.

Looking forward to more updates.

Bob

Hi Mark,

I know this design is very preliminary and I assume you know, but I thought I'd mention it just in case, that your lower level track is set to a height of 2.99" and the upper level to 6.1". Obviously, this will not work.

You also have your upper level track crossing over itself on the curves in the lower left section. Do you intend to have an over/under grade there or a crossing? The over/under on supports might be a challenge, but if your intent was a crossing, I don't believe Ross makes a curved one and the standard straight ones will change the upper level geometry.

You mentioned using GarGraves track with Ross switches. You're currently using GG switches, so I thought I'd also mention that the footprint of the Ross switches is quite different. I added a Ross O54 just to show you the difference in size. I used the GG O54 you had and didn't play with O42 or O72.

I hope you don't mind, but I also played around a bit to see what an over/under would look like on the upper level and added a crossover to the lower level because it looked like you were leaning in that direction. I wasn't sure of the layout size inside the room, so I just used 138x115. I look forward to seeing where this goes.

Capture1

Capture2


Attachments

Images (2)
  • Capture1
  • Capture2

You seem to have a lot in mind in what will be a limited space.  Logging and a mine, even a representation of those functions will take up a great deal of space.  Think long and hard about what is the most appealing and build that out.  This type of space lends itself to the small details.  A well detailed mine or logging operation but probably not both would be fun to build.  I agree with the person above about having a hidden staging track(s).  The train could leave and be replaced by something else.  Having the train leave your sightline automatically gives the appearance of a much larger space.  I would look at other sources for ideas like the online magazine Model Railroad Hobbyist or back issues of Model Railroad Planning for ideas.  Even though those sources tend to favor HO, many of the ideas can be scaled up to O with some editing.  And if you have to have a logging operation consider a separate line using Bachman 0n30 equipment.  Terrific looking stuff but it may be a better fit in the available space.

Bob, Thank you for the comment about the operating accessories.  I have a few I picked up when I saw them at good prices, took them out of the boxes for a look see, and then boxed them up again.  Now that I have the room free, I need to get them out and just set them around to see how much room they and key static structures I have collected will take.  It is a good Idea, as I can then mark squares on the plan where they will go.  Thank you.

Dave and Carl, I will comment separably to your suggestions.

Mike, Thank you for the well wishes on the new layout!  I am glad to see you are working the kinks out of your plan as well.  I guess you got the major projects on the new house under control, so this winter is to start the layout.  Good luck on yours too.  I hope to run into you again soon.  I enjoyed talking with you at Patrick H's.

Jim, Thank you on the offer on the track.  Yes, I found the plan Carl posted interesting, and maybe a good starting point.

NECRails, I agree, I just don't have the space to have models of both logging areas and coal mines at all.  I think I will have to select one, then just run through trains of the other.  I was in HO for many years before switching to O gauge about 5 years ago.  I have read up on the staging concept quite a bit, attempted it on a very small layout, and think it would be good to try to incorporate.  I recently had a thought that may be a useful way to incorporate the Ceiling Central RR from the other room.  Rail height is 81" above the floor.  That is 2" above the top of the door jam, so If I ramped down about 7", I could get trains into the new layout room.  I actually bought a Bachmann On30 engine and 3 or 4 cars to see if I liked bigger scales.  Once I got into O 3-rail, I sold them to a friend; but I could certainly buy another one and fit it into a 3-rail layout.

Thank you everyone.

DoubleDAZ posted:

Hi Mark,

I know this design is very preliminary and I assume you know, but I thought I'd mention it just in case, that your lower level track is set to a height of 2.99" and the upper level to 6.1". Obviously, this will not work.

You also have your upper level track crossing over itself on the curves in the lower left section. Do you intend to have an over/under grade there or a crossing? The over/under on supports might be a challenge, but if your intent was a crossing, I don't believe Ross makes a curved one and the standard straight ones will change the upper level geometry.

You mentioned using GarGraves track with Ross switches. You're currently using GG switches, so I thought I'd also mention that the footprint of the Ross switches is quite different. I added a Ross O54 just to show you the difference in size. I used the GG O54 you had and didn't play with O42 or O72.

I hope you don't mind, but I also played around a bit to see what an over/under would look like on the upper level and added a crossover to the lower level because it looked like you were leaning in that direction. I wasn't sure of the layout size inside the room, so I just used 138x115. I look forward to seeing where this goes.

Capture1

Capture2


Dave,

Your assumptions were all correct!  You had me figured from past conversations.  As far as the elevations, I tried to change them, but never figured it out.  I don't even know where I'm starting yet.  You were also correct about the upper loops, I was thinking of running them over and under as you did.  I didn't even know if the grades would be practical in that room, but thought the only way to find out was to try it in SCARM.  I was not aware Ross switches had different dimensions than GarGraves.  Thank you!!  So, what you shared is just what I had in mind for a starting point.  Of course, the upper level may only work as a once around with no grades, and I was thinking of sidings or a little yard for the accessories, but they can be added.  You gave me a great starting point!!

Thank you!!

Moonman posted:

The MTH 45-1105 Spare Room & Pacific in your room.

45-1105_3D145-1105_3D2

Carl,

I did not even know that that MTH had 45-xxxx track plans, bills of materials out there on their site.  Thank you!  Yes, this plan is a good example of a starting point I had in mind for one level.  I will have to examine it more closely!  You are most correct about leaving people space.  I want to share the layout with others, of course only a small number at a time.  Also, at 60 years of age, I want to make it easy on me as I age to work with, add to, and maintain.  I need to keep in mind not to try to cram too much into the space.  Thank you on a reality check!!

Mark:  Maybe you should keep the pink walls?  Those are kind of cool!  You have some real good specific ideas.  That's a good start.  One thing you can do to create the illusion that the trains are going somewhere is to have staging drawers under your layout.  No one, not even folks with basements have enough storage space.  A guy I know buys those plastic clear containers from Walmart that slide in and out like a small dresser.  Those would be ideal for extra storage.

I see you want to run passenger cars.  Since you aren't holding true to an area, purchase the early 1900s small passenger coaches and pull with an 0-4-0 steamer!  MTH just recently came out with an 0-4-0 and it will look great in a smaller area.

I would recommend buying the under-sized (traditional) stuff, because the smaller stuff will look better on smaller curves.  Even if you get full-scale "O" stuff, but the smaller pieces of equipment.  Be sure to check out the MTH 44 ton switcher.  It looks awesome and is small even in full size "O."

Please send me the exact dimensions for your room.  Put in ALL obstructions including doors, windows, there size and hieight off floor for base of window etc.  If there is any other obstruction, be sure to tell me.  Usually, I would charge for detailed track design, but for you it's a freebie.  You can come up with some really cool stuff in small spaces.


I like the coal and logging ideas....need to figure out a loads in and empties out for both...

Mark , Finally getting to this... Plan is interesting but so are the ideas everyone else has chimed in with. The MTH plan could be expanded with modification. Either way looking forward to seeing this build as I know you have waited a long time for this.  I just cant help but think that you married her off so you can have a train room....

suzukovich posted:

Mark , Finally getting to this... Plan is interesting but so are the ideas everyone else has chimed in with. The MTH plan could be expanded with modification. Either way looking forward to seeing this build as I know you have waited a long time for this.  I just cant help but think that you married her off so you can have a train room....

Thank you Doug for the encouragement!!

How did you guess??    Actually it took him almost 9 years to pop the question!  We thought he never would!!  

John C. posted:

Mark:  Maybe you should keep the pink walls?  Those are kind of cool!  You have some real good specific ideas.  That's a good start.  One thing you can do to create the illusion that the trains are going somewhere is to have staging drawers under your layout.  No one, not even folks with basements have enough storage space.  A guy I know buys those plastic clear containers from Walmart that slide in and out like a small dresser.  Those would be ideal for extra storage.

I see you want to run passenger cars.  Since you aren't holding true to an area, purchase the early 1900s small passenger coaches and pull with an 0-4-0 steamer!  MTH just recently came out with an 0-4-0 and it will look great in a smaller area.

I would recommend buying the under-sized (traditional) stuff, because the smaller stuff will look better on smaller curves.  Even if you get full-scale "O" stuff, but the smaller pieces of equipment.  Be sure to check out the MTH 44 ton switcher.  It looks awesome and is small even in full size "O."

Please send me the exact dimensions for your room.  Put in ALL obstructions including doors, windows, there size and hieight off floor for base of window etc.  If there is any other obstruction, be sure to tell me.  Usually, I would charge for detailed track design, but for you it's a freebie.  You can come up with some really cool stuff in small spaces.


I like the coal and logging ideas....need to figure out a loads in and empties out for both...

One of my sons-in-law said I should keep the pink wall and make it a sunset scene.  I have read about and seen photos of the staging drawers.  A good alternative, and I like plastic bin idea.  The less 'furniture ' I have to build, the better.  lol

Another mention of the MTH 44-ton unit!  I have had several folks suggest it.  Maybe I should.  The Western Maryland one would be my pick!  :-)  I have liked the loads in empties out idea for a long time.

Thank you for the offer.  I will send dimensions.

Mark Boyce posted:

As I have mentioned on other topics, our last daughter married in September, leaving us empty nesters.  Just a week ago, I helped her and our son-in-law move the rest of her things out of an 11’ 6” x 11’ 4” basement room she had been using as an art studio.  This will be my layout room.  While I have built layouts in HO and N scales, this will be my first in O gauge, not counting the temporary 4x8 temporary layout that has our Christmas theme and my Ceiling Central RR in a similarly sized room diagonal to the new layout room.

I have hesitated starting a topic of my own layout design as I have been struggling getting some thoughts down on what I am looking to accomplish and realistically look at obstacles and how to address them.  First, this is the most room I have ever had for a layout since my first back when I was about 12, but I never built in O gauge, so there are definite restrictions.

I envision this layout depicting the Appalachians, as I have observed in my home state of Pennsylvania and states of Virginia and West Virginia, where I have lived in the past.  It seems I like anything that was around before I was born in 1956, so steam to diesel transition era works.  I am not sticking to a year or decade.  If there is a car or engine I like that is a bit newer, it will be on the layout.  Here are some things I want to include:

  1. A small town
  2. Some mountains
  3. I want a look of the trains going somewhere, but realize I may have to rely on imagination in a room less than 12 x 12
  4. Coal trains and operating accessories
  5. Logging trains and operating accessories
  6. Mixed freight
  7. Passenger trains
  8. An area of operating accessories for future grandchildren which could be at a lower level than the rest of the track.
  9. There are more I will add as they come to mind or as you ask questions.

Some thoughts on how to accomplish this in such a small space.  As the preliminary SCARM diagram shows. There is a sliding glass door on the right-hand wall as you enter the door from the rest of the basement.  I need to keep full access to it.  My thoughts have been a ‘U’ shaped layout with the open end of the ‘U’ facing the door.  There are 2 windows as well.  I do not want to be stretching across the layout, but may have to have turnback loops at the ends of the ‘U’.  To accommodate my Premier N&W J 611, Weaver Gold Edition B&O Cincinnatian, and their consists, I think I would have to include a loop around the room.  My thoughts have been to put that at the highest level, with lift-out bridges at the opening of the ‘U’.

These are initial thoughts that have been with me for a good while.  It is time to put them out there for anyone who wishes to participate to ask questions, give suggestions, or just chat in general.  At the outset, I want to thank everyone who contributes in any way.  I want to get this close to what works best for me, because I do not want to count on doing heavy rebuilding at a later age.  At 60, I realize I could be hampered in the heavier construction sooner than I would hope.

Mark:  After re-reading your Post much more closely today, I have some thoughts to share with you to consider.  It sounds like you want four layouts in that space: a logging line, a coal line, an operating layout at a lower level for future grandchildren and a layout loop big enough to accommodate your larger engines and passenger trains.  That will be a challenge to accomplish well.

Further, you wrote that you have another room which has your Ceiling Central RR and a "temporary" Christmas themed layout.

If I were in your boots (shoes):

FIRST, I would, if it isn't already possible, make your ceiling central RR able to accommodate your Premier N&W J 611, Weaver Gold Edition B&O Cincinnatian, and their consists.  Those trains are "too big" for a 12 x 12 room.  I mean yes you can make them work, but their size will compromise the scenery/display integrity.  In a smaller area, it is a great idea to either use undersized O stuff or small full-sized stuff.  MTH has that 44 tonner and an 0-4-0 both Premier Line that are full-size but could be used effectively on the smallest layouts.  They are both awesome!

SECOND: I would make your "temporary" Christmas themed layout into a toy train layout featuring accessories for future grandkids.  The reality is: the layout you build for YOU is going to be entirely different than for small children.  I don't know what your temporary is constructed on, but build one on a two-inch thick foam 8 by 4 sheet.  These foam sheets are light as a feather and simple to move.  You could construct a simple layout or figure 8 on this sheet and place the operating accessories on it.  It could be on the floor for the smaller ones to play with.  WHAT I DO WHEN SMALL KIDS ARE COMING is break out the loop of Lionel Fastrak and lay it on my foam sheet, which I lay on top of my pool table and the kids can play with it to their hearts content. I use the tougher, harder-to-break engines and cars.

THIRD: DESIGN a layout for YOU and other adults that would be your coal carrier and logging line in the Appalachian Mountains in YOUR room.  I'm kind of torn, and its entirely up to you anyway, of whether or NOT to make this one railroad or two--the same layout in the same place.  Many people for logging lines use the On3 stuff (O scale that runs on HO track).  The engines are specialty shays, climaxes, etc., engines that were specifically made for steep grades.  It might be neat to have a separate logging line.  It could even pass through the same scenery or you could make two levels in that room: one for the logging and the other for the coal hauler.  You'll have to think about that and let me know.

FOURTH:  If you go with having the coal and logs as ONE line and that may be the best, there are several possibilities that don't include reversing loops at each end of the line.  It may be difficult to put into words what I'm attempting to describe but you may have  "u" shape around the outer walls of the room.  Near the "tips" (Ends) of the "U" there would be an adjacent siding about four feet long.  Your consists would need to be very short, 3 to 4 cars total including caboose, and a short engine.  The engine would uncouple from these cars immediately at a track switch (turnout) and pull forward through the switch.  You would "throw" the switch and back the engine onto the adjacent siding rolling past the consists that it just uncoupled from.  The engine would go to the next turnout, where it would reverse again and couple onto the rear of the train it just uncoupled from at the start of this sequence for the return trip home.  There would be a similar arrangement of track-work on the opposite side of your "U" and this process would be repeated again.  One side would be your loading side.  The other side would be your unloading place.  You could have staging drawers under the layout to swap out empties and loads.  I would consider buying an 0-4-0 and 44 tonner for YOUR space.  It would be fun to switch around coal and logs in this arrangement.  In my mind, I picture a very old time town stationed in the mountains.  Given your space constraints, it would be idea to have the town painted onto the backdrops with the mountains looming right behind.  It would be neat to extend your scenery over the front edge of your layout and have the backdrops rise completely to the ceiling.

I have been thinking of a "stacking" arrangement for you as well where both of your reversing loops at the "ends" of your run would be over/under each other to maximize your space.  There would be access to clean/build/maintain in the center of these probably 36 diameter bubbles if you go this route.  DO YOU HAVE THE SKILL to build a lift out or hinged section across your sliding glass doors that can EASILY be moved for access/egress?

I'm going to await your response...if you want to call me and discuss this in more detail I can private message you my number.  YOU ARE GOING TO HAVE TO DECIDE HOW MANY LAYOUTS YOU WANT IN THAT SPACE.  :-)  I want everything too and it just can't be done well.  God knows I've tried.

John


OK, Mark, I am going to jump in with MY track plan for a layout.  My layout is the same size as your room so it makes it easy to visualize. Since I am illiterate with computers, I am going to draw it by hand-to scale- and send you a digital image.  This will be a general main line plan with room for  secondary lines and branches. it can be run as a looop or two or point to point plus some could be elevated.   Jim P.

Mark:

After reading a comment from your about the 44 tonner Western Maryland switcher I began searching some history.  CHECK THIS OUT!  I have a great idea for you! 

The West Virginia Central and Pittsburg Railway (WVC&P) was a railroad in West Virginia and Maryland operating in the late 19th and early 20th centuries. It had main lines radiating from Elkins, West Virginia in four principal directions: north to Cumberland, Maryland; west to Belington, WV; south to Huttonsville, WV; and east to Durbin, WV. Some of the routes were constructed through  subsidiary companies, the Piedmont and Cumberland Railway and the Coal and Iron Railway.


West Virginia coal country

The West Virginia Central and Pittsburg Railway (WVC&P) began as a narrow gauge line in 1880, its name and gauge changed in 1881 and in the ensuing years it opened a huge swath of timber and coal territory in the Allegheny Highlands of West Virginia. The railroad was directly responsible for the creation of such towns as DavisThomas, and Parsons.

In the large valley near the mouth of Leading Creek and the Tygart Valley River, the WVC&P constructed the city of Elkins (named after investor Stephen Benton Elkins). Elkins was home to a large rail yard for the railroad and served as the hub of Western Maryland and Chessie System operations in the region well into the 1980s.[citation needed]

The WVC&P was sold to the Fuller Syndicate in 1902 and was merged into the Western Maryland in 1905. Known as the Thomas Subdivision, the line connected to the Western Maryland mainline at Maryland Junction, south of Cumberland.

This line, famous for its Black Water Grade in Blackwater Canyon, became an important part of the Western Maryland's success until its eventual abandonment in the 1970s.

This railroad became the Western Maryland in 1905.

The Canyon extends from the foot of Blackwater Falls, near the town of Davis, to the confluence of the Blackwater River with Dry Fork (forming the Black Fork), near the town of Hendricks.

 Davis became a center for loggingsawmills and leather tanning

HERE IS MY IDEA FOR YOU................................................

NAME YOUR RAILROAD:  The Blackwater Canyon Lines

Location:  West Virgina from small town of Davis (visible) to town (unmodeled) of Hendricks through Blackwater Canyon.  Passing thru canyon across curved stone arched bridges!  That would be cool!

COMMODITIES:  LOGS and Coal!  What else?

ERA: varies, but earlier days (1900s) are better because of smaller engines and consists will make a model appear LARGER.

Plausiblity?  Believable, OH YES!

PURPOSE?  To haul coal and logs to their destination thru Blackwater Canyon!

PARTICIPATION: with a point-to-point style absolutely.  Design for minimally two Operators may keep commodities moving along this line, which would include steep grades and sharper curvature; EVEN IN REAL LIFE.

Mark:  for what you were envisioning THIS RAILROAD IS AN IDEAL FIT!  Use this railroad as a "model" and source for information.  Don't try to duplicate it.  Just try to develop your Design to be "in tune" with this.  I was looking at pictures of the canyon, river and area--even the town of Davis which is still a bump today, 600+ people.

You would have a fantastic idea by viewing pictures and gathering other info. about what this area looks like and what was actually there.

This theme would make for an awesome model of a railroad! 


ATION

Mark Boyce posted:
baltimoretrainworks posted:

My rebuild is going to be a similar size, roughly12-1/12 x 11=1/2 along with a complete redo of the basement into and I hate this word, "mancave". I was originally planning a full blown take no prisoners layout but since I need to isolate the trains from our cats a sealed off train room was the way to go. It's tough tho having a blank canvas and a million ideas, I wish you luck and look forward to what you come up with.


Jerry

Hey Jerry!  I don't like the term 'man cave' either!  Walk out basement to the patio isn't really a cave anyway!  I know I have more ideas than room. Thank you, and good luck to you too!

Mark - Its great that you are building this railroad!!  I look forward to seeing photos of your progress as your project evolves.  There's nothing like a blank canvas to inspire ideas.   I do agree with you and Jerry that having all these ideas bubbling up at once can be overwhelming and at the same time can be very enjoyable because, at least for me, its like being a kid again letting our imagines roam as if there are no limits.  Enjoy your process to the max!  I'm very happy for you!!  

 Jerry - I also agree with you and Mark about the term " man cave".  Since my layout is up on the second floor I sort of have a "man loft"  


Mark,

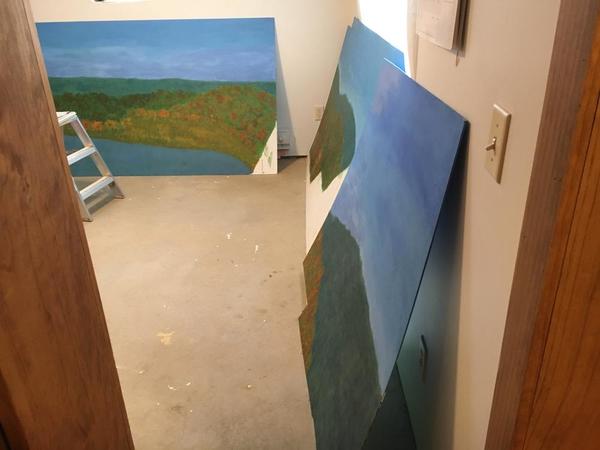
First of all I am happy to see that your finally able to start a layout of your own!  Now, after looking at your room pictures, if you can't take out that window (The one in the brick wall) and continue the layout into the next room, then I think a multi level design will be the best bet.  I have a old book, my father in law works at a library so he finds me a lot of older material, but it shows multi level design layouts, very cool in my opinion.  Let me know if you want to take a look at it, I'll figure out a way to get it to you. 

With a design like that you could have three levels, separated, all with different themes, and be able to run several trains.  I haven't worked with SCARM in awhile but I'll see what I can muster up, probably better if I just drew it on paper, LOL.

Darren

Mark:  Just a short note:  you don't have to worry about the window.  On the Glacier Line there are three (3) windows that you never see.  Two are behind the backdrop.  The pieces of backdrop in front of both windows may be removed in seconds.  You can do the same.  It will save you the expense/trouble and the "next" people who live there would probably prefer a window to a train layout.  People have no taste!

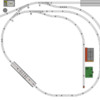
Mark, I always get concerned when someone says they have a small space where they want to run O72 curves, especially for a passenger train. Unfortunately, O72 doesn't leave much room for anything else when it comes to things like logging and coal operations. Since your better half suggested joining up with the ceiling layout in the other room have you considered expanding the ceiling layout into the new space and using it for your passenger run? You could come into the new space where there'd be a cityscape on the wall, perhaps with bas relief storefronts, etc., and a passenger station. Moving the larger equipment off the main layout would free it up for the logging and coal operations, perhaps on separate levels. Using O54 or even O42 curves gives you a lot more space for loop2loop, folded dog bones, etc. Here's a very early design I did for 10.8x12 using O31 ScaleTrax to show how much or how little track will fit that space. I don't have it in SCARM, but could convert it easy enough and change it to GG/Ross O42/O54, but I offer it just for idea value. FWIW, the bridges were going to be lift-outs and the blue would have been a fold down panel.

Capture


Attachments

Images (1)
  • Capture

I appreciate all responses!  I put out the list of all I would like just to see what responses I would get.  I agree, the list is too much for the space.  Yes I could stack levels, but I think it would be a bit overwhelming, both to build, but to operate too.

I agree the big passenger trains would overwhelm any scenes in 12x12.  I am not happy with how I did the corners on the Ceiling Central and have seen some ways to improve them.  I could make them a little wider to handle the big passenger engines and cars.

Last edited by Mark Boyce
John C. posted:
Mark Boyce posted:

I appreciate all responses!  I put out the list of all I would like just to see what responses I would get.  I agree, the list is 

The list is...???????????????????????  :-)  Don't keep us in suspense man!

Ha, ha!  I hit the wrong button and it posted.  That's what I get for using the cell phone to type.  lol. You got the first part.  I'll post more in a bit.  It is good.

I'm back.  John, have you been in my mind or have some kind of surveillance into my past?    Your information about the Western Maryland, the Blackwater Canyon and the action around it is something I researched many years ago.  Long before I worked at Mt. Storm Power Station not far from Davis in the early '90s, I had come upon the WM and liked it.  Once we moved to Keyser, WV and I started working on the mountain, I did quite a bit of investigation.  So much so, that once we moved back to Pennsylvania in '96, I planned an HO layout based on a lot of what you have shared.  I got some benchwork up and a little track, bought some HO Western Maryland engines and freight cars, and ran them on the first track.  Alas, we decided to buy a smaller house, and with our family's growing activities, I never went any further.  Then in this house without a layout, I started looking at O scale, bought a building kit and liked the larger size.  Then I bought a Bachmann On30 shay and a three-pack of log cars.  I liked it.  However, I kept realizing I liked the B&O, and the N&W, and our local Bessemer & Lake Erie, and, and...

It was about that time, I picked up an O Gauge Railroading magazine in a grocery store of all places.  I had never seen the magazine before probably even as a 12-year old I shied away from "toy trains".  Scale modeling was my thing.  I was impressed, I saw the article on Dave Minarik's layout in his Mercer Junction Train Shoppe, just 45 minute drive from home, which I visited a week or two later, and the rest is how I ended up here.

I initially had thoughts of having an On30 logging line along with O gauge 3-rail, but as I got so interested in Premier and current Lionel offerings, interest in the On30 waned and I sold it to buy 3-rail.  

So, I wrote all that to say, you have opened a concept for a layout that I have already researched pretty thoroughly, but need to refresh my memory.  I am with you on basing the operations on something like the Blackwater Grade, Davis, etc.  I can picture Davis in my mind, and where I saw where the trains went is if I had taken photographs.  I have plenty of smaller engines and cars.  The only things long are the Premier N&W J and 4 Lionel Powhatan Arrow cars and the Cincinatian with 5 cars.  I never intended to buy anything that big, but I had seen the J under steam back in the early '90s, chased it on the old Southern route from Alexandria to Charlotesville.  I loved that train.  While living in Keyser, I also researched the old 17-mile grade to Oakland, Maryland, and met an old timer who modeled B&O in HO.  He lived a block from the old B&O tracks, and said he used to watch the Cincinatian.  He had an early brass model of the train in Ho and ran it for me.  That along with reading about it, made it special.  In both cases, I just happened on fantastic deals on the O gauge models I bought.

I need to rebuild the Ceiling Central RR in the corners, which I am not happy with.  I just need to make them a little wider to handle the broader curves for the two passenger train.  Everyone is correct, they don't fit into a concept for the main layout in the new room.  I could run them through the door into the ceiling area of the new room, or leave them just in the small family room.  Either would work.

Now on to the operating accessories.  Guess what?  The temporary Christmas layout is built on the top of a 4x8 x2" sheet of foam, sitting on top of a heavy duty folding banquet table; the kind of table churches and fire halls like to buy.  Just what you mentioned.  My wife already suggested I keep tat layout, reconfigure it as I want.  I could keep it as a Christmas layout for now, and since no grandchildren are on the way, I would have time to make sure all the accessories are in operating order.  I could then set that up anywhere for kids on something lower or even the floor.  I might like to put a log unloader, sawmill or something on the main room for fun.

I see it is 1:00 again.  Well at my next chance, I want to respond to Dave, Jim, and others.

Thank you so much for joining me on this adventure!!  

Okay Mark....so we are on the same wave length!    I loved the Blackwater Canyon concept and how cool is that you know about Davis and the Canyon!  Even in your space, you CAN come up with an ultra realistic look!  I can picture some stone arch supports as the train(s) makes it through the canyon.  I will work on a track arrangement for you.  I've got a couple of ideas envisioned.

I need to know:  Can you build a life out, hinged or otherwise swing section across the glass doors?--the side that slides open.  EXACTLY, where is the glass door positioned on the wall...how long is the wall that it's on and at what point from the corner does the door the sling door start--from BOTH sides.  I need to know exactly.  If you can't construct something like that--no problem just considering ALL options.

HOW TALL ARE you?  How high is your ceiling?

I'm planning the track arrangement in mind with a Western & Maryland 44 tonner or an old time 0-4-0 pulling a string of 4 to 5 cars, no longer than ten inches in length (shorter better), plus a caboose (A bobber 4 wheel caboose) hauling open hoppers and flats with logs) up street grades and sharp curves.  Those two MTH PREMIER engines will go around ridiculously tight curves and look decent; which is EXACTLY what you need in that space.

I'm excited about the idea of the Blackwater Canyon Line (BCL)!   

I would recommend keep the ceiling central in the other room.  If it runs the ceiling it will distract from the BCL.  Your backdrop should go to the ceiling---how high is the ceiling?

And the two-inch foam issue with Christmas layout is perfect for future grandkids in ANOTHER room.  You should keep that room floor to ceiling SOLEY dedicated to the BCL.  

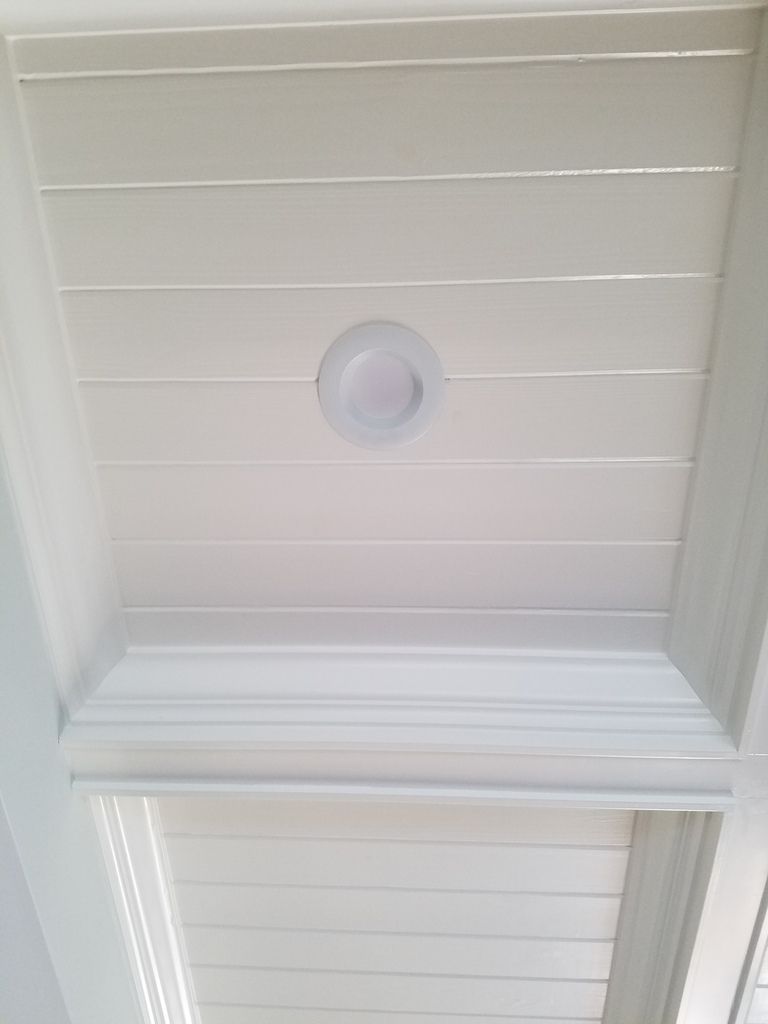
Lastly, there's just so much to ask:  "How many light fixtures are on the ceiling of that room?"  Depending on the track configuration, it would be IDEAL (not required) to have spot lights that can be dimmed and brightened so that you may adjust according to your needs.  

Too much to digest already...

John C. posted:

Okay Mark....so we are on the same wave length!    I loved the Blackwater Canyon concept and how cool is that you know about Davis and the Canyon!  Even in your space, you CAN come up with an ultra realistic look!  I can picture some stone arch supports as the train(s) makes it through the canyon.  I will work on a track arrangement for you.  I've got a couple of ideas envisioned.

I need to know:  Can you build a life out, hinged or otherwise swing section across the glass doors?--the side that slides open.  EXACTLY, where is the glass door positioned on the wall...how long is the wall that it's on and at what point from the corner does the door the sling door start--from BOTH sides.  I need to know exactly.  If you can't construct something like that--no problem just considering ALL options.

HOW TALL ARE you?  How high is your ceiling?

I'm planning the track arrangement in mind with a Western & Maryland 44 tonner or an old time 0-4-0 pulling a string of 4 to 5 cars, no longer than ten inches in length (shorter better), plus a caboose (A bobber 4 wheel caboose) hauling open hoppers and flats with logs) up street grades and sharp curves.  Those two MTH PREMIER engines will go around ridiculously tight curves and look decent; which is EXACTLY what you need in that space.

I'm excited about the idea of the Blackwater Canyon Line (BCL)!   

I would recommend keep the ceiling central in the other room.  If it runs the ceiling it will distract from the BCL.  Your backdrop should go to the ceiling---how high is the ceiling?

And the two-inch foam issue with Christmas layout is perfect for future grandkids in ANOTHER room.  You should keep that room floor to ceiling SOLEY dedicated to the BCL.  

Lastly, there's just so much to ask:  "How many light fixtures are on the ceiling of that room?"  Depending on the track configuration, it would be IDEAL (not required) to have spot lights that can be dimmed and brightened so that you may adjust according to your needs.  

Too much to digest already...

John,

You're recommendations do sound good.  I still can't get over your suggestions of this theme that I researched and planned for over 15 years ago!  Remarkable!  I still like the overall theme at heart!  I will answer all the questions you asked in a day or two.  When I get the chance, I will look for my books, articles, etc.

"Too much to digest already" is right!  

DoubleDAZ posted:

Mark, I always get concerned when someone says they have a small space where they want to run O72 curves, especially for a passenger train. Unfortunately, O72 doesn't leave much room for anything else when it comes to things like logging and coal operations. Since your better half suggested joining up with the ceiling layout in the other room have you considered expanding the ceiling layout into the new space and using it for your passenger run? You could come into the new space where there'd be a cityscape on the wall, perhaps with bas relief storefronts, etc., and a passenger station. Moving the larger equipment off the main layout would free it up for the logging and coal operations, perhaps on separate levels. Using O54 or even O42 curves gives you a lot more space for loop2loop, folded dog bones, etc. Here's a very early design I did for 10.8x12 using O31 ScaleTrax to show how much or how little track will fit that space. I don't have it in SCARM, but could convert it easy enough and change it to GG/Ross O42/O54, but I offer it just for idea value. FWIW, the bridges were going to be lift-outs and the blue would have been a fold down panel.

Capture


Dave,

I do recall this plan that you were doing before you decided to make the plan for in the garage instead.  I was captivated by what you were putting in a room the same size as mine.  Also, it was very much like I had envisioned in my mind.  Please hold off converting it to SCARM for now.  I may ask you to later.  As you can probably tell, my preliminary plan I attached at the beginning of this topic has a resemblance to yours.


AGHRMatt posted:

Hi Mark.

I've done designs for small rooms that support O-72 down to 10x10. Spurs could be added to the straight sections as desired and the layout could be re-done as a single lap tri-oval. This particular one is 48" radius (O-96)

12.0x12.0_two-lap_o-96

Matt,

That certainly is what I was thinking for an upper level.  As I look at it more, a 27" Premier J pulling four 70' cars will always be on curves.  I'm not saying that is bad. I just want to ponder all possibilities, including running the big trains on the Ceiling Central RR which already has some straight always.  Thank you as always!!

Mark, I just offered it to show how much track you can get in the space using smaller curves. I'm having a hard time visualizing a lower level for logging/coal and an upper level with a raised over/under run using O72 curves on top of it. But, I look forward to following this thread to see how things develop.

Mark Boyce posted:

Matt,

That certainly is what I was thinking for an upper level.  As I look at it more, a 27" Premier J pulling four 70' cars will always be on curves.  I'm not saying that is bad. I just want to ponder all possibilities, including running the big trains on the Ceiling Central RR which already has some straight always.  Thank you as always!!

Mark, keep in mind that straight (i.e. tangent) track is really pretty rare compared to curved.  Oh, I know that we like to see our trains on straight track--for me, it's a legacy of the ovals I had as a kid with only straight section on each side and n unfulfilled desire to see the train all stretched out.  But, as a percentage of the total mileage, there really isn't as much tangent our there as we imagine.

palallin posted:
Mark Boyce posted:

Matt,

That certainly is what I was thinking for an upper level.  As I look at it more, a 27" Premier J pulling four 70' cars will always be on curves.  I'm not saying that is bad. I just want to ponder all possibilities, including running the big trains on the Ceiling Central RR which already has some straight always.  Thank you as always!!

Mark, keep in mind that straight (i.e. tangent) track is really pretty rare compared to curved.  Oh, I know that we like to see our trains on straight track--for me, it's a legacy of the ovals I had as a kid with only straight section on each side and n unfulfilled desire to see the train all stretched out.  But, as a percentage of the total mileage, there really isn't as much tangent our there as we imagine.

You do have good points,  You made me think about where do we see the most dramatic photos?  Leaning into a curve.  Thank you!

Mark,

One thing to keep in mind is that your N&W J will operate on 0-54 curves. I have a SP 4449 and now NKP 765, both of which are about the same size as the J. If you can achieve 0-54 on your new layout, you'll at least be able to run all of your smaller stuff in addition to select larger locomotives. The overhang will be your biggest issue. It won't look prototypical, but it at least will fill the desire to run your big trains on the layout if you want. You have seen my layout in person. It is 7'x10'. I have achieved a decent amount in a small space using 0-54. The consolidation that I traded to you will look very nice on 0-54 as will any of your other shorter engines. 

There are a lot of cool ideas posted so far. I like the thought of expanding your ceiling central to accommodate your biggest trains, but also keeping the minimum requirements for the main layout. Best of luck in selecting the winning design!

-Marc 

Mark Boyce posted:...


AGHRMatt posted:

Hi Mark.

I've done designs for small rooms that support O-72 down to 10x10. Spurs could be added to the straight sections as desired and the layout could be re-done as a single lap tri-oval. This particular one is 48" radius (O-96)

12.0x12.0_two-lap_o-96

Matt,

That certainly is what I was thinking for an upper level.  As I look at it more, a 27" Premier J pulling four 70' cars will always be on curves.  I'm not saying that is bad. I just want to ponder all possibilities, including running the big trains on the Ceiling Central RR which already has some straight always.  Thank you as always!!

I understand. This one is the 48" radius (O-96) version. You'd obviously gain more tangent track using smaller curves such as 36" radius (O-72).

Everyone,

I have watched numerous plans develop here also.  I really enjoy it, and get ideas for myself.  They have been of special of interest when folks are designing layouts for areas similar to what I was looking forward to having.  Now that we are actually discussing a layout for my room, it is almost overwhelming in a good way!  I appreciate all the encouragement and interest!  Through the development of my layout, we can bring ideas to others!

Matt,

I got it, I hadn't noticed what size curves were on your plan.  You bring good news.

Bob D.

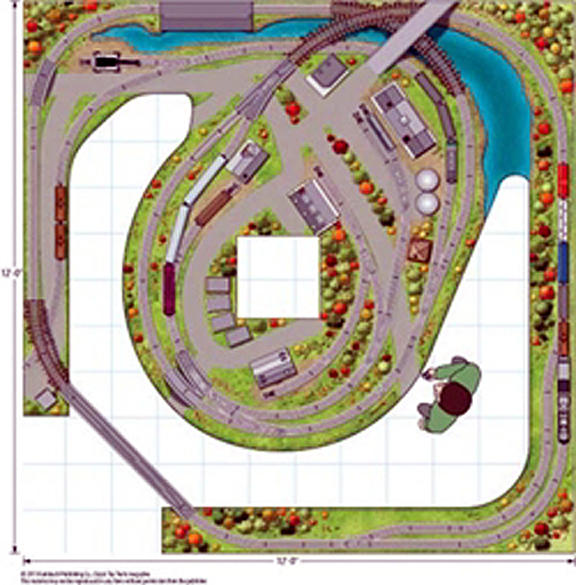
Those are good plans.  The published one with the island in the center certainly brings in a lot of interest, and with John C.'s idea of a lift out/swing out would work with the sliding glass doors.  The light that came in the doors was great for my daughter's art studio, but they are something to work around for a layout.

JHZ,

Congratulations on the new house!  I hope you have good weather for your move, and that it goes smoothly.  We have moved more times than I would have liked, and it has always been a challenge.  I know you are looking forward to a new layout in the new house.

Icytrains,

I'm glad to see you here.  It has been a while since we chatted on a topic.  I hope we can give you some ideas as well!

John,

Yes I don't doubt you need clarification.    Surprisingly the sliding doors are not the main entrance out of the basement.  That door is right beside the door that enters the room from the rest of the basement.  I will show it on a drawing that I will send with the room dimensions tonight, I hope.
The layout room is an addition that supports the sunroom above.  After my in-laws moved here following the death of my wife's grandmother (the original owner) they decided to replace the small deck with a sunroom.  The trainroom was only built to support the sunroom so to speak.  So the door to the train room and the door to the outside take the place where the sliding glass which were originally the only way out.  My mother-in-law insisted on reusing the sliding glass doors even though all they were going to use the room for was storage.  My wife and I thought it would have been better if they just put a window there and discard the sliding glass door.

So, the sliding glass door is seldom opened, but I want to keep access in case we want to open it at some time.  Blocking the door with a removable bridge or section would be fine.

I'll show it on the drawing.

Some "high line" inspiration might be found in the old N&W line that parallels parts of the PA 43 toll road North of I-70. 

Also remember that not every "coal mine" has to have a monster tipple. A 1-2 car siding with a truck dump or the Lionel conveyor coal loader could simulate a small "off layout" industry.

There was a layout in "101 Track Plans" that would be approximately 10x10 in O scale. As I recall, in H.O., it was 18" radius (approximately 33"-36" in O scale) and used a couple of bridges and scenic elements to disguise it's small size. Can't remember if it was two or three laps. I'll have to find my copy of the book, but the point is that even with a small spare bedroom in basement-deprived areas you can have a continuous-run O scale layout.

Mark:

I've got an awesome idea for you to consider!  I've been drawing on my C.A.D. for hours (my birthday gift to you.  :-)) today for you.  Things keep falling into place.  too bad I didn't charge, I could retire!  :-)

The main line run is over sixty feet of non-repeating, non-circling-main and travels along sharp curves with steep grades.  It mimics the actual run!  I was reading about the real "Big Run" today and read that the curves were so sharp that they had many derailments.  Your curves will certainly be a prototypical correct "model" for that canyon.  You should as part of your operating plan have RESTRICTED SPEEDS throughout the canyon.  No more than 15 MPH.  That will be prototypical and make your run feel even longer.

In addition, your track is on 3 levels!  This is going to be really cool!  The train may be passing through the same wall area twice or three times, but all on distinct different levels.  A canyon is PERFECT for distracting viewers that the train is in the same generally vicinity.

I hope that you have some skill with bench-work and backdrop construction.  I'm giving you an advanced prototypical track arrangement that will require flex track and the need for ensuring spacing between lines thru the passing siding and several clearance issues.  There are 4 places where the main passes over or under itself on its long and winding road. 

The best part of my plan is I've left your doors both unobstructed.  You may simply walk up to and in or out either one.  Life is good.

After receiving your measurements, and getting your blessing, I may want to put some layout in front of the sliding glass door section that does NOT move.  Maybe and maybe not--it's entirely up to you.

The "ends" of your line (Blackwater Canyon Line), are the town of Davis (elevation 3100 feet with 600 and some odd people) and the town of Hendricks (elevation 1700 and having 250 people.)  The canyon is "between" those two points.  YES!  Even on YOUR LINE, Davis is higher up than Hendricks at 60 inches and Hendricks at 41 inches.  Your grade is 6%, which is steep but ideal for the look you are attempting to capture and allows for between 60 to 70 feet of running without circling.

Currently, I don't have these "ends" drawn, because I could put reverse loops at both ends which would allow a train to run unattended; (My "ceaseless" pattern) so that you could operate the other making it more challenging passing through the canyon.  You will have one long passing siding between Davis and Hendricks allowing "opposing" trains to pass by one another.

Because of your room size, and because reversing loops take up a lot of space and aren't that interesting--limit scenic possibilities, I think you should consider a WYE configuration at Hendricks and a small (24 inch) turntable at Davis.  Both these configurations are interesting to operate/control vs. just looking at a train run on a turn-around loop.  You would stop, switch consists, drop off, pick up, and have some staging drawers near by.  

However, I understand that at times it's more convenient to have the reversing loop arrangement.  It's up to you.

I will post the main line run tonight for you to observe.  It will probably require a phone conversation between us so that you may gain a clear understanding.

You will be able to see my color coded lines and markings on the drawing and trace the main line path.  However, you will need a verbal explanation of what I envision as scenery and an operational scheme for this line.  This is going to be fun to operate!  Two or three people could operate this system at one time.

This DESIGN PROCESS theme theme will require you to investigate more details for your future acquisitions.  Also, regardless of what you decide, PREPARE THAT ROOM FOR A LAYOUT COMPLETELY before you start construction.

I think your ceiling is painted already.  I would do a very light blue if it isn't.  But, the BIGGEST thing I'd do is settle on a track arrangement and then install overhead spotlights that may be controlled by separate dimmer switches so you may set your lighting any way you wish easily.

I know that Im throwing a ton at you at once, but I put the layout higher to get better spacing between the points where needed while leaving that baseboard heater unobstructed.  Heat is good.  :-)  Fire is bad!  I hope that you are taking notes.  :-)  I wish that I lived closer, because this will be a great project.


Greg Nagy posted:

Also remember that not every "coal mine" has to have a monster tipple. A 1-2 car siding with a truck dump or the Lionel conveyor coal loader could simulate a small "off layout" industry.

I built one from one of the Lionel coal Depots on top of two Plasticville coaling towers.  It doesn't operate, of course, but the footprint is small (for O scale, anyway).

palallin posted:
Greg Nagy posted:

Also remember that not every "coal mine" has to have a monster tipple. A 1-2 car siding with a truck dump or the Lionel conveyor coal loader could simulate a small "off layout" industry.

I built one from one of the Lionel coal Depots on top of two Plasticville coaling towers.  It doesn't operate, of course, but the footprint is small (for O scale, anyway).

Great suggestions Greg and Palallin!  The small or a suggestion of an off layout industry is defiantly a plus the smaller space you have.  Greg, the N&W high line off 43 sounds like what Pittsburghrailfan Dan suggested earlier, just he may be thinking of a different section.  I am not familiar with the area off 43 other than I know from the map it is there.  I will look into it.  Thank you!

AGHRMatt posted:

There was a layout in "101 Track Plans" that would be approximately 10x10 in O scale. As I recall, in H.O., it was 18" radius (approximately 33"-36" in O scale) and used a couple of bridges and scenic elements to disguise it's small size. Can't remember if it was two or three laps. I'll have to find my copy of the book, but the point is that even with a small spare bedroom in basement-deprived areas you can have a continuous-run O scale layout.

I almost wore out my copy of 101 Track Plans when I was growing up!  I built one of the simple 4x8 plans back about 1970.  I still have my copy, but it is packed away in a box along with my information on the Western Maryland Blackwater Canyon.  Trouble is, the boxes are in the closet under the stairs to the basement, that I will have to empty to get to them.  Well, that is a project I planned to do once I got the room in question.  Thank you for the tip.  While those plans lack accuracy, they at least can provide ideas.

John,

Wow!  You have been busy!!  I am attaching the room drawing.  I'm not good with CAD, so I just wrote on a copy of the SCARM room border drawing I fought through a few evenings to make.   All the dimensions are there for anyone who wants to can take a look.  Here are answers to questions I wrote down last night when I was finishing the measurements.

I can build a lift out.  Hinged lift up or swing in would be more challenging

Glass door starts 31” from the far corner, 36” from the near corner, and is 71” long, Opens from the far end.

My height – 5’ 11”

Ceiling height – 89” Last 16” by pink wall – 77 ½”

One – three-bulb light fixture, yes I defiantly plan to put in more light.

I will send you an e-mail with phone number and some other comments.

Anyone, feel free to comment any way you wish.  

Thank you everyone for your interest!!  

Attachments

Last edited by Mark Boyce

Okay Mark:

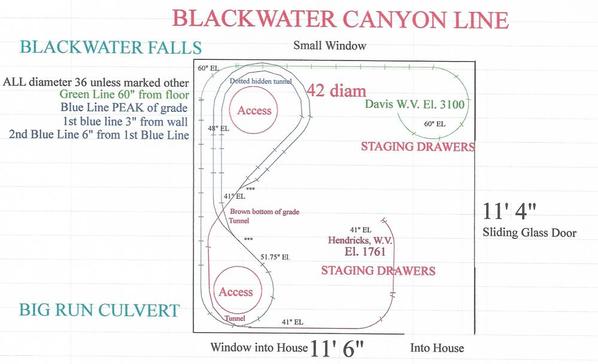
Here is my first DRAFT.  I have NOT yet looked at your dimensions.

GREAT NEWS!  DOORS COMPLETELY UNOBSTRUCTED!  MORE THAN SIXTY FEET OF MAIN LINE UN-REPEATED!

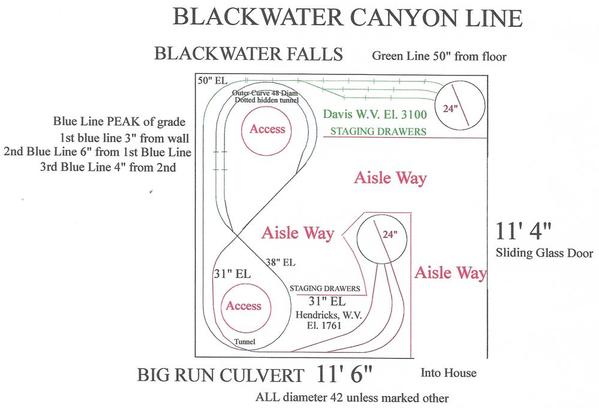
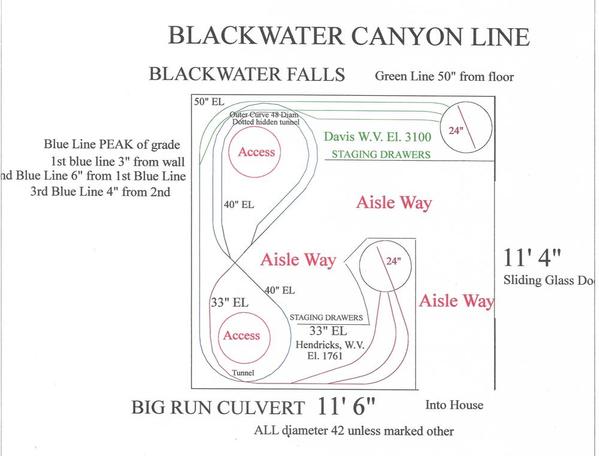
The tour of the BCL is as follows...4 to 5 car train departs highest point the Town of Davis at 60 inches on the way down the mountainside toward Blackwater Falls which is painted onto the backdrop.  The steady LINE OF GREEN IS AT 60 INCHES.  I will complete town of Davis track arrangement with some turnaround alternative for an engine, turntable, wye or reverse loop.  Also, there will be a few sidings.  You could switch cars on/off there.  I really like the idea of a wye track.  Not too many people use them.  The arrangement would be interesting and serve a critical purpose as well. 

As the line CHANGES TO BLUE in color it begins its steep descent thru Blackwater Canyon (pink wall).  There are MOUNTAINS PAINTED ONTO THE BACKDROP--OR PHOTO REALISTIC IMAGES OF BLACKWATER CANYON.   The first sharp curve (36 diameter) is BIG RUN CULVERT.  Many trains derailed there in historical times.  Restricted speed is a good idea.  After rounding Big Run Culvert over some of the many stone arch supports (SCENIC HIGHLIGHT), the train comes to the lone, but long, passing siding.  It's outer curve is a forty-two diameter curve.  The track switch (turnout) is flat and level with the track attached to it flat/level at least for a foot.  The train continues its steep descent enters a tunnel, goes around a hidden horseshoe curve, and as it emerges from a tunnel the track shortly becomes flat and level at the turnout at the end of this lone passing siding.

The line becomes brown in color at the lowest level.  It is now 41 inches from the floor...19 inches less than where it started.  It runs behind the Big Run Culvert and emerges out of a tunnel onto a short straight section of track leading into Hendricks.  Exactly as with Davis, there will be some turnaround alternative for an engine, turntable, wye or reverse loop.  I envision a turntable configuration here as a turntable is a highly impressive feature of any layout!  It will be the first thing people see upon entering the layout and since this area is "centered" access to the turntable area is easy.  There would only be two or three "spoke" tracks and maybe a custom-built roundhouse--two or three stall--very small--maybe.  This would be a scenic highlight.  I would add a few spurs as well.

There will be STAGING DRAWERS at both Davis and Hendricks.  

I may add a short spur inside the passing siding to drop off or pick up some flats to transport logs.  I think the coal should be "off stage" with coal loads passing through.  However, both towns will need coal for power and to replenish.  Both towns should have water tanks as well.  I would buy HO scale water tanks.  These give the illusion but do NOT overwhelm a small layout.  

I will wait for your feedback.  Just FYI:  The curves are 36 diameter.  An 0-4-0 and 44 tonner would fit like a glove and work great.  I picture old time, older era 40 foot boxcars, hoppers and flats being pulled in small strings.  Buy a "Bobber" caboose or two!  :-)  Ideal and interesting.

The spacing of the track from the walls are 3 inches.  On the pink wall the 1st track is three inches from the wall.  The second is 6 inches further in, the third is four inches in.  Your spacing on the passing siding is 4 inches.  With short cars, it will work fine and look awesome!  I left six inches between the highest track and the second track so you could use screen wire, foam, paper mache, whatever to build canyon side rocks with grass and weeds growing out of the rocks.  There are tons of actual canyon photos.

Your Aisle Ways will be 36" wide minimum.  You will have two ACCESS POINTS as the track in the rear will need to be installed, and maintained.  Your main line has two turnouts which will minimize your issues.  You will easily be able to walk up to either turnout to maintain it.

This track arrangement maximizes the space and provides exceptional alternatives for exceptionally interesting and dynamic scenery.

You will have to let know what you would like to see in Hendricks and Davis.


PS:  The track looks like a spaghetti bowl, but it's not.  The track is at different levels and using scenery as scene dividers will give the illusion that the train is traveling from point to point and not circling, because it isn't.   

NOVEL OVER.Mark Blackwater Canyon Line


Attachments

Images (1)
  • Mark Blackwater Canyon Line: Blackwater Canyon Line for Mark Boyce
Last edited by John C.

John,

A Novel?  Yes!    Illustrated too!

I printed off the drawing to better follow along the story.  It is not what I had in mind when I made my initial post Sunday, but it does have striking similarities to what I was planning in HO between 15 and 20 years ago.  It is just I had it more strung out in a little larger room in HO.  Amazing!!

I am going to search my stored documents for a written description I made of my plan then, similar to the description you just posted to refresh my memory.  I also need to dig in that closet for my books and articles.  Come to think of it, the articles may be in a box in the garage.  That is easier to get to.  I will get back to you tomorrow, after I have had a chance for it to sink in, and come up with comments.  Right now, I am almost overwhelmed, not just the work you did, but the similarities to my thoughts before we got too bust with our girls' activities in high school and then college.

Thank you again!!!

John,

Here are a couple quick thoughts while I am on break.

I am really hoping to run my H9 Consolidation which takes 042 curves.  I realize expanding the curves to 042 stretches the canyon loops out into the middle of the room.  However I got to thinking, I don't need to provide for continuous running on this layout.  If I want to do that, I can just step through the door and run trains on the Ceiling Central RR.  So, besides some sidings, buildings, and wye/turntable at each end, I don't need room for a turning loop.

Do you think this idea would work?

Marc Williams really wants to see that H9 I got from him on a trade run on this layout.  

Right Marc?  ;-)

Oops, gotta go for now!

Mark:

I'll see what happens with 42 as the minimum.  Yes it will stretch it out a bit.  I'm just trying to ensure that you have a three foot wide aisle way in order for you to have ease access and at least two people may run the trains and get by one another. 

Having a turntable at the ends or a Wye will make it more interesting and cut down on a bigger "blob" return loop...I don't think there would be enough aisle way remaining with 42 blobs at both ends...


Dear Mark:

I changed the curves to a minimum of 42 diameter.  Your baby will work!  :-)  

The passing siding curve is a 48 diameter.  Since we increased to 42 as a minimum a reversing loop at each end became impractical because of everything needing to be with a 30 inch maximum reach and people space.

I discovered that my "Wye" suggestion also became impractical because of aisle way widths.  The turnaround "solution" is a 24 inch turntable.  Atlas does make one that size that is inexpensive.  However, you will need to "weather" it well.  I placed turntables at both "ends." 

There are three lanes leading to the turntables on both ends.  That means you could have another train or two (might be pressed for space) on any of the "free" spokes.  Another advantage of this arrangement is that it will allow an engine to get on either end of a train so you may easily "classify" (arrange) your loads/empties in Davis or Hendricks. There are staging drawers at both towns.  And you will need to switch the caboose from the front to the rear of the trains at both locations.  Talk about realistic!

At Davis, 60 inches off the floor is high for a turntable in my opinion.  Maybe not in yours.  You may want to consider the height of this layout.  I have the bottom at 41" and the top at 60."  I wanted a dramatic difference to illustrate the steep grades and sharp curvature.

You may maintain that same grade by "adjusting" the entire profile.  I mean make the top of the layout 55" up and the bottom 36" from floor.  That 5 inches will make a world of difference in Davis as it will be easier to reach the rear track which is 28 inches back from the aisle way.  At your height, you'd be okay at 60" but it may be a stretch.  I'm 6'2" and I'm stretching at 60 inches high to reach.  TEST YOUR REACH AT DIFFERENT HEIGHTS.

Whatever you decide, everything, that means EVERYTHING must be within 30 inches of reach, and less is better.  As layout height increases your reach decreases.  And factor in there are two lines of track in front of the rear track at Davis.  You would have to reach over to fix a problem.  You would need a step ladder/stool.

I have multiple step stools at my layout.  As we clean track or install scenery we need to reach over trees and buildings at times.  Those objects "reduce" (restrict) your reach.  I have library rolling stools which are also a step.  These are great because you can sit at Hendricks, stand at Davis and roll this library stool anywhere you need it to be including out of the way.

This track arrangement is fantastic for operation as trains pass each other going up and down the canyon.  I can "picture" two Operators running the line.  There would be four trains total.  Two trains in Davis and Two in Hendricks.  The first two would start, one each from opposite ends, and "meet" in the canyon.  When they arrived at their respective towns for water and coal, the crew would switch to the other train, already standing by, and make their return trip to "home" and finish their "trick."  If a third person was there, he or she, could "stage" additional trains or remove already used rolling stock to the staging drawers.

I suggested the "bare bones" of this theme and operational plan.  You may have a better idea for a spur along the way or a different track arrangement at either town.  The turntable at Hendricks is pretty much stuck where it is because you will want to maintain a 36 inch wide aisle way.  It isn't worth one or two more spoke tracks to store an engine because your people space is at a premium!  You and any one else viewing or operating the layout is far more important than one spoke track.   

I think this is a great theme and good for the space.  If you go with this, you will have to very carefully plan the bench-work.  If you don't have it buy Linn Westcott's "How to Build Model Railroad Bench-Work."  USE THE L-GIRDER method.  This layout is ideal for that support system.

Also plan to include BACKDROPS.  You will need them to make the BCL awesome.  You will want to curve your backdrops around the corners of the room.  It will make the layout look far, far better than square corners.  Hardboard works very well.  

I would also recommend you extend your backdrops all the wall to the ceiling.  I would paint the ceiling a very light sky blue. Think about your lighting prior to constructing all of that bench-work which will swiftly become an obstacle.

I will attach the revised larger curvature diameter plan tonight; which includes suggestions for the "ends" of the line.  

John,

Thank you for speedy work!  I'm surprised you don't have something else to do!!  lol

I agree with all your suggestions, I think.  I built layouts using Westcott's book.  I still have the book, but think I have it pretty well down pat.  Yes 60" is a bit high for reach especially.  The highest I built was about 50 to 52" if I recall correctly.  I already use a two-foot step ladder for accessing the Ceiling Central, and have a cheap rolling low seat for working down low.  No more crawling on my hands and knees. Mine took a pounding working as a technician for over 30 years before moving to engineering almost a decade ago.  ;-)

Ill say more later.  Back to the old grind!  lol

Mark:

I adjusted the height based on your response.  The highest point is 50 inches up and the lowest is 31 inches.  I dropped all 10 inches lower.  

Ultimately, you can determine where you want it to be.  There are two places where the tracks cross over one another.  At those points the closest one is 7 inches up which is extra room and you aren't going to run tall equipment.  6 would be fine for 99% of O scale stuff anyway.  Think about it...

Blackwater Canyon Line 42 diameter min SMALLER SCAN AREA01-13-2017

Mark:

Here is the amended version with minimum 42's.   

I'm disappointed with my printer scanner.  I don't know why the scanner is NOT picking up dotted lines.  It is showing them as solid.  I use the dotted to indicate a line is "hidden" from view.  A lot of the passing siding is under Davis.  There is sufficient space to access everything through the access hole.  I don't know if you can kind of envision this set up because the main is constantly on a steep grade less the turnouts on the grade that are flat/level and the tracks connected to the turnouts are flat/level for at least one foot in all directions.

I also used dotted lines to show the aisle ways...it appears as solid on the scan.

Well here it is.  Point to Point.  About 50 to 55 feet of run--very good for a room this size.  Three yard tracks and one turntable each town.  Maximum four trains.  1 lane in each town should always be available.  You need it to put the caboose on the correct end of the train for the return trip.  Every time a train makes the journey, regardless of direction, the caboose will need to be put on the "new" end of the train--very prototypical.  

Constructing this will require precise bench-work because there's just enough room to maintain a 36 inch aisle way in the area making it relatively easy for two people to pass by one another.  

I really like this arrangement and theme.  I've been checking out photos today.  There is a hiking trail there  now.  You have great information to know how to make the scenery similar.


Attachments

Images (1)
  • Blackwater Canyon Line 42 diameter min SMALLER SCAN AREA: Blackwater Canyon Line
Last edited by John C.
Mark Boyce posted:

John,

Here are a couple quick thoughts while I am on break.

I am really hoping to run my H9 Consolidation which takes 042 curves.  I realize expanding the curves to 042 stretches the canyon loops out into the middle of the room.  However I got to thinking, I don't need to provide for continuous running on this layout.  If I want to do that, I can just step through the door and run trains on the Ceiling Central RR.  So, besides some sidings, buildings, and wye/turntable at each end, I don't need room for a turning loop.

Do you think this idea would work?

Marc Williams really wants to see that H9 I got from him on a trade run on this layout.  

Right Marc?  ;-)

Oops, gotta go for now!

You bet! I must say that it will look great on the new layout! If I can, I'd be happy to help out with the build and I'd definitely love to see it once it is completed. This Blackwater Canyon line looks incredible! Certainly it is designed for your smaller locomotives, but I think the H-9 will function well. Just be sure that the grade at the bottom of the hill is small. I have had some problems with my 734 touching the center rail at the bottom of my grade and shorting out the layout. Be very careful with this! I run a 4% grade. I think the outdoor carpet worsens the problem.

-Marc 

I want to see it when it's done too!  But to do that layout justice, it's going to take a very long while.  Unless of course Mark is independently wealthy and has been holding out on us!  I wish that I was close to help build.  This is going to take some careful planning and loads of plaster cloth and some scratch built stone arches???  This layout has masterpiece written all over it.

People forever get hung up on the size thing.  Some of the best most realistic layouts I ever saw were on a shelf.  The detail was out of this world.  It's not the size.  It's the quality, coupled with a Design theme.

Model Railroading is so much more than just arranging track pieces to fit a space.  You need a theme.  You need a place.  You need a purpose.  You need something for the Operators to do. 

Plausibility

Purpose

Participation

You'll need some custom logo for the BCL Mark!  :-)

John,

Yes it does look like everything will fit nicely.  You did a great job! Don't worry about the lack of dotted likes for now it is just fine. You are right, I am working on visualizing how the scenery will work out on the curves.  You are right, I can picture some scenes from memory and a few photos I found on the Internet.  I think I will have time to dig the books and photos out of the closet tomorrow.  Also, we will have to take a trip down there come better weather.

Yes Rome was not built in a day.  Cecil B DeMille's 1934 Cleopatra is on right now; probably why I thought of the old saying.  It will take quite a while to build as I am not independently wealthy, and still have to work for a few more years.  LOL

I'm thinking about the towns too, as to what will go in them.  I have seen various arrangements for car staging drawers or shelves.  That will work!

The scenery will be challenging but fun.  I will like doing the stone work.


Marc,

I understand what you mean about hitting at the bottom of the grade.  You have to have a section that gradually changes from level to the full grade percentage.  I would be glad to have help.  However I can envision this year spent planning and finishing the room.  I need more lights, and do some painting.  I might need to add a separate power circuit for the room.  Thank you!!

Mark, I don't if this will help, but while watching TV this evening I threw this together using GarGraves O42 curves and Ross O42 switches. I deviated from the O48 curve and used O54 because neither GG nor Ross many O48 curves. My goal was just to show how John's design appears to work using GG/Ross track. I guesstimated the measurements for the bench work and the whole layout obviously needs to be refined using/cutting GG flexible track if you go with this design or something close to it.

Capture


Attachments

Images (1)
  • Capture
Files (1)

Ha, Ha!  Much appreciated!!  

Actually, I have a pretty decent gig right now.  I get two small pension checks each month, and work as a contractor/consultant at my old company.  Best thing is, I don't have the pressures I had as a regular employee!  If it holds out until I can collect Social Security, I'll be in good shape!    If not, I'll ask one of my sons-in-law for a job!   

Well, after that one warm day we had, the snow is gone.  Since it is in the low 30s, I decided to do a few odd jobs outside I normally do in November, and take down Christmas wreaths and lights.  As I was on the patio, I decided it would be a good idea to take a photo of the doors outside so you can better visualize what I am talking about.  First is where you can see the addition in white vinyl siding with the infamous glass sliding door.  The door on the tan brick and aluminum siding part is where the sliding glass door originally started and continued into where the addition went.

2017-01-14 14.16.45

I am now inside sitting at the desk right beside the newer 36-inch door.  Here you can see where the sliding glass door was taking the space of the 36-inch door, a pillar, and the 20-inch wide entrance to the train room.  Part of the Ceiling Central RR is above.  Also, you can see on the left where the laundry is and the window through the brick wall. Beyond the washer and dryer is the firewall separating the living space from the garage, so there is nowhere else to move the laundry.  As you can see in the train room with the single three-bulb fixture, my outside work is not complete as I have power cords and part of the Nativity I need to box up and put in the attic.

2017-01-14 14.44.24

Attachments

Images (2)
  • 2017-01-14 14.16.45
  • 2017-01-14 14.44.24
Last edited by Mark Boyce

I have following this thread but keeping my mouth shut because I am marveling at people who have the ability to see a space with obstacles and come up with an actual plan. You guys are amazing......I am learning a lot about conceptual planning. My biggest weakness in seeing things in 3 dimensions....I think in only 2. I am learning loads......a big thank you to all!

Peter


Actually, Mark, I just searched for Atlas turntable and that link popped up. Of course, that doesn't mean they're in stock.   I had missed that John mentioned Atlas, so my SCARM file has a Ross TT. Then when Keith mentioned the potential supply problem, I noticed the price for a Ross TT and said "Wow!" 

Mark Boyce posted:
DoubleDAZ posted:

LOL, Dave!  Leave it to you to be submitting the source just as I was typing my response!!  Thank you!!  

I see that page was from 2002 at MSRP $149.  When I search O 3-rail accessories, I see it listed MSRP $255, which seems that would be a newer page.  I'll have to do some investigating to be sure.

DoubleDAZ posted:

Actually, Mark, I just searched for Atlas turntable and that link popped up. Of course, that doesn't mean they're in stock.   I had missed that John mentioned Atlas, so my SCARM file has a Ross TT. Then when Keith mentioned the potential supply problem, I noticed the price for a Ross TT and said "Wow!" 

WOW is right!!  Maybe I will have to rely on the 0-5-0 switcher to turn my locomotives!    Just one of many problems to come!  There will be an answer to all of them.  I may not like some of the answers, but there will always be an answer!!  

Putnam Division posted:

I have following this thread but keeping my mouth shut because I am marveling at people who have the ability to see a space with obstacles and come up with an actual plan. You guys are amazing......I am learning a lot about conceptual planning. My biggest weakness in seeing things in 3 dimensions....I think in only 2. I am learning loads......a big thank you to all!

Peter


Peter,

I am with you, I have trouble visualizing in 3 dimensions myself.  That is a big reason why I decided to ask for input on this layout.  I know it is possible to fit an exciting layout into a space this size, but I have trouble visualizing it.  I wouldn't have any trouble if I was stretching it out over a whole basement.  But then, I would never have time to build it.    John has certainly come up with a plan that does it.  I am sitting here at that desk typing and then looking over through the door at that pink wall, and I am starting to see the Blackwater Canyon folded over itself for lack of a better term.  Without John's ideas, the only way I could have done it was to keep circling the room, then what would I do at the doors.  And how do I eliminate those turnback blobs that eat space?  I am learning a lot from each entry.  

I am so glad you joined into the conversation!

Sorry, Mark, I totally missed that 2002 date. I couldn't find 1 in stock either though I did find a site saying Pre-Order and another saying to call for availability. This is one of those instances where if they are releasing it again, you'll need to buy 2 as soon as they get released or buy from eBay if you want to pursue this design. Now you can appreciate my decision to forego ScaleTrax in favor of GarGraves because of availability concerns. It really sticks that the hobby is not popular enough to have items in stock all the time.

Mark:

As far as the turntables go, just keep an eye out.  The Atlas ones surface from time to time and will continue too.  I'm betting that if you posted WANTED on here someone would have 1 or two.  BEFORE you do, and again you've got time, you might keep an eye out for someone selling an old used Bowser or another higher quality turntable.   Here's more great news for you, you don't need a motor, indexing etc. as both turntables are easily accessible.  Yes if they had motors that would be fine, but you won't need motors.  Manual is fine.  You will find a good deal if you are patient.

Also, you could go crazy like I did and build one.  I built a small one that catches everyone's attention.  They ask me who made it.  I'm kind of embarrassed to admit it's a cake pan with an upside down HO scale girder bridge.  I use it for turning the old rotary snow plow.  It's functional and looks realistic.  No it's not in a league with Ross or MillRiver Studios, but it cost me $17 to make and not $1200 or more. 

NEXT:  INTERESTING FACT!  Davis is the highest town at 3100 feet in all of West Virginia!  Second, under Cheat Mountain there's a tunnel leading out to a connection with the C  & O and B & O.  It would be cool to put a turnout o the line with a track leading to a backdrop portal (painted or 3D) that gives the appearance the train is entering a tunnel...that would be your interchange/connection to the world.  If somehow you can position a small mirror inside a tunnel portal facing out it provides a great illusion like track is traveling through tunnel.  I've never tried it but I've seen photos.

Last edited by John C.

There's an Atlas O on ebay with 22 hours left.  Bid is at $105.00 with multiple bidders.  

Atlas 2 or 3 Rail O Scale Turntable #6910 - Manual or Electric Operation

  • $105.00
  • 33 bids
  •  
  • Take your time Mark...the right ones will come along and you may do better than the Atlas.  I have one that Connie weathered.  It is in a hidden part of the layout.  We weathered it for us.  It's okay, but you may find some highly detailed really great looking table for not too much.  People will see both of your tables.  Atlas isn't bad weathered but the others are better done which is what they cost much, much, much more!  That is my table.  We made it dirty.IMG_7020

Attachments

Images (1)
  • IMG_7020
Last edited by John C.

Thank you Dave, RTR12, and John on the turntable advice.  Yes, I have seen many folks remark about Atlas O and MTH Scaletrax being hard to get at times.  That is why I have tried every kind of track out there except for those two.  Now as far as the atlas turntable goes, I can either mate up GarGraves to it or put GarGraves on it, so there is no concern.  

No, I don't need one immediately, but it is something I need to get a handle on and be watching for.  This sounds like a scenario I have heard before as to things folks find at York.  They find something they never found anywhere else, even online.  Yes, I only live 240 miles from York, but I have never been there.  

John, I am familiar with Davis as I worked about 15 miles from there at the power station 20 to 25 years ago.  It is on a plateau area that is rather stark for West Virginia because of the elevation.  Quite a difference in appearance from Hendricks down in the valley.  Those are differences to capitalize on.  I do not know whether I was aware of the tunnel or not.  If I was, I forgot.  I agree, that would be something cool to do too.  I have always wanted to try a mirror, but never have.

I saw your homemade turntable on the latest videos you posted last weekend!  Pretty neat!  That rotary snow plow looked pretty neat as well.  I have an MTH plow that can be pushed by an engine.  I ran it this Christmas some.  I see what you mean about weathering the Atlas turntable.  I also like manual.  Even though my career has been in electronics, I like to keep things as simple as possible at home.  One less motor to maintain and a few less wires to tag and document works for me!!

No I need to get back to digging out that closet to find my Western Maryland information.  

Looks like Atlas is still taking orders online for them Atlas O Turntable and this time I found a price (just a tad higher ), I didn't try to order one. Probably calling Atlas is the best way to know for sure. 

Woops, I got brave and clicked on the order button, nothing happened...still a mystery? Maybe they were cancelled?

Last edited by rtr12

Dear Mark:

I woke up this morning (Sunday the 15th) thinking about the track plan.  I'm concerned that the lengths of the lanes in Davis are too short.  I'm envisioning short consists meaning a maximum of four 10-inch cars and one eight inch caboose maximum, about 50 total inches.   I want to leave room for at least one engine, and a few cars, to be parked on a turntable spoke/spur ready to go when another arrives.  I increased the length of the lanes.*READ In the drawing...below

And, I reduced the grade (It is still steep--intentionally--) from Davis to the first turnout in the canyon.  I moved the other main line turnout back toward the tunnel to reduce the grade in the lower portion of the grade.  I also increased the Height from the floor of Hendricks by 2 inches--better for your back.  

I like the longer lanes and slightly reduced grades better

In the drawing, I didn't put tracks directly over/under one another for CLARITY of the drawing.  At my computer, I can turn on/off the various lines by color.  Showing a photo, I can't do that.  When you construct this arrangement this you will discover you have a little more room to work with than what is shown in this drawing, because I on purpose left more space between upper/lower tracks than necessary to give you a less cluttered and more easy to understand view.  

It is great that there is a trail on the old roadbed your are modeling!  You can see firsthand what the scenery looks like.  I realize it's expensive, but I think you should consider photo-realistic images for your backdrop.  Your entire backdrop, with curved corners, will be about 25 to 30 feet in total length.  It would appear as a mural of shorts from the edge of the wall as you walk in the room from the house (NOT the small section between the opening and sliding glass door) and go 3/4 of the way around the room ending at the sliding glass doors (nearer to rear wall side).

Lastly, I went to the website of the Western Maryland Historical Society yesterday.  Good stuff.MARK REVISED longer lanes reduce grade 01 15 2017 

Attachments

Images (1)
  • MARK REVISED longer lanes reduce grade 01 15 2017: Longer Lanes in Davis, Reduced Grade, Hendricks Raised 2 inches

John,

You are really hooked on this if you woke up thinking about it!    I do like the longer lead into Davis, that does give more flexibility.  At Hendricks it is hard for me to tell how long it is compared to Davis, but I would think I don't want it any longer because I do not want a turnout/switch inside the tunnel where I would have to go into the access hole to get to it.  Once built, I want to go in the access holes as little as possible.  Also, I would have to put some kind of detection system it to be sure which way the switch is thrown and if there is something in the way of a moving train.  I want to keep maintenance to a minimum.  I like the idea of raising Hendricks a bit and lessening the grade a bit.  I think 40" is ideal for the lower town.

I was already thinking about the backdrop, and agree I want to spend the money to get something printed.  I do not have the talent Connie has as she demonstrated on your layout, and my artist daughter doesn't have the time to do something for me.  Besides, my mountains would end up pink and not green.  

Yes, I want to get on the trail sometime.  I hate to leave my wife behind, as she has had one knee replaced and needs the other done.  If we can go this year, I'll just look for the easy access points - the two ends.  I doubt there is access anywhere in the middle. 

I agree the WMHS has a lot of great information.  I dug out some of what I have last night.  There are a couple other boxes that I need to look at because there are some books I did not find when I was looking last evening.  I piled up a bunch of locomotive and rolling stock boxes in the train room so I could get to the boxes that have the books.  Some of those books I haven't seen in 6 years since we bought this house from my mother-in-law.  It's like meeting up with old friends!  

One last thing, about the hidden track on the drawing.  If you put lines across the track to show tunnel portals, then I can see where you are thinking the track will be hidden, and I can see if I agree.  Thank you again so much!!!

John,

You are really hooked on this if you woke up thinking about it!    I do like the longer lead into Davis, that does give more flexibility.  At Hendricks it is hard for me to tell how long it is compared to Davis, but I would think I don't want it any longer because I do not want a turnout/switch inside the tunnel where I would have to go into the access hole to get to it.  Once built, I want to go in the access holes as little as possible.  Also, I would have to put some kind of detection system it to be sure which way the switch is thrown and if there is something in the way of a moving train.  I want to keep maintenance to a minimum.  I like the idea of raising Hendricks a bit and lessening the grade a bit.  I think raising the lower town to 33" is good.

I was already thinking about the backdrop, and agree I want to spend the money to get something printed.  I do not have the talent Connie has as she demonstrated on your layout, and my artist daughter doesn't have the time to do something for me.  Besides, my mountains would end up pink and not green.  

Yes, I want to get on the trail sometime.  I hate to leave my wife behind, as she has had one knee replaced and needs the other done.  If we can go this year, I'll just look for the easy access points - the two ends.  I doubt there is access anywhere in the middle. 

I agree the WMHS has a lot of great information.  I dug out some of what I have last night.  There are a couple other boxes that I need to look at because there are some books I did not find when I was looking last evening.  I piled up a bunch of locomotive and rolling stock boxes in the train room so I could get to the boxes that have the books.  Some of those books I haven't seen in 6 years since we bought this house from my mother-in-law.  It's like meeting up with old friends!  

One last thing, about the hidden track on the drawing.  If you put lines across the track to show tunnel portals, then I can see where you are thinking the track will be hidden, and I can see if I agree.  Thank you again so much!!!

I dug the rest of my Western Maryland information out of that closet last evening.  There was more than I remembered.  Seven hard back books, a couple paperback books, two 3" magazine boxes, and miscellaneous papers.  Yes I would say there was an interest in the WM.  I had looked at various portions from Cumberland on int West Virginia for inspiration for a layout over a long span of years.  Blackwater Canyon is one of my favorite areas.

John, how did you know??

Mark Boyce posted:

I dug the rest of my Western Maryland information out of that closet last evening.  There was more than I remembered.  Seven hard back books, a couple paperback books, two 3" magazine boxes, and miscellaneous papers.  Yes I would say there was an interest in the WM.  I had looked at various portions from Cumberland on int West Virginia for inspiration for a layout over a long span of years.  Blackwater Canyon is one of my favorite areas.

John, how did you know??

You know its funny how things just fall into place some times.  You are so lucky to have a HUGE head start.

John,

Oh please don't worry about when you get back to me!  There are all too many things that take priority for all of us.

Head start or stalled for a dozen years now picking back up?  I found my last hand drawn plan and written description for my HO layout that never got beyond bench work.  I will have to fiddle with it to scan and show everyone.  Basically it was Blackwater Canyon then over the top and down the Horth Branch of the Potomac, with branches to Mt Storm Power Station and Mines at Vindex Maryland.  It was still too much for a bigger room in HO.

After refreshing my memory by looking through some of my books, I have a few ideas.

First I was reminded at the upper end of the Blackwater Canyon, there is a yard at Thomas, with a cool station and the Francis Branch peals off towards Davis.  Thomas is a cool town because it is built on a hillside with two streets one at a higher elevation than the other that act as one Main Street.  I think that could be represented on a backdrop with buildings higher right behind the foreground buildings.  Really, either Thomas or Davis would work, as we are using it as a terminus of the layout, but I would want a dead track going behind scenery or off the table edge to show the main line goes on to Cumberland.  I would want to do the same thing at Hendricks.   I don't think I would buy a switch, just cut some track to fit, so at a glance, it looks like it goes on.  It would take little room.  Of course, I am not trying to make an exact replica of either town, just give the impression of a similar town.  I tried prototypical scenery in HO, and felt it was too constricting and it became work.  All I am after is to make it look plausible and give the feel of the location.

The photos helped me visualize the canyon scenery in my mind, but I am unable to get much of anything down on paper.  I may do what I did years ago, and make a small mock up out of cardboard and clay.  That worked quite nicely back then.

John, I have seen your drawers idea for extra rolling stock before.  It also reminds me of the fiddle yard, which is common in England.  In this case, the drawers and yard are out in the open sceniced layout instead of hidden as they do at shows in England.  While I have a lot of small Western Maryland equipment, I have no problem running some of my other railroads on a layout based on a location on the Western Maryland.  All of my favorites had lines in the Appalachians.

I have been thinking of paint and lighting.  I have always planned on a sky blue for the walls, and even thought of a light blue ceiling as well.  With that I will want to get the backdrop figured out and up in the early stages of construction.  As for lighting, I see people have used can flood lights, track lights, and even now LED bulbs.  I am thinking I would rather use track lighting, as I wouldn't have to cut big holes in the ceiling and they can be positioned to cover the layout easier.  The type of bulb is something yet to be thought out.  Heat from lighting will also be a factor in a small enclosed room.  Suggestions on lighting will be greatly appreciated.

I still have at least one box to find.  It got too late, and I had to clean up the room, because the closet door is right at the traffic crossroads of the basement level of the house.  I found a bunch of old Kalmbach books, but I am still missing the benchwork one and some others, including some hardback books on long abandoned Western Pennsylvania railroads.  Maybe this weekend will give me some time.

Mark:

I love your idea of "continuing" the line via dummy track.  That is a way to "suggest" that the track connects to the remainder of the world.  That is a very good idea.

Lights...they make all kinds these days.  I would go with the track lighting because if you use the kind that inserts into the track you may easily readjust position.

I want to try a "new" LED that dims.  All of my can lights are non-LED.  I understand the LEDs can be brighter as well as dimmer and last longer.  I understand that these are expensive, but I want to see.

If you do go with the track lighting consider putting each track (set) of lights (usually 3 to 4) on a SEPARATE DIMMER SWITCH.  It will be very convenient to regulate the intensity of your lighting in different areas.  In your application.  I'm thinking 3 separate tracks of 3 to 4 fixtures each, all independently controlled, would serve you very well.  I would also position a fixture directly over both turntables to eliminate shadows.  Those will be a lot of photos.

Painting a town, or getting a photo realistic backdrop of either of these towns made in the background would be awesome!  It would conserve a ton of space.

Lastly, I was just notified that my proof of the design book is at the printer.  If Connie and I like it we will order the first run.  This is an exciting time for both of us.  :-) 


John C. posted:

Mark:

Lights...they make all kinds these days.  I would go with the track lighting because if you use the kind that inserts into the track you may easily readjust position.

I want to try a "new" LED that dims.  All of my can lights are non-LED.  I understand the LEDs can be brighter as well as dimmer and last longer.  I understand that these are expensive, but I want to see.

We just installed the dimmable can LED lights in our new house. They dim very well with no fluctuations in the light during transitions. They are very bright on the high end. Ours came in "contractor" 4 packs from Lowes for like $60. We have six of the 65 watt cans in our living room, which is about 350 sq ft. I would think you could do the train room very affordably!

Goshawk posted:
John C. posted:

Mark:

Lights...they make all kinds these days.  I would go with the track lighting because if you use the kind that inserts into the track you may easily readjust position.

I want to try a "new" LED that dims.  All of my can lights are non-LED.  I understand the LEDs can be brighter as well as dimmer and last longer.  I understand that these are expensive, but I want to see.

We just installed the dimmable can LED lights in our new house. They dim very well with no fluctuations in the light during transitions. They are very bright on the high end. Ours came in "contractor" 4 packs from Lowes for like $60. We have six of the 65 watt cans in our living room, which is about 350 sq ft. I would think you could do the train room very affordably!

Dear Corey:

Thank you for the post.  I have "heard" good things, but have never owned/tested one.  I've got 23 to change out.  I think I'll do it a little at a time to lessen the pain.

What BRAND did you purchase?

Mark and John C,

I don't know about the fixtures, but LED bulbs have come way down in price in the last couple of years. Many are dimmable, but check them to be sure. We have now converted almost our entire house to LEDs. Some CFL & 4' florescents left, but incandescents have all been replaced.

Go up to Home Depot and have a look around. The selection and variety has greatly increased. They even have LED bulbs you can control color and brightness with your smart phone. I have been watching them at Home Depot for about 3 years now and I think you might be surprised at the prices and selection available. Some are nearing the prices of the better incandescent bulbs. Also consider that they last from around 12 to 22 years depending on brand and use just a fraction of power that incandescent bulbs use. In my case, I will probably be expired before the 22 year bulbs fail.


Since I last wrote, I have been searching my archives and online for photos of the proposed Western Maryland Blackwater Canyon area from Thomas to Hendricks.  I have found all the photos I was remembering, but one.  That is a good photo of the Tub Run bridge near the top of the grade.  I found one on a bike trail site that shows a small portion, but I have not found the photo of the whole scene from the steam era.

If anyone can provide a photo, I would greatly appreciate it.  Thank you.

I will post some photos later when I have some time to scan the ones I don't already have digitally.

Mark Boyce posted:

Since I last wrote, I have been searching my archives and online for photos of the proposed Western Maryland Blackwater Canyon area from Thomas to Hendricks.  I have found all the photos I was remembering, but one.  That is a good photo of the Tub Run bridge near the top of the grade.  I found one on a bike trail site that shows a small portion, but I have not found the photo of the whole scene from the steam era.

If anyone can provide a photo, I would greatly appreciate it.  Thank you.

I will post some photos later when I have some time to scan the ones I don't already have digitally.

Mark:  Scan and post the photos you have--if it isn't too much trouble.  I'm really curious to see what you've got.

Mark Boyce posted:

Yes, here are photos I pulled off the Internet.  Let's see what I have here before I get the books out scanning.  I think I will save some time.  Actually, there is quite a lot here.

Here is one I have seen a lot giving an overall view of a train going down the canyon.  Super!

Davis Engine House

davis01


I love this engine shed. I don't think it would be that hard to model.

As a side note from an earlier discussion, here is a picture of one of the LED can lights in m house. They are super easy to keep clean.

Last edited by Goshawk

Corey,

I agree the engine shed is fairly basic to build.  I have to decide what will fit in my space, and what I want most.  John C. Was so correct I had way too many things on my list that I would like; but that was the whole reason for posting all of it.  

Thank you for the photo of a can light.  Yes I will have to decide on it or track lights.  Somehow I think the track lights would be easier to install, but I don't know.

Mark:

You already have a gold mine!  Wow.  I love the stations.  Whichever you select, I would place the actual photo on the backdrop.  Those are too cool!  Unless of course, you have the ability (I wish that I did) to scratch build replicas.  Having just written that, you are kind of pressed for space.  Maybe if you built, just the FRONTS of the station against a backdrop?  My vote is for a picture blended into the backdrop!

Or plead with your daughter to paint the photo on the backdrop.  :-)


John,

Yes, the main photo I want to locate is of the full Tub Run Bridge from any era.  I do have a photo of downtown Thomas, showing how the Main Street buildings are on a hillside.  I will have to scan that.  That would be a backdrop item, and I agree about the station as well.  It worked well for you on your Izaac Walton Inn.

I think I have a source for mountainous backdrop for the main line.  I may have to wait on the towns.  That may not be so bad, since they are at each end I could maybe slip them in from the side at a later date.  Our daughter mostly specializes in three dimensional art, as in dolls, crocheted stuffed animals all of her own designs.  She does excellent painting, but gets bogged down with other interests.  She has a 3/4 completed (in my estimation) portrait of our other daughter and son-in-law on an easel in our family room.  It has been there for 2 years.  lol  My wife suggested I pay her for any backdrop painting.  That may be what happens on the towns.  

Can't wait to see your progress. You are doing it right. Lots of thinking before making sawdust. When I saw the photo of the Davis  engine house I said to myself, hey I have seen that before. I kitbashed 2 Lionel loco sheds by removing one panel from each side of one shed and gluing those to each side of the other shed and then making 2 new ends with 2 portals. The doors were easy to make from skinny sticks.  I traced the openings from the donor opening. It is a pretty big bldg so it takes up space. But I find the proportions and design appealing.

download [1)

loco shed1

Attachments

Images (3)
  • download (1)
  • loco shed1
  • loco shed1
Last edited by pennsynut

I scanned those preliminary plans for my proposed HO layout back in 2001, just to show I had been thinking along these lines back then.  This layout was to have staging for Elkins and Cumberland.  Elkins was to be on a lower level, and Cumberland on the main level.  There was to be a steep run to an upper level for the Chaffee Branch which veered off between Thomas and Cumberland.  Yes, it is crude, and certainly not final.  In fact, I recall thinking I would move the Thomas yard over towards the curve to allow more room for the Blackwater Grade.  I hadn't decided on all the sidings etc. either.  However, one can see this plan was point to point, just like John's is now.

I had built a bunch of benchwork, and before putting risers for elevations, I had placed sheets of Styrofoam on the benchwork to try out the track to see how it fit.  Eventually, I kept taking up track and we ended up building 2 dollhouses and other projects for the girls on it.  Then it seemed to become a catch all for stuff my wife put there.  Eventually, I took it all down, and used the lumber and foam for various home projects.  Such is life.  And now we have come to where we are today.

Attachments

Last edited by Mark Boyce
Jhainer posted:

just a thought in one of the pics you showed the ceiling layout running over the door to the train room . couldn't a helix be put in to tie bot the ceiling and the room layout together so you could transition between the two just  a thought .

It is a thought I had too.  I do intend to rework the shelving of the corners of my ceiling layout regardless of what I do otherwise.  With that, I could make a ramp into the train room at the upper corner of the door.  John C's opinion that overhead trackage could distract from the main layout, is a good point too.  I think the helix could be done.  I just need to think about that; and maybe leave provision for something like that in the plan for a future possibility after the main layout is well on it's way.

Thank you for the idea.

So here is an update of some action taken.  Yesterday, I drove to the Harrisburg area to pickup the backdrops that George (G3750) had professionally painted for his PRR Panhandle Division layout.  I had been following George's layout build, since the Panhandle Division is in the same area I live, crossing the Ohio River at Weirton, West Virginia about an hour and a half drive from here.  I had noted that George announced he was going to move to a new home and posted a new plan for that home.  Then George posted that he was going to sell his backdrop sections instead of trying to get movers to move them.  I think they will work well in providing a backdrop for areas on the layout where I want a view into the distance.  I am also thinking I will have some areas where the sceniced mountain will go up to the sky.

So here they are in my train room, in no particular order from right to left.  

2017-01-29 16.12.382017-01-29 16.12.45

Attachments

Images (2)
  • 2017-01-29 16.12.38
  • 2017-01-29 16.12.45
Last edited by Mark Boyce

I was just in the train room measuring heights John C proposed on his latest plan, which lined up pretty well with my daughter's shelves left on the pink wall.  I also was comparing my reach, and I agree 50" at Thomas/Davis works pretty well for me without having to stand on anything.  I got looking at the lower town of Hendricks at 33".  It isn't too low for me for wiring, because I will be using the cookie cutter method of building my roadbed, and have successfully run my wiring standing and reaching into the layout on past layouts.  My thoughts went to getting into the access area on the lower end of the layout.  This concerns me some.  No, if I build it well, I won't need to access much, but there will always be the occasion where there is a derailment in a tunnel or something that needs attention.

Then I had an idea.  No, not a new idea.  I actually used this idea on the 2-module layout I built that we moved from Virginia to West Virginia in 1993.  I built a hill on the workbench which had a farm and some woods that covered a double track turn-back loop.  I then placed the farm scene over the framing, and the tracks were covered.  Some bushes hid the joints neatly.  I think the portals were attached to the main layout.  Anyway, why not do something like this again?  Yes, I could use the access, but in the future if I wasn't able to get in there, the foam liftoff scenery may be handy.  Just thinking.  

I also thought of moving the tracks at Davis out near the edge of the layout, and putting some building/station flats in behind.  Maybe even the engine house would fit.  I did no measurements yet.  I just made a quick sketch on the last plan John C sent.  I attached a .pdf of that.  Once again, just some thoughts to throw out there.

Thank you for following along!!

Attachments

Mike,

I'm glad you got started on your train room.  It has been some waiting for both of us.

I need 042 to run my Premier Western Maryland H9 Consolidation.  That would be the largest engine I could run on this layout.  I could fit larger curves in the room, but I would be confined to big loops around the room, I'm afraid.  I do want to expand the shelves in the corners of my Ceiling Central RR in the family room.  I could run larger engines there, and do already.

Thank you for taking a look, and I will be glad if you follow along.  I will be glad to see how your layout goes as well.  Did you get your wiring problem solved?

Mark Boyce posted:

I was just in the train room measuring heights John C proposed on his latest plan, which lined up pretty well with my daughter's shelves left on the pink wall.  I also was comparing my reach, and I agree 50" at Thomas/Davis works pretty well for me without having to stand on anything.  I got looking at the lower town of Hendricks at 33".  It isn't too low for me for wiring, because I will be using the cookie cutter method of building my roadbed, and have successfully run my wiring standing and reaching into the layout on past layouts.  My thoughts went to getting into the access area on the lower end of the layout.  This concerns me some.  No, if I build it well, I won't need to access much, but there will always be the occasion where there is a derailment in a tunnel or something that needs attention.

Then I had an idea.  No, not a new idea.  I actually used this idea on the 2-module layout I built that we moved from Virginia to West Virginia in 1993.  I built a hill on the workbench which had a farm and some woods that covered a double track turn-back loop.  I then placed the farm scene over the framing, and the tracks were covered.  Some bushes hid the joints neatly.  I think the portals were attached to the main layout.  Anyway, why not do something like this again?  Yes, I could use the access, but in the future if I wasn't able to get in there, the foam liftoff scenery may be handy.  Just thinking.  

I also thought of moving the tracks at Davis out near the edge of the layout, and putting some building/station flats in behind.  Maybe even the engine house would fit.  I did no measurements yet.  I just made a quick sketch on the last plan John C sent.  I attached a .pdf of that.  Once again, just some thoughts to throw out there.

Thank you for following along!!

I like your lift out scenery idea Mark.  That would be ideal.  In these days and times the foam is great because its sturdy and weighs next to nothing.  I want to try my hand a carving foam one day.  I love the results I see people posting on the Forum in photos.  

Curious.. I haven't seen this mentioned previously, or maybe I missed it.. On my current layout, instead of homosote, I put 2 layers of 3/4 in pink foam board on the plywood.. This allowed me to 'sculpt' ditches, creeks, etc pretty easily.. I plan on doing this on my new layout build as well..  Just another idea to 'confuse' things.. lol Look forward to your updates as well!!

John,

Curious you wrote this about two hours ago.  It was at that time that I had another thought on this idea.  I will digress a bit.  Yesterday, I received the Atlas turntable I bought from Doug.  After looking it and the instructions over, I powered it up and moved the table around some, first with nothing on it, then with an MTH RS1 that was handy sitting on it.  It worked fine.  Now I had measured out 24 inches in the Davis/Thomas corner before I talked to Doug about buying it, and thought that two 24" turntables are going to defiantly catch the eye in my small room.  I thought of this again as I unboxed the turntable.

Now to this morning.  The thought crossed my mind that maybe I could hide one at least with removable scenery.  The town of Thomas is on a hill overlooking the station and yard.  Maybe I could make a foam scenic hill cover over the turntable, but still have a good sized opening in the side of it facing the aisle where I could observe the turntable movement.  When there is a problem, I could lift the town scene off to take care of the problem.  I would like to have some downtown buildings for at least one town, and this could be a way to fit it in.  It may be an idea that I will have to try out with some bare foam glued together to see how it works once the turntable and track are in place and fully operational.  Maybe I won't like it, but it would be easy to try.

Woodson,

I'm glad you are here with us.  I put foam on top of a plywood base on my last layout; the one I didn't get very far, then had to take it down.  Your idea was what I was going to attempt.  One thing I do have already is a large sheet of Homasote.  My mother-in-law bought a house a while back from an elderly woman who had been a seamstress.  My mother-in-law isn't that much younger, but that's another matter.  This woman had a large table in a basement room where she would layout all she was working on.  The table was topped with a large sheet of Homasote.  It is longer than 8 feet, I am quite certain.  I see she had measured marks on the top and lots of pin holes where she evidently laid out her work.  Since my mother-in-law doesn't use the basement, she will let me take the Homasote, and the large table for that matter when I am ready.  I was thinking of cutting the Homasote in sections to go on top of my cutout plywood put my GarGraves track and Ross switches on that.  If I was going with a flat topped table layout, I may have topped it with foam.

Thank you for the comments.

Last evening I worked on enhancing DOUBLEDAZ Dave's SCARM rendition to get some GarGraves and Ross parts into John C's design.  I am new to SCARM, so it has been a struggle.  In fact, I have not even looked at how to add elevations.  This is starting to look like how I am envisioning John C's design.  I started substituting Ross curved switches in to make things flow better.  Obviously, I need to move the tracks out to make room for the access hole on the bottom of the drawing, but I will post anyway.  Any ideas or assistance would be appreciated.  I will attach the SCARM file along with this .jpeg.  Thank you one and all!!   

BCL 7

Attachments

Images (1)
  • BCL 7
Files (1)

Good Morning Mark,

I'm getting ready to leave for the World's Greatest Hobby Tour in downtown Phoenix, so I don't have time to play with this right now. Not sure what time I'll get home, but I'll check in to see if anyone has taken a stab at it. If not, I'll work on it then.

Is my understanding correct that one of the turntables will be higher than the other? The one at the top? There is a Figure 8 in the center and I believe the idea is for the bottom half to be an over/under affair. Is that also correct? My concern is all those switches close to the intersections (circled in blue). You don't want switches on a grade, so it's going to be awfully hard to raise those tracks the 6" or more you'll need for clearance.

The tracks going across the top are too close, so that will also need some serious modification.

Widening the lower circle for access may not be too big of a problem, but I'm hoping we can get some regular switches in there, not the curved ones that are shown. I know you plan to use Ross switches, but how much trouble are their curved switches, especially since they will be in constant use?

Lining up with the turntables is probably going to require the use of flextrack, so I hope you're ready to learn how to bend GarGraves.  

Capture


Attachments

Images (1)
  • Capture

Mark,

Not to rain on your parade, but let me caution you about track work behind scenery.  From my own experience , it's a disaster waiting to happen.  And putting a turntable there? 

You'd better be sure you can get to it easily and quickly without moving anything because you're going to spend more time there than you ever dreamed of (hope I am wrong).

Rest of it looks super!  Can't wait to see it.

George

Dave,

You are correct on all counts!  I realize I will need steep grades and level areas for the switches.  The prototype is steep, and I'll be running short trains.  I have never used curved switches before, even in HO.  Straight ones would be less expensive as well.  Yes, I have bent GarGraves before for a little jog in one wall on the Ceiling Central, and yes it is a bear!  I am up for it where necessary however, and I realize the yard and turntable area will need it. 

As to longer trains, I already started refitting one corner of my Ceiling Central RR with 072 to run them.  I agree with John C that trying to fit an upper loop for them in the adjacent train room would be just too much!

Thank you for taking a look.  I hope the train show in Phoenix was good!  Enjoy the weather.  It is 14 degrees here.

G3750 posted:

Mark,

Not to rain on your parade, but let me caution you about track work behind scenery.  From my own experience , it's a disaster waiting to happen.  And putting a turntable there? 

You'd better be sure you can get to it easily and quickly without moving anything because you're going to spend more time there than you ever dreamed of (hope I am wrong).

Rest of it looks super!  Can't wait to see it.

George

George,

Your caution is well taken.  You are correct, the place with the worst access will be the biggest trouble spot.  I want to see how this plan would work out in 3D.  It may be too twisty for the space.  I am up any suggestions of any kind, even some way to do it like my original idea.  This I know, I want mountain scenery, and the backdrops will be of great use.

BTW, my artist daughter was impressed with the backdrops.

Mark,
Had a little time, so I played around a bit just to see where we are. The outside grade is 4.6% and the inside is 5.8%. When I got to looking at the turntables, I realized there were no storage tracks (stalls), only complete runs into the TTs. So, I added some for you to look at and comment. I also used regular switches instead of the curved just to see what it could look like. If the grades are okay, then I can probably move the bottom switch inside the circle so the leads will hold complete trains. Looking it again, I'm not sure I widened that circle enough. I assume the idea will be to pull a train into the TT, unhook the cars, park the engine and bring another one out to takes the cars back.

Capture

Capture1


Attachments

Images (2)
  • Capture
  • Capture1
Files (1)

Mark:  You need to practice bending some Gargraves.  :-)  It does take some practice, but it goes really easily for me.  I litterally hold a strip of flex against my chest and gently begin bending in around my torso...just a little at a time.  It doesn't take too long.  

Sectional pieces work...I've used several along the Glacier Line.  I just like the flex because it's more "railroadee" for the lack of a better word.  I really like you can make the curve go anywhere you want...anywhere....a little tighter here, a little looser there...as is in real life.  

As far as concerns, just make certain everything is under 30 inches in reach.  In the turntable area...I would leave uncovered and strictly go with buildings on the back-drops.  If you want 3D buildings, ensure you can easily remove there should you need to replace a track or work on an issue.  The turntable itself is 24 inches.  Therefore at a maximum from back-drop to fascia board would be 30 inches--meaning three inches from either side.  If you go with your 50 inches in height, you may stand on a step-stool (We have 5 on the Glacier Line) and you will easily reach the back-drop over a turntable.  

If you use sectional track, try and not make the track appear geometrically perfect...I'm talking about the "railroadee" thing again.  I think the track-work itself would appear more "real" if all the curves weren't exactly the same.  I realize that may not be possible but just think about what the curves on the line look like.  They are NOT uniform.

I realize that you have an averaged sized area, on the Glacier Line I have curves that are 42, 54, 64, 72, 80, 89, 96 and large smooth flowing flex curves.  Do the best you can do.  :-)  Regardless and most importantly, weather the track and roadbed.

This is going to be a great project.  I wish that I lived closer.  You did get the book didn't you?  I was guessing Thursday? 

Dave,

Ha, you were working on it, as I was working on another rendition, but there just isn't as long a run for trains as in this concept John came up with.  That is slick how you worked out the grades and switches.  You are mighty good at SCARM, as I know you have had lots of practice and I know I appreciate it very much!!  Yes, you got the general idea.  At each town, there would be a track for an inbound train and one for holding a few cars.  Other cars would be on shelves underneath.   And yes, I could keep turning and using the same engine, but it would be more realistic using different ones.  Even I have more engines of appropriate length than I need.  Also maybe a place for a dock/station for other cars, While the main traffic here would be coal, there was other freight as well.  The track flows very nicely, and it is good the heights work out.  John C. said they do, but I like seeing the 3D rendition.  The idea would be that the tracks go in and out of tunnels, so there wouldn't be any bridges where the track crosses another.  Thank you ever so much!

John and George,

Yes it would be difficult to do something over the turntable.  The problem is, I have so many neat buildings.  LOL  I have enough buildings to fill the space inside a 036 oval on the 4x8 temporary layout, that now has the Christmas buildings on it.  I can use some pieces and parts as flats for the first layer of streets, then suggest the rest of a town on the backdrop.  I will have to see what I can come up with when I get to that point.  I do want mostly rugged scenery, I always have liked that over lots of city areas on a layout.  I guess that is because I prefer living in the country.  There just is only so much you can fit in less than 144 square feet in O gauge.  No regrets, Even though I have had O gauge trains exclusively for 5 years, I think I still think spatially in HO.

John,

As to the GarGraves; I have seen others express the same way of bending GarGraves flex track as you describe.  I did not do that when I was using it on the Ceiling Central RR.  I tried bending it just with my hands.  I was thinking about the run up the Blackwater canyon as I drive up the road to my house from the main road.  The road is cut onto the hillside following a small tributary below.  It bends in and out to follow the curve of the hillside.  Come to think of it, that was the same on the road to our old house and numerous others here.  There is almost nothing flat in Pennsylvania compared to say Indiana.  I must confess I like symmetry too much.  There isn't much in the natural landscape that is symmetrical.

Actually I received the book on Monday and sent you an e-mail about receiving it.  I have the book almost finished.  Very good.  A lot of ideas I have seen in HO material, but not in material designed with the 3-rail O gauger in mind.  Look and see if you have an e-mail then, and if not, let me know, and I will send some comments again.

DoubleDAZ posted:

Mark,
Had a little time, so I played around a bit just to see where we are. The outside grade is 4.6% and the inside is 5.8%. When I got to looking at the turntables, I realized there were no storage tracks (stalls), only complete runs into the TTs. So, I added some for you to look at and comment. I also used regular switches instead of the curved just to see what it could look like. If the grades are okay, then I can probably move the bottom switch inside the circle so the leads will hold complete trains. Looking it again, I'm not sure I widened that circle enough. I assume the idea will be to pull a train into the TT, unhook the cars, park the engine and bring another one out to takes the cars back.

Capture

Capture1


Dave,

I have to say, you do an amazing job helping people on this forum by taking their concept and then retooling or enhancing with some great ideas. And then you even put this into a visual representation.  All I can say is - Wow!  

I did have one question, though.  The figure eight loop with the siding (or run-around track) starts and terminates at two turnouts.  My understanding is that turnouts - and at least 10" on each side of a turnout - should always be flat and level to avoid operating issues.  Counting the sectional pieces, is there enough trackage in between those turnouts (plus 10" on each end of each turnout) to avoid an extreme grade to get the 6" or whatever of clearance needed before the underpass point? Thanks  

Peter

Last edited by PJB

Mike CT has posted his method for bending GarGraves several times and while it's mostly half circles, the same concept can be used for other size arcs. I don't think he went as tight as O54, but I could be wrong. From what I've read here, the key to bending any O scale flex seems to be to over-bend it so there's less pressure to return to it's original position. My very limited experience playing around with ScaleTrax says bending the final few inches is the pits. Someone suggested bending most of it to the position you want and then cut off the end. I'm sure you'll figure out a way that works for you.

BTW, the bridges were just so you could see the 3D aspect better.

Peter, the short answer is "No". My goal was just to see what the grades were going to be like. My first try had a crossover there and the grade started after that. Unfortunately that resulted in a 10%+ grade and I knew that wasn't going to be acceptable. I wanted to see if Mark was okay with the almost 6% grade on the inside of the curved siding (which I think is still too steep) as well as what I did with the curved siding and turntables. I think there's still room to widen the Figure 8 a bit to put the connecting tracks on the same level as the switch, but GarGraves doesn't have anything less than 6.2", so I also needed to get an idea of how willing Mark is to cut and bend track. And since he's adding access hatches, I'm also wondering if he's willing to alter his bench work a bit, something like this. Trouble is he might have to use the hatches more often than he wants to.

Capture2


Attachments

Images (1)
  • Capture2

Yes that is one thing I need to do is setup a 6% grade and see how it looks and how my engines perform.  Earlier I went back to a partial of my original design where there would not be any crossovers dictating the grades.  There certainly wouldn't be as long a run, but here is a screenshot of where it is at.

Also, the idea of closing in that small alcove beside the lower turntable is a bit scary.  I was initially hoping not to have any access holes at all.  Ones to get to an occasional derailment would be acceptable I think.  I'm pushing 61 now.  I am fearful with other obligations, I won't have this layout operational until I retire.  It's probably not the best idea to close off that alcove.  One thing in my favor, I am skinny compared to most men my age, so at least I can squeeze in sideways places others can't.  

Capture

Attachments

Images (1)
  • Capture
DoubleDAZ posted:

Peter, the short answer is "No". My goal was just to see what the grades were going to be like. My first try had a crossover there and the grade started after that. Unfortunately that resulted in a 10%+ grade and I knew that wasn't going to be acceptable. I wanted to see if Mark was okay with the almost 6% grade on the inside of the curved siding (which I think is still too steep) as well as what I did with the curved siding and turntables. I think there's still room to widen the Figure 8 a bit to put the connecting tracks on the same level as the switch, but GarGraves doesn't have anything less than 6.2", so I also needed to get an idea of how willing Mark is to cut and bend track. And since he's adding access hatches, I'm also wondering if he's willing to alter his bench work a bit, something like this. Trouble is he might have to use the hatches more often than he wants to.

Capture2


Dave and Mark,

I went back to re-read a chapter in my layout bible (written by John Armstrong) last night before posting, and have some - hopefully - good news.  Armstrong says that you can have an extreme grade and it is OK (he even mentions a 9% grade!) so long as the length of it isn't great. The rationale is that the weight of the entire train will not be on it, and therefore not affected by it, at the same time. In essence, the concept is that the locomotive wouldn't be struggling on an incline against the entire weight of the train.

For instance, it could be that the locomotive and a few cars are already on the level part past the grade by the time the last cars start up the grade.  Alternatively, while the locomotive and first few cars are going up the grade, the momentum of the last few cars on the level surface are actually assisting the cars up the grade. 

All this to say, one size doesn't fit all, and a 6% grade isn't necessarily a 6% grade - it depends on the situation and length of it. In this case,  the steepness might be overcome by its short length. 

Hope this helps,

Peter

Peter,

Thank you for this point from John Armstrong.  I have his books, and read them thoroughly back over 25 years ago.  Now that you mention it, I do recall this discussion of short grades.  I had already remembered his and others warnings about grades on curves which makes it tougher for engines to pull cars.  After my last post last evening, I was in the train room measuring out 100" to see what I need to make a 6" rise to do some testing.  I did that years ago, but it was with an HO Shay.  I will set something up to test, hopefully later today, then I will report back.  Again, thank you for providing this insight,  I'm glad you are following along!!

Mark,
I took your idea and played with it to add a reversing loop and reorient the bench work, see what you think. The first siding section (including the tracks on either side of the switches) rises to 4" and the grade is 2.6%. The switch (including the leading track) and turntable rise another inch to 5" and the grade is 4%. There are only 2 flex tracks that need to be bent, but there are a few straights that need to be cut. I also reoriented the single access hatch so you could put a lift-out landscaping element on it. The aisle in the lower left could be changed to give you more area for landscaping. I also think the bench work by the turntable could be bumped out to allow at least 1 more leg. The 2 tracks along the top appear to be too close, so some work still needs to be done there. Personally, I think a reversing loop makes more sense than 2 turntables, but that's just me.

Capture

Capture1


Attachments

Images (2)
  • Capture
  • Capture1
Files (1)
Last edited by DoubleDAZ
DoubleDAZ posted:

Mark,
I took your idea and played with it to add a reversing loop and reorient the bench work, see what you think. The first siding section (including the tracks on either side of the switches) rises to 4" and the grade is 2.6%. The switch (including the leading track) and turntable rise another inch to 5" and the grade is 4%. There are only 2 flex tracks that need to be bent, but there are a few straights that need to be cut. I also reoriented the single access hatch so you could put a lift-out landscaping element on it. The aisle in the lower left could be changed to give you more area for landscaping. I also think the bench work by the turntable could be bumped out to allow at least 1 more leg. The 2 tracks along the top appear to be too close, so some work still needs to be done there. Personally, I think a reversing loop makes more sense than 2 turntables, but that's just me.

Capture

Capture1


Dave, that is amazing!  And what a nice plan.  Long main line run, two reversing loops, sidings, AND a TT with whisker tracks - all in a relatively modest space.  

I'm getting close to starting to think about our next layout (wife wants to reclaim part of the basement so we will be downsizing) and keeping my fingers crossed for your input.

Peter 

Thanks, Peter. There's only one reversing loop though.

John C did the initial drawing and Mark just started learning SCARM. He also has a day job, so I'm just helping him get things done a little faster even though he's got some time before he actually begins construction.

I think the nice thing about this design is that he can have one train running to the loop and back while he uses the turntable to get another train ready to make the same run and even use the passing siding for them to pass each other. Truth be told, I'm not sure the entire siding couldn't be on a grade as long as he doesn't try to park any cars on the siding and just uses it for passing.

DoubleDAZ posted:

Thanks, Peter. There's only one reversing loop though.

John C did the initial drawing and Mark just started learning SCARM. He also has a day job, so I'm just helping him get things done a little faster even though he's got some time before he actually begins construction.

I think the nice thing about this design is that he can have one train running to the loop and back while he uses the turntable to get another train ready to make the same run and even use the passing siding for them to pass each other. Truth be told, I'm not sure the entire siding couldn't be on a grade as long as he doesn't try to park any cars on the siding and just uses it for passing.

Wondering if that bottom left LH turnout can be doubled up to link with a RH turnout that might be added to the return curve to create another reversing  loop?  Just a thought. 

PJB posted:

Wondering if that bottom left LH turnout can be doubled up to link with a RH turnout that might be added to the return curve to create another reversing  loop?  Just a thought. 

If I understand you correctly, the answer is "no" because the switch is at 4" and the loop is on a grade from 0". Even if they were at the same elevation, the reverse would be in the same direction as the current one and that wouldn't really add much to the operation.

However, if the RH turnout on the right end could be connected to the curve coming out of the current reverse loop, Mark could have an unattended loop2loop run, but again, that section is on a grade, so it's not practical.

Besides, Mark has the ceiling layout in the next room for unattended operation of his larger engines/trains. With this new layout, I believe he's more interested in a prototypical reason to go up to the turntable area, swap engines/trains and return to the valley. I just didn't like the dead-end on the bottom of the design he posted, so I added the reversing loop.

The way I envision things, if he stages a short train on the siding inside the revering loop, he can pull another train into the loop, stop, pull out the new train to head up the grade, pull the other train around the loop and park it to set up for the next run. Basically, he'd be taking supplies/empty cars up to the turntable and bringing down product. If he does things this way, he can be operating 3 trains at the same time. He'd stage one up top and one in the loop while another is running between the 2 areas.

Here's a view with some color and trains.

Capture

Capture1


Attachments

Images (2)
  • Capture
  • Capture1
Files (1)

Wow Dave and Peter; you two have been busy!!  Well, this afternoon I setup my 6% track, Z4000, TIU, and some engines 0-4-0, 0-8-0, F3, RS1, and the largest the WM H9 Consolidation.  As I was finishing our younger daughter and her husband showed up to record my wife playing piano accompaniment for our daughter's voice students' recital this Friday.  She has some piano students as well.  Therefore, my testing was postponed so we don't have the noise of engines straining up the Blackwater Line on the recital recording.    I could tell Dustin to filter out the engine noise, but he is too good to our daughter to be nasty to him.    So I will check in here.

Yes Dave, you got the idea I was thinking of.  Thank you everyone for the suggestions.  Yes, my only reason for turning trains is to have a way to move loads one way and empties another, with throwing some mixed freight now and then.  No matter how we d it, I think there will be one pesky switch that I will have to reach from a access hole.  Even if I put the most money and the greatest care into installation of roadbed and track, my buddy Murphy will make sure that is the one that will give me trouble.    At least it should be at the end of the railroad that has the highest head clearance.  The biggest problem with this plan when compared with John's is that in John's the two towns are separated so that an operator's back is turned to one town when facing the other town.  That is the best part of John's plan, I think.  This plan doesn't need as steep a grades as John's If I desired, but the towns are almost side by side, just separated by elevation and whatever scenic features I can come up with.  I knew that when I was doodling in SCARM yesterday, but wanted to see an alternative where I didn't have to cross over and worry about vertical clearances.

The idea of even being able to run 3 trains at a time is something I wasn't expecting.  Yes, my plan is to have a train stopped on the passing track, for a passing train.  While it would be nice to be able to uncouple the engine to cut a train and double up the hill, it isn't practical on this small a layout.  Besides, if I really had the desire, I could rig up some sort of wheel chalk to slip behind the train manually.  I probably won't bother.  Short trains are the name of the game here.  I will run the long ones on the Ceiling Central RR in the next room.  Right now I have one 14-car train and one 15-car train I have been running there.

At this point, I think I have two nice alternatives to ponder.  I hope no one feels bad if I pick something over another.  I greatly appreciate everyone's ideas!!!!!!!!!  This is the first layout, other than the Ceiling Central, where I had someone to bounce ideas off of.  The Internet has made such a wonderful contribution in brainstorming with like minded folks.  I was totally a lone wolf until the time period between the last layout and starting in O gauge.  I don't know about Peter, but I know the rest of us started out before way before the Internet age.  One more thing, in either plan, I have to figure out how I will make the scenery of the grade resemble the Blackwater Canyon, since there are tracks lower.  Just something else to work on in a small room.

John,

I did finish reading the book after we got home this afternoon.  Very good ideas!  I like the information about the length of cars for each size curves.  While the concept is not new, I have never seen anyone actually produce a handy chart before.  I think the book is good for anyone, especially the folks who get bored with loop running layouts.  Let me know if you got that email Monday.  I will send another too, when I get a chance.


I will report back once I have had a chance to do the grade testing.  I plan to run an engine with no cars, then keep running back adding one car at a time and record what each engine does.  Here is the setup; some old Woodland Scenics foam grades, a 2% on top of a 4%.  No I do not plan to use them on the layout.  They are something I played around with 20 years ago, and still had.  Thank you again, everyone!!

2017-02-05 16.47.44

Attachments

Images (1)
  • 2017-02-05 16.47.44
Last edited by Mark Boyce
Mark Boyce posted:

Wow Dave and Peter; you two have been busy!!  Well, this afternoon I setup my 6% track, Z4000, TIU, and some engines 0-4-0, 0-8-0, F3, RS1, and the largest the WM H9 Consolidation.  As I was finishing our younger daughter and her husband showed up to record my wife playing piano accompaniment for our daughter's voice students' recital this Friday.  She has some piano students as well.  Therefore, my testing was postponed so we don't have the noise of engines straining up the Blackwater Line on the recital recording.    I could tell Dustin to filter out the engine noise, but he is too good to our daughter to be nasty to him.    So I will check in here.

Yes Dave, you got the idea I was thinking of.  Thank you everyone for the suggestions.  Yes, my only reason for turning trains is to have a way to move loads one way and empties another, with throwing some mixed freight now and then.  No matter how we d it, I think there will be one pesky switch that I will have to reach from a access hole.  Even if I put the most money and the greatest care into installation of roadbed and track, my buddy Murphy will make sure that is the one that will give me trouble.    At least it should be at the end of the railroad that has the highest head clearance.  The biggest problem with this plan when compared with John's is that in John's the two towns are separated so that an operator's back is turned to one town when facing the other town.  That is the best part of John's plan, I think.  This plan doesn't need as steep a grades as John's If I desired, but the towns are almost side by side, just separated by elevation and whatever scenic features I can come up with.  I knew that when I was doodling in SCARM yesterday, but wanted to see an alternative where I didn't have to cross over and worry about vertical clearances.

The idea of even being able to run 3 trains at a time is something I wasn't expecting.  Yes, my plan is to have a train stopped on the passing track, for a passing train.  While it would be nice to be able to uncouple the engine to cut a train and double up the hill, it isn't practical on this small a layout.  Besides, if I really had the desire, I could rig up some sort of wheel chalk to slip behind the train manually.  I probably won't bother.  Short trains are the name of the game here.  I will run the long ones on the Ceiling Central RR in the next room.  Right now I have one 14-car train and one 15-car train I have been running there.

At this point, I think I have two nice alternatives to ponder.  I hope no one feels bad if I pick something over another.  I greatly appreciate everyone's ideas!!!!!!!!!  This is the first layout, other than the Ceiling Central, where I had someone to bounce ideas off of.  The Internet has made such a wonderful contribution in brainstorming with like minded folks.  I was totally a lone wolf until the time period between the last layout and starting in O gauge.  I don't know about Peter, but I know the rest of us started out before way before the Internet age.  One more thing, in either plan, I have to figure out how I will make the scenery of the grade resemble the Blackwater Canyon, since there are tracks lower.  Just something else to work on in a small room.

07-076

John,

I did finish reading the book after we got home this afternoon.  Very good ideas!  I like the information about the length of cars for each size curves.  While the concept is not new, I have never seen anyone actually produce a handy chart before.  I think the book is good for anyone, especially the folks who get bored with loop running layouts.  Let me know if you got that email Monday.  I will send another too, when I get a chance.


I will report back once I have had a chance to do the grade testing.  I plan to run an engine with no cars, then keep running back adding one car at a time and record what each engine does.  Here is the setup; some old Woodland Scenics foam grades, a 2% on top of a 4%.  No I do not plan to use them on the layout.  They are something I played around with 20 years ago, and still had.  Thank you again, everyone!!

2017-02-05 16.47.44

I never got an email from you Mark.  

Well John, I am very sorry about that!  I sent two e-mails.  I wonder who I sent them too, the server didn't kick the messages back as bad address.  

Here is what I intended to send to you on Monday:

Mark,
There will be no hard feelings no matter which way you go, these are just to give you options to consider and give me something to do on a lazy Sunday. Believe me, these samples are not taking more than 10-20 minutes to modify, so I'm not expending a lot of effort and I'm doing it all while watching TiVo recordings of DIY and HGTV. What they need is a TTN-TV channel (Toy Train Network-TV).

Here is another version with an area for a town in the original turntable location. The elevation of the existing turntable section was raised to 7" and that increased the grade to 3.9%, so there is still room to elevate the turntable section even more if you want a steeper grade.

Capture

Capture1


Attachments

Images (2)
  • Capture
  • Capture1
Files (1)

Dave,

If you get it, check out the RFD channel. They have some occasional train shows and also the I Love Toy Trains series from TM books. They also have some other interesting shows on old farm machinery and stuff like that, if you like that kind of thing. We had it with Time Warner, but when we switched to Google they don't offer the RFD channel. They are a LOT less on the old monthly bill though!

Now back to the regular scheduled programming of layout planning. Sorry to interrupt Mark, but they do have some good train shows. 


RTR12,

Thank you for joining in, no problem taking a tangent.  I wish we had RFD channel too!  You have to buy the Deluxe package to get it here.  One would think that a cable company whose headquarters is located in Butler, still a rural community would offer it.  But since I work for the telecom company I learned that the providers are offered the packages from the producers, and special interest channels are stuck on the deluxe packages!

Dave,

Both plans are very good.  The last one gives a longer run, and the extra spurs are nice on them.  I printed them all out on paper; yes I break the 'print only when you have to' rule at work; but I spent most of my career with paper, so I print when I have to; which is more than the younger guys.  

I finished testing my MTH engines.  All passed pulling 5 2-bay hoppers and a caboose up the 6% grade, that is a 2-8-0, 0-8-0, 4-4-0, F3, RS1, and my only 'modern' engine a Buffalo and Pittsburgh GP38-2.  It was the best puller of them all.  The only reason I have it is, I live one mile form the B&P and a fellow was selling it at a nice price.  I called it quits for tonight.  I will test the Lionel engines another evening.  They are F3, F7, 0-4-0, and a Virginian Rectifier.  Yes I know.  I think the VGN Rectifier is cool, and they used them on their mountain division, so it works for me.  

2017-02-05 21.37.532017-02-05 21.40.04

Attachments

Images (2)
  • 2017-02-05 21.37.53
  • 2017-02-05 21.40.04

Dave, I must say I really like the most recent of your designs. Especially if there is a way to work in a passing siding. Mark, from my experience, the diesels will perform significantly better on the grades than the steam engines will. I run a 4% grade on my layout. Overall, I don't have too many problems any more, but steam engines really struggle with any imperfections in the track. I learned this very quickly when troubleshooting my build. Smaller wheel bases are more forgiving. 

This is really turning in to an interesting thread! I look forward to seeing how your planning and implementation progresses!

Best,

Marc 

Marc,

Yes I think you are right about that.  In general my HO steam engines gave me more trouble than diesels, but I like steamers better.  I am going to do my best to make the roadbed, track, and wiring as good as I can to head off as much trouble as possible.  I t doesn't have to be overbuilt, but needs to be solid and smooth flowing. Thank you for the comments.

Ok, Mark and Marc, I swapped out the photos above. I was able to add a passing siding by moving the start point for the grade and increasing the initial grade to 4.4%. That gives a total rise of 6.6% over the length of the overpass and the 2 grades. I also added a second siding inside the reversing loop. I could be wrong, but I think this is as close as I'm going to get to the original and keep the grades reasonable for the trains that will be run. The sidings can be lengthen by adding a curve to the ends, but that's not prototypical, so I didn't do that. Those and the top end of the passing siding can probably be smoothed out using flextrack during actual construction.

Oh, and the overpass is 6", so that might have to be adjusted too depending on the roadbed and sub-roadbed used in that area.

Last edited by DoubleDAZ

Wow Dave, you are up and at it early; Mountain Time I think!  I see the changes.  You have packed a lot in!  Yes that does include everything from the original plan except using a loop at one end instead of a turntable! The prototype had a grade a bit over 3%, so no one could argue it isn't prototypical; as if I care what someone would say about that.  I was thinking of trying my hand at some rough sketches to see how I would scenic all these, way back to John's original concept.  Much to ponder!  Thank you!

We're morning people, so we're up around 5:00 am every day and it's lights out by 10:30 pm, retirement hasn't changed that. Except for a couple of years of night shifts, I was at work by 6:30 am every day and never "slept in" on weekends like so many do. Heck when we travel, there are times where we wake up at 3:00 or so and can't get back to sleep, so we've been on the road as early as 4:00.

When I saw Marc's comment about the passing siding and then yours about the incline test, I decided to see if I could add one and stay below the 6%. We were just watching the news about the Super Bowl anyway and it only took a few minutes, so it was no big deal. As always, the hardest part was lining up the right side of the loop so I could make the 2 cuts needed for things to fit. I could have just left the uncut pieces in so you'd see them, but then you can't run the simulation and I didn't think you were proficient yet in making cuts. With 3 trains in 3D, you can see how things will operate before you even start building. The sim is the main reason I bought RR-Track (before SCARM was available), but now I use SCARM almost exclusively.

I thought you must be a morning person.  I get up when I have to, but don't like it!  LOL

You are correct in seeing I am having trouble with cuts and flex track.  I read up on it, but only got it to work a couple times, so I greatly appreciate you doing it.  I realize once you get the knack of it, it is probably a piece of cake.  I have not tried the simulator, but look forward to doing it!.

Well I guess I should finish my break and get back to work!  :-)

Thank you again!

The key to making cuts is to zoom in. In this example, you can see where the 2 tracks meet *blue circle) and "align". You simply can't see the alignment unless you zoom in. You can then see the thin lines on the sides of the arrow. You place the cursor over either one of those and then right-click to get the "Snip off" option. After you select it, you then select the piece you want to discard and delete it. If you did it right, they should automatically connect and the arrows should disappear.
NOTE: It works a little differently if you're on a grade because the heights might not match, but once you edit those, things should connect just fine.

In your layout, I had to snip the piece by the switch and then the short straight section coming out of the loop below that. Getting them both to line up was the hard part.

Capture

Now, when it comes to flextrack, you connect one end to one section of track to be joined. When you do that, you'll see the line I've circled in blue. You move that toward the other section of track to be joined until you get the red/green arrows. At that point, you right-click so the tracks connect and you get the 2nd photo. Sometimes, the angles won't line up to make the connection, so you have to right-click multiple times (blue circles) in different locations like I did in the 3rd photo to end up with what you see in the 4th photo. Notice the straight section that mimics what's in the design for your layout with the difference being only 2 joints instead of 4.
NOTE: You have to be very careful though to not "over" bend and end up with a radius your engines might not like.

Capture1

Capture2

Capture3

Capture4


Attachments

Images (5)
  • Capture
  • Capture1
  • Capture2
  • Capture3
  • Capture4
Last edited by DoubleDAZ

Dave,

Thank you for the tips.  Yes, I see what I was doing wrong.  First of all, I forgot to zoom in.  That is why I couldn't line up and snip.  On the flex track, I was not right clicking multiple times.  The flex track was connected on one end, and the other end would flop around like a wounded snake when I barely moved the mouse.  Thank you very much!

DoubleDAZ posted:

And the last one for tonight moves closer to the original, but without the passing sidings because the reversing loop acts like a siding when you pull the staged train off the siding.

Capture

Capture1


NOT BEING NEGATIVE....Dave you are great to work so hard!  The program display diagram is impressive!  I really like it.  I foresee an issue in respect to reaching the track in the rear and the placement of turnouts "inside" of one loop.  In that loop area, there needs to be a 24 inch opening for ACCESS.  The tracks in the rear near the walls will be inconvenient to reach and switches are always an issue.

Mark:  Whatever you decide to do, for yourself, please ensure that you keep everything within 30 inches of reach, less better, and assure that you will not have any portion of a switch under another track or anywhere you cannot see it easily.  You know as well as I the majority of track issues, real and model, are at track switches.

I envisioned two access openings in both corners of your room (away from the sliding glass door) where you could easily gain access to the rear portion of this design WHEN it becomes necessary.  Make it as easy as possible.  We are getting older...  :-)

PS:  I think the original design was more interesting with the lower track crossing under the upper track twice; not once as this is.  This "feels" more geometrical in my opinion.  I realize that it does make the construction slightly easier and the grade lower.  However, your grade, even steeper, will be fine because of limited train length.  You already tested which was really smart.

Going under twice makes the route seem more interesting to me.  That's my two cents.  Ultimately, you will decide what will work best for you.  :-)

John,

Your points about 30" or less reach is well taken.  I have had my "temporary" 4 x 8 layout up for over 2 years changing it from Christmas to Summer theme and back.  It is a 2" sheet of foam on a folding table.  To do any track work in the back, (and I have had trouble with Flextrack there) I have to slide the foam out at an angle, then crawl under the corner to the newly opened area, because there is a dresser at each end blocking the way.  When I just want to change a building in the back, I have been sliding it in by placing it on the end of a 4' stitck and gingerly moving it in place with the stick.  I HATE IT!  LOL. That is why the Christmas theme is still up and I am in no hurry to take it down.  I am pushing 61, and am more limber than a lot of guys my age, but I am well aware I am in decline!  LOL

That said just to emphasize I need realativly easy access to all points.

John,

Two points I like about the initial design.  First, I agree it is a more interesting run than the 'What If' I proposed that Dave then ran with.  Second, and I forgot to mention earlier, these later plans have a situation where the track crosses over several 'yard/fiddle' tracks or switches.  While lots of folks like that interest, it doesn't resemble anything on the prototype, and I'm not looking for that.  I have a friend on Facebook who is building a very handsome layout, and it has a track bridging over a yard.  He built an ingenious sectional bridge he can lift out for access.  Cool, but not what I had in mind.

 I want to sketch out the scenic possibilities of the initial snaking design with tunnels and see what the views could be.  I have something in mind, but want to get it on paper.

One more thing, while more tracks and switches make for more operation possibilities, they can also clog up the layout and I could lose the mountains effect.

Yes, I proved I can handle any grade we have discussed.  

This has been most interesting and fun!  I appreciate every idea every one has offered.  I need to step back and take it all into consideration.

Okay Dave.  I see the hatches.  I still would cross the lower line under the upper as in my original drawing.  There are pluses and minuses both ways....

I would go with the 2nd turntable as well in the lower area.  The reversing loop consumes more space than its worth and lessens interaction.  

The more you have to do the more fun and interesting it becomes.  

Last edited by John C.

Add Reply

Post
The Track Planning and Layout Design Forum is sponsored by

AN OGR FORUM CHARTER SPONSOR

OGR Publishing, Inc., 1310 Eastside Centre Ct, Suite 6, Mountain Home, AR 72653
800-980-OGRR (6477)
www.ogaugerr.com

×
×
×
×
Link copied to your clipboard.
×
×