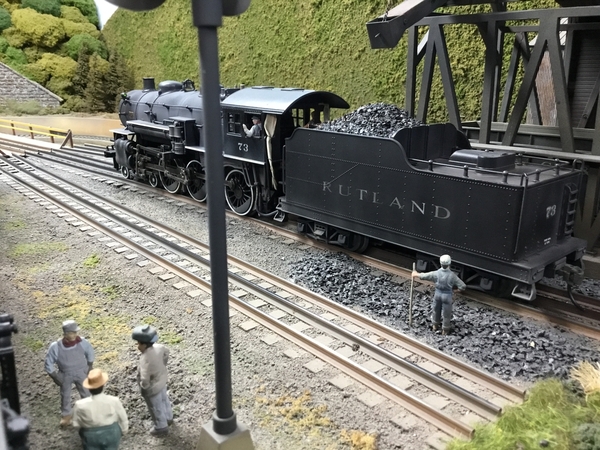
Its that time of the week again, time for Weathering Wednesday, 5/8/2024 (better early than never). So, gentlemen and ladies, start your air brushes, acrylic paints and pastel chalks. I and your fellow forum members are eager to see your engines, rolling stock, buildings and scenery that you have weathered and don’t forget to explain and demonstrate your techniques for us.

          But first, here are the forum ground rules as so adroitly stated by my good friend Patrick Whitehead (aka trumptrain), host of the popular topic of this type, Switcher Saturday:

  • Have fun and enjoy!
  • Post only photos that you have taken.  
  • If you post a photo taken by someone else or a copyrighted photo be sure you have express written permission from the photo's owner to post their photo.  
  • Any individual who posts copyrighted material is subject to legal liability. Furthermore, that individual will be banned from the OGR Forum.  
  • Please consult the OGR Forum TOS (Terms of Service) for further information regarding copyrights.


Again, it has been a busy week filled with commitments that did not allow much layout work time. So, I will, again, start today’s Weathering Wednesday with a few more past photos of our weathered rolling stock, a building and scenery.

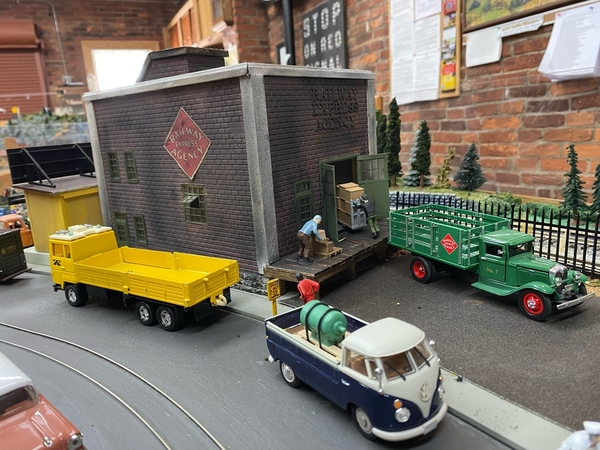
The next 3 photos are of a scratch-built Railway Express freight depot that I built for the club layout of the Red Lion (PA) Model Railroaders. The building was weathered using powdered graphite, my fingers and Testor's Dullcote to seal the graphite.
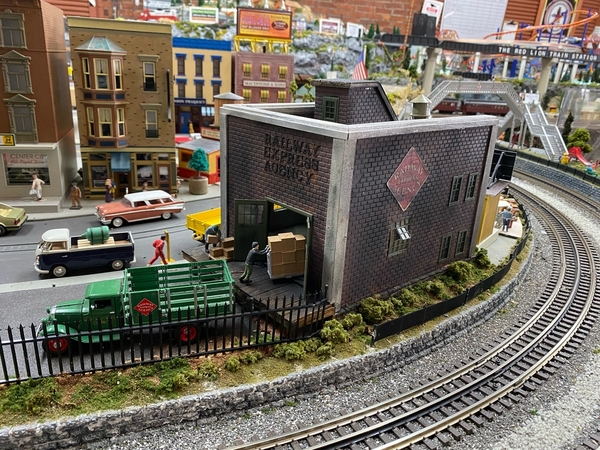
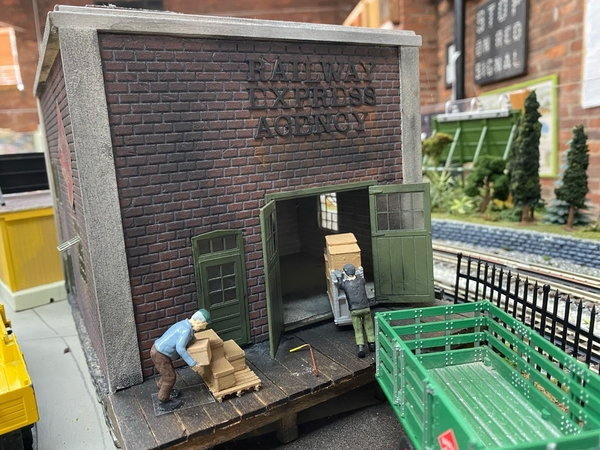
REA Freight HouseREA Freight House 2REA Freight House 1

The next photo is of a layout corner filler scene, the Schmutzig Coal Company.
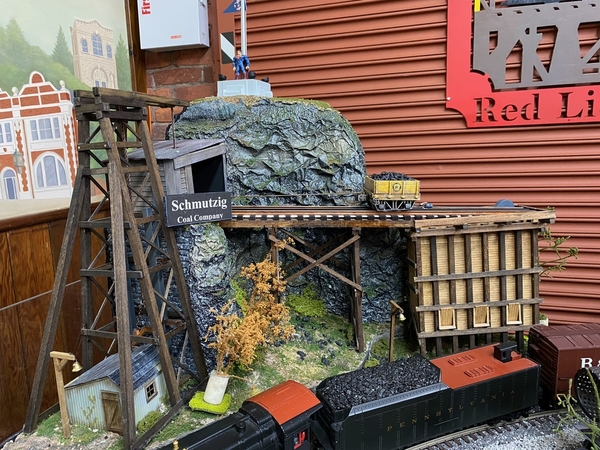
Schmutzig Coal Co 1

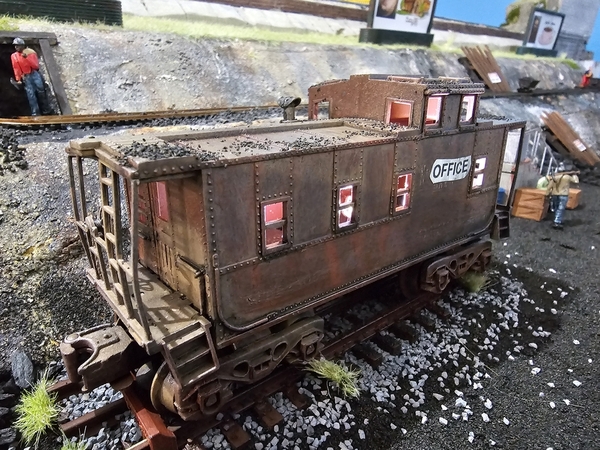
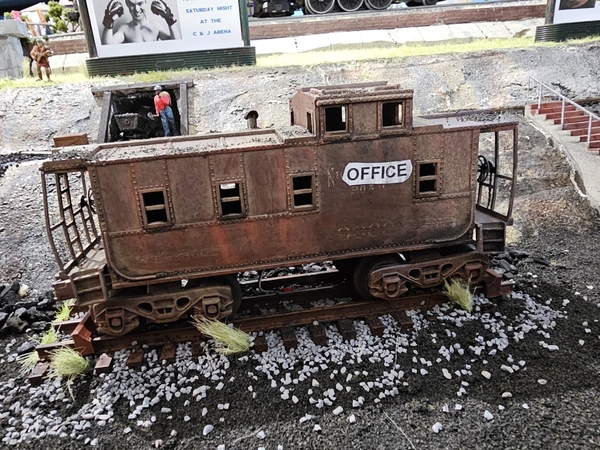
My final offerings are the Great Northeastern Railway caboose and Dockside, 0-6-0 switch engine expertly weathered for me by my friend of 49 years, Patrick Whitehead (AKA trumptrain),
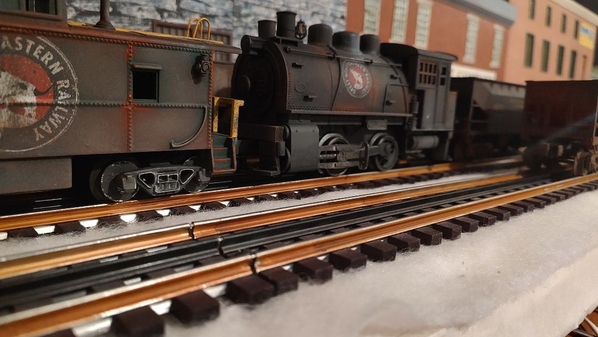
Caboose and Dockside

          Now it is your turn to show us your weathering artistry as well as how you achieved yours results.

Attachments

Images (5)
  • REA Freight House
  • REA Freight House 2
  • REA Freight House 1
  • Schmutzig Coal Co 1
  • Caboose and Dockside

Thanks Randy for getting us started!   49 years is a long time my friend!   Here's to many more ahead!  

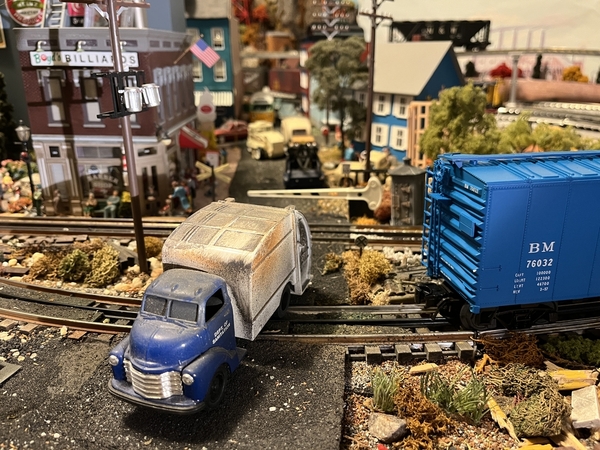
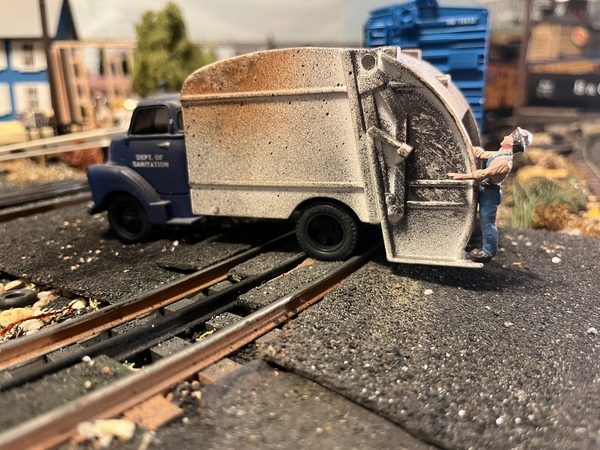
My offering for this fine Weathering Wednesday is this 1953 Chevrolet garbage truck which I bought new in 2010 from a former OGR advertiser who's located in Weedville, Pa.  I would not have known about this retailer  if I had not read OGR magazine.  The exact name now escapes me, however, I think ( ? )   it's the Valley Farm Market which is a convenience store that also sells trains.  The only store I've ever experienced where you can pick up a loaf of bread and an MTH boxcar right next to each other on the same shelf  while your car's gas tank is being filled... lol !    

Since I model the Transition Era of railroading, it is essential that my  street vehicles are reflective of that period ( 1946 - 1959/60 ).  When the Patsburg Town Council passed a measure to create a Dept. of Sanitation a garbage truck was needed.  Indeed, the Mayor himself went searching for the "perfect" rig and this is the one he chose.  

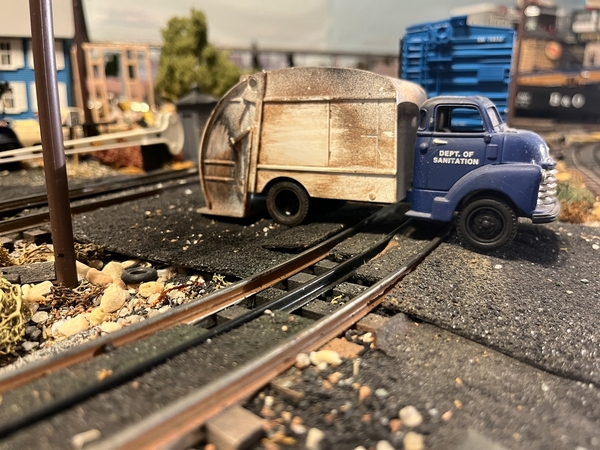
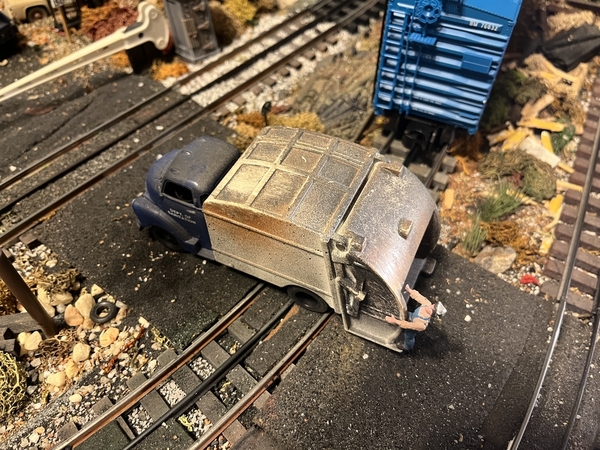
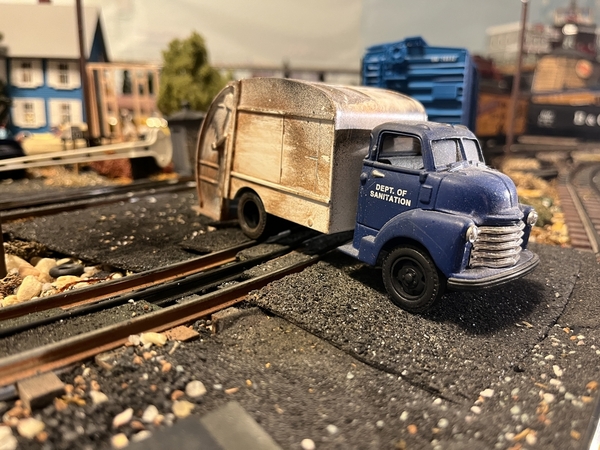
I don't have any before and after shots.  Here is one side of the truck coming out of Patsburg on its way to the dump with a full load.  I first sprayed the vehicle with Testo Dullcote to take down the sheen.  Once the Dullcote dried I used spray paints ( grimmey black and earth tone )  applied by holding the can about 1.5 - 2.0 ft away and giving a few very short bursts.  Holding the can this distance and applying a few short bursts allowed for a thin mist rather than a thick coating.  With the paint still wet I wiped the wet paint with a paper towel to give a smudge/well used effect.  I  should point out that I sprayed only one color at a time.  After the wiped paint dried, I then applied the second color and repeated the wiping process.   Actually while taking photos of  this truck last night I noticed the front grill could use some schmutzing up, which I will do soon.   I hope these photos will be inspirational!   I can't wait to see what you all post today ... I learn so much here on this thread!

IMG_4019

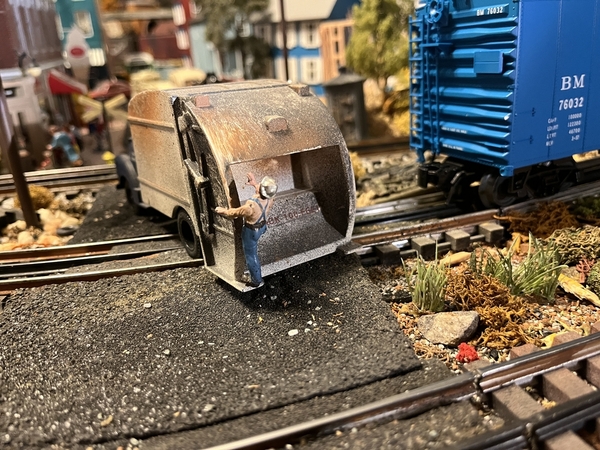
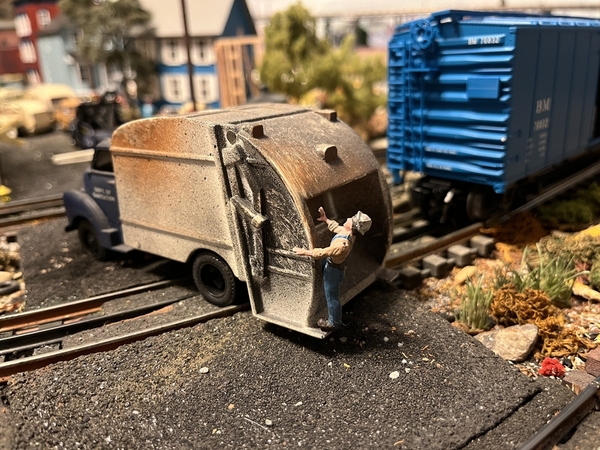
The rear of the truck.  That's Winkie Wheeler riding the rear step. That man can throw a garbage can quite a distance.   IMG_4015

View from above. IMG_4023

I used Testor Dullcote on the cab. IMG_4017IMG_4018IMG_4012

Sideview as the truck heads into Patsburg. IMG_4020

Attachments

Images (8)
  • IMG_4020
  • IMG_4021
  • IMG_4012
  • IMG_4019
  • IMG_4015
  • IMG_4023
  • IMG_4017
  • IMG_4018

I did one side of this Lionel Round Roof Boxcar yesterday, along with weathering 4 pairs of trucks.  The only weathering process used on the D&M Round Roof Boxcar at this point is an initial coat of Krylon Flat clear, then Pan Pastels.  Haven't top coated/sealed it yet.

Also a shot of an MTH Premier flatcar delivered with a simulated wood deck (plastic)...  Scratched and scribed the plastic decking with my medium tooth razor saw blade then used acrylic craft paints diluted and a final wash.

Since it's raining today, need to weather the side rails of the flatcar, and do the other 1/2 of the D & M boxcar

DSC02145DSC02144DSC02138DSC02142

Attachments

Images (4)
  • DSC02145
  • DSC02144
  • DSC02138
  • DSC02142

Ok guys I have been fallowing along and in amazement of the work you all do! I have to say I find it kind of funny that we look for wonderful car to buy and then the next thing you know spending hours on end to make them look OLD and USED! LOL

I can't wait to give it a try down the road! But I will keep fallowing so I can be somewhat educated before I start! LOL

@mike g. posted:

Ok guys I have been fallowing along and in amazement of the work you all do! I have to say I find it kind of funny that we look for wonderful car to buy and then the next thing you know spending hours on end to make them look OLD and USED! LOL

I can't wait to give it a try down the road! But I will keep fallowing so I can be somewhat educated before I start! LOL

@mike g.

Mike:

Your plan is a good one. Several weeks ago, my son, Chris, produced a how-to video explaining, in detail, his weathering technique for freight cars. Watch his video and try his technique. It is easy and the results are great!

We will be eager to see your weathering results in the future. Also, we all are eager to see your new, layout evolve. Keep us posted.

Just thought I would throw some thoughts out for those "thinking" about weathering. A couple of years ago I bought 50 various freight cars for $100. I knew someday I would try to weather. I have thought about it a lot over the last 3-4 months, but was really not sure how to even start. The very idea of powders or pastel paints was enough to make me sick, it was all Greek to me. Watching videos of those using spray cans struck a chord with me, I could do this. I took a deep breath, reminded my self if I screwed it up, it was just a $2 caboose, not the end of the world and I could probably primer it and start over. I made some mistakes, learned some things. Overall, the caboose came out pretty good. And I only used spray cans I had in my surplus paints. So my advice is to just do it, don't try your first run on a $1600 engine, but on a car cheep car you can throw away if it comes out bad. Channel your inner 10 year old and have some fun!

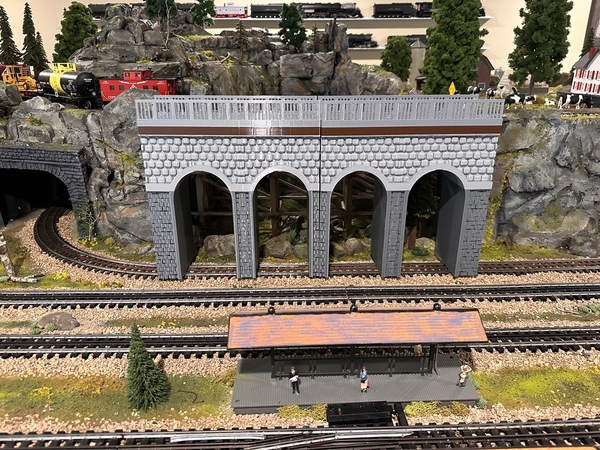
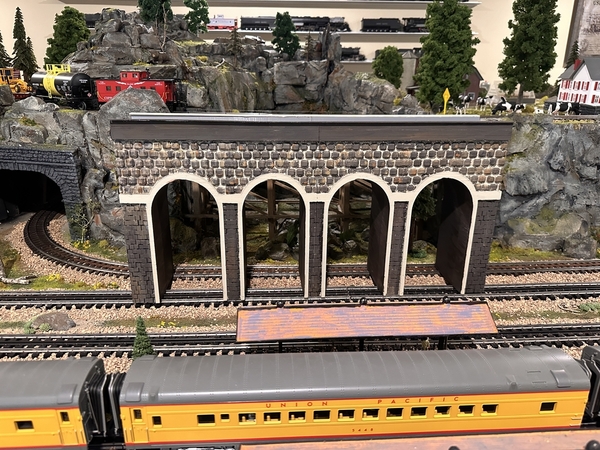
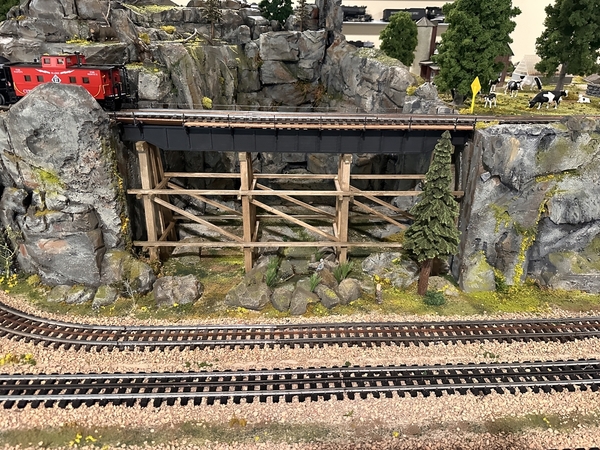
Hello,    I have lots of weathered items I can share on my layout, but for starters I’d like to highlight my new Viaduct Bridge.   The Viaduct was 3D Printed.    Amazing what can be done these days.      A before and almost after photo    I am replacing an existing trestle bridge I built using bass wood and a Ross Bridge.           Please check out my YouTube IMG_3187IMG_3260IMG_3190

Attachments

Images (3)
  • IMG_3187
  • IMG_3260
  • IMG_3190
Last edited by Alabama Joe
@Alabama Joe posted:

Hello,    I have lots of weathered items I can share on my layout, but for starters I’d like to highlight my new Viaduct Bridge.   The Viaduct was 3D Printed.    Amazing what can be done these days.      A before and almost after photo    I am replacing an existing trestle bridge I built using bass wood and a Ross Bridge.           Please check out my YouTube IMG_3187IMG_3260IMG_3190

@Alabama Joe

Joe:

Your viaduct before and after photos are great. What did you use to get your weathered effect? The difference is striking.

In in future editions of Weathering Wednesday, please do share other weathered items in your layout.

@chris a posted:

I did one side of this Lionel Round Roof Boxcar yesterday, along with weathering 4 pairs of trucks.  The only weathering process used on the D&M Round Roof Boxcar at this point is an initial coat of Krylon Flat clear, then Pan Pastels.  Haven't top coated/sealed it yet.

Also a shot of an MTH Premier flatcar delivered with a simulated wood deck (plastic)...  Scratched and scribed the plastic decking with my medium tooth razor saw blade then used acrylic craft paints diluted and a final wash.

Since it's raining today, need to weather the side rails of the flatcar, and do the other 1/2 of the D & M boxcar

DSC02145DSC02144DSC02138DSC02142

I like those!

           Weathering Wednesday, 5/14/2024 is upon us. So, gentlemen and ladies, again start your air brushes, acrylic paints and pastel chalks. I and your fellow forum members are eager to see your engines, rolling stock, buildings and scenery that you have weathered and don’t forget to explain and demonstrate your techniques for us.

          But first, here are the forum ground rules as so adroitly stated by my good friend Patrick Whitehead (aka trumptrain), host of the popular topic of this type, Switcher Saturday:

  • Have fun and enjoy!
  • Post only photos that you have taken.  
  • If you post a photo taken by someone else or a copyrighted photo be sure you have express written permission from the photo's owner to post their photo.  
  • Any individual who posts copyrighted material is subject to legal liability. Furthermore, that individual will be banned from the OGR Forum.  
  • Please consult the OGR Forum TOS (Terms of Service) for further information regarding copyrights.

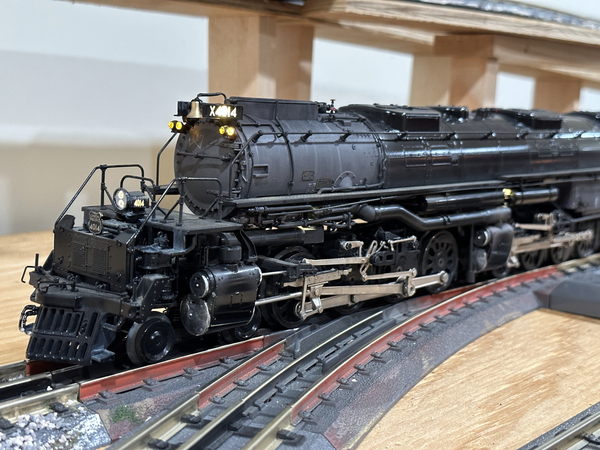
            I will start today’s Weathering Wednesday with a few more past photos of one of our weathered locomotives.

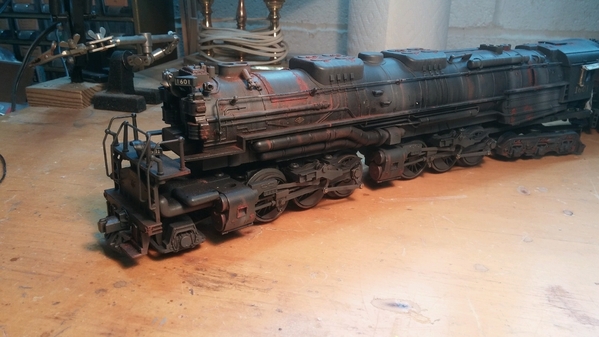
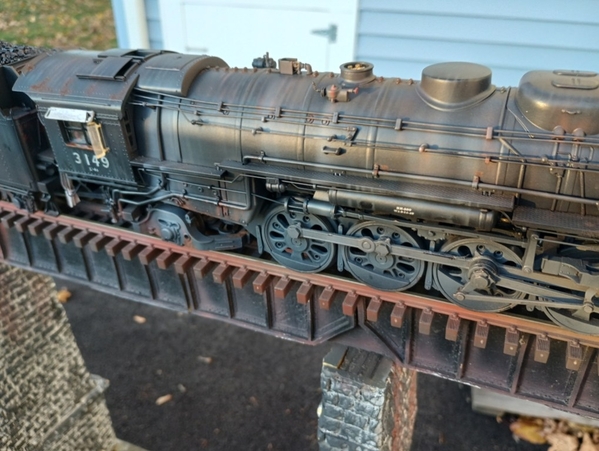
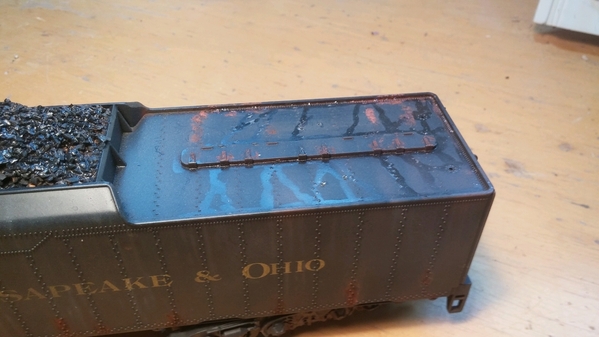
Our K-line C&O Allegheny weathered and super-detailed for us by Harry Hieki.

1205231415aimage000000 [2)

1205231416b1205231420

          Now it is your turn to show us your weathering artistry as well as how you achieved yours results.

Attachments

Images (4)
  • 1205231415a
  • image000000 (2)
  • 1205231416b
  • 1205231420

           Weathering Wednesday, 5/14/2024 is upon us. So, gentlemen and ladies, again start your air brushes, acrylic paints and pastel chalks. I and your fellow forum members are eager to see your engines, rolling stock, buildings and scenery that you have weathered and don’t forget to explain and demonstrate your techniques for us.

          But first, here are the forum ground rules as so adroitly stated by my good friend Patrick Whitehead (aka trumptrain), host of the popular topic of this type, Switcher Saturday:

  • Have fun and enjoy!
  • Post only photos that you have taken.  
  • If you post a photo taken by someone else or a copyrighted photo be sure you have express written permission from the photo's owner to post their photo.  
  • Any individual who posts copyrighted material is subject to legal liability. Furthermore, that individual will be banned from the OGR Forum.  
  • Please consult the OGR Forum TOS (Terms of Service) for further information regarding copyrights.

            I will start today’s Weathering Wednesday with a few more past photos of one of our weathered locomotives.

Our K-line C&O Allegheny weathered and super-detailed for us by Harry Hieki.

1205231415aimage000000 [2)

1205231416b1205231420

          Now it is your turn to show us your weathering artistry as well as how you achieved yours results.

Err you’re a day ahead Randy the 14th is Tuesday.

A day early, no big deal!  I say what the heck, let's roll with it...

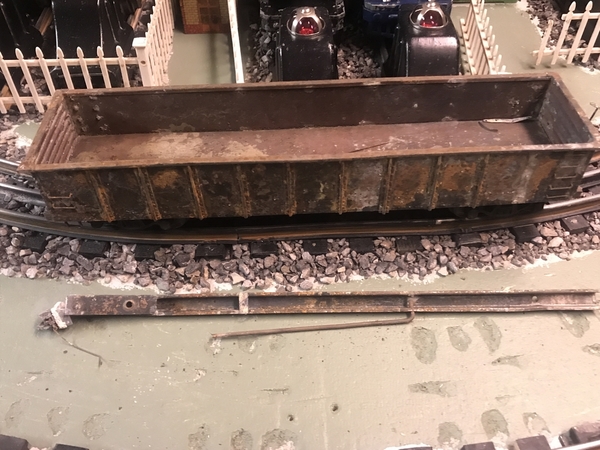
Here's a Lionel Maine Central PS-5 drop-end gondola that I did in 2016, about two years or so after I started weathering.  I was literally weathering everything I could get my hands on back then in an effort to try different techniques, learn from my mistakes, and improve my skills.  I distinctly remember the goal with this particular car was to experiment with rust techniques.  For the record, I typically don't like my cars to be this rusty, and only have a few like this on my roster.

I sold off almost all of these early weathering attempts--including this car--to help pay for more cars to weather.  Buy-weather-sell...buy-weather-sell.  I guess you can say I caught the weathering bug really bad!!

DSC_0001DSC_0002DSC_0014DSC_0011DSC_0003DSC_0006

Attachments

Images (6)
  • DSC_0001
  • DSC_0002
  • DSC_0014
  • DSC_0011
  • DSC_0003
  • DSC_0006
Last edited by CNJ #1601
@CNJ #1601 posted:

A day early, no big deal!  I say what the heck, let's roll with it...

Here's a Lionel Maine Central PS-5 drop-end gondola that I did in 2016, about two years or so after I started weathering.  I was literally weathering everything I could get my hands on back then in an effort to try different techniques, learn from my mistakes, and improve my skills.  I distinctly remember the goal with this particular car was to experiment with rust techniques.  For the record, I typically don't like my cars to be this rusty, and only have a few like this on my roster.

I sold off almost all of these early weathering attempts--including this car--to help pay for more cars to weather.  Buy-weather-sell...buy-weather-sell.  I guess you can say I caught the weathering bug really bad!!

DSC_0001DSC_0002DSC_0014DSC_0011DSC_0003DSC_0006

Joe,  I really like the "rust effects" on that Maine Central Gondola...  So I know it's been over 2 years, but do you happen to remember what you did to achieve that effect.   Like you, I am more interested in duplicating "your rust" effect on other items, ie. deck bridges, truss bridges, steel in the scrap yard etc.   

I applied a final coat of Pan Pastel "Raw Umber" to this MTH Flat Car, both on the deck and on the sides then found a better location to shoot a photo where the lighting was more forgiving...

DSC02147DSC02148

Attachments

Images (2)
  • DSC02147
  • DSC02148
@chris a posted:

Joe,  I really like the "rust effects" on that Maine Central Gondola...  So I know it's been over 2 years, but do you happen to remember what you did to achieve that effect.   Like you, I am more interested in duplicating "your rust" effect on other items, ie. deck bridges, truss bridges, steel in the scrap yard etc.   

I applied a final coat of Pan Pastel "Raw Umber" to this MTH Flat Car, both on the deck and on the sides then found a better location to shoot a photo where the lighting was more forgiving...
DSC02148

Hi Chris...thanks for the kind words.  I always enjoy seeing your weathering work, and I think the MTH P-M flat car looks great!

It was actually 8 years ago when I did that MEC gondola (2016), so I may not remember every single detail (such as exact colors used), but I do know the basic concept because I've since adopted it as sort my "go-to" method for achieving rust effects.

Basically I use weathering powders and matte medium.  I pour some matte medium into a small artist's paint cup or tray, then stir in a small amount of weathering powder to form a "paint" or paste.  What's really cool about this method is that there's actually a texture--or substance--to the rust effect.  To me that looks much more realistic than just using brushed or spayed-on rust-colored paint or powder with no texture to it.

It's trial and error to get the correct consistency (but usually more matte medium that powder!) for the desired effect you're trying to achieve.  More powder equals a thicker or heavier rust appearance...less powder equals lighter rust.  BTW, this effect looks great (and very realistic IMO) on trucks and couplers!

As for application...when doing larger rusty areas, I tend to dab it on with a short-bristled brush rather that using strokes.  I use a bigger brush for larger surface areas, and a smaller brush for small areas.  Just like other weathering, I mix up different powder/matte medium color mixtures and layer them on.  Obviously you don't want a rusty area to be 100% the same color from edge to edge.

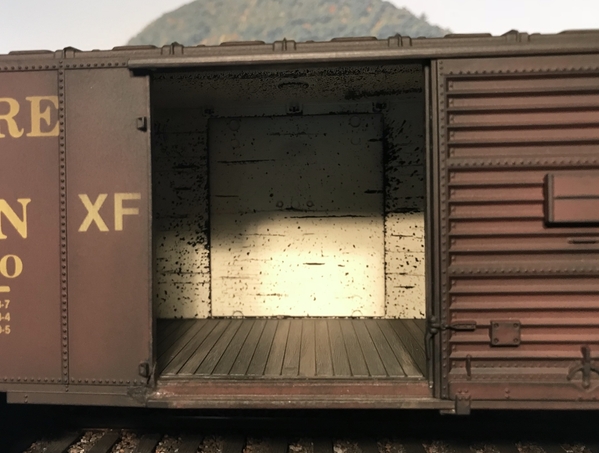
When imitating rusty scratches, I use artist's knives and load the thin edge side of the knife with the matte medium/powder mixture and simply transfer it to the surface.  You can also load a small amount of the  mixture onto an artist's fine sponge and dab on to create some light rusting effects.  One example of where I would use these two effects would be on the inside of boxcar doors and walls as shown in the photos below.

IMG_3172IMG_3395

Hope this helps explain things a little bit.  Please keep us posted here on the Forum if you give this "rust" method a try!

Attachments

Images (2)
  • IMG_3172
  • IMG_3395
Last edited by CNJ #1601

Joe, your killing me with that Rutland boxcar. I’m stuck in the late 40’s and everything’s boxcar  brown or red. I have a couple of MTH RS1’s on order.  I may have to dip into the future at some point. I see a number of them for sale. Just curious as to the manufacture. Great Job on it.

Chris, those cars look great. I need to make another visit and watch you do a couple. I’ve never tried Pan Pastels. I really like the look and need to step out of my airbrush comfort zone.

Joe,  I can't thank you enough for the great description.  It all makes perfect sense !  The Matte Medium I have on hand  is dead flat and dries clear, layering on different color pastels/powders creates the different shades of rust.

Dabbing or stamping with different size brushes is a technique I use frequently to prevent obvious brush strokes.

I really like the use of the blade edge to simulate scratches, great idea again.


Hey Dave,  yes we should get together, I need help putting Kadee's on one of my TMCC  0-8-0 Yard Goats, 

Last edited by chris a
@Dave_C posted:

Joe, your killing me with that Rutland boxcar. I’m stuck in the late 40’s and everything’s boxcar  brown or red. I have a couple of MTH RS1’s on order.  I may have to dip into the future at some point. I see a number of them for sale. Just curious as to the manufacture. Great Job on it.

Chris, those cars look great. I need to make another visit and watch you do a couple. I’ve never tried Pan Pastels. I really like the look and need to step out of my airbrush comfort zone.

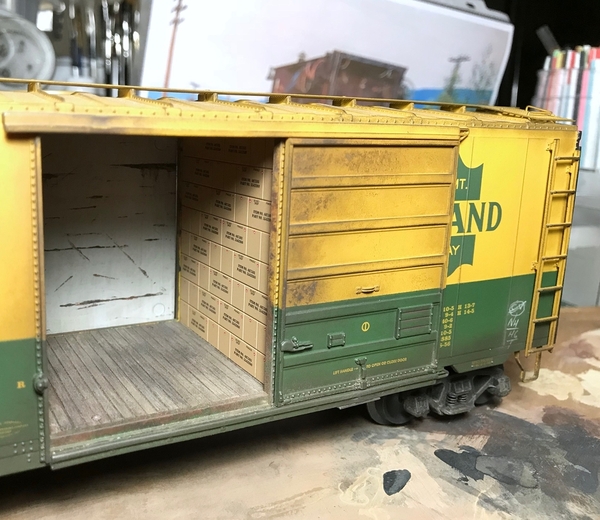
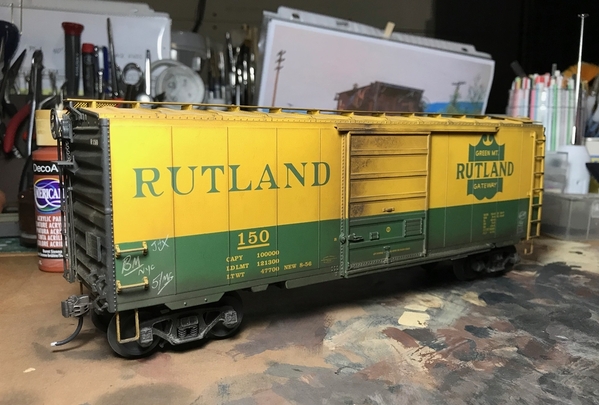
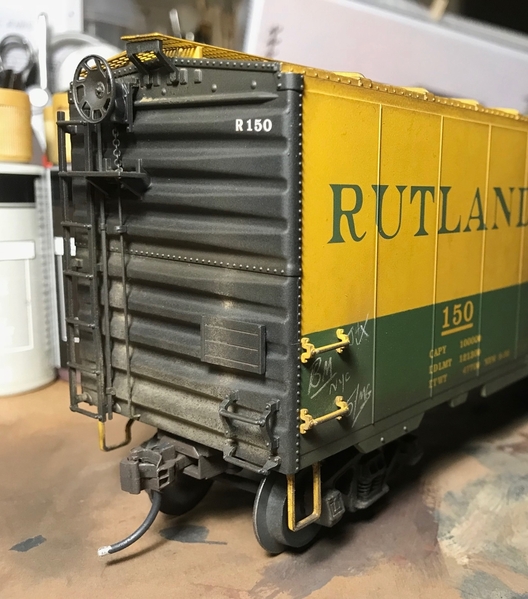
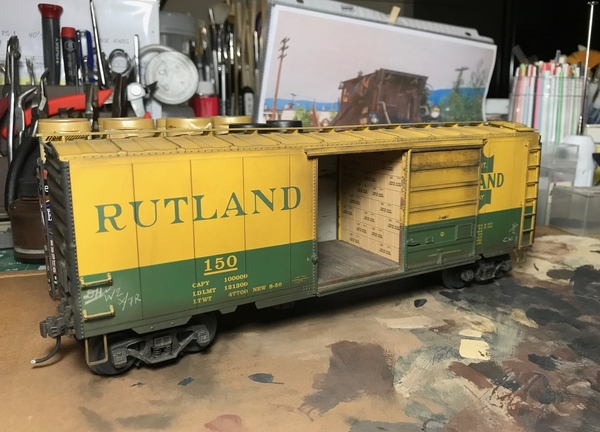
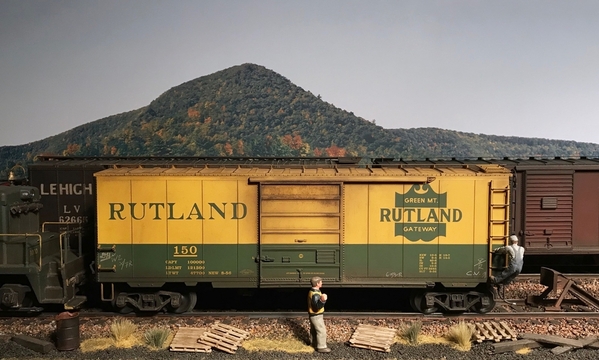
LOL, Dave...I think you need some more color!!  Thanks for the complements on the Rutland boxcar.  It's a Lionel PS-1 model that I modified with Kadees.  I see them listed on the Bay quite often...a lot cheaper now then when I purchased this one!  Really nice detail on these cars.  I used mostly pan pastels on this car--and most of my cars these days.  Love working with them.  Here are a few more photos...come on, I know you want one!

IMG_3385IMG_3383IMG_3393IMG_3626

Attachments

Images (4)
  • IMG_3385
  • IMG_3383
  • IMG_3393
  • IMG_3626

@CNJ #1601

Your weathering results are superb! Also, thank you for your explanation of your techniques. Sharing techniques is also a major purpose of this weekly thread.

I have one non-weathering question for you. In the Rutland boxcar above, how did you make the stacked load of boxes? Its appearance and detail are GREAT!

Thank you.

Thank you very much, Randy!  I can't take credit for the box loads.  They come included with the Lionel PS-1 boxcar model.

@chris a posted:

Joe,  I can't thank you enough for the great description.  It all makes perfect sense !  The Matte Medium I have on hand  is dead flat and dries clear, layering on different color pastels/powders creates the different shades of rust.

Dabbing or stamping with different size brushes is a technique I use frequently to prevent obvious brush strokes.

I really like the use of the blade edge to simulate scratches, great idea again.

You're welcome, Chris.  Happy weathering!

@Dave_C posted:

Joe, your killing me with that Rutland boxcar. I’m stuck in the late 40’s and everything’s boxcar  brown or red. I have a couple of MTH RS1’s on order.  I may have to dip into the future at some point. I see a number of them for sale. Just curious as to the manufacture. Great Job on it.

Chris, those cars look great. I need to make another visit and watch you do a couple. I’ve never tried Pan Pastels. I really like the look and need to step out of my airbrush comfort zone.

Dave,  Here's another Rutland Green/Yellow boxcar, weathered with Pan Pastels.   You sold me this boxcar the first time I came over to visit you, many moons ago !!!!   Also, moved an Atlas O State of Maine BAR Boxcar into the photo.

The Pan Pastels do a great job of fading out really vibrant colors and making them look more realistic. 

I'll send you an email we can talk about a day and time to get together. 

Chris

DSC02153DSC02154

Attachments

Images (2)
  • DSC02153
  • DSC02154

             It is time for the Weathering Wednesday, 5/22/2024 edition (Though I am starting a day early, at least I have the correct Wednesday date this week). This is the weekly thread where we celebrate dirt, grime and rust in the interest of simulating realism in our trains and layouts. So, gentlemen and ladies, I hope that you again have your air brushes, acrylic paints and pastel chalks fueled and ready to GO! I and your fellow forum members are eager to see your engines, rolling stock, buildings and scenery that you have weathered and don’t forget to explain and demonstrate your techniques for us.

          But first, here are the forum ground rules as so adroitly stated by my good friend Patrick Whitehead (aka trumptrain), host of the popular topic of this type, Switcher Saturday:

  • Have fun and enjoy!
  • Post only photos that you have taken.  
  • If you post a photo taken by someone else or a copyrighted photo be sure you have express written permission from the photo's owner to post their photo.  
  • Any individual who posts copyrighted material is subject to legal liability. Furthermore, that individual will be banned from the OGR Forum.  
  • Please consult the OGR Forum TOS (Terms of Service) for further information regarding copyrights.

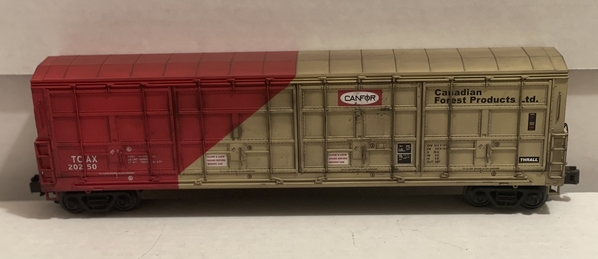
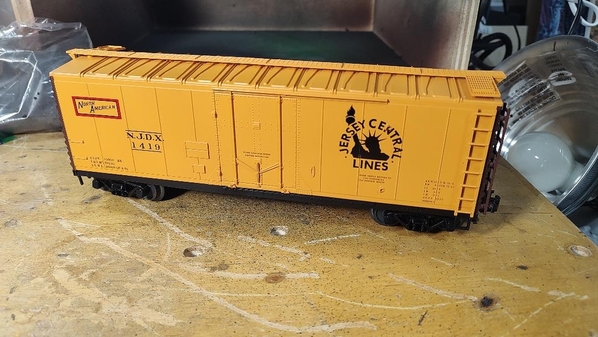
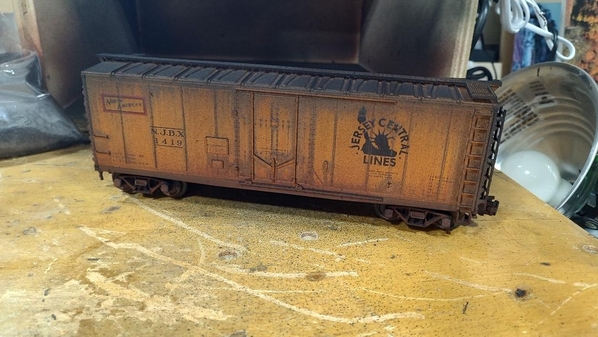
            My son, Chris, has been at it again. Below is a before and after photo of a Jersey Central RR Refer that Chris completed over the weekend using his technique that he explained in a video on a previous Weathering Wednesday.

CNJ Yellow Refer BeforeYellow CNJ Refer Weathered

          Now it is your turn to show us your weathering artistry as well as how you achieved yours results.

Attachments

Images (2)
  • CNJ Yellow Refer Before
  • Yellow CNJ Refer Weathered
Last edited by Randy Harrison

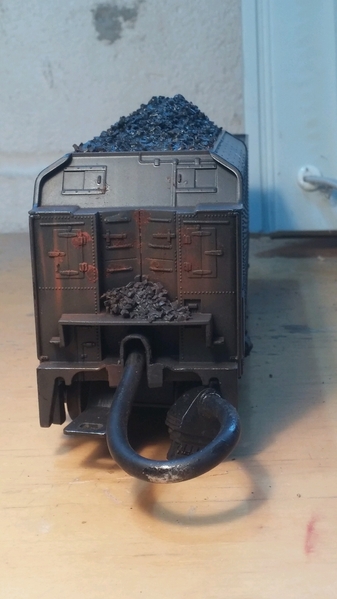
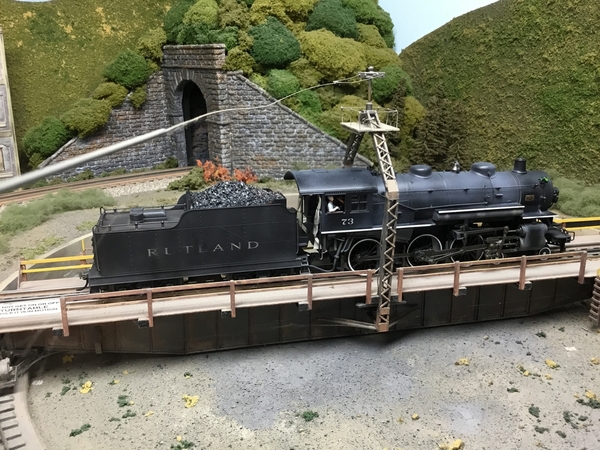
Rutland 73 started out as a Northern Pacific. I added a few things. Arttista figures, cab curtains. Kadee’s front and rear, water lines from engine to tender, Alco builders plates, higher coal pile and the biggest change. Closing the gap between the engine and tender.  Not that it was a huge gap. They are now about 1/8” apart. I have 5 on the roster and try to do each one a little different to give them sort of a personality. The weathering was pretty much all airbrush. Used Tamiya lacquer. Flat black, German Gray and Flat Earth.
FA898A55-13FC-4542-9BD7-53A8D868F9155A4E2E0B-2A7F-445E-A97D-2F6AEDC29EA1

Attachments

Images (2)
  • FA898A55-13FC-4542-9BD7-53A8D868F915
  • 5A4E2E0B-2A7F-445E-A97D-2F6AEDC29EA1

Add Reply

Post

OGR Publishing, Inc., 1310 Eastside Centre Ct, Suite 6, Mountain Home, AR 72653
800-980-OGRR (6477)
www.ogaugerr.com

×
×
×
×
Link copied to your clipboard.
×
×