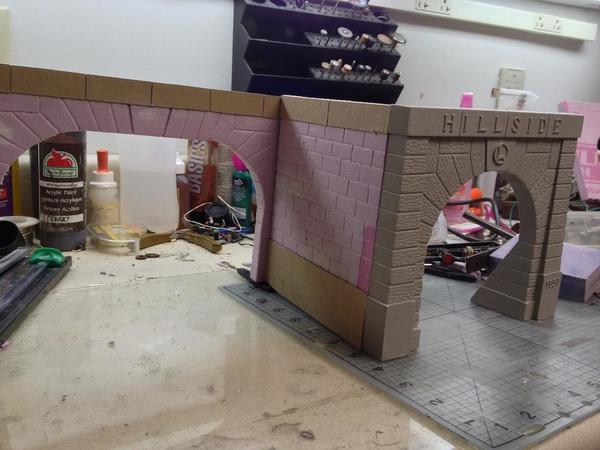
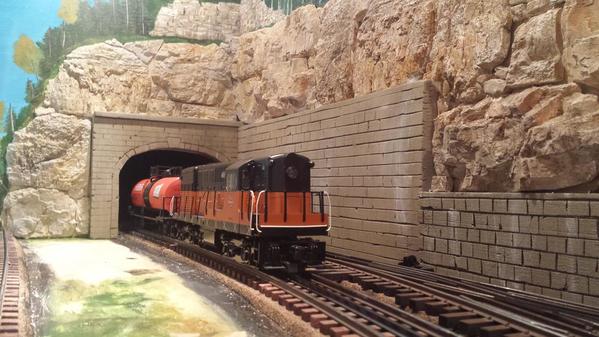
I need to make some scratch built portals mainly due to the odd size openings I will have.  I am hoping someone can provide some tips or photos of ones they have built.   I would like to make stone portals but in the end any type or style will work as I got short changed when they were handing out creative genes. 

Thanks,

Ed

Original Post

Replies sorted oldest to newest

Wow, they all look great.   Thanks for posting the photos.    Do you guys have a tool of choice for carving the foam blocks ?  

Pete - how did you create the rough surface and holes in the foam?

JDaddy - what is that structure over and  to the left of the track.?I have 1 area with a portal that looks very similar and something like that would fit in pretty.

Thanks, I appreciate the help.

Ed

Ed Walsh posted:
Do you guys have a tool of choice for carving the foam blocks ?  

Pete - how did you create the rough surface and holes in the foam?
 

My favorite carving tools are a cheap manicure set -- has all the shapes you need. Check the dollar store.

I can't really remember exactly how I did that texture. Probably, I just picked out bits of foam with the tip of an Xacto knife or a tiny screwdriver. One of the virtues of insulation foam is that it is friable very much like stone, so it is easy to get realistic textures.

Ed Walsh posted:

Wow, they all look great.   Thanks for posting the photos.    Do you guys have a tool of choice for carving the foam blocks ?  

Pete - how did you create the rough surface and holes in the foam?

JDaddy - what is that structure over and  to the left of the track.?I have 1 area with a portal that looks very similar and something like that would fit in pretty.

Thanks, I appreciate the help.

Ed

Hi Ed,

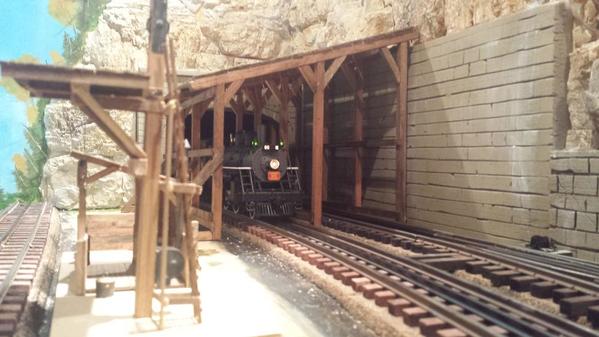
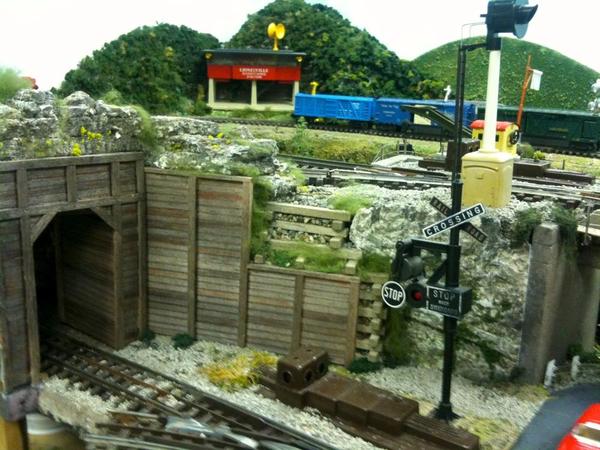
That is a branch line steam engine sanding facility that  I felt would look at home here coming out of the tunnel, since most of the steamers would use up most of the sand coming up the grade to tunnel 1... it has a stove to dry out the sand and platform for the crew to reach the sand domes of the locomotive... not sure who made that kit.

20170803_224801

I also added a caboose supply shed by Berkshire Valley for the boys to refill their coal and kerosene.

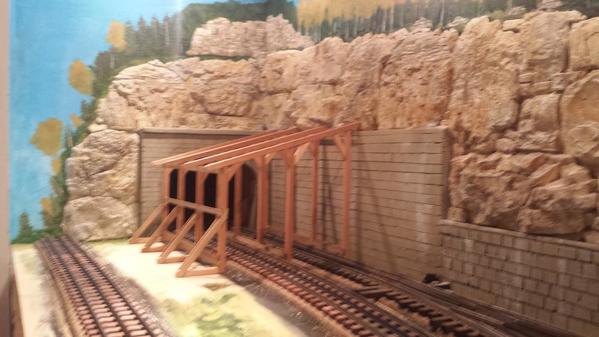
the snow shed I scratch built...

20170710_22571920170710_22570620170709_232923


Attachments

Images (4)
  • 20170803_224801
  • 20170710_225719
  • 20170710_225706
  • 20170709_232923
Ed Walsh posted:....

Frank - I really like the timber portals you have.  That is a great look.   I might have to try that.  Very nice job on the weathering......Ed

The portals are available from Jim Elster's Scenic Express. One of the really nice features about them is that they can be altered with a utility-knife/carpet-knife (if you are careful about your fingers!) , cutting them along the beams, vertically or horizontally, to add a piece to lengthen the upper section, forming a longer top to the portal, and  you can add a piece of one of the vertical elements to each side-support to heighten them when you want broader or higher portals.

IMG_5406 [3)

Those tunnel interior walls are available from Jim also.

FrankM

Attachments

Images (1)
  • IMG_5406 (3)
Last edited by Moonson
Ed Walsh posted:

Steve,

That is pretty cool stuff.   What did you use for a top coat over the celotex ?  The celotex I am familiar with wouldn't end up with such a smooth surface after the carving.   Very creative solution.    Thanks for posting the photos.

Ed

I paint the Celotex with brown latex paint.  Then carve it up with knives and dremmel  tool.  Paint again, then rough it up with a wire brush, repaint again. Hack at it some more.  When I am satisfied with the look,  I brush on watered down white glue, then sift onto the surface fine sand I dug out of a stream bed.  The sand adds to the texture.  For the concrete portal,  I paint the Celotex a grey concrete color  ( cheap grey primer paint ),  apply a coat of white glue + water, then sprinkle on the same sand, then add another layer of grey primer paint.  Then spray on some flat black to dirty up the concrete to get the look of the grime from smoke.

Steve

Last edited by Steve24944

Pink Foam Insulation is the best combined with Great Stuff to fill-in openings and lock the Pink together.

Scoring the foam with a  razor and straight edged is all you need; you can lightly brush the foam with acetone to get some weathered effects. ( test a sample piece to get the brushing right)

Paint with a water-based paint or acrylic OR use a thin coating of lightweight joint compound over it, re-score then paint with oil-based paint. 

Add Reply

Post

OGR Publishing, Inc., 1310 Eastside Centre Ct, Suite 6, Mountain Home, AR 72653
800-980-OGRR (6477)
www.ogaugerr.com

×
×
×
×
Link copied to your clipboard.
×
×