I'm having a similar problem, where the steamer is derailing approaching the curve side of an 072 Ross switch coming from a slight gargraves curve.  A conventional engine runs over it fine, and the steamers go over the straight side of all switches fine.  I spent hours setting up the coaling tower to house two steamers...so I'll pay close attention here to read what develops.  I need to examine the steamer approach more, but it appears as the front truck hits the frog area, it derails.  As we all know, the front trucks are loosy goody for lack of a better term and subject to roaming off on their own

I'm in all the way for Ross switches by the way...great product and Steve is always quick to provide feedback...

@RWL posted:

Yes, the engines are only going thru the straight section of the two Regular 11 Crossover switches. One is a lead in, and the other is a lead out switch. Dirt is not the issue as the wheels are clean and hardly used on either engine. The switches are also brand new, so they should be clean as well. Also, the traction tires are very tight, again, with very little use.

I am beginning to think that the Pennsylvanian Flyer is just a problematic locomotive, almost like the flange of the front truck may be grabbing the track edge and just climbing out.
From some of the earlier posts, here, maybe the Berkshire may need some tweaking, but I would need some guidance on that.

The, very old, General, with its very light and very loose front trucks goes thru with no issues at all.

I have found that "new" does not equal clean for wheels or track.  I have had new engines that would not run through switches until I cleaned both the wheels and the track.  They look clean but they are not.  

I have had to add weight to the front trucks of a few of my steam engines to get them to track through switches.  You can also try to increase the spring tension as suggested above.  NH Joe

@CAPPilot posted:

It would be nice to see several closeup photos of the switch from different angles in both positions.  This may allow us to help you.

Still not sure about the Pensy Flyer.

However, I think that I have found the issues with the Berkshire Locomotive.

Derailing at entering the turnout switch: When going into the entrance of the turnout switch, that front truck seems to hit the tip of the switching point rail, and rides up, over, and falls down on the other side, and heads into the turnout. This of course tries to take the loco that way, causing it to derail.

Derailing at entering the back side straight of the switch: I  have found that in one of the 90 degree corners, leading into that switch, the loco lifts a bit, and the back drive wheel slips up and over, and to the outside of the rail. It always slips over and to the inside of the turn, so I put a shim under the inside edge of that turn, at the point where this happens, and the problem went away.
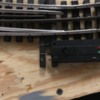
This only happens at the one turn. See the pic with the piece of wood under the track.

Attachments

Images (7)
  • IMG_1174
  • IMG_1175
  • IMG_1176
  • IMG_1177
  • IMG_1178
  • IMG_1179
  • IMG_1180
Last edited by RWL

I agree with Dennis. The point should nestle a little farther into the stock rail when the turnout is in that position. Make sure nothing is jammed in there, and that there is no burr on the point rail from when it was filed into shape.

Another thing that could be happening is that the flange of the left-front wheel on the locomotive is hitting the free end of the left point rail. As it tries to ride the left point rail (instead of the left outer rail where it belongs) it forces the locomotive to the right and derails it. This can happen easily if the wheel gauge on the engine is a little narrow. Can be fixed by adding a little guardrail ahead of the points to force the engine ever so slightly to the left. Or by re-gauging the engine, but adding the guardrail is easier :-)

Darn!  I see that the point isn't tight against the stock rail.   Can you apply an extra volt or two to the switch to see if it snaps into place?

I saw that gap as well, and I can't push it over any further either. The switch is not wired up at this point, as it has no where to go from the turnout. I just set up the loop temporarily to ferret out these kinds of details before actually doing the final positioning and wiring.
Now, I did take a needle nose pliers, and very gently bent the point toward the mating track, then gave it just a bit of a rotational twist, to bring the top edge into position as well.
The Berkshire now passes thru with no issues. The front truck rolls thru like it should. I plan to tweak it a bit more, and then smooth out the hump a bit, with my Dremel, as well.

I have attached a pic that switch, before the modification, along with a pic of the second switch, and there is marked difference, where the second one is a nice tight fit, and the Berkshire has not issues passing thru it.
--------------------------------------------
I have also discovered that this track has to be very accurately positioned.
That issue of the curve, where I had to shim up the inside of the turn, led me to believe that I did not have it in a true 90 degree angle, and that it might have been ever so slightly, for lack of a better way of putting it, kinked. I rearranged the leg going into it a but, and is now not a problem.

I think that I this was the issue with the Pency Flyer, as there are other 90 degree curves where, if one end of the loco is on one piece of track, and the other end is on the adjoining piece of track, it wobbles. One wheel on one end will be on the track, while the opposite wheel on the other end will be on the track, with one of the other two wheels in the air, and able to walk out of the track.

I would like some ideas on how to get the setup accurate enough to remove these issues.
I will also contact Steve about these issues, and I am sure that he will have helpful suggestions.

Attachments

Images (2)
  • IMG_1175
  • IMG_1181
@RWL posted:

Now, I did take a needle nose pliers, and very gently bent the point toward the mating track, then gave it just a bit of a rotational twist, to bring the top edge into position as well.
The Berkshire now passes thru with no issues. The front truck rolls thru like it should. I plan to tweak it a bit more, and then smooth out the hump a bit, with my Dremel, as well.

That's great!!!  I like your style!  I was tempted to suggest the pliers because that is probably what I would have done.  I often do things to my layout that makes some folks nauseous.

I use a 6" plumbers level for side to side shimming... and, I don't screw the track down tight ...just barely enough to hold.

What is under the green matting?   If it's just ply I would consider adding homasote or sound board (sound board is recycled sugar cane fiber down here in New Orleans) under the matting.  It adds a tad of give and leveling that my trains find desirable.  It would also quiet the Fastrak quite a bit.

I think you've got this!  Rock On!

Last edited by Dennis-LaRock

That's great!!!  I like your style!  I was tempted to suggest the pliers because that is probably what I would have done.  I often do things to my layout that makes some folks nauseous.

I use a 6" plumbers level for side to side shimming... and, I don't screw the track down tight ...just barely enough to hold.

What is under the green matting?   If it's just ply I would consider adding homasote or sound board (sound board is recycled sugar cane fiber down here in New Orleans) under the matting.  It adds a tad of give and leveling that my trains find desirable.  It would also quiet the Fastrak quite a bit.

I think you've got this!  Rock On!

Yea, I will tweak that switch point a bit more, but it seems to be working very well.
Under the green matting is plywood plus two layers of the white bubble sheet padding that goes under pergo flooring. It is just under 1/8" thick, so there is some give under the track.
By the way, you mentioned that it would quiet down the fastrak, but there is no fastrak on this layout. I have been down that road, and left in in the rear view mirror. I have a loop of it just so that I could run trains until I finished my table.
Now it is all Ross track and switches.

@romiller49 posted:

I would tweak the attaching spring first before bending the rail. I make my own springs for a smoother more reliable operation.

I tried that, but the point rail is all the way over against the main rail, and the actual point is just isn't quite trimmed as it should be.
So that the only thing to do is to modify the point. I just gave it a bit more, and ran the Berkshire thru, forward and backward several times, with no issues.
I think that the Pensy is the only problematic loco, and that may get better when I actually finish the loop and get it good and square, and screwed down.

Last edited by RWL

Here are pics of the before and after of the problem switch.
I have run my Berkshire, with the Loosy Goosy front truck, thru this modified switch at least a half a dozen times, in both directions, and both forward and revers, and it seems to be working as it should.

I will say this: The next time I attempt this modification, I will modify the back side of the point real first, before trying to reshape the actual point. I am convinced that the reason it would not go over to the main rail, like it should was due to the back side not being trimmed out sufficiently.
Good news though, it now works,

And, again, I will go over this with Steve, so that he knows what happened. I know that he would want to be made aware of this, as he really does want to make, and ship good, proper product.

THANK YOU ALL FOR YOUR COMMENTS. They all really helped me to figure out the actual problem, so that I could go about correcting it.

Attachments

Images (2)
  • IMG_1175
  • IMG_1185

OK, it is all sorted now.

The issue of the Berkshire derailing was due to the switch point not making good contact with the main rail, so that the front truck caught it and rolled over into the turnout, and taking the loco with it and into a derailment.
I modified the point, so that it now fits against the main rail as it is supposed to, and all is now really good and smooth.
I will polish all of the points with the Cratex Polishing Wheels, as soon as they come it.
I will also hit all track joints with these polishing wheels just for good measure.

The issue of the Pennsylvania Flyer derailing had mostly to do with the simple fact that one of the drive wheels never had a tire on it, making it a fair amount smaller in diameter than the wheel on the other side, so that the wheel with the tire and the opposite wheel on the other axle would raise the loco such that only 3 wheels could actually be making contact with the track at any one time. That fourth wheel would be up in the air enough to walk out of the track.
I added a tire on the other wheel, and it now runs much better. It will still walk out of a turn if it is in any way kinked, but it is orders of magnitude better.

Last edited by RWL

Years ago a friend gave me the Cratex #777 assortment, I had never used the Cratex wheels before.  I was blissfully unaware of how expensive they are, I was floored to see that assortment is over $100!  I'm going to have to go back and thank him again.

Yea they are a bit pricy."
I found lots of 10 each (7/8 x 1/8) for $9.00 at the following site.
They had Fine and Extra Fine.
I ordered the Fine version.
I hope they work well.

https://www.esslinger.com/crat...DEAQYDCABEgL-xfD_BwE

Add Reply

Post

OGR Publishing, Inc., 1310 Eastside Centre Ct, Suite 6, Mountain Home, AR 72653
800-980-OGRR (6477)
www.ogaugerr.com

×
×
×
×
Link copied to your clipboard.
×
×