pennytrains posted:

Why do trains always derail in the worst places possible?  Today I plowed the 303 on the left here into the back of it's own train which of course, just happened to be inside the double track tunnel just around the bend behind the apartment building and under the tree.  ... 

It's a rule, Pennytrains, perpetrated by some train-challenged demon, foisted on the rest of us just 'cause the monkey can do so. Also, a side-rule, especially if you are having a really good time of it, is that derailments must happen when you have guests and wouldn't dare think of crawling around hunting for errant trains in tunnels (or at the absolutely farthest points away from you.) Yup. That is our lot for daring to still play. Oh well. So what. Sort of. Oi-vey!

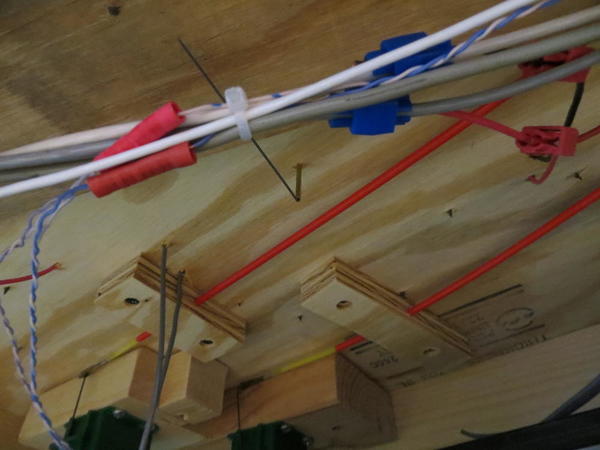
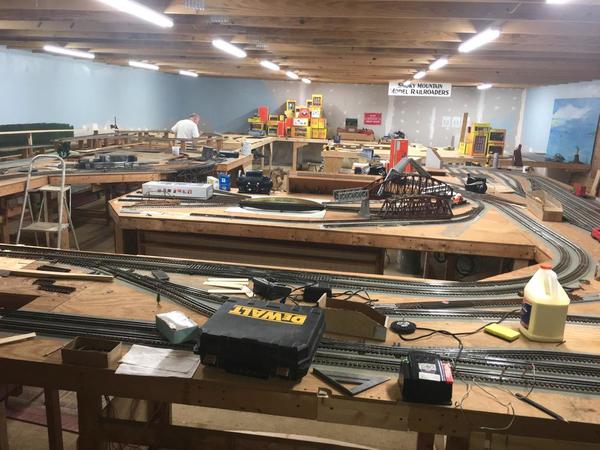
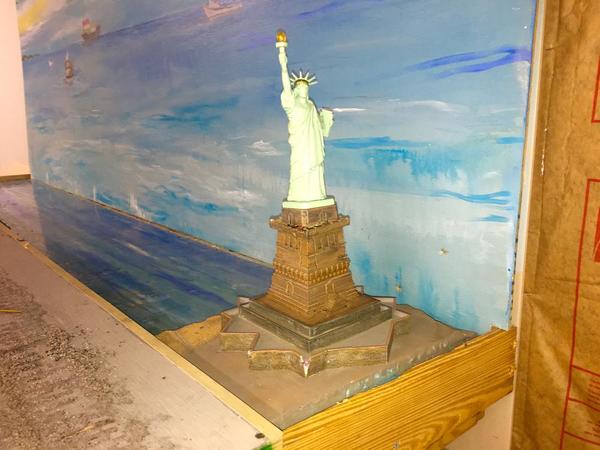
Progress continues on the new club layout with all of the benchwork roughed in and a lot of new track down. This thing is really big!

A new member has come along a few weeks ago and enjoys wiring - thank goodness. He's about 15 years younger than us old fellas and most welcome. Thanks Larry!

Anyone else out there want to be a part of this from 'early on'?  Come visit!

IMG_3713

IMG_3842IMG_3844IMG_3848IMG_4253IMG_4278IMG_4279IMG_3712

 IMG_4251IMG_3844

Attachments

Images (11)
  • IMG_3712
  • IMG_3713
  • IMG_4397
  • IMG_4406
  • IMG_4251
  • IMG_3842
  • IMG_3844
  • IMG_3848
  • IMG_4253
  • IMG_4278
  • IMG_4279
Last edited by c.sam

Last night flipped a coin to decide which train show to go to. Medina Ohio or Springfield Ohio. Maybe I should of flipped a few more times. Ended up at the Medina show. Only got a couple more boxes of ballast from Brummy's. Not much in the line of trains this time. So I have a box of three barstools to put together for the basement layout. Then I think I will just runs some trains the rest of the day.......................Paul

Began rearranging as to what sits on what shelf in my train room.  Decided on a totally radical swapping of shelf spaces/re- locations  of my locomotives and special rolling stock such as my beer car and caboose collection.

Up until today my entire caboose and beer car collection ( plus other rolling stock ) was displayed in a closet with sliding doors.  This closet parallels my layout and also houses my work bench.  Above the workbench are several shelves for the cars ( which are moved to where the locos once were ) and now the locomotives.  When this move is finally completed, and the sliding doors are slid open viewers will see my work bench and locomotive collection.... where my caboose and beer car collection once occupied shelf space.   The beer cars and cabeese now sit out in the open,  in the train room, on wall shelving that once held the locomotives.  This shelving was not actually long enough or deep enough to display my entire locomotive collection, which is now growing again.  

Once completed this new arrangement will make better use of my spaces and make for improved viewing  of my collection for visitors ( such as being able to place my 2 scale GG1s and my semi scale GG1 all in a row plus my Pennsy MU cars on the same shelf).  I've staircased some tracks on each shelf of the open wall shelving (  3 to 4 tracks deep per shelf ) making viewing of special cars such as MOW, snow removal equipment, etc much more visible and appealing to the eye.  

My train room tends to get cluttered so I thought exploring new fung shway ( sp?) will be a good thing.  

While doing this I also had trains running.  There is still work to be done, however I'm motivated to reach this completion this week.  Good times working on the railroad!!!!

Last edited by trumpettrain
paul 2 posted:

Last night flipped a coin to decide which train show to go to. Medina Ohio or Springfield Ohio. Maybe I should of flipped a few more times. Ended up at the Medina show. Only got a couple more boxes of ballast from Brummy's. Not much in the line of trains this time. So I have a box of three barstools to put together for the basement layout. Then I think I will just runs some trains the rest of the day.......................Paul

Paul - when in doubt run trains!

c.sam posted:

Progress continues on the new club layout with all of the benchwork roughed in and a lot of new track down. This thing is really big!

A new member has come along a few weeks ago and enjoys wiring - thank goodness. He's about 15 years younger than us old fellas and most welcome. Thanks Larry!

Anyone else out there want to be a part of this from 'early on'?  Come visit!

 IMG_3844

Looking mighty good Sam!!  I'm glad you got a new member; and he likes wiring!  Hooray!!  What is the exterior building construction about in the photo I forgot to include?

Mark Boyce posted:
c.sam posted:

Progress continues on the new club layout with all of the benchwork roughed in and a lot of new track down. This thing is really big!

A new member has come along a few weeks ago and enjoys wiring - thank goodness. He's about 15 years younger than us old fellas and most welcome. Thanks Larry!

Anyone else out there want to be a part of this from 'early on'?  Come visit!

 IMG_3844

Looking mighty good Sam!!  I'm glad you got a new member; and he likes wiring!  Hooray!!  What is the exterior building construction about in the photo I forgot to include?

Mark,  the building belongs to the Buffalo Creek Vacations business and will be used as their office, laundry & storage. Supposedly, they will make it look like a station. They've graciously given us the 30' x 50' open upper level for our layout. The Seaboard caboose is the first of 4 that they are converting into 'hotel' rooms. Our layout will become an additional 'attraction' for them when we're further along.

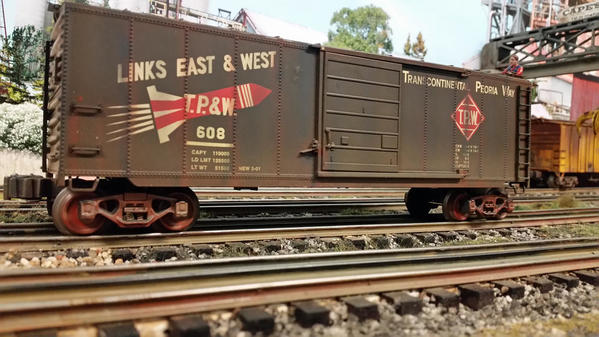
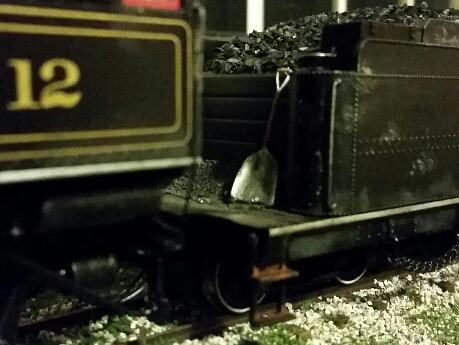
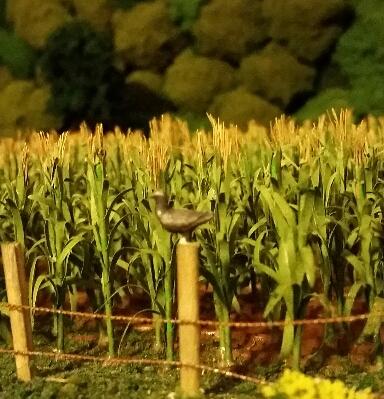
I just finished painting and installing several castings on the layout. First, I split a grouping of birds up into two segments, half of them are now pigeons, and the other half are crows. The crows, naturally, are in the cornfield or sitting on the posts around it. I kept one in my extra parts box for the eventuality of getting a scarecrow someday.
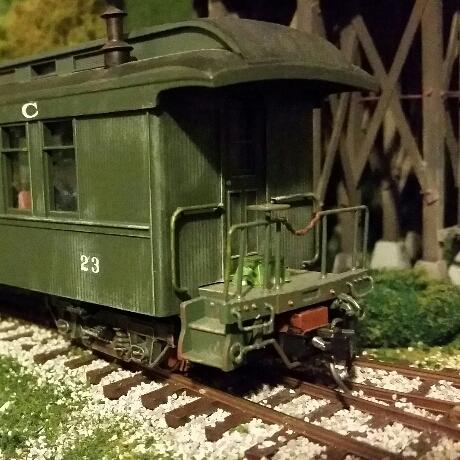
Next, I painted and weathered enough shovels for all of the locomotives, and placed them on the fireman's side of each tender. It just seemed to be needing that. Then, I finished the passenger car step stools, weathered them, then place them on the back decks of each end of each passenger car.2016-12-04 21.29.272016-12-04 21.29.552016-12-04 21.30.252016-12-04 21.31.01

Attachments

Images (4)
  • 2016-12-04 21.29.27
  • 2016-12-04 21.29.55
  • 2016-12-04 21.30.25
  • 2016-12-04 21.31.01

Feng shui..... BUT fung shway would be a cool name for a funky, swaying jazz tune

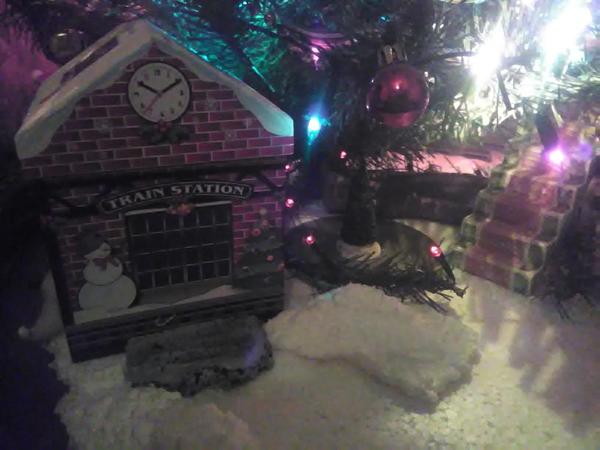
I "shoveled snow"  and shifted things around so my new station would fit the Christmas layout. I really had no idea why I had decided to paint that piece of foam grey.  I tried it as a landing off the castle steps; as a loading platform by the rails; and even moved it to 2 other layouts where it looked....  like nothing. Its a little better here imo.

  A bit more snow around the steps, some more fussy shifting things about, and I think it will be ok. I think the rink and tiny tree need to come forward more, but I want paths between snowpiles too,  and to still retain the lights on the ground. (those are led and have been on 24/7 since Turkey day on the same batteries,  and the same batteries as last year, also on for weeks then, lol. IMG_20161205_014540

IMG_20161205_020233

Yea,  one day I need to paint the flat foam to eliminate the round textures too.

Attachments

Images (2)
  • IMG_20161205_014540
  • IMG_20161205_020233
c.sam posted:
Mark Boyce posted:
c.sam posted:

Progress continues on the new club layout with all of the benchwork roughed in and a lot of new track down. This thing is really big!

A new member has come along a few weeks ago and enjoys wiring - thank goodness. He's about 15 years younger than us old fellas and most welcome. Thanks Larry!

Anyone else out there want to be a part of this from 'early on'?  Come visit!

 IMG_3844

Looking mighty good Sam!!  I'm glad you got a new member; and he likes wiring!  Hooray!!  What is the exterior building construction about in the photo I forgot to include?

Mark,  the building belongs to the Buffalo Creek Vacations business and will be used as their office, laundry & storage. Supposedly, they will make it look like a station. They've graciously given us the 30' x 50' open upper level for our layout. The Seaboard caboose is the first of 4 that they are converting into 'hotel' rooms. Our layout will become an additional 'attraction' for them when we're further along.

Sam,

Sounds great!  So the model train fan will be able to schedule a time to visit your club and sleep over in a vintage caboose motel!!  Cool!  My wife and I will be ready to make a reservation when the time comes!!

My layout started over two years ago, has now slowly been expanding from my Living Room into what used to be my Dining Room, by authority of my General Manager (Suzie) ...

I now have the ability to operate TWO mainline trains, in opposite directions, as well as FOUR trolleys on separate r-o-w's...   Power, for everything, is substantial.  2- ZW's ;  1-LW ; 1-KW and 1- Z ...

Mark Boyce will love this !!  He has always given me encouragement !  I have far too much rolling stock !  I got carried away on my purchases.  My LAST major purchase as of November 13th was that beautiful K-Line 'Great Northern' Empire Builder with an A-B-A diesel set plus SIX cars !

We're talking about SIX motors and smoke generators in each diesel unit.  I won't unpack it until after Christmas.


Happy Holidays !!


KRK

keyrouteken posted:

My layout started over two years ago, has now slowly been expanding from my Living Room into what used to be my Dining Room, by authority of my General Manager (Suzie) ...

I now have the ability to operate TWO mainline trains, in opposite directions, as well as FOUR trolleys on separate r-o-w's...   Power, for everything, is substantial.  2- ZW's ;  1-LW ; 1-KW and 1- Z ...

Mark Boyce will love this !!  He has always given me encouragement !  I have far too much rolling stock !  I got carried away on my purchases.  My LAST major purchase as of November 13th was that beautiful K-Line 'Great Northern' Empire Builder with an A-B-A diesel set plus SIX cars !

We're talking about SIX motors and smoke generators in each diesel unit.  I won't unpack it until after Christmas.


Happy Holidays !!


KRK

Ken,

The K-Line 'Great Northern' Empire Builder with an A-B-A diesel set and six cars must look very impressive!  The GN green and orange is a very handsome paint scheme indeed.  I can't run smoke in the house, it messes with my wife's asthma.

Anthony K posted:

My friends Sam, Lynn, and Tom were over Sunday to help with wiring switches and power drops.  Then we ran a test train to evaluate DCS performance.

IMG_2281IMG_2283

Anthony,

The yard looks great and so does the scenery!  You are progressing very well!

Is that a Buffalo and Pittsburgh or another affiliated company engine in the lower left?  What model is it?  I have a B&P GP 38-2 from MTH, which is very nice!

p51 posted:

I just finished painting and installing several castings on the layout. First, I split a grouping of birds up into two segments, half of them are now pigeons, and the other half are crows. The crows, naturally, are in the cornfield or sitting on the posts around it. I kept one in my extra parts box for the eventuality of getting a scarecrow someday.
Next, I painted and weathered enough shovels for all of the locomotives, and placed them on the fireman's side of each tender. It just seemed to be needing that. Then, I finished the passenger car step stools, weathered them, then place them on the back decks of each end of each passenger car.2016-12-04 21.29.272016-12-04 21.29.552016-12-04 21.30.252016-12-04 21.31.01

Nice attention to detail. Only observation, I thought crows were black and rats with wings( pigeons ) were gray.

jim pastorius posted:

P51 -I like your imagination and what ou do with your layout !!  Keep them coming. Do you have a scare crow in that cornfield ??


Nice attention to detail. Only observation, I thought crows were black and rats with wings( pigeons ) were gray.

Yeah, a scarecrow is coming. I've been eyeing a casting of one, but I'd have to order it from England. I might just make one instead.

As for the pigeon/crow colors, these cell shots don't do them justice. The crows are indeed black, but they don't shot it so much in the photos. The pigeons are indeed grey...

jim pastorius posted:

I think a home made scare crow would really work !  A casting is a casting.

Yeah, and now that I'm getting to just having the small detail stuff to work on, on the layout (I painted a bunch of resin castings last night), I have some time to make one. But still, I really like the looks of this one...

That said, one I made myself would be more satisfying, I'd think.

p51 posted:
jim pastorius posted:

I think a home made scare crow would really work !  A casting is a casting.

Yeah, and now that I'm getting to just having the small detail stuff to work on, on the layout (I painted a bunch of resin castings last night), I have some time to make one. But still, I really like the looks of this one...

That said, one I made myself would be more satisfying, I'd think.

    Its the little details that makes layouts stand out.    Now about this one...    I done with being stuck in the cornfields.

suzukovich posted:

Reeling from a 4500.00 repair bill on my truck( M1028 CUCV)  Was looking at my last video and decided to reshoot and edited scenes(SD7 in the lead). Now It all flows better with the music.    Adriatic, Its still November Rain.  


Wow!!    I don't feel so bad with a bill that is going to end up around $1400 on my car.  Of course my car is only worth about half what your repair bill is.  13 years old, but still in good shape.  Like my dad has said, it is only worth something to me.

Once again, a super video!!  December snow, I would say!  

Mark Boyce posted:
suzukovich posted:

Reeling from a 4500.00 repair bill on my truck( M1028 CUCV)  Was looking at my last video and decided to reshoot and edited scenes(SD7 in the lead). Now It all flows better with the music.    Adriatic, Its still November Rain.  


Wow!!    I don't feel so bad with a bill that is going to end up around $1400 on my car.  Of course my car is only worth about half what your repair bill is.  13 years old, but still in good shape.  Like my dad has said, it is only worth something to me.

Once again, a super video!!  December snow, I would say!  

Its a restoration project. still a shock but once they found the short and repaired that it was go for the other stuff. When done the drivetrain well have been completely rebuilt. It might be old but its paid for and has that cool factor. As for the video. There were a couple of errors in it that was bugging me. The last section transition from the SD9 to the SD7(scenes added )with the SD7 flows with the music now.    Also had just finished adapting a Red Caboose GP9/7 shell to an RK GP9/7 Chassis. Still need to do some finishing work and still may power it down the line. 


DSCF6045DSCF6047 


Attachments

Images (2)
  • DSCF6045
  • DSCF6047
Last edited by suzukovich

I've been working in the train room every day so far this month. The countdown clock is running, winding down to April 29th, when I will be part of the NMRA division layout tour. I have some solid and achievable goals for the end of 2016.

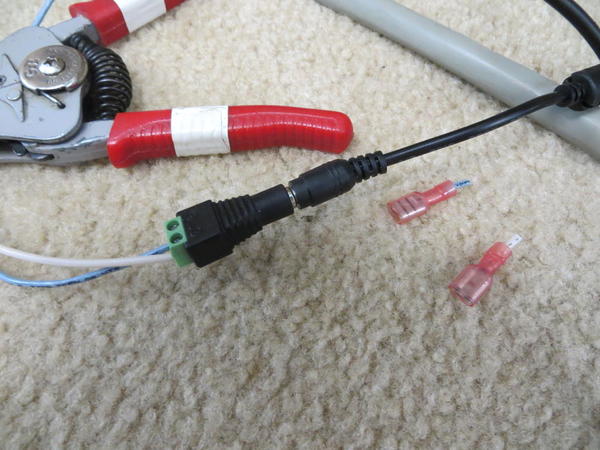
In November, I finished the last of the mainline switches, 124 tortoises, all working. I was never happy with the temporary power supply that I had been using. It was just an old MPC transformer with a bridge rectifier. I shopped the Bay and found a nifty 12VDC 5A supply that came with an adapter to connect wires, for just $6.67.
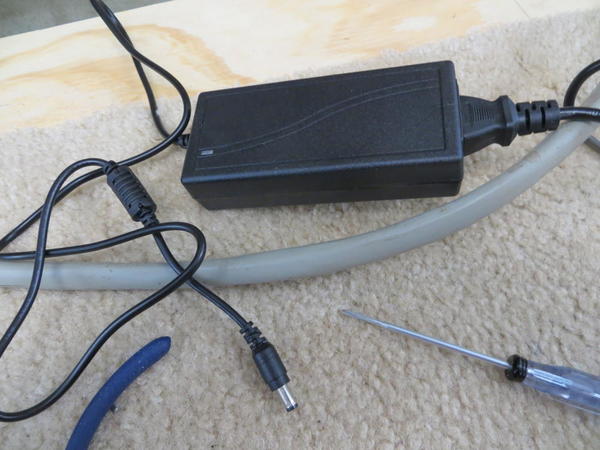
IMG_7115

Here's that little adapter with its screw terminals.

IMG_7114

The Tortoises work much better now. This one is installed on the north side of the room, but serves the whole layout. I bought a second unit, and will add it to the south side of the room to reduce voltage drop. Eventually they will also power the signals which run on 12V.
IMG_7116

That little piece of curved track next to the end of the backdrop was almost the last piece on the entire layout. I still have to build one last bit of benchwork in the big helix for the other turntable, an old Bowser. The connection and garden tracks will be the last. Target date December 31st.

IMG_7117

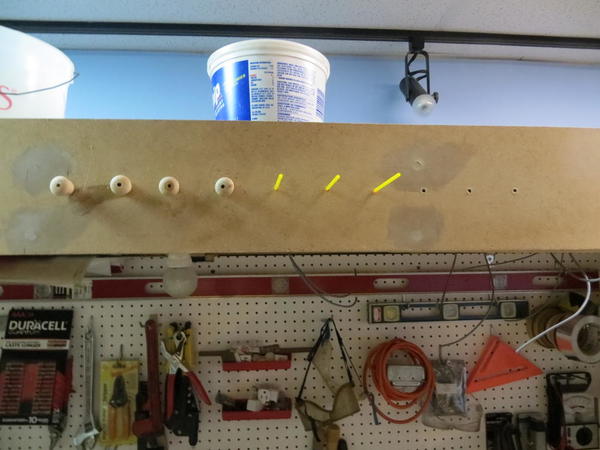
It's up to me to pickup where Matt left off, and finish the last 10 manual switch throws.
IMG_7120

A little more bending and fitting, and these 3 will be done. It's the next 3 that are going to be tough, because 2 of the switches are above the bookshelves. The push rods will have to be spliced, and the wires will have to be bent in the very confined space. Yikes!

IMG_7121

Here's one of the 3 new lower arms.

IMG_7122

And this is what they look like up top.

IMG_7125

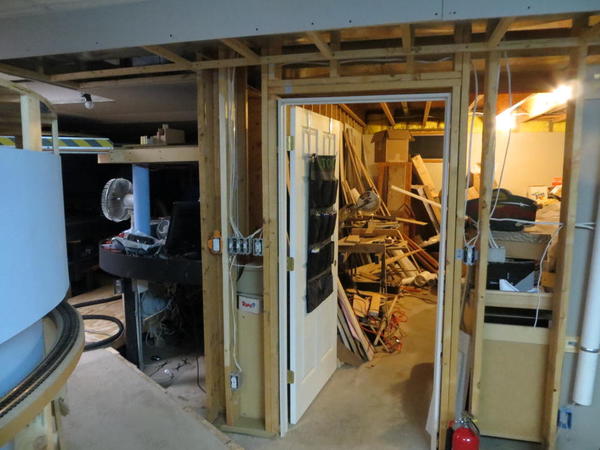
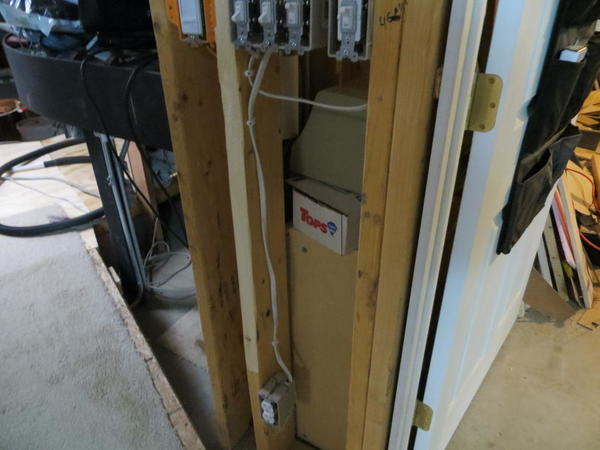
See the stud by the light switches, the one that isn't as dark as the others? That one was bowed out almost a half inch. I took my planer and shaved it down, then used a chisel to finish the chunk between the boxes that the planer couldn't get. After all that, I had to carefully pull the nails out of the electrical boxes, and re-nail them at the correct depth for the 1/2" rock.
IMG_7127

Now the rock will go on nice and smooth. This wall segment was just too short to not repair the stud.
IMG_7128

Attachments

Images (10)
  • IMG_7115
  • IMG_7114
  • IMG_7116
  • IMG_7117
  • IMG_7120
  • IMG_7121
  • IMG_7122
  • IMG_7125
  • IMG_7127
  • IMG_7128
Last edited by Big_Boy_4005

Thanks Carl. I've always enjoyed playing to an audience. When I was a kid, all of my parents friends would visit the basement when they came over. In my late teens, I was doing weekend train shows at malls. That just kept growing, until the "big one", enterTRAINment at Mall of America.

This layout is even bigger and better than that, but it is back to being a hobby and not a business. As such, I don't have the financial and time constraints, but the downside is there is a limited audience. This forum is a perfect platform to share what I am up to, with a large group of fellow train enthusiasts. I've said this a bunch of times over the last four years, but it's all of you that keep me going on this thing.

As always, there is a standing invitation to visit in person, for anyone on the forum that manages to make it to the Twin Cities. All you have to do is drop me an email and set up a time. I'm almost always available.

Thanks guys.

Mike, I had never seen those gizmos before, but I became an instant fan. My original plan was to just clip off the connector and hard wire it. That is much better.

Mark, the chiropractor will be all mine, Matt won't be doing those switches. I'm working to formulate a plan to get my hands in the 3-1/2" space and bend the wires. I think what I'm going to do is bend the bottom part first, feed it up through the tube, then bend the top part. It's going to be tricky, because the top bends need to be precise, and are hard to do when the wire is in place.

Big_Boy_4005 posted:

I've been working in the train room every day so far this month. The countdown clock is running, winding down to April 29th, when I will be part of the NMRA division layout tour. I have some solid and achievable goals for the end of 2016.

In November, I finished the last of the mainline switches, 124 tortoises, all working. I was never happy with the temporary power supply that I had been using. It was just an old MPC transformer with a bridge rectifier. I shopped the Bay and found a nifty 12VDC 5A supply that came with an adapter to connect wires, for just $6.67.

IMG_7115

Here's that little adapter with its screw terminals.

IMG_7114

The Tortoises work much better now. This one is installed on the north side of the room, but serves the whole layout. I bought a second unit, and will add it to the south side of the room to reduce voltage drop. Eventually they will also power the signals which run on 12V.

IMG_7116

That little piece of curved track next to the end of the backdrop was almost the last piece on the entire layout. I still have to build one last bit of benchwork in the big helix for the other turntable, an old Bowser. The connection and garden tracks will be the last. Target date December 31st.

IMG_7117

It's up to me to pickup where Matt left off, and finish the last 10 manual switch throws.

IMG_7120

A little more bending and fitting, and these 3 will be done. It's the next 3 that are going to be tough, because 2 of the switches are above the bookshelves. The push rods will have to be spliced, and the wires will have to be bent in the very confined space. Yikes!

IMG_7121

Here's one of the 3 new lower arms.

IMG_7122

And this is what they look like up top.

IMG_7125

See the stud by the light switches, the one that isn't as dark as the others? That one was bowed out almost a half inch. I took my planer and shaved it down, then used a chisel to finish the chunk between the boxes that the planer couldn't get. After all that, I had to carefully pull the nails out of the electrical boxes, and re-nail them at the correct depth for the 1/2" rock.

IMG_7127

Now the rock will go on nice and smooth. This wall segment was just too short to not repair the stud.

IMG_7128

Looking good Elliot.  Keep up the great work.  I am looking forward to the April visit. 

Dave

Went to the depot today to get paint for the cork roadbed. Took the ballast with me to match it up. Also found some colors in the small jars that will possible work on some buildings I am going to be doing and they were only .50 a jar. So tonight after dinner and while the wife is watching her Cavs I am going to lay down some cork on the basement layout. Finally a bit of track work started.......................Paul

GG1 2340 posted:
Thaddeus posted:

Here are some pics, now I just need to finish the other reversing loopIMG_1436IMG_1447IMG_1448

I dont feel so bad now,

Layout top looks like mine with all the tools and supplies spread around. Papers, wire, boxes, tools etc.

Love it!

Buzz

Funny thing is that this is the cleanest it has been for some time!  Glad To hear that I'm not the only one.

Thaddeus posted:
GG1 2340 posted:

Layout top looks like mine with all the tools and supplies spread around. Papers, wire, boxes, tools etc.

Funny thing is that this is the cleanest it has been for some time!  Glad To hear that I'm not the only one.

I think all "Plywood Pacific" layouts look like that before the scenery goes in.

My own layout was essentially a odd-shaped workbench with track on it for the better part of a year.

Woodson, I am using Midwest cork. Been using that forever. I don't know if it the lazy mans approach the way I do it. But I start out gluing it down with Elmer's carpenter wood glue using finishing nails to hold it in place till it dries. Once dry I paint the roadbed with a color made up at the depot to blend in with the ballast. Right from the start I never ballasted the whole track. I just ballast the sides of the cork. Couple of pics of what I mean.......Paul 

DSCN2667DSCN2670


Attachments

Images (2)
  • DSCN2667
  • DSCN2670
paul 2 posted:

Woodson, I am using Midwest cork. Been using that forever. I don't know if it the lazy mans approach the way I do it. But I start out gluing it down with Elmer's carpenter wood glue using finishing nails to hold it in place till it dries. Once dry I paint the roadbed with a color made up at the depot to blend in with the ballast. Right from the start I never ballasted the whole track. I just ballast the sides of the cork. Couple of pics of what I mean.......Paul 

DSCN2667


 Nice technique!

I so badly wish I'd at least painted the cork under my turnouts grey, as my Micro Engineering On30 turnouts are very fragile and picky, and I'm worried about gluing down ballast anywhere near the points or moving sections.

Mark Boyce posted:

I like your technique.  I have used cork before, but always ballasted between the ties.  No matter how much I tried, some always got where I didn't want it.  I have considered not balasting at all on the new layout, but your technique will make it very less noticeable that no ballast is between the rails.

I don't want to ballast at all, but especially between the ties, and this looks like a great compromise.

paul 2 posted:

Woodson, I am using Midwest cork. Been using that forever. I don't know if it the lazy mans approach the way I do it. But I start out gluing it down with Elmer's carpenter wood glue using finishing nails to hold it in place till it dries. Once dry I paint the roadbed with a color made up at the depot to blend in with the ballast. Right from the start I never ballasted the whole track. I just ballast the sides of the cork. Couple of pics of what I mean.......Paul 

DSCN2667DSCN2670


Thanks for answering my question.. I've used Midwest before and I was pleased with the results.. Plus, you gave me  and others a brilliant blasting  technique!! I learn so much from you guys everyday!! Thanks for sharing!!

I got my first section down. It is the only section I was sure of where I wanted it. As the track sits it is going to be part of the mainline. It will also be hidden to a point. being at the back of the tables it will go down between buildings on the front side and on the wall side Flats of buildings. Later tonight I hope to paint the cork. Pics show the section runs straight then starts into an 0-80 curve.......................Paul

DSCN0017DSCN0018

Attachments

Images (2)
  • DSCN0017
  • DSCN0018
suzukovich posted:

As usual a lot of great work.

Elliot love seeing the progress on your layout. Only issue when you show all the details of the wiring I get a headache and my eyes become sore just looking at it.   Made another video with my 3rd Rail CB&Q/C&S SD9s.


I agree with you about the wiring! LOL. Another great video and music, but your killing me! Being from the west Washington I need some green! LOL

Sorry, no pics today, but something of a milestone was reached on a trip to Menards. Today I bought what I believe will be the last dimensional lumber the layout will ever need, some 1x4's and 2x4's. There could still be some sheet goods, but I have some stockpiled in the garage. It's going to be very close.

While we were there my wife discovered the toy aisle, and dragged me over to see the trains. Yes Dear, I know all about them. I have my Red Owl store, that's all I want (for now).

I fell asleep mid post waiting on the attachment tool to show up yesterday.

I had played the shell game with scenery, trying for an "uplifting" scene.

Ended up wanting to sing "One of these things is not like the others" to Mitch.

 Can you guess which of these.5 things is not like the others?, lol.

IMG_20161209_011039

Six , six ,six , six, let's sing the song of six! How many is six?

Six lifting devices.

(It could have been seven if I had only thought of the helicopter too..darn)

IMG_20161209_010653

Ah hah, I made you count!

(Too old?  Too "soft"?   https://youtu.be/Qn_Lu6hcLqw    link is broken and won't respond to edits. See next post.


Attachments

Images (2)
  • IMG_20161209_011039
  • IMG_20161209_010653
Last edited by Adriatic

IMG_0330IMG_0360IMG_0358IMG_0357Hi Folks:   I've been working on the river on the right side of the round the wall layout. I finally added some color to the river bed, and tomorrow I'll start adding the first coat of gloss acrylic medium. There is a stream section under the truss bridge at the entrance to our train shed, and I have experimented with that small area first. That's the first picture.

Attachments

Images (4)
  • IMG_0330
  • IMG_0360
  • IMG_0358
  • IMG_0357

IMG_2879I bought some dirty Lionel Pullmans cheap this past week - put some elbow grease on the observation and it looks brand new.  They all had a thin layer of cooked on mud on one side of the exterior and the opposing interior.  They must've been on their sides.  I got the combination cat and a Pullman done, just 2 more Pullmans to go.  And order new diaphragms for all of them too.

Attachments

Images (1)
  • IMG_2879

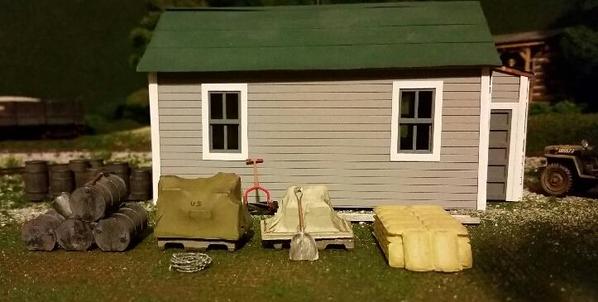
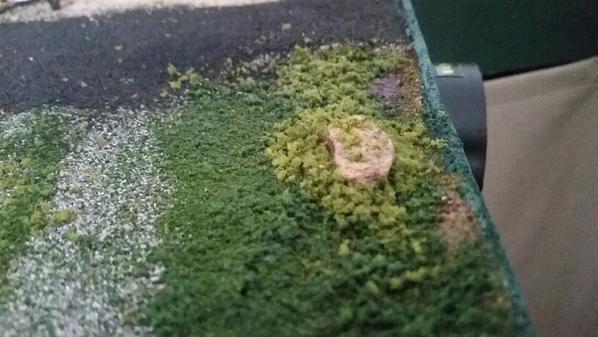
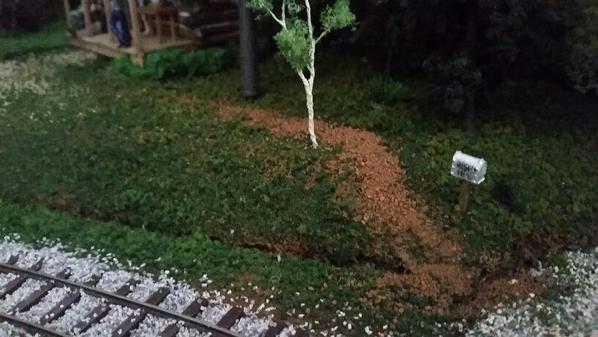
It's a small thing, but I filled every depression and hole on the layout and lined every path with real dirt from the place the layout takes place. I also placed a few small pebbles in certain spots to represent large rocks on the surface. Those also came from where the layout takes place.

Before I started the layout, my Mom actually collected a jar or dirt and a bag of small rocks from the area, just so I could do this once the layout was built.

It means a great deal to me to have several small actual pieces of Stoney Creek on the layout today.2016-12-10 09.42.392016-12-10 09.42.022016-12-10 09.41.37

Attachments

Images (3)
  • 2016-12-10 09.42.39
  • 2016-12-10 09.42.02
  • 2016-12-10 09.41.37
Last edited by p51

Kyrian and I have been working on the bench-work for the "Milwaukee Sub" on the Cabin Lake and Western .. seemingly forever ... but it is getting there.   Have to move the car out into the snow to make room for the sawing boards work.   Making about 3-6 feet of progress a day.  Hoping to have all the track and wiring done by May .... it just seems like it takes FOREVER!!  Risers -> sub-roadbed -> roadbed -> paint roadbed -> paint track -> install track -> wire it up -> play ... if still on this Earth by then ... :-)

Somewhere along the line this hobby turned into a job.

That wasn't the plan :-)

Last edited by Kerrigan

Finally had some time to begin a project that will improve visibility of the switch position LED's.  Using Ross switches with DZ1000's and DZ1002 push button controllers.  The controllers did not give an adequate position of the switch relative to the individual track.  So, I incorporated a SPDT-mom toggle switch just prior to the switch and LED's to indicate the switch position.  This arrangement is easier to see.  See attached photo showing "Green" position.

BruceIMG_4687

Attachments

Images (1)
  • IMG_4687
WP posted:

Hi Folks:   I've been working on the river on the right side of the round the wall layout. I finally added some color to the river bed, and tomorrow I'll start adding the first coat of gloss acrylic medium. There is a stream section under the truss bridge at the entrance to our train shed, and I have experimented with that small area first. That's the first picture.

Nice job!

paul 2 posted:

Yesterday after painting the cork an it had dried I added ballast to the side. Today I'll mix up some glue to apply to the ballast. The only thing bad about working on the basement layout is I can't run trains while working on it. A couple of pics............Paul

DSCN0029

Paul,

Yes, this is one of the greatest techniques I have seen in 50 years of trains!!  I hate ballasting; too tedious and painful.  Even though I will be building in only a 12 x 12 room, this could take a year off construction!!   Thank you!!  

Mark, it still takes a bit of time to place the ballast along the side. When I first started ballasting more years back then I want to remember I used crushed stone and did the whole track. Worked okay till I needed to move and it was a pain to pull up. So the next layout I did I went to the rubber ballast which I first saw at a Right of Way open house in Akron Ohio. Since that day I have used the rubber ballast and have been quite happy with it. The plus side is by chance if it got into the train gears it would not be as harmful to the gears as stone ballast would by. So today I found my glue and glued down the ballast. Tomorrow morning at trip to the Massillon train show and then a trip to Menards first. Lay down some track on the section I just did giving me a section of track to no where......Paul

mike g. posted:
suzukovich posted:

As usual a lot of great work.

Elliot love seeing the progress on your layout. Only issue when you show all the details of the wiring I get a headache and my eyes become sore just looking at it.   Made another video with my 3rd Rail CB&Q/C&S SD9s.


I agree with you about the wiring! LOL. Another great video and music, but your killing me! Being from the west Washington I need some green! LOL

But there is green in the beginning, Burlington Northern Green.   Or do you mean this kind of green


Of course I wouldn't want you seeing red either.

  So how about a compromise. Orange and green.

But after all you do have a new Mercedes Benz to drive.

1-DSCF5715


Attachments

Images (1)
  • 1-DSCF5715
Videos (3)
1-DSCF5849
1-DSCF5783
1-DSCF5693
Last edited by suzukovich
paul 2 posted:

Mark, it still takes a bit of time to place the ballast along the side. When I first started ballasting more years back then I want to remember I used crushed stone and did the whole track. Worked okay till I needed to move and it was a pain to pull up. So the next layout I did I went to the rubber ballast which I first saw at a Right of Way open house in Akron Ohio. Since that day I have used the rubber ballast and have been quite happy with it. The plus side is by chance if it got into the train gears it would not be as harmful to the gears as stone ballast would by. So today I found my glue and glued down the ballast. Tomorrow morning at trip to the Massillon train show and then a trip to Menards first. Lay down some track on the section I just did giving me a section of track to no where......Paul

Paul,

Yes I know what it is like pulling up track that was ballasted a few years earlier.  Maybe I glued it to well.  The plastic ballast sounds like a great idea.  Yes it is some work getting it to sti

Yes it is 2018 at the Detroit Model Railroad Club

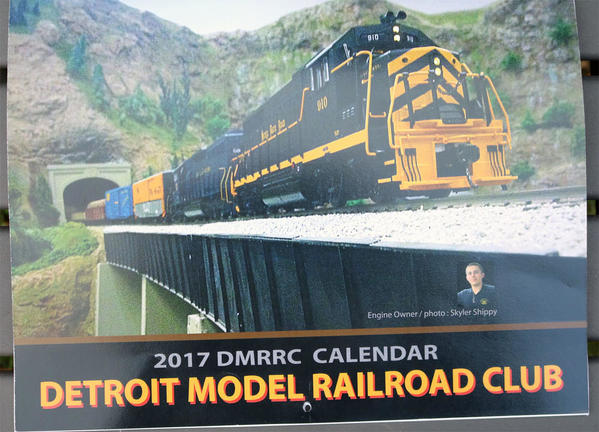
Today we started on one of the club's fund raising activities, the 2018 Calendar.  The 2017 calendar is on sale at the DMRRC's Open Houses. We use a local printing company to print this calendar, on a high speed digital press. A long with a folding and binding machine.

Below you will see the results of today's brain stormy at our Saturday's Open House and a photo of the 2016 Calendar. 

January - 2018 DMRRC Calendar 1 DMRRC Cover 2017

Founded on January 19, 1935   /   Michigan's Largest 2-Rail O Scale Club

Gary

Attachments

Images (2)
  • January - 2018 DMRRC Calendar
  • 1 DMRRC Cover 2017

Add Reply

Post

OGR Publishing, Inc., 1310 Eastside Centre Ct, Suite 6, Mountain Home, AR 72653
800-980-OGRR (6477)
www.ogaugerr.com

×
×
×
×
Link copied to your clipboard.
×
×