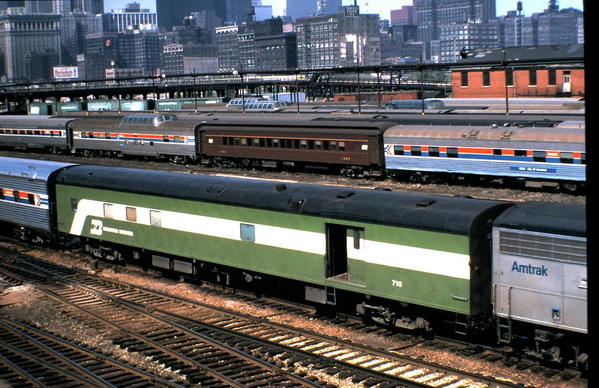
Thanks Len, out of curiosity, was that "Empire Builders to Milwaukee" by Pentrex? That's the one I have. I keep watching it, running some of them by in slow motion. They have another title that I want to get, called "Early Amtrak Across Wisconsin". Now I see it's on sale. Just happened this week, because I checked last week and it was full price. Not sure how much of that title is rehash, but at the sale price, it's worth a shot!![]()
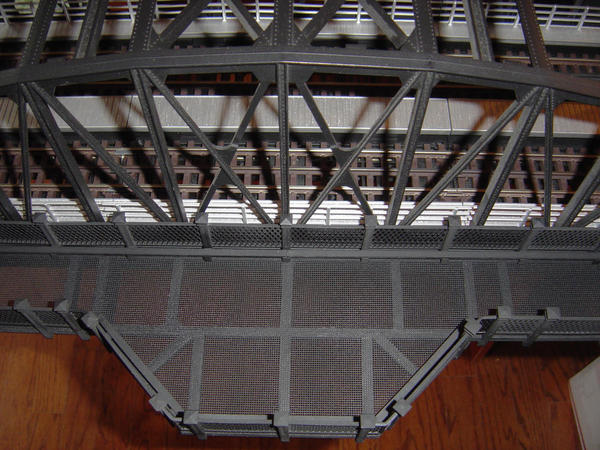
Had a great day yesterday working on my fascia. My son Jim and I got a lot done and hope to finish most of the rest today. We continued cutting the corners back and rounding them which I feel makes a huge difference in the looks and flow of the layout. We are leaving the areas that abut the control panels until he has a chance to get the new ones made so we don't have any wasted efforts. The big goal today is to get the fascia installed in my river valley area and the tunnels behind the curved stone arch bridge. This will allow me to start constructing the plaster scenery in these areas.
I will post pictures tonight or in the morning. It's great to be finally making progress again on the layout.
Art
Big_Boy_4005 posted:Thanks Len, out of curiosity, was that "Empire Builders to Milwaukee" by Pentrex? That's the one I have. I keep watching it, running some of them by in slow motion. They have another title that I want to get, called "Early Amtrak Across Wisconsin".
It looks like I have the one you want and you have the one I want. There probably is a lot of overlap between the two, but I would still like the Milwaukee title, especially if there is decent of footage of SE Wisconsin - mainly Pewaukee on into town.
Len B posted:Big_Boy_4005 posted:Thanks Len, out of curiosity, was that "Empire Builders to Milwaukee" by Pentrex? That's the one I have. I keep watching it, running some of them by in slow motion. They have another title that I want to get, called "Early Amtrak Across Wisconsin".
It looks like I have the one you want and you have the one I want. There probably is a lot of overlap between the two, but I would still like the Milwaukee title, especially if there is decent of footage of SE Wisconsin - mainly Pewaukee on into town.
Looks like we're both in luck, because they're both on sale. I think Pewaukee is one of the locations. Most of it is shot west of the city. There's also some south.
Elliot - I just shot you a private email regarding a Ross transfer table that has just come up for sale. Jim seemed to think that you may expressed some interest in one when he visited you last year.
Art
Happy New Year Everyone!
Finally 12 sheets of homosote were delivered today - track laying will soon start. Still making minor changes on track plan though. Hope everyone is enjoying the new year!
Regards,
Attachments
CHUGMAN, nice start to the layout. Nice size basement allowing for future expansion............Paul
Today after letting the plaster dry overnight I applied my first coat of color. I'll let that dry and see if I need another coat. Mark, it is definitely the lighting, same color but different looking. Other side of the wall is lit by a LED shop light and where I just colored I still have a Fluorescent light bulb the two lights give different shades to the earth color. In the meantime I am going to start to layout the small fiddler yard and engine servicing facility I am done with that area till I get Masonite up behind the factory....Pics..................Paul
Attachments
Looking very good. Unless you're modeling the southwest, you need to add quite a bit of grey to the earth. To get a good idea of what the color should be; take an empty paper towel tube and look through it with the other eye closed at an area (ie. a light to medium industrial site near a RR siding) similar to the one you're trying to model; see what the basic color is. I found that here in the Northeast grey was dominate.
paul 2 posted:Today after letting the plaster dry overnight I applied my first coat of color. I'll let that dry and see if I need another coat. Mark, it is definitely the lighting, same color but different looking. Other side of the wall is lit by a LED shop light and where I just colored I still have a Fluorescent light bulb the two lights give different shades to the earth color. In the meantime I am going to start to layout the small fiddler yard and engine servicing facility I am done with that area till I get Masonite up behind the factory....Pics..................Paul
Gee, I guessed right. Glad you solved the mystery!!
Won 2 turnouts today on da-bay I needed and ended up @ $25.60 each with shipping. A left and a right. I have a worn out right I need to replace.
Got some paint and I am primer painting 3 ALCO 200 series shells I have restored. My original 202 shell from 1957 and two TX special 210 shells I replaced the front skirts pilot aprons on. They look darn good to me.. Not much on the lay out table today.
been doing some cleaning of the layout. did some wiring of a Marx light tower, and a Kramer double street light. My 397 coal loader wasn't running right, so I pulled it apart and gave it a good cleaning and fixed a loose wire on the motor, and now it runs great. didn't relize how dirty the coal bin was until I cleaned it!
Busy day on the layout today. I started by unpacking the last three cars for the rainbow.
The last of the K-line BSB cars, a Pullman.
A GGD GN coach.
And a CB&Q duplex sleeper.
Sixteen feet of rainbow!
Back to actually working on the layout. With rail paint, ballast and scenery on the horizon. it is time to fill in all of the openings in the benchwork. Using scraps of plywood from the floor decking replacement, I filled in the section between the fascia and the track.
I'll continue to fill in all the little slivers, then calk all of the seams. This will stop any ballast glue from dripping down into the hidden yard below. Also closing these gaps will allow me to safely airbrush the track.
After accidentally knocking over my signal bridge and breaking one of the masts off, I re-glued it and secured the whole thing with a screw.
The other thing I worked on was carving the roadbed profile.
My plan is to get all of the filling and carving done on this section by the end of the week
Attachments
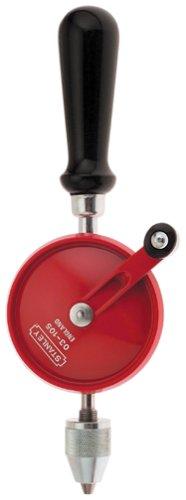
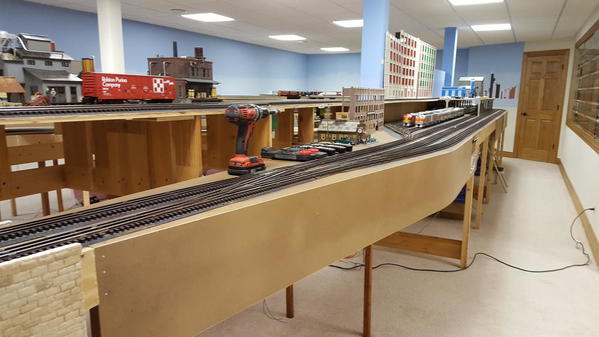
That's an impressive layout, Elliot. By the way, what's the black thing sticking out of the drill in photo #4.....LOL My corded drills rarely see life outside of their storage drawer these days.
Thanks Dan, I'm old school. I have one cordless set of regular and impact, but I still love my corded drills. I have three of them, and they have been used a lot to build this thing.
I don't even have a cell phone, just a land line.![]()
Had part of the day off. Started handlaying the first section of trackage. The realtrax wasn't doing it for me. Looks much better imo.
Attachments
OK, I'm getting on my bandstand on cordless drills.
1. in ten years, my corded drill will still work. I have my dad's old black and decker from the 60's and it still works: very small so it's nice in tight quarters.
2. I'm not sure why it's such a hassle to plug in a drill! In my shop, I have an outlet 4' high and every 4' and I can drill all day without losing power. I've got a 20K shop of tools and they're all the plug into the wall type, or air.
3. I'm not really the environmentally friendly type but I'm surprised at how many people have cordless drills. I'm betting that the bulk of owners use them very little in a year, and when they do, the battery is probably not charged, or has gone bad. A lot of money and materials are needed to make and replace all those old batteries. Batteries don't last forever and as they get older, their power depreciates. None of that is needed for a corded drill.
4. corded drills are very cost effective: ie, much cheaper to buy, and they last forever. I bet a lot of people could have bought a really expensive engine for what they have inputted into cordless tools over the years. Most of us only have 'so many bucks' to spend, so choose wisely 'grass hopper'.
5. I've had the same two drills 3/8" and 1/2" chuck for decades with no replacements needed. How many cordless drills have been bought and the batteries no longer work, or a better (meaning more power) battery has become available?
6. I can see using them in wet surroundings or on new homes when the power is not available.
7. I watch a lot of tool shows on PBS and it amazes me how they 'whore out' on using cordless drills by their sponsors.
8. I have one of the original cordless drills and it IS many times over 10 years old:
OK, your turn!
Attachments
samparfitt posted:
2. I'm not sure why it's such a hassle to plug in a drill! In my shop, I have an outlet 4' high and every 4' and I can drill all day without losing power.
I'm not sure of the "bandstand," exactly. I can say that building an around the room layout in a modest room to lay Gargraves track was much easier with two cordless drills: one drill fitted with a countersink bit, and the other with a bit to drive the track screws. This was especially true since the walls were "finished" and outlets above layout height to use wired drills was not in the cards; nor, was putting them lower, under the layout to plug/unplug corded drills tedious.
I've never found discovering a cordless drill dead was a big deal; usually, I plan ahead, but if I don't it takes little time to recharge it. In any case, I do have a corded drill handy if necessary.
To sum up, without addressing all of the previous OP's points, the utility of cordless v. corded drills is a function of circumstance and personal preference.\
I'm sure there are circumstances when the OP is glad to have a cordless drill on hand for a specific task where it is a super tool to one of his corded variety.
I didn't mean to start a cord vs cordless debate here. Frankly, I like and use both, but for specific tasks. I generally don't like cordless for actual drilling. I feel that I get more power and better control with the corded. Driving screws, cordless all the way. One big reason I don't mind corded is that I have plenty of outlets that are easily accessible around the perimeter of the layout.
BTW, I counted incorrectly in my earlier post. I have five standard corded units including a 1/2", and two hammer drills, but for the layout it's mainly the three. I also forgot another cordless which is only a 12V and has very low power. I mainly use it for track screws.
samparfitt posted:OK, I'm getting on my bandstand on cordless drills.
1. in ten years, my corded drill will still work. I have my dad's old black and decker from the 60's and it still works: very small so it's nice in tight quarters.
2. I'm not sure why it's such a hassle to plug in a drill! In my shop, I have an outlet 4' high and every 4' and I can drill all day without losing power. I've got a 20K shop of tools and they're all the plug into the wall type, or air.
3. I'm not really the environmentally friendly type but I'm surprised at how many people have cordless drills. I'm betting that the bulk of owners use them very little in a year, and when they do, the battery is probably not charged, or has gone bad. A lot of money and materials are needed to make and replace all those old batteries. Batteries don't last forever and as they get older, their power depreciates. None of that is needed for a corded drill.
4. corded drills are very cost effective: ie, much cheaper to buy, and they last forever. I bet a lot of people could have bought a really expensive engine for what they have inputted into cordless tools over the years. Most of us only have 'so many bucks' to spend, so choose wisely 'grass hopper'.
5. I've had the same two drills 3/8" and 1/2" chuck for decades with no replacements needed. How many cordless drills have been bought and the batteries no longer work, or a better (meaning more power) battery has become available?
6. I can see using them in wet surroundings or on new homes when the power is not available.
7. I watch a lot of tool shows on PBS and it amazes me how they 'whore out' on using cordless drills by their sponsors.
8. I have one of the original cordless drills and it IS many times over 10 years old:
OK, your turn!
I have both corded and cordless and still use them all. The batteries are a costly expense to replace...almost cheaper to by a new drill kit at HD or Lowes then just replacing batteries.
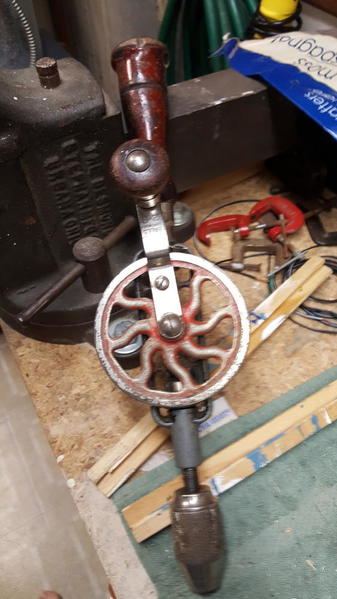
Still can't beat the old reliable. (belonged to my wife's grandfather, a cabinet maker, probably close to 100 years old and still works) ![]()
Attachments
theteejmiester posted:
TJ,
The track looks very good! I didn't care for Realtrax either, but a lot of folks like it. Whatever works for each individual is they way they should go.
Today I was finally able to finish the assembly and installation of 1 of 2 grated road beds on the bridge. Hopefully the majority of parts will be here today or tomorrow, barring any weather delays, for the second one. On the second one I will have to measure and order two sections of railing once I complete most of the assembly. And a somewhat belated Happy New Year to all.
Attachments
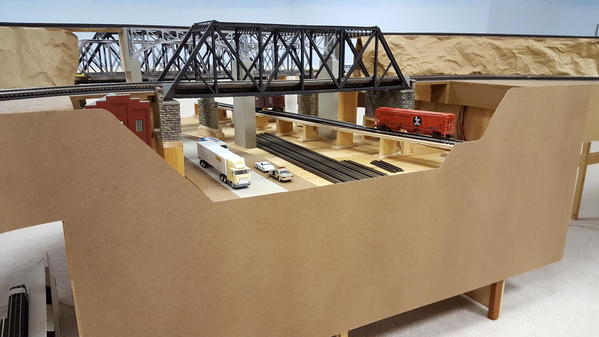
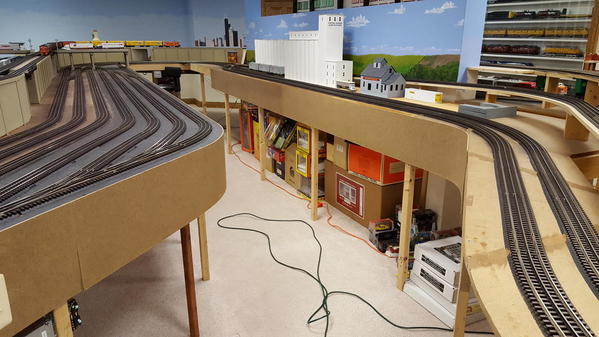
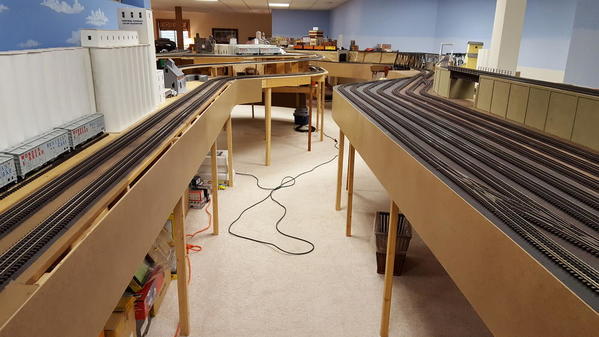
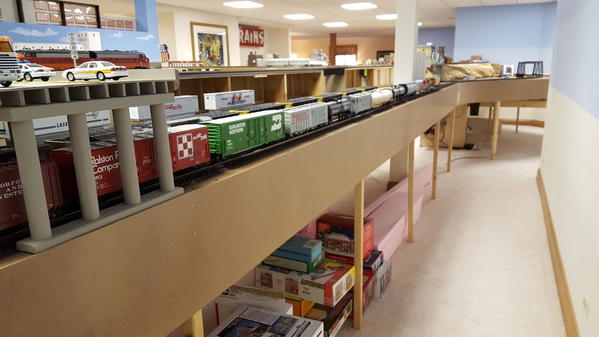
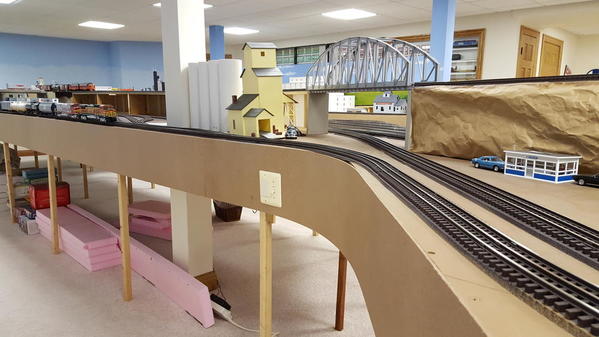
We had another productive day working on the layout yesterday. Over the last two days we hung many feet of fascia on the layout and curved all the corners that we could. We have two major areas left to do: the ends behind my curved stone arch bridge and all the places where we are going to replace the current control panels. Below are pictures of our progress.
I also got my parking garage project in the paint booth and will add the floors for each floor last and then it will be done and ready to install on the layout. Jim assembled the Korber fire escapes, I painted them, and we put them on the kitbashed Korber factory building. I will post pictures of them when they are finished later in the day.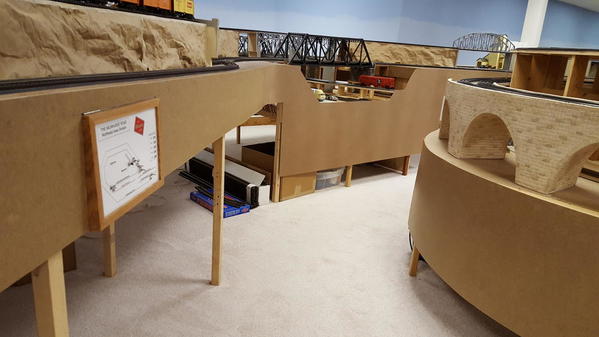
Attachments
Art,
I have so missed your posts and photos of your layout! I am very glad you are back at it and posting again! The facia looks great! I love that stone arch bridge you posted a year ago.
I wish I had a Jim to handle delicate things like the fire escape. I have trouble with small, tedious things these days, even though I am getting some relief from my arthritis!
Keep posting!
Chugman - I dare you to put the front half of a car in your garage with it sticking through the wall with a woman there with her hands in the air- like "Oh my ! What did I do?"
Thanks, Mark. It does feel really good to be back at it again. And I couldn't do it without my son. He tells me to figure out what I want to do and he will help make it happen. I have been intimated by portions of the fascia, but he made it seem easy so far.
Jim - Fortunately my layout is in the basement and not my garage, but it would be a funny sight gag. We see pictures every day of cars going through businesses and homes, pretty scary.
Art
jim pastorius posted:Chugman - I dare you to put the front half of a car in your garage with it sticking through the wall with a woman there with her hands in the air- like "Oh my ! What did I do?"
Better yet, a Mini 1000 and Mr. Bean...
Looking good Art! The forum is a much better place with you here. I kind of wish my son would help me.![]()
Yes Elliot; wouldn't it had been nice if my daughters married young men who were interested in trains. They are fine young men, but their interests are elsewhere.
Art, Your layout looks fantastic. ![]() It's good to have you back.
It's good to have you back.
Elliott and Art. Great work. Enjoy following your progress, creativity and problem solving. Many others have also been inspiring.
Yesterday after inside chores and shoveling a little snow I sprayed dullcote on passenger station, removed masking from window panes. Spent too much time researching old one story brick freight houses. The architecture for some reason I can't explain draws my interest. Same for passenger stations. Ironically the freight houses are not complicated structures. I approximated the dimensions from online photos and drew some designs. Thought about buying a couple of one story or one two story Ameri-towne bldgs to kitbash. Instead, I went to my scrap bin and after 8 or so cuts of masonite, glue and rattle can paint I have the basic bldg. 21 x 6 x 5. I plan to print out brick paper, make a 1 inch foundation (I forgot to extend the height for that when measuring) and detail.
Now waiting for the glue on pieces of foam on rock face to cure before I carve them. 
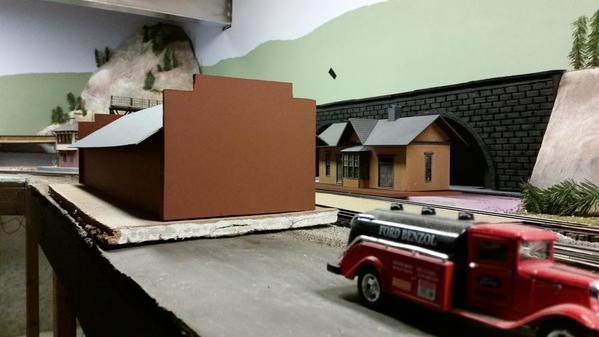 In the meantime, I'll ponder paint color for Rico bldg.
Attachments
Pennsynut when you get done with this we can custom make you a sign for the ends of the building check out our website for laser engraved signs LASER ENGRAVED SIGNS. we also have other Pennsy signs and can make you almost anything you would want.
Mark Boyce posted:Yes Elliot; wouldn't it had been nice if my daughters married young men who were interested in trains. They are fine young men, but their interests are elsewhere.
Actually Mark, I may have better luck with my daughter helping me with scenic elements of the layout. She'll be moving back here when she's done with school in May.![]()
Scale City Designs posted:Pennsynut when you get done with this we can custom make you a sign for the ends of the building check out our website for laser engraved signs LASER ENGRAVED SIGNS. we also have other Pennsy signs and can make you almost anything you would want.
Thanks. Got so many details on the burner. You do good work.
Big_Boy_4005 posted:Mark Boyce posted:Yes Elliot; wouldn't it had been nice if my daughters married young men who were interested in trains. They are fine young men, but their interests are elsewhere.
Actually Mark, I may have better luck with my daughter helping me with scenic elements of the layout. She'll be moving back here when she's done with school in May.
Sign her up!!
One of my daughters is an artist, but I was never able to coerce her into any scenery work. Since I never did sign her car over to her, since I paid for it, I should tell her I need it back unless she does a backdrop for the new layout room, which incidentally used to be her studio! lol
Really cold out so I decided to work on my Standard gauge track. Installed the 072 curves I bought a couple of days ago. Took my time and most things went pretty smooth. The curved track seems pretty rugged but the 36" straights I use,not so much. Made it a little hard to cut some pieces that were a little too long. The trains really run smooth on the track, though. This is all pre-war Lionel & Ives. The tighter 042 curves that are almost new go to the bedroom layout where I have some old curved track that don't conduct electricity as well. Very little gets thrown out.
TRied to run my Standard gauge train and it wouldn't go-then the breaker tripped. A very slight short and I suspected the new curves so turned it on again and felt the new curves. Sure enough felt a warm spot, took the piece out and replaced it with an extra. everything OK. I suspect the center rail and the thin piece of cardboard they use for insulation. Had the same issue when I put the 36" straights in. An extra piece or two always helps.
I removed all the buildings I've built and bought that have been stored on the top of the layout. First, I'm also going to redo my background and then do some ballasting and detailing on a hard to reach area. Next I will finalize laying and wiring the yard track.
Hello guys and gals.....
Been busy last night adding stick on wheel weights to my 3 MTH Premier cars. They seem to roll better and smoother with the added weights !!!!!!!!! I added 1.2 to 1.56 pounds to 1 40' foot Reefer and 2 50' foot boxcar and hopper.
"your word is like a lamp that guides my steps, a light that shows the path I should take" Psalm 119:105 ERV (Easy to Read Version)
Tiffany
Ran the layout for a visiting girl in her twenties that had never seen a model train let alone a layout before. A lot of "you're kidding me"-s "so cutes" and "neats" along with some decent timeline, operations, and history questions. Not a "fan", but an accepting observer for sure. Maybe one day in the future another kids Christmas train will be bought and run.
Ended up playing with the teapot again after that. The AF drivers are too tall and no matter what I did it wasnt low enough up front. I'll need a set of junk Berk drivers or something else rod driven thats even smaller in dia., if there is such a thing.
Adriatic posted:Ran the layout for a visiting girl in her twenties that had never seen a model train let alone a layout before. A lot of "you're kidding me"-s "so cutes" and "neats" along with some decent timeline, operations, and history questions. Not a "fan", but an accepting observer for sure.
Yep, they're out there. I set up a WW2 re-enacting display at an airshow in June and had several young ladies who were genuinely interested in the timeframes and asked some very insightful questions. One new guy to the hobby said, "If I'd known it was like this, I'd have gotten into this years ago!" I explained that this didn't happen nearly as often as he though it does (as I have been in the hobby since I was about 5 years old).
As for my own layout, I've bought about 70 flower plants (made by JTT) in O scale and just finished "planting" them last night. I think little details like that really can make a layout 'pop' more than simple ground foam and a lone tree here and there.
Adriatic posted:Ran the layout for a visiting girl in her twenties that had never seen a model train let alone a layout before. A lot of "you're kidding me"-s "so cutes" and "neats" along with some decent timeline, operations, and history questions. Not a "fan", but an accepting observer for sure. Maybe one day in the future another kids Christmas train will be bought and run.
Ended up playing with the teapot again after that. The AF drivers are too tall and no matter what I did it wasnt low enough up front. I'll need a set of junk Berk drivers or something else rod driven thats even smaller in dia., if there is such a thing.
Maybe next time ![]()
![]()
Received my Glenn Snyder shelves yesterday. Picked up everything needed to mount them at Lowes. Came home and 3 hours later I was done.
I had Snyder cut 6 shelves at 40" for me. I saw the 6 leftover pieces and said to myself "hmmmmm wonder how long those heritage engines are with the matching cabooses.
I still have 2 of the shorter ones left. Probably throw those up tomorrow. Talk about utilizing what would have been wasted space.
Attachments
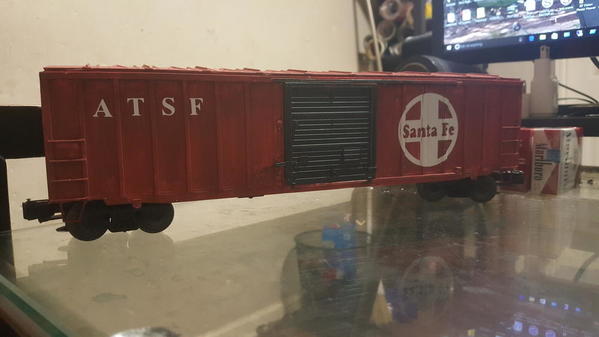
played with my vinyl cutter tonight its the first time I tried something like this this boxcar yesterday was white I hand painted it in Tuscan Red the paint isn't perfect but in older boxcars are they ever I downloaded a Santa Fe vector resized it and cut it out the vinyl is a little thick but it folded into the seams nice What do you think total outlay to make this car go from white to this about $2.00 .
Attachments
Last night I took the 042 curves from my dining room Standard gauge layout and put them at the one end of the Standard gauge loop on my bdroom layout. So I solved two problems with one purchase. if only all problems were as simple and easy.
Jhainer posted:still working on the layout added the second Yard and ran the track to it . ordered some wire and connectors to make more feeders. so in the mean time I have been running the one loop I have running . and doing alittle scenery in the process. here's this weeks results .
Nice looking scenery. The grass and trees look very nice!
Jhainer posted:played with my vinyl cutter tonight its the first time I tried something like this this boxcar yesterday was white I hand painted it in Tuscan Red the paint isn't perfect but in older boxcars are they ever I downloaded a Santa Fe vector resized it and cut it out the vinyl is a little thick but it folded into the seams nice What do you think total outlay to make this car go from white to this about $2.00 .
Great job on the car, I have a few I would like to do that with. Do you just run it threw a printer?
645 posted:Big_Boy_4005 posted:
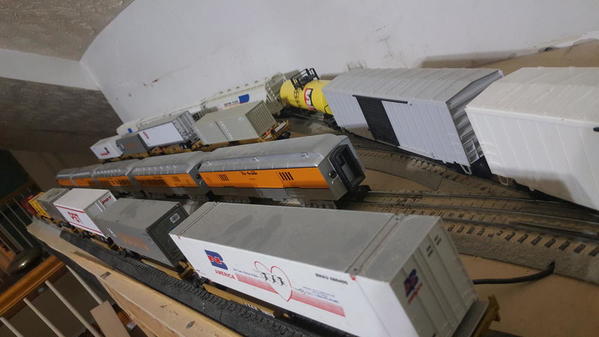
I give you "The Rainbow"!
The concept for the train came from this print by railroad artist Larry Fisher. It is an early Amtrak Empire Builder made of a colorful hodgepodge of of equipment.
I'm still waiting on two more cars from GGD. A CB&Q duplex sleeper and a GN green and orange coach. That will bring the total to eight. I'll still need two more cars, but they will need custom paint. The train still needs a baggage car, and probably another coach. One will get BN Cascade Green, the other NP two tone green.
I love early Amtrak - the Rainbow Years were fascinating!
One suggestion - paint the baggage NP two-tone green as quite a few lasted a long time in those colors - especially on the BN as MOW storage cars. This way it can do double duty if you get a hankering to swap out the baggage car for something in different colors. The coach would look good in BN Cascade Green. I'm guessing BN repainted very few baggage cars into BN colors - they probably spent the paint money on the passenger carrying equipment and not head end cars during their short time offering passenger service to the public. Amtrak of course repainted stuff but as well all know after the rainbow years they standardized on (rebuilt/upgraded with HEP) Budd built Heritage equipment. Ex-NP baggage cars would not make the cut for rebuilding as Heritage Fleet stock...
And I believe south of the Twin Cities ex-Milwaukee Road E8/E9's handled the Empire Builder in Amtrak's first years until the SDP40F's arrived. Gives you another choice for motive power if your layout includes the south end of the Twin Cities area?
Thanks, I have two different ideas that I'm mulling over. There is a rather unique baggage dorm car that seemed to always run on those trains. The earliest trains had no full baggage, just this car. Here it is in Cascade green. It was also done in big sky blue, but I don't need any more of those.
This car would be a total kitbash using a K-line combo as a starting point. Then the other car would be the NP, probably a dome with coach seating,bringing the train to 4 domes.
The other option would be as you suggested, a straight NP baggage. You may not be able to see it in the print, but that train has two NP baggage cars followed by that baggage dorm. That would leave Cascade green for a coach or a dome.
Attachments
Mark Boyce posted:Big_Boy_4005 posted:Mark Boyce posted:Yes Elliot; wouldn't it had been nice if my daughters married young men who were interested in trains. They are fine young men, but their interests are elsewhere.
Actually Mark, I may have better luck with my daughter helping me with scenic elements of the layout. She'll be moving back here when she's done with school in May.
Sign her up!!
One of my daughters is an artist, but I was never able to coerce her into any scenery work. Since I never did sign her car over to her, since I paid for it, I should tell her I need it back unless she does a backdrop for the new layout room, which incidentally used to be her studio! lol
Sounds like you have some good leverage there Mark.![]() A couple years ago, my daughter visited and expressed interest of her own free will, so time will tell.
A couple years ago, my daughter visited and expressed interest of her own free will, so time will tell.
I did do some more work on the layout yesterday. Planning to head down again today for a few hours. Photos when I'm done.
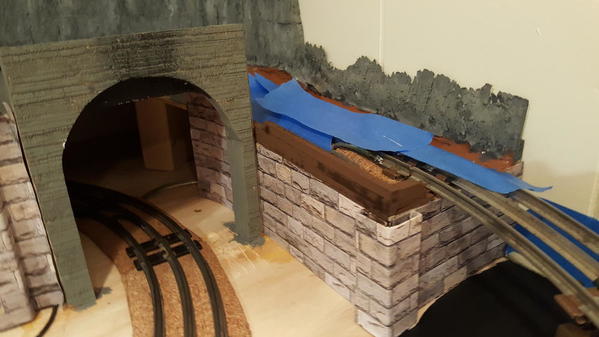
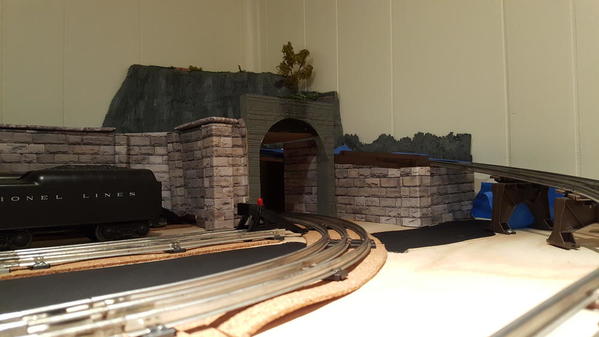
Continued on the cliff. Filled in and painted the base at the board. Added a small piece to the right of the cliff to give a transition from the blank wall. I made a small RR tie retaining wall at the top corner of the stone wall. Tried painting the "smoke" stains on the tunnel arch (first time ever). Going to ballast the track next.
Worked on the roadway that will serve the sidings on this side of the layout. The road pieces are sprayed and are drying. I painted the board black so nothing shows through from underneath when I glue the road down.
Good productive day when its snowing outside. 
PS- Anyone know where I can get a 2037 decal for the cab on my 2-6-4? Its missing from this side of the cab, bought it this way.
Bob
Attachments
Big_Boy_4005 posted:Mark Boyce posted:Big_Boy_4005 posted:Mark Boyce posted:Yes Elliot; wouldn't it had been nice if my daughters married young men who were interested in trains. They are fine young men, but their interests are elsewhere.
Actually Mark, I may have better luck with my daughter helping me with scenic elements of the layout. She'll be moving back here when she's done with school in May.
Sign her up!!
One of my daughters is an artist, but I was never able to coerce her into any scenery work. Since I never did sign her car over to her, since I paid for it, I should tell her I need it back unless she does a backdrop for the new layout room, which incidentally used to be her studio! lol
Sounds like you have some good leverage there Mark.
A couple years ago, my daughter visited and expressed interest of her own free will, so time will tell.
I did do some more work on the layout yesterday. Planning to head down again today for a few hours. Photos when I'm done.
Maybe my daughter will come into the train room someday and say, "You need this or you need that". She and my wife do like to find fun things to put on the layout. Today I found a 1948 Porsche 1:36 Scale! lol
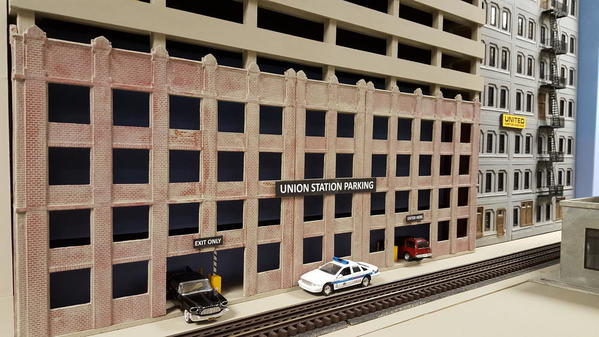
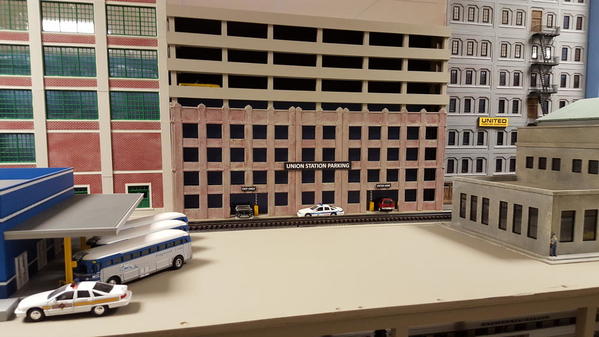
I finally got my parking garage done. I added a modern 4 story addition to the top so it would look better beside my other tall downtown Chicago area warehouses. I still have to add roads leading to it over the railroad tracks and more cars parked inside.
Next to it is several Korber buildings kit-bashed together to make a tall inner city furniture warehouse.
Attachments
Chugman posted:I finally got my parking garage done. I added a modern 4 story addition to the top so it would look better beside my other tall downtown Chicago area warehouses. I still have to add roads leading to it over the railroad tracks and more cars parked inside.
Next to it is several Korber buildings kit-bashed together to make a tall inner city furniture warehouse.
Well done! I like the idea of the modern addition...practical and probable.
Built that 200 series ALCO out of parts I had on hand and when I was working on that I let the three year old grand-son test out his action corner of the layout while he ran his Dinosaur train.
Jhainer posted:
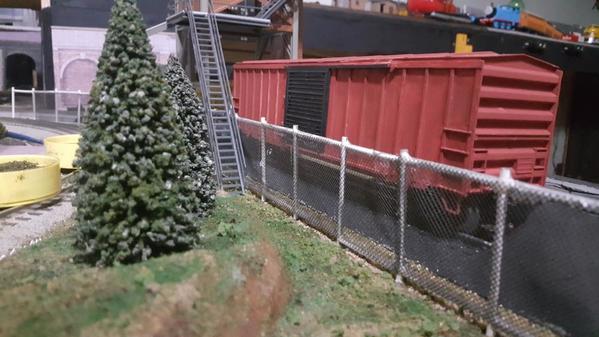
Nice chain fence, where did you get it?
The right wing of my office "temporary" layout will need to be removeable to give access to the chimney ash pit. The homasote is too tight so I trimmed it. Tomorrow I hope to start securing the track on that end so I can figure out exactly where the track cuts need to be made so I can slide that wing out once a year.
I've been wanting to do this since I moved in a year ago:
I'm more likely to spend time down here now. :-)
Attachments
3 bldg projects today.
1. Glued the roof braces back on a golden valley depot builtup and placed a painted piece of cardboard between 2 tracks.
2. Painted parts for my Rico station repurposed as a restaurant. Base color is rustoleum cranberry satin that I will dullcote. Wainscoting, trim, windows and doors flat light gray primer. Roof dulled with flat black followed by dark gray primer.
3. Tweaked the cardboard freight house roof by bending the edges about an inch width to relax the pitch. 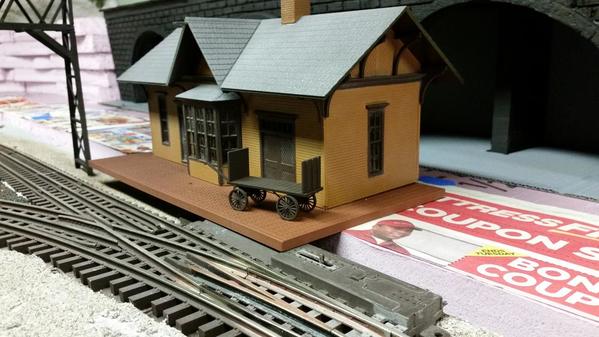
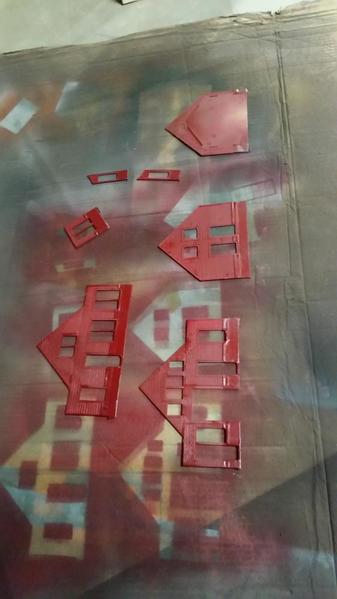
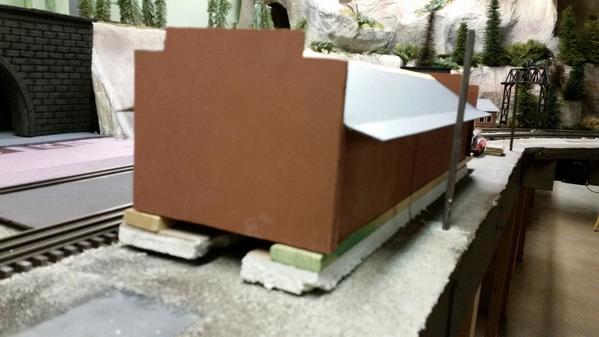

The freight house base is next and I am thinking about another bldg next to the power house. Eventually I will detail the freight house with brick, windows and door paper.
Attachments
Nice job on the buildings. Looking good !!
Have not done anything for a couple of days on the layout. Yesterday took a ride to Parma Ohio for the S gauge show. Nice little show. This time there was a nice amount of O scale for sale. Decent prices. Even came across someone selling Menards trains for 30 dollars a car. But I got a nice pack of very small drills that I needed. Today I got time to spend on the layout..................Paul
Chugman posted:I finally got my parking garage done. I added a modern 4 story addition to the top so it would look better beside my other tall downtown Chicago area warehouses. I still have to add roads leading to it over the railroad tracks and more cars parked inside.
Next to it is several Korber buildings kit-bashed together to make a tall inner city furniture warehouse.
Art, the garage turned out looking great, I agree the modern addition fits well and is believable.
Pennsynut, the building are coming along wonderful, I have an old wood building that was given to me I might post a picture of that here to get some ideas of what to make out of it.
mike g. posted:Jhainer posted:played with my vinyl cutter tonight its the first time I tried something like this this boxcar yesterday was white I hand painted it in Tuscan Red the paint isn't perfect but in older boxcars are they ever I downloaded a Santa Fe vector resized it and cut it out the vinyl is a little thick but it folded into the seams nice What do you think total outlay to make this car go from white to this about $2.00 .
Great job on the car, I have a few I would like to do that with. Do you just run it threw a printer?
no not a printer it an vinyl cutter kind of like a plotter with a razor blade mine is just like this one.
Attachments
Doug N posted:Jhainer posted:Nice chain fence, where did you get it?
I made it from platistruct tubing and a bad screen from my house cut the screen out to replace it and kept the extra for a fence ![]()
mike g. posted:Jhainer posted:still working on the layout added the second Yard and ran the track to it . ordered some wire and connectors to make more feeders. so in the mean time I have been running the one loop I have running . and doing alittle scenery in the process. here's this weeks results .
Nice looking scenery. The grass and trees look very nice!
Thank you
yesterday I wired up all the switches on the one side of the layout a few gave me trouble one still isn't working just right it switches one way but not the other. one the anti derailment kept kicking in checked the wiring 3 times turned out a small scenery stone was in the switch and not allowing it to travel the full amount got it fixed tho. here's some photos I cleaned up that side of the layout and placed the buildings where they are going to go . I think I am going to lift all the building up on some foam first carve it to look like scenery then put some joint compound over it like I did the other day it seemed to take the foam over the baseboard look away from the scenery the joint compound seemed to smooth it out and make it look more realistic. I have been thinking about doing this that's in the first picture but the wall would be fake building fronts along the whole side with a opening to get thur the wall it does 2 things helps support the upper level and hide the wiring and such for the upper level but I think it gives the layout a more finished look in that area problem is the area its 11 3/4 tall that would make some really tall buildings its either that or maybe a printed out stone retaining wall but then again it would be a really tall retaining wall . any suggestions
Attachments
Jhainer posted:mike g. posted:Jhainer posted:played with my vinyl cutter tonight its the first time I tried something like this this boxcar yesterday was white I hand painted it in Tuscan Red the paint isn't perfect but in older boxcars are they ever I downloaded a Santa Fe vector resized it and cut it out the vinyl is a little thick but it folded into the seams nice What do you think total outlay to make this car go from white to this about $2.00 .
Great job on the car, I have a few I would like to do that with. Do you just run it threw a printer?
no not a printer it an vinyl cutter kind of like a plotter with a razor blade mine is just like this one.
Wow I just looked and there not cheap are they? But if you think about it you could do your own layout print to put on your bench work with a 12" x 25' roll of vinyl.
Jhainer, From the tunnel moving right some rock face to eat at least a foot or so somewhere, anywhere, just seems natural. But more archway work or steel and cement running off it is what I "want" to see there. Continuing what you started at the right, but with taller, open areas/ arches. You'd get visual separation but still let light get to the" buried loop" that I'm assuming you see the loop from another angle considering the length of the grey wall? Is there is a business under there? If the "trolls den" is well lit, the less obscured "partition" would give it more attention too. Arches would hide the upper level wiring if it isn't hanging bad or at ground level.
mike g. posted:Jhainer posted:mike g. posted:Jhainer posted:played with my vinyl cutter tonight its the first time I tried something like this this boxcar yesterday was white I hand painted it in Tuscan Red the paint isn't perfect but in older boxcars are they ever I downloaded a Santa Fe vector resized it and cut it out the vinyl is a little thick but it folded into the seams nice What do you think total outlay to make this car go from white to this about $2.00 .
Great job on the car, I have a few I would like to do that with. Do you just run it threw a printer?
no not a printer it an vinyl cutter kind of like a plotter with a razor blade mine is just like this one.
Wow I just looked and there not cheap are they? But if you think about it you could do your own layout print to put on your bench work with a 12" x 25' roll of vinyl.
the photo is from a auction site it was going for 200 I paid 10 years ago 1500
Adriatic posted:Jhainer, From the tunnel moving right some rock face to eat at least a foot or so somewhere, anywhere, just seems natural. But more archway work or steel and cement running off it is what I "want" to see there. Continuing what you started at the right, but with taller, open areas/ arches. You'd get visual separation but still let light get to the" buried loop" that I'm assuming you see the loop from another angle considering the length of the grey wall? Is there is a business under there? If the "trolls den" is well lit, the less obscured "partition" would give it more attention too. Arches would hide the upper level wiring if it isn't hanging bad or at ground level.
are you thinking something like this but with open arches
Attachments
Chugman posted:I finally got my parking garage done. I added a modern 4 story addition to the top so it would look better beside my other tall downtown Chicago area warehouses. I still have to add roads leading to it over the railroad tracks and more cars parked inside.
Next to it is several Korber buildings kit-bashed together to make a tall inner city furniture warehouse.
Art
Spectacular, Art!
Peter
Jhainer posted:
Well then I guess they have came down a lot! Might have to check into one down the road!
Grandson got up a little after seven this morning and by nine we had already been playing with the trains for over an hour. By the time, he left he is almost a pro at the controls be it the remote or the transformer.
So I finished up the 200 series A-A set I have been working and have them running. Used both the Texas Special 210 shells on them. Now just got to figure out what to do with the paint job.
You'll hate it if anything derails. And you have sun blasting out of the tunnel ![]() , I think that what's "wrong", lol
, I think that what's "wrong", lol ![]() Does it have an access opening at the window at all to block off?
Does it have an access opening at the window at all to block off?
It's kinda tall too. By closing the nook off so much, it's really giving the area cramped look. In the photo at least.
The open nook shape and border work can give it the feel of a valley, plateau, or clearing for that sun to play in. Maybe keep things running in parallel lines with pavement, track, buildings, etc. and do a fast rising horizon line above the windowsills line of sight is all you need to take more advantage of the light that always pours in there. And honestly, tinting it, or using a shade with a moon on it are still all I can think of to fight it.
I'd leave it open, push the horizon up and back, and use the exaggerated visual length on the oval from that angle, for giving you a good head on or trailing view out of a short distance, and some "down the row" views on scenes.
Or build a hillside to one wall, and eliminate half the tunnel? I know you like the portal views and that would open it up more, but keep a view.
You move fast and the changes are hard to keep track of. You didn't do all this since that post did you? But yeah, that would've been fitting. The bottom retaining arches especially, as the sill blocks were well used to keep them looking shorter. A section of open arches in front of the nook to allow passage, and some viewing . Staggered arches? Opened then.closed?
Sprayed some dullcote on satin cranberry I sprayed on my Rico restaurant. I liked the proprtions of my freight house so well I decided to make a similar bldg as a machine. No photos yet. It will be 6 in. wide, 18 long, 4 in. tall on the sides and about 5.5 inches tall on the ends, with a flat roof.
Daleks do Disneyland:

Daleks go where Kruschev was refused admittance...

Becky
Adriatic posted:You'll hate it if anything derails. And you have sun blasting out of the tunnel
, I think that what's "wrong", lol
Does it have an access opening at the window at all to block off?
It's kinda tall too. By closing the nook off so much, it's really giving the area cramped look. In the photo at least.
The open nook shape and border work can give it the feel of a valley, plateau, or clearing for that sun to play in. Maybe keep things running in parallel lines with pavement, track, buildings, etc. and do a fast rising horizon line above the windowsills line of sight is all you need to take more advantage of the light that always pours in there. And honestly, tinting it, or using a shade with a moon on it are still all I can think of to fight it.
I'd leave it open, push the horizon up and back, and use the exaggerated visual length on the oval from that angle, for giving you a good head on or trailing view out of a short distance, and some "down the row" views on scenes.
Or build a hillside to one wall, and eliminate half the tunnel? I know you like the portal views and that would open it up more, but keep a view.
You move fast and the changes are hard to keep track of. You didn't do all this since that post did you? But yeah, that would've been fitting. The bottom retaining arches especially, as the sill blocks were well used to keep them looking shorter. A section of open arches in front of the nook to allow passage, and some viewing . Staggered arches? Opened then.closed?
theres a big enough hole for me to crawl under the layout into the nook and pop up in the middle of it all. I work from home so no commute to eat up train time. kids don't want anything to do with dad there 15 the older ones are out running around a lot and wife she's a whole different story. so it's easy to say I have a lot of extra time
I thought about cutting it down so it's just the width of the track with some railing and just a few pillars to hold up the area or the wall area so trying to figure it out .
Becky -is that your Disney land ?? really great.
jim pastorius posted:Becky -is that your Disney land ?? really great.
Yep. Paper daleks with beads for heads.
pennytrains posted:jim pastorius posted:Becky -is that your Disney land ?? really great.
Yep. Paper daleks with beads for heads.
Very nice Disney, though I've never been there, I've seen a few photos
And here I took your name to be Penny. I should never assume
Tonight I worked on doing some patching of a couple of small holes in the brick wall of the basement. Being an older house they are clay. Tomorrow I can apply some dry lock to the wall. Then I have to make something up for the transformer, legacy, TIU and power brick to sit on under the table. Keeping it simple this time around. I plan to run this layout with Legacy and DCS. No conventional. Plus the majority of the switches will be manual so less wiring.... ....Paul
Did some wiring on the mainline today. Essentially using Buss wiring and so far the DCS seems to work ok. Drilled holes in the benchwork cross members to snake wire pairs through. Using 14 gauge stranded wire .
Mark Boyce posted:Very nice Disney, though I've never been there, I've seen a few photos
And here I took your name to be Penny. I should never assume
Thanks! Rebecca Penelope. So, either/or. ![]()
pennytrains posted:Mark Boyce posted:Very nice Disney, though I've never been there, I've seen a few photos
And here I took your name to be Penny. I should never assume
Thanks! Rebecca Penelope. So, either/or.
That's excellent! I could go by Alanrails. I think I like it! :-)
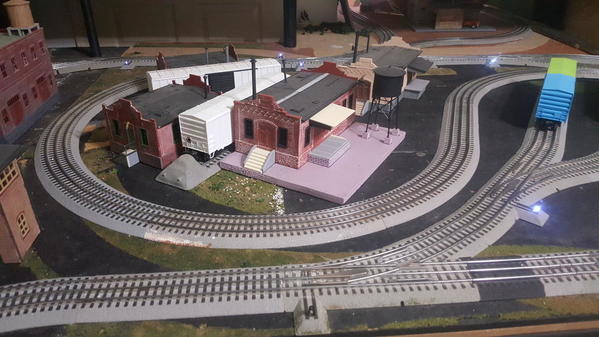
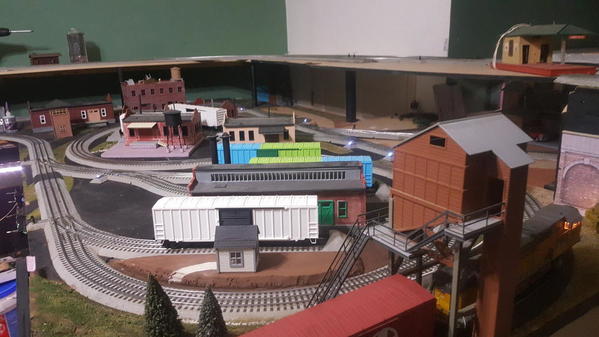
Assembled most of the Rico restaurant, carved some foam, cleaned up a lot of the basement, positioned the freight house, power house, machine shop and depot. I plan to add a 2 or 3 inch brick room on the left side of the restaurant where the freight room would have been. 


The restaurant will eventually be located somewhere in front of the pink rock slope.
Attachments
I would have to say the restaurant turned out wounderfull, I like the new colors. The power house looks sharp also. will be fun to fallow the progress of the mountain. Keep up the great work!
I agree with Mike ! What a transformation to the RICO!
I tried to do something yesterday,,
Got two switches yesterday from the Bay and both have issues. ![]()
This sucks for both of us, me and the seller.
You know e-bay should not allow someone to put not tested in their add then tell you "oh I am sorry". If you can't test it and be sure it works then they should force them to sell them as Parts or Repair. JMHO. and a good one.
So I can get the right switch to work but it falls short on closing all the way swinging to straight, plunger is not pushing far enough. The other left hand, will switch off auto derail but not off the remote posts. Must be a wire issue. They are riveted together so I would need to drill them out to see what is wrong. If I have to pay shipping again then I am out half the cost of the total order. So I may as well just make a project out of the darn things and right it off as a lesson learned. 


Now today to figure out how to get them apart and fix them,if I can.
Set up the logging railroad so two engineers can operate at once (the old fashion way!).
Functioning lighted billboard signs by Miller.
Five that I remember when I was a kid (many moons ago!) and a GN sign that my GNRHS had made.
videos:
https://www.youtube.com/watch?...amp;feature=youtu.be
https://www.youtube.com/watch?v=FgKfNiRM2D4&feature=youtu.be
For details on installation see:
https://ogrforum.ogaugerr.com/t...52#70693071085359952
Attachments
Today I learned how to take apart lionel modern O27 switches. I got two on the bay yesterday and both were bad. So I worked it out with the seller and mixed what I got with what I had to get running.
I had a very worn out point on the switch on the layout.
Used some parts from my switch to fix the one I got so now I have a switch with a much better point.
The other switch had an elect issue so I had to drill out the rivets, un-solder the track from the back plate fix the wire and put it back together.
It is good to be retired.
Here is the rivets I drilled out.
Here is where I had to un-solder the track from the back.
Here is it opened up and back working. Sorry I did not take a picture of under the paper.
Nice repair work. Yes it is good to be retired. I too have repaired a number of these in PW 0-22 models.
What is the part number for the toggle switch you show int helots photo. I am assuming you are using this type of switch for throw the turnout?
jeff
Jeff Z posted:Nice repair work. Yes it is good to be retired. I too have repaired a number of these in PW 0-22 models.
What is the part number for the toggle switch you show int helots photo. I am assuming you are using this type of switch for throw the turnout?
jeff
Jeff,
I got them off E-bay a few years back but they are still there all over the place.
I use them for all my switches (bottom row) and the plain on off ones that match.
SPDT Toggle Switches ON/OFF/Momentary ON (three position)
http://www.ebay.com/itm/4-SPDT...9:g:d78AAOxyyq5TMc0C
On -Off
http://www.ebay.com/itm/5-X-He...5ZBWKKwn&vxp=mtr
Happy New year. Well vacation is over and back to doing things train wise again. Been following the thread and there has been some nice work. Art with the parking Garage, The rico restaurant and others. Today first order of business test a newly arrived Atlas ATSF GP9 Zebra then build a lash up with other Atlas ATSF GP9. Couldn't get the lash up to work right and raised the white flag. Turned out to be a simple fix but had some help. https://ogrforum.ogaugerr.com/t...ly=70693071086103124 Lash up now working fine. Of course the cool part I now have all three Atlas ATSF GP9 Zebras. 2 powered and one dummy. Still need to install kadees, but that will come.
Attachments
Not diddly since before holidays, but today l took a few pictures of the steam coach while it is incomplete, to try to psych me up to getting back in gear.
suzukovich posted:Happy New year. Well vacation is over and back to doing things train wise again. Been following the thread and there has been some nice work. Art with the parking Garage, The rico restaurant and others. Today first order of business test a newly arrived Atlas ATSF GP9 Zebra then build a lash up with other Atlas ATSF GP9. Couldn't get the lash up to work right and raised the white flag. Turned out to be a simple fix but had some help. https://ogrforum.ogaugerr.com/t...ly=70693071086103124 Lash up now working fine. Of course the cool part I now have all three Atlas ATSF GP9 Zebras. 2 powered and one dummy. Still need to install kadees, but that will come.
Looking nice! I don't know so I have to ask, when you do a lash up do the fallowing engine lights not come on? Just wondering. I don't have enough engines to know or the layout to try! LOL
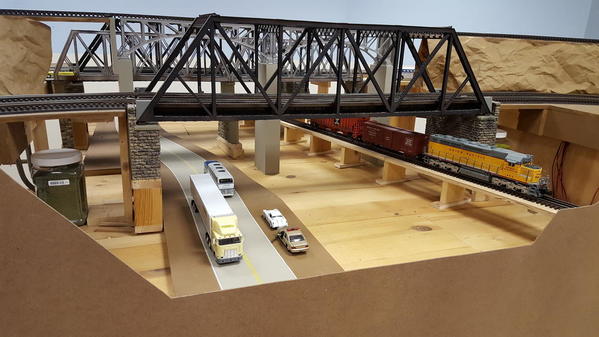
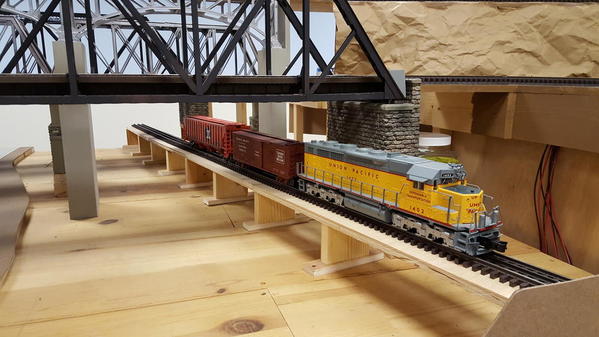
Got a little bit done today. I installed Atlas track on the banks of my Mississippi River valley. I first sprayed the track with Camo Earth Brown and then cut it to fit. I displayed a "shelf queen engine" and a couple cars to see how they will look there. I'm anxious to get started on plaster, rock formations, water, and trees in this area. The highway that runs on the left side will be my "River Road" and looks like a good place to get a speeding ticket. I have some fishermen very eager to see the dam opened and water flowing in the river too.
Art


