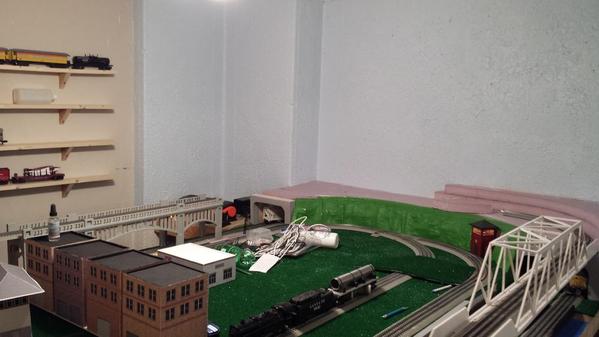
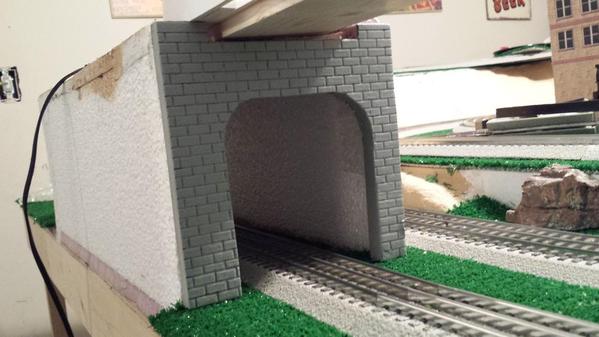
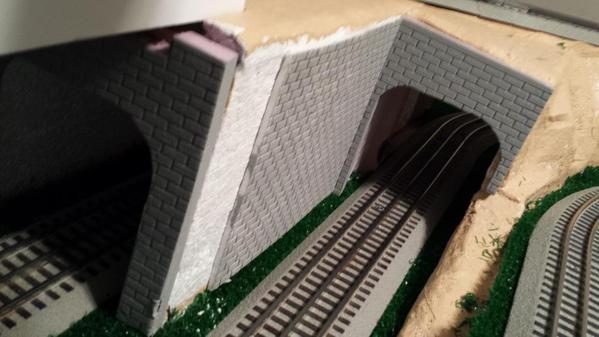
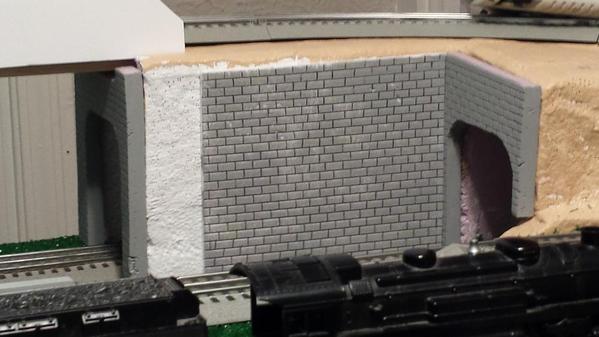
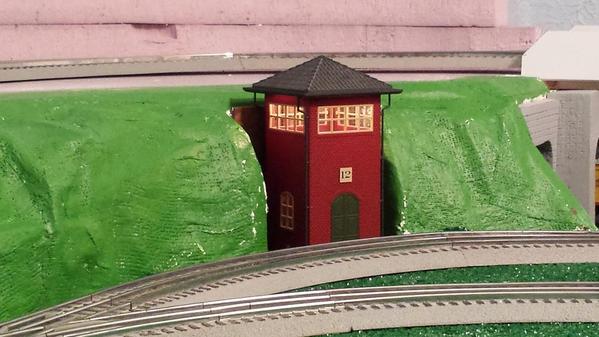
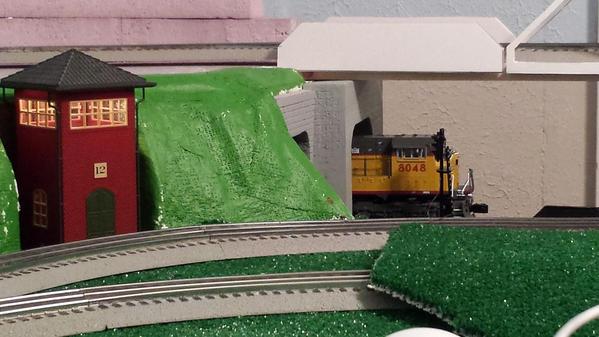
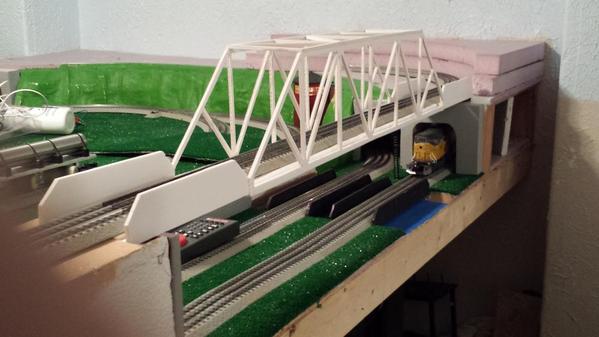
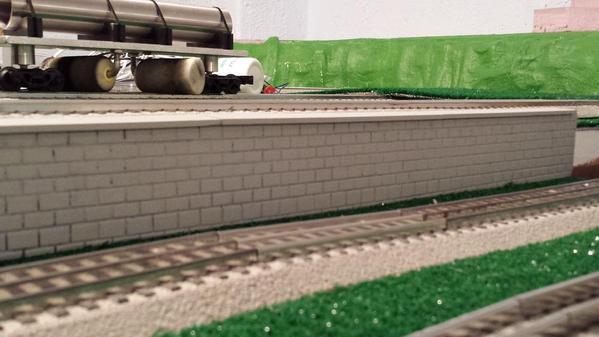
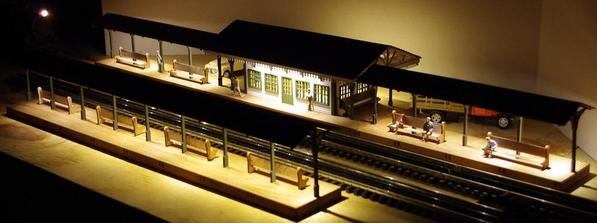
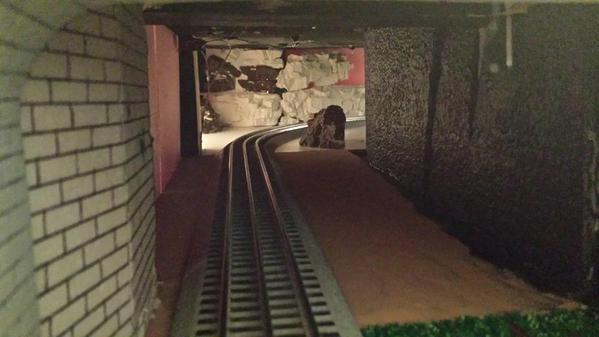
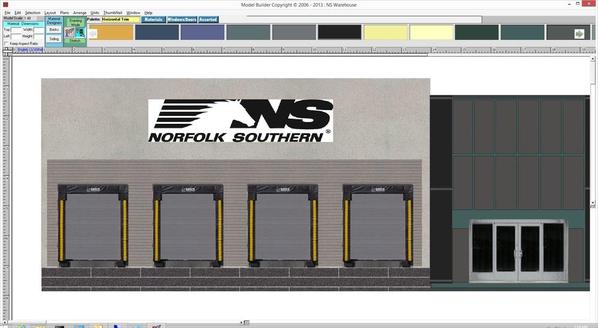
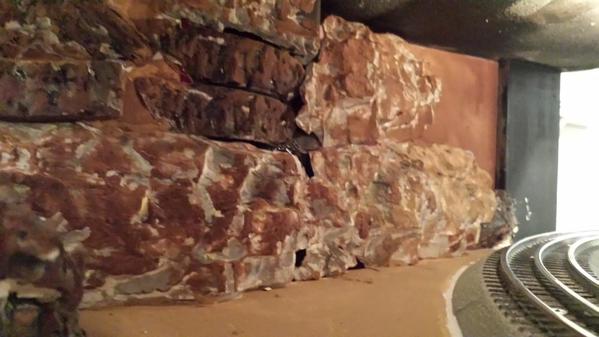
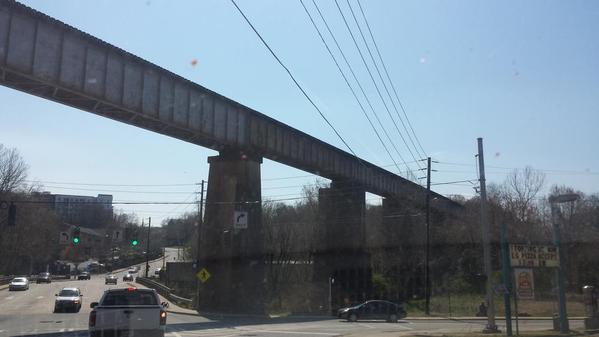
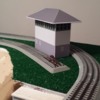
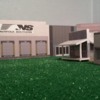
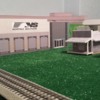
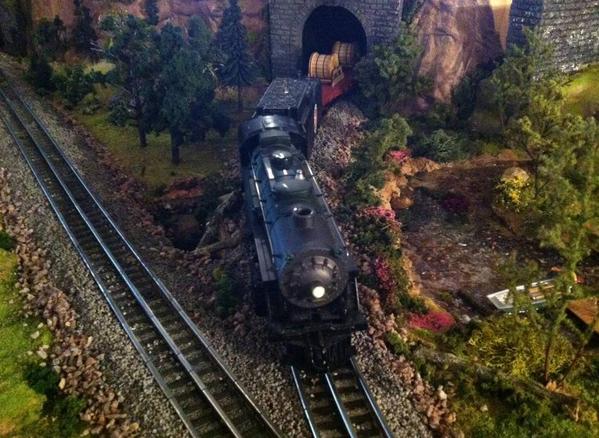
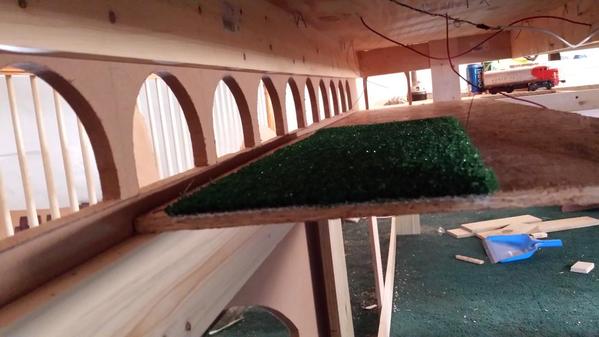
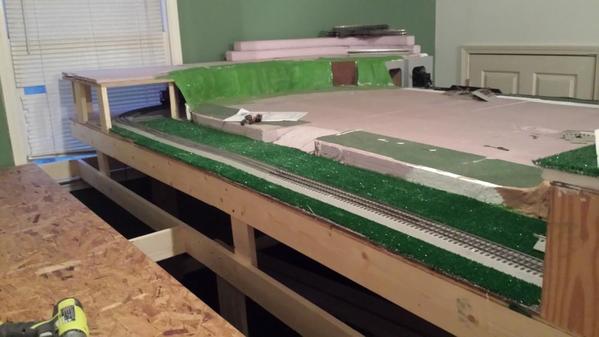
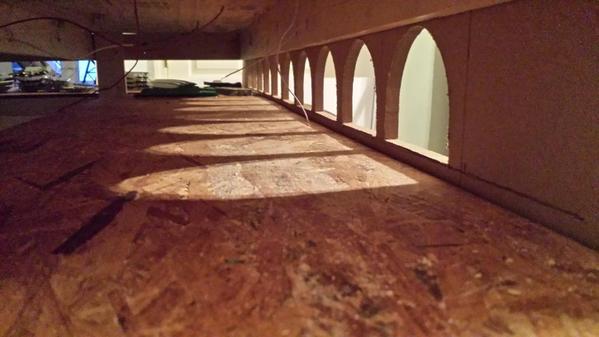
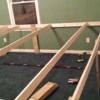
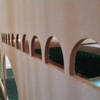
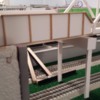
Originally Posted by trumptrain: Thank you very much a lot of what I have done I have learned from this site! the retaining walls and all the portals are made from pick foam board. it's time consuming drawing out all the bricks and the more I do the better I get at it. I have been trying to get my daughter to make them for me but they seem to have a bad mason when finished double motor lines and such but atleast she is trying and that's all I can ask for. she did help with the Indoor outdoor carpet tho and did fine with it the cut out for the switch tower came by accident I planned on it being there but didn't account for the hill side so alittle redesign was in order. I came up with the idea and my daughter made it with 1/4 square dowels I placed it on the layout then that whole hill side she made from doing the lattice work with cardboard to covering it in plaster she has been a big help. I even had her do the painting of the green (she doesn't like the green tho). the bridge's I have theres 2 one being the tw trainworx one that I ordered with arches running length wise for a train to pass under it. the second one was really an experiment. I had a wooden truss bridge built there and it kept coming apart. the weight of a train seemed to be to much for it probably a combination of poor craftsmanship on my part edges not quite square things like that but anyways it kept falling apart the last time it was on the layout a train was crossing it and two track supports broke out the bottom dropping the track and the train. off the layout it came. so I put up a temp board across the span just to keep things running in the time being until I could figure out what needed to go there. total length is 52 inchs. well while I was building a few structures out of foam core I thought I could build a truss bridge out of it it doesn't need to do the supporting the temp board could. so I drew it out and begain making it the center section is 32 inches and the two plate girder ends are 10 inches making the 52 inches needed I hot glued it all together and it seems to be fine. now what I need to do is add some details to it paint it and then see how I like it. the plan was for me to buy a another trainworx bridge b52 I think is the number for it which is 32 inches and they also sell girder plate in 30 inch sections and finish up the other bridge leadins then use what was left over to do the girders on this bridge. but I like $7.00 compared to the $200 for the other bridges . the station photos I wish I could take credit for it but I can't it's accually from a company a few miles from where I live they make the station this is there photo from there website. the station is on order for my layout but it has a 6 week leaway before it gets here. I bought the station the small platforms then one long platform. the small platforms are about 12 inches the long platform is almost 24 inches it comes complete ready to run with lighting and the benches I will have to add the people here is the website is anyone is interested. http://www.locomotiveworksinc.com/Home.html he also does laser cutting so I might have him do up the other station I have plans for maybe give that one to my daughter for her help


Originally Posted by Jhainer:  I really like how you made a cut in the hillside for your switch tower.  Very cool!! Very nice looking bridge as well!  Retaining walls looks really good too, as does the night shot of your passenger station! WOW!

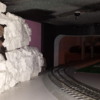
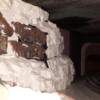
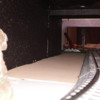
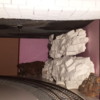
I was busy today. I decided today that before I start on the upper part of my tunnel/mountain I needed to paint the wall in the room blue for sky. also I wanted to finally attach the tunel portals I worked on over the weekend so I did that tonight also. so here is a layout update of sorts. I also ordered a few things in the past few days I ordered 2 sc1 switch controllers and a station with 3 platforms 2 at almost 12 inchs and one at 24 inches.


20140326_010845


20140326_010955

20140326_011009

20140326_011041


20140326_011102

20140326_011109


20140326_011226


20140326_011311


CLW007D


Originally Posted by Lima:   Hi Lima... Thanks for your compliment.


Here is a photo of the MTH portal as per your request.  It sort of has the look of the prototypical raised tunnels that major railroads are making today ... to accommodate double stack containers.


Although it is not a pretty customized portal, it does the job of allowing GG1 panagraphs to be fully raised as they pass through the tunnel.... and it is not located in an area of my layout that directly meets the viewers eye.  


I cut into the top of the portal using my own version of a hot knife..... a candle flame and old steak knife.  i held the steak knife over the flame until it got good and hot.  once hot enough I cut into the plastic.  I had to do several repetitions before I got the desired outcome as you see in the photo.


When i got the upper part cut, I spray painted the top with flat black paint.  This gives the effect that this portal has swallowed decades of steam locos.  I'm not at all finished scenicing this area.  As I continue to do so I plan to put a black interior inside the tunnel.


Thanks for asking about this portal.  Like I said its not pretty but it is effective. 


Actually I misspoke in regard to having to widen the portal.  It is wide enough to accommodate all rolling stock and locos.  The reason for employing the double portal at this very location is that this portal lies at the very end of a 42 inch radius curve .... thus must accommodate the excessive overhang of my full scale Lionel J class when it backs up out of the tunnel.


 This portal is located on the mainline of my Free State Junction Railway, taking the mainline underneath Patsburg Westend.  At the opposite I have a K line double portal ... which is installed on a 3/4 inch base on either side thus raising the entire portal enough to allow the panagraph to come through the tunnel.  The K line portal is actually located right on the curve and accomodates the overhang of my  20 inch passenger cars 

Originally Posted by trumptrain:

an MTH double track portal ... which I had to widen a bit and cut the top higher to accommodate GG1 panagraphs...


Nice work! Can we see that MTH portal? Cutting one up also.


mth tunnel raised portal

Attachments

Images (1)
  • mth tunnel raised portal: Cut to accommodate panagraphs.
Originally Posted by mjrodg3n88:

Bryan,


That looks really good.  What did you use?

Thanks Mike,

I used the cardboard lattice technique for the form.  First coat was paper towels dipped into mixture of water and drywall mud.  The first coat was mixed at a soup like consistency.  Let dry for 2 days.  The second coat was another layer of paper towels with drywall mud but more of a cake batter consistency.  This layer I did more shaping of the mud.  Painting was just water downed paint using a spray bottle.  The pipe was just left over copper pipe spray painted.  Darkened the cliff so it looks like dirty water runoff. 

Randy,


Thanks for the compliment.  I used the cardboard lattice technique for the form.  First coat was paper towels dipped into mixture of water and drywall mud.  The first coat was mixed at a soup like consistency.  Let dry for 2 days.  The second coat was another layer of paper towels with drywall mud but more of a cake batter consistency.  This layer I did more shaping of the mud.  Painting was just water downed paint using a spray bottle.  The pipe was just left over copper pipe spray painted.  Darkened the cliff so it looks like dirty water runoff. 


This weekend I plan on adding a little moss to some of the rocks and start on the bottom of the gorge.  I really need to get this part done so I can install the wooden trestle that will span the gorge area.  Already built the bents just need to get ground level done in order to put it up.  Also plan on having a lake at the bottom of the area.

I thought of doing this, did it crack at all?  did you use the 30 min setting type? you can mix that powder to what ever you want. 
 
Chris Originally Posted by Bryan in Ohio:
Originally Posted by mjrodg3n88:

Bryan,


That looks really good.  What did you use?

Thanks Mike,

I used the cardboard lattice technique for the form.  First coat was paper towels dipped into mixture of water and drywall mud.  The first coat was mixed at a soup like consistency.  Let dry for 2 days.  The second coat was another layer of paper towels with drywall mud but more of a cake batter consistency.  This layer I did more shaping of the mud.  Painting was just water downed paint using a spray bottle.  The pipe was just left over copper pipe spray painted.  Darkened the cliff so it looks like dirty water runoff. 


Yesterday I finally started the Rock Ledge on the face of my tunnel.

1st attempt at doing this.

I used DEP Lightweight Pre-Mix and I am very happy with the results.

Goes on Pink, dries White.

Tested it this morning and it is hard as a ROCK !!

Now on to the top of the mountain.

I just ordered a roll of "Shaper Sheet" from woodland scenics. It looks REAL easy to use for the mountain form. I am going to wait till it arrives and see for myself. Keep you all posted on that.

I have a ?

Do I have to use Acrylic Paint for the inside of the tunnels ?

I am going to be applying it directly over the foam boards I used for the rock face and mountain bottom supports.

Any ideas are good ideas.

Thanks in advance.


IMGP6830

IMGP6831

IMGP6832

IMGP6833

IMGP6834

IMGP6835

IMGP6836

IMGP6837

Attachments

Images (8)
  • IMGP6830
  • IMGP6831
  • IMGP6832
  • IMGP6833
  • IMGP6834
  • IMGP6835
  • IMGP6836
  • IMGP6837
Chris,
 
I used easy sand 90 lightweight joint compound.  You are correct you can mix the powder to any consistency you want.  First coat runny soup on the paper towels, after 2 days of drying went back and put a cake batter consistency over type of the first coat.  Also straight mud on top of some areas to give more definition.  So far no cracking and it is nice and solid. 
 
Originally Posted by Chris D:
I thought of doing this, did it crack at all?  did you use the 30 min setting type? you can mix that powder to what ever you want. 


I've had 2 level around-the-room Mianne benchwork in my trainroom for a couple of years.  But, things in life have just come up to keep me from getting an operating layout up and running.


Last week I decided to take things one step at a time.  So, my goal now is to get a single loop of track wired so I can run a train. 


The layout runs around the perimeter of a room that is about 27' x 28'.  So a single loop of track will be about 100'.  For the past week I have been clearing all the junk that had built up on the benchwork.  Being a retired IT guy, I have run poly rope around the back of both levels of the layout to use as a dragline to pull wire where I need it. 


I haven't had a layout since we moved from PA to NC in 2007.  Today I upgraded my 2 DCS remotes and TIU's from 3.1 to 4.3.  I also upgraded my Legacy system from 1.3 to 1.52.


For my longer power runs I am using 12 gauge wire.  Last night I realized my terminal blocks can only handle 14 gauge.  So, today I placed an order with Mouser for some terminal blocks that can handle up to 10 gauge wire.


I also got my 2 TIU's, TVS-4's and fuse blocks mounted on a sheet of plywood today.  Tomorrow I'll get them wired together.


My goal is to be able to run a train 4 days from now.

Finally, I had a great day for going into the garage man hole, and as I was gazing around, I decided to count my tin plate locomotives thinking it would be easy. Boy, I found more important things that I had to do to get my layout running. My layout is named the Neverdun R.R, for good reason.  Any way when I and my wife, Rose (and she is, she has been my care taker for the last six months) returned from our dinner, I went back to the hole, and found more things that went high on the do list.  Just maybe I may get a screw or two installed some where by the end of the week.  That is my story and I will stick with it.

Al

Originally Posted by trumptrain:
Originally Posted by p51:
Originally Posted by trumptrain:
Looks great!  Nicely done!
Originally Posted by p51: Yeah P51!  Keep those dreams alive and may your friend get over to your place and help you out with the bench work!  This little station looks great!  Would love to see the rest of your structures.

Completed a depot repaint and re-detail I've been wanting to do for a very long time. You can even read the writing on the bulletin chalkboard if you break out a magnifying glass...


Thanks!


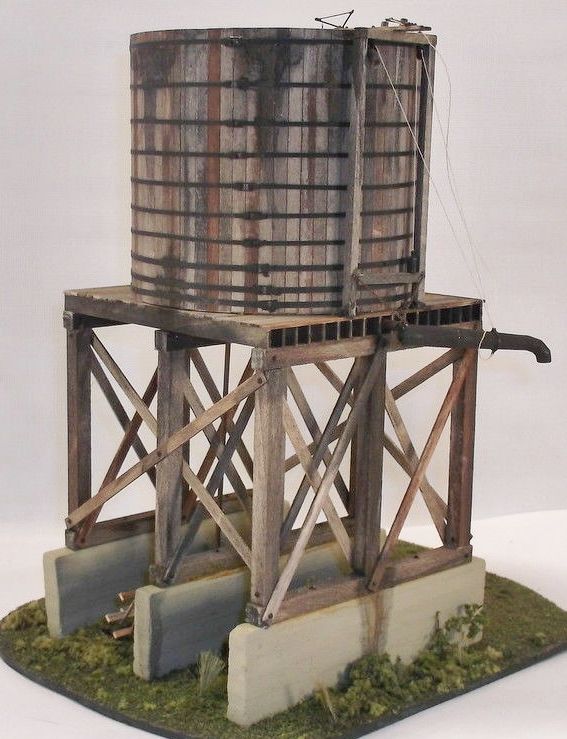
I also have a few new structures, including two single-story farm houses, a water tower and some small sheds.

My layout only exists on paper, I'm waiting for a pal of mine who's offered to help me with my benchwork (I'm going to be building it in sections, so it can be broken down and transported if I ever have to move) for a time he can break out the saws. I have my track plan and am also currently buying up more On30 flex track.


Check out the water, then. I need to change the ropes with chains, didn't like how that part turned out...

Originally Posted by p51:   Really an awesome water tank P51!!  Great weathering effects!  You really got to get your layout up so you can ( we can ) see these structures in context with your trains running.  You have a great talent!  Thanks for sharing your photos. Got more?
Originally Posted by trumptrain:
Originally Posted by p51:
Originally Posted by trumptrain:
Looks great!  Nicely done!
Originally Posted by p51: Yeah P51!  Keep those dreams alive and may your friend get over to your place and help you out with the bench work!  This little station looks great!  Would love to see the rest of your structures.

Completed a depot repaint and re-detail I've been wanting to do for a very long time. You can even read the writing on the bulletin chalkboard if you break out a magnifying glass...


Thanks!


I also have a few new structures, including two single-story farm houses, a water tower and some small sheds.

My layout only exists on paper, I'm waiting for a pal of mine who's offered to help me with my benchwork (I'm going to be building it in sections, so it can be broken down and transported if I ever have to move) for a time he can break out the saws. I have my track plan and am also currently buying up more On30 flex track.


Check out the water, then. I need to change the ropes with chains, didn't like how that part turned out...


With all the work I have been doing on the outside of the house I have had little time for trains lately.  Tore out 11 over grown bushes yesterday, and have 3 more to go in our back yard tomorrow.  This morning I took the day off of the house work to run trains with my almost 4 year old son.  He woke up this morning asking if he could put on his engineering overalls and run daddies trains.  


IMG_20140401_094004997


IMG_20140401_093538878

Attachments

Images (2)
  • IMG_20140401_093538878
  • IMG_20140401_094004997
Originally Posted by Jdevleerjr:

With all the work I have been doing on the outside of the house I have had little time for trains lately.  Tore out 11 over grown bushes yesterday, and have 3 more to go in our back yard tomorrow.  This morning I took the day off of the house work to run trains with my almost 4 year old son.  He woke up this morning asking if he could put on his engineering overalls and run daddies trains.  


IMG_20140401_094004997

He looks so happy Jim, thanks for sharing.  Hope he had fun!

Originally Posted by Jdevleerjr:

With all the work I have been doing on the outside of the house I have had little time for trains lately.  Tore out 11 over grown bushes yesterday, and have 3 more to go in our back yard tomorrow.  This morning I took the day off of the house work to run trains with my almost 4 year old son.  He woke up this morning asking if he could put on his engineering overalls and run daddies trains.  


That sounds like a good day. You have your priorities in order. Never miss spending time with your son.

Originally Posted by Randy Harrison:


That sounds like a good day. You have your priorities in order. Never miss spending time with your son.

We had tons of fun running trains!


I also got my Cab2 and Legacy Base back from Lionel back today.  Hooked it up and remembered how much better the legacy trains run compared to using the Cab1 / TMCC Base.

bought my first MTH starter set Prr Passenger train. bought an End of train device for my grain hopper train and also bought a err AC commander for my Santa Fe Alco.

setup dcs on a loop of fastrack on my layout and ran the Mth train Smoked my room out is all I can say it smoke a lot sounds good and runs good. took apart a hopper and added the end of train device. it works good kinda neat to see. then figured I would start the ERR upgrade thinking it wouldn't get finished tonight well its done and tested works good. ran for the first time 2 trains on the same loop. note to self never have the slower train in front and eng ID set to the following train trying to speed up the front train it causes a nice little mess LOL I shoud have paid better attention to the signals being red LOL


Another piece of our 9x30 puzzle is finished. Except for adding more water to the lake (waiting for spring rains), our springtime section looks presentable to us. It's fun to watch a train come barreling out of darkened tunnel! Our next layout project is to work on a small town which is located on the level above the tunnel. That's actually reserved for rainy days this spring and sweltering days in summer. Meanwhile, there's real work to be done outside in the sunshine, like planting something! Anything edible!

layout apr02

Attachments

Images (1)
  • layout apr02

Well we are experimenting/playing with ground textures and rock coloring again. Oh and don't forget the hundreds of feet of track that need painting and ballasting.


Dirt, ballast, and lots more dirt!


IMG_1245


Grass and more ballast that's still very wet.


IMG_1253

IMG_1255

IMG_1263


The rock canyon has it's first color on....black. Color to follow.


IMG_1271


We're looking for a yard building to put in this corner that will blend in with the backdrop.


IMG_1274


This Scenic Express Silfor, Buffalo grass, and Tufts are really cool. Expensive...but cool stuff.


IMG_1279

Attachments

Images (7)
  • IMG_1245
  • IMG_1253
  • IMG_1255
  • IMG_1263
  • IMG_1271
  • IMG_1274
  • IMG_1279

Patrick was over last Tuesday, and we took care of a few small sections of the raised floor that were never finished. The floor is now 100% complete.

After that it was on to a long dreaded project that has been something of a sticking point. The curved backdrop on the upper deck has sort of been holding up the show. There will still be 2 more of these to do in the future, but they shouldn't be as difficult.


All of the fitting is done for the first piece, it just needs to be secured.


IMG_4172
The 2x4 will carry the lighting and valance.

IMG_4173
I've quietly been chugging along on the new hidden yard.

IMG_4175
The east ladder is laid out and will be the next project to be tackled. Once secured, the body tracks can be completed.

IMG_4178
A couple hours a day is about all my knees can take. Unfortunately, I found my knee pads a little too late.

IMG_4180
With Jon and Matt's help, this should be done by the end of next week.

Attachments

Images (5)
  • IMG_4172
  • IMG_4173
  • IMG_4175
  • IMG_4178
  • IMG_4180

My first attempt at water.  Bought a piece of plexiglass at Lowes (cracked in the corner so 1/2 half) Since I could see through it just put it on top of the lake cutout and traced lake.  Cut plexiglass using band saw.  Painted bottom of plexiglass using various colors dark in middle to lighter towards shore.  Sprayed dull coat on top to take away some of the shine.  Next step is to work on the shore line going in the water.

IMG_3521

Attachments

Images (1)
  • IMG_3521
Originally Posted by Mill City:
Originally Posted by Big_Boy_4005:

Spent a couple more hours today working on the yard. Got all the filler pieces cut for the second ladder, and more track placed. One step closer.

Come-on Elliot! Leave something for us to do!

Be careful what you wish for. Just because I cut those pieces, doesn't mean there isn't still a lot left to do.

Built a "set-up track" for the club today while one of the kids ran my train. Will make it easier to add engines to a remote without having to worry about other trains entering the staging room TIU zone. Also setting it up with an On30 track for DCC programming of On30 locomotives for the logging operation currently under construction. A simple project, but one long needed.

Originally Posted by Big_Boy_4005:
Originally Posted by Mill City:
Originally Posted by Big_Boy_4005:

Spent a couple more hours today working on the yard. Got all the filler pieces cut for the second ladder, and more track placed. One step closer.

Come-on Elliot! Leave something for us to do!

Be careful what you wish for. Just because I cut those pieces, doesn't mean there isn't still a lot left to do.

I try not to think about all that's left to do.

Originally Posted by Mill City:
Originally Posted by Big_Boy_4005:
Originally Posted by Mill City:
Originally Posted by Big_Boy_4005:

Spent a couple more hours today working on the yard. Got all the filler pieces cut for the second ladder, and more track placed. One step closer.

Come-on Elliot! Leave something for us to do!

Be careful what you wish for. Just because I cut those pieces, doesn't mean there isn't still a lot left to do.

I try not to think about all that's left to do.

Consider yourself lucky that it's my head the plans are stuck in, because that's what I think about most of the time.

Originally Posted by Big_Boy_4005:
Originally Posted by Mill City:
Originally Posted by Big_Boy_4005:
Originally Posted by Mill City:
Originally Posted by Big_Boy_4005:

Spent a couple more hours today working on the yard. Got all the filler pieces cut for the second ladder, and more track placed. One step closer.

Come-on Elliot! Leave something for us to do!

Be careful what you wish for. Just because I cut those pieces, doesn't mean there isn't still a lot left to do.

I try not to think about all that's left to do.

Consider yourself lucky that it's my head the plans are stuck in, because that's what I think about most of the time.

No one said it was easy being you.

Dressed out some of the wires for my gateman, switch tower, and the relay/rectifier for the timing of the gateman.  It's nice having wires go neatly under the table as opposed to strewn across the top.  I think I finally am ready to open the package of road and see if I can get some cars to the burger joint!

A couple of busy days with Jon and Matt, and the yard is really taking shape.

IMG_4190
4 of the 7 yard tracks are now complete. There are about a half a dozen sections of track and some small fillers that still need to be done on the remaining 3, as well as the loop.

IMG_4191

Patrick will be over Friday for more backdrop work, and Matt will be back Saturday so we can polish off the lower level.

Attachments

Images (2)
  • IMG_4190
  • IMG_4191

Doing one of my favorite things. Building a long out of production kit. It's a very old Colorado Scale Models Mine kit. I got it very cheap on E-bay.There will be three mines in the new area of my layout. This is the last and biggest to be built. It's about ready to piece together then paint red and weathered like the picture. Don

DSC_0218

4409620167_f877e390e6_z

Attachments

Images (2)
  • DSC_0218
  • 4409620167_f877e390e6_z
Originally Posted by scale rail:

Doing one of my favorite things. Building a long out of production kit. It's a very old Colorado Scale Models Mine kit. I got it very cheap on E-bay.There will be three mines in the new area of my layout. This is the last and biggest to be built. It's about ready to piece together then paint red and weathered like the picture. Don


Don,

That is going to look super when finished!

For the past few days and a few weeks thrown in too I have been riding the wave of working on the railroad. I just finished a third section of pink board and applied plaster wrap to it.  I had just enough plaster wrap left to cover the pink board. So today I just ordered enough supplies from scenic express to keep on working on the railroad. It feels great to have this burst of energy and enjoyment again after a number of years of stagnation. Of course with this lull in waiting for more supplies maybe I'll run a  train or two.............................Paul

well it's been a few days so I will do an update of a few days. I cut the old layout up into 2 pieces to move it up 2 flights of stairs to the loft in the house. the loft allows for a 12x10 sized layout with a 58 inch by 36 inch leg coming off of the left side. it's 12 wide by 10 deep. then I put the old layout above this 12x10 table layout so that I can run track under the old layout. here's the photos's hope you enjoy.

20140408_224427

20140408_224446

20140408_224519

20140409_225732

20140409_225745

20140412_145617

20140412_155712

20140412_155723

20140412_155812

20140412_155820

20140412_201254

20140412_201306

20140412_201315

20140412_201323

20140412_201334

Attachments

Images (15)
  • 20140408_224427
  • 20140408_224446
  • 20140408_224519
  • 20140409_225732
  • 20140409_225745
  • 20140412_145617
  • 20140412_155712
  • 20140412_155723
  • 20140412_155812
  • 20140412_155820
  • 20140412_201254
  • 20140412_201306
  • 20140412_201315
  • 20140412_201323
  • 20140412_201334

I'm whipped after 4 days with help this week, but boy, did we get a lot done.


Patrick hung all that backdrop on the upper deck.

IMG_4192
He did it so quickly, we had time to work on a couple other things.

IMG_4194
The mini-panels I made months ago, finally got mounted to the layout.

IMG_4196
Now they just need to have their wires connected.

IMG_4197


IMG_4198


IMG_4199
Matt and I finished the track in the hidden yard, by securing the last couple switches, and completing the loop.

IMG_4195
All of the lower level track is done!!!

IMG_4200
There are still a few little things that need to be done, and then it's on to wiring.

IMG_4202

I guess it's time to start hauling junk out of the train room, there's no place left to hide it.

Attachments

Images (9)
  • IMG_4192
  • IMG_4194
  • IMG_4196
  • IMG_4197
  • IMG_4198
  • IMG_4199
  • IMG_4195
  • IMG_4200
  • IMG_4202
Originally Posted by sp2207:

Well the weather is getting better and so am I. So I finally got out to the garage and started to build some more bench work. I also have been saving $ for some needed wire. So the next few days I will get to drilling some holes under the bench work.


007

Scott,

I went back to your post on the "Before During After" thread last month, and see your layout table.  Looks good!  Are these two sections modules, pop-up covers, or something else.  I have been looking at others' methods, because I hope to start building my next layout in a year or two.  I have built open grid,  L girder, and modular on two different kinds of frames.  However, the last time I did that was 20 years ago.

Thanks.

Originally Posted by Larry Sr.:

Partially completed a rough in on the upper loop. Finished the ballast on the fastrack on the upper and about 1/3 on the lower. Bridges are still a slow go. Still have a lot of patch up on the upper mountains and then placing the larger trees. STILL having fun.

DSCN1808

Larry,

I really like your rock work.  What method did you use?

Thanks

I finally got around to changing the PAs previously assigned to the El Capitan and moved them into service with the Super Chief. The F3s were re-assigned to the El Capitan. This made all kinds of sense as the F3s are an ABBA combo with two powered units. The El Capitan has nine 21" cars in it's current configuration, so having two powered units up front handles this long Hi-Level train with ease. The Super Chief has seven 15" cars that the PAs are more comfortable with.

Originally Posted by Uncle Fester:

I ran my new Lion Master Challenger today and finished weathering my lumber shed and started weather another building.

Uncle Fester,

The Challenger is a beaut!  This is the first I have seen of your layout.  Looks to me like the structures match the Challenger in good looks!


I haven't heard back on the work on my Hudson, but I would rather they take their time.  I think I may send an e-mail, just for a status.

Mark

Originally Posted by Mark Boyce:
Originally Posted by Uncle Fester:

I ran my new Lion Master Challenger today and finished weathering my lumber shed and started weather another building.

Uncle Fester,

The Challenger is a beaut!  This is the first I have seen of your layout.  Looks to me like the structures match the Challenger in good looks!


I haven't heard back on the work on my Hudson, but I would rather they take their time.  I think I may send an e-mail, just for a status.

Mark

Mark,


Thank you very much. This is just a platform I set up in the garage just to run some trains. I am currently planning a layout build hopefully to start in the fall. But in the meantime I can run some trains to help curb my cravings. so to speak...LOL

Originally Posted by Larry Sr.:

Mark

I copied Patrick H method. He was very polite in my e-mails giving me some additional instruction. I copied them because of that beautiful layout he built. He really did a fantastic job. He did explain a lot to other members as well on his original thread while he was building. Now, he is taking it down


Uncle Fester..that's some nice loco you have.


Larry

Larry,


That's great!  I had the privilege of seeing Patrick's layout twice.  It looked even better in person, so I trust yours does too. His method certainly produced excellent results quickly.  The finished product reminds me of the old cut and broken ceiling tile method, which I used on my last layout.  I am going to try Patrick's method on my next layout that I hope to start in a year or two.

I re-designed part of my layout, adding soft floor underlayment atop my old 3/4" plywood and then an additional 1/2" plywood sheet and finally 3/8 cork over the entire board.  The additional wood provided more mass which, along with the cork, quieted my train considerably.  My old style tubular tracks are only screwed down as far as the cork with clear caulking applied under the screw head.  Boards rest on a frame that has foam strips. I can add signs, billboards, and do some surface wiring with small nails and staples on the cork which can be re-arranged as need be since the entire cork board is self-repairing once the small nails, screws, and staples are removed.

Mark The table size is 18.5' X 11' yard extension size  4' x 27'  Overall size is 18.5' x 38' .  Its a copy of the Atlas Texas Western: Layout O-20.  As you can see in the 1st photo is the back of my garage and the 4' section that runs the length of the garage. My plans are to wrap around the last section to make it a big U shape. And as in previous photos This layout was built as a large flat top layout. Big mistake by me.

   Well time to move on and get started again. I have some plans but we will have to see how the $$$$ part goes. All I do know is I am one lucky guy  since I lost my Leg a few years ago and the recent Valve replacement back in mid November. I will still keep posting photos now and then any questions just E-male me   sp2207@hotmail.com

Add Reply

Post

OGR Publishing, Inc., 1310 Eastside Centre Ct, Suite 6, Mountain Home, AR 72653
800-980-OGRR (6477)
www.ogaugerr.com

×
×
×
×
Link copied to your clipboard.
×
×