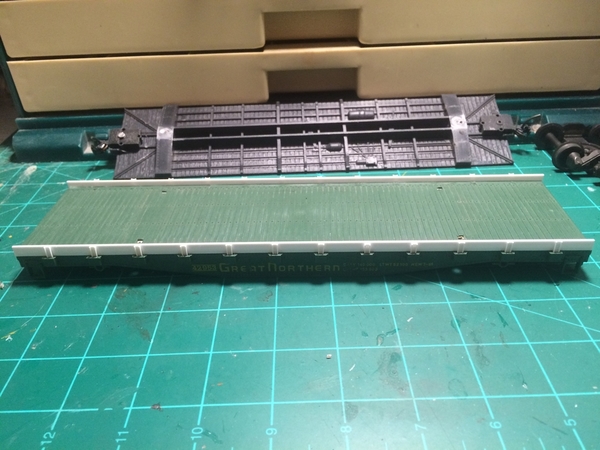
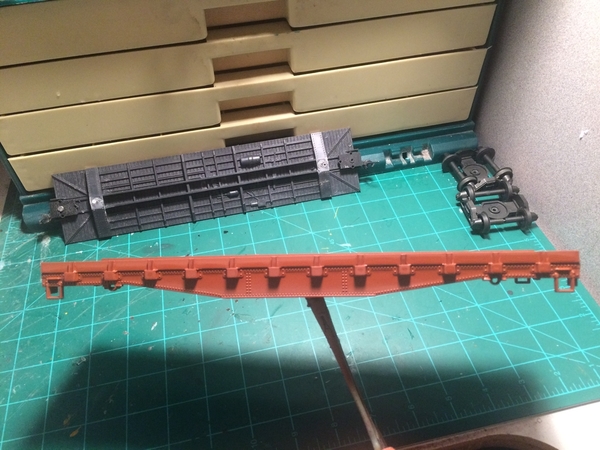
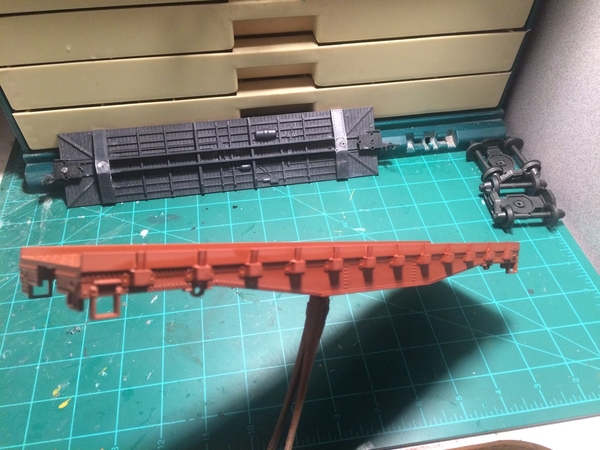
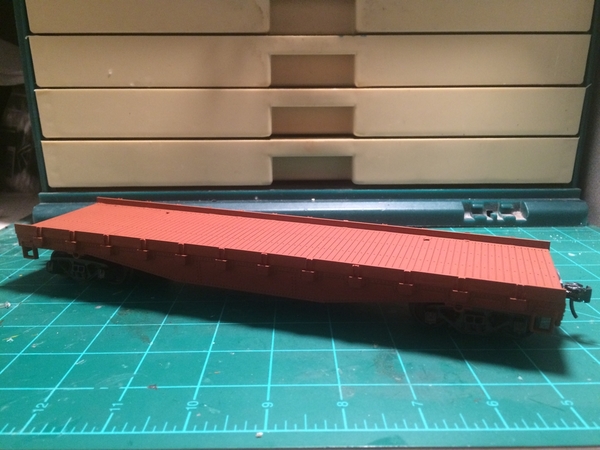
Fendermain posted:

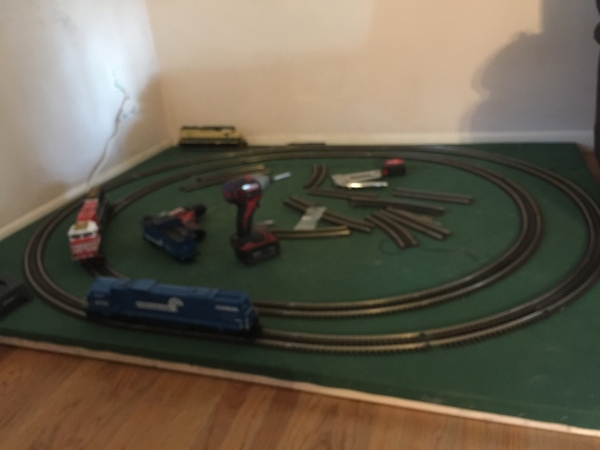
Arnold if you are handy with soldering, you might consider it and eliminate the lockons at the track when you do your rewire.  I think it provides better conductivity.   Fendermain

I actually found a wire glowing cherry red under the tenuous grip of an aging Fahnestock lockon clip - and this was on a carpet layout! That was the last time I used a lockon for power - I now solder every connection to the bottom of the track when using my 027 track.

For Fastrack, I use feeders to the factory clips, and the other end of the feeders are all screwed down on a bus bar type connection. I haven't had any issues as of yet. But then I always make certain the connectors are a very snug fit

Mixed a batch of Scalecoat I silver paint and shot the formerly "shiny Oxide Red" Lionel bridge gifted to me by a fellow forum member.  I'd previously shot it with SC I dull coat to render it no longer "shiny."  But the dull Oxide Red clashed with the shiny red LIONEL elevated trestles--silver should look much better, especially for a Christmas display.  Was hoping to shoot the companion Plastruct truss bridge that will sit on bridge piers gifted to me by this same forumite as the final stage in its repair, but ran out of time today.

Having secured a circle of new, Gargraves Phantom 032 track in a wonderful purchase from Mario's Trains today, I'm doing a second Christmas display; the track plan will be a simple oval roughly 34" x 72".  To connect the feeders, I stripped 2" or so of insulation, soldered the stranded wire, and stuffed the soldered, stranded wire into the opening of the GG flex track below where the track pins go.

With this second Christmas display, I'm going to use the PW LIONEL street lamps (5 green and 5 silver) which I tested today.  All work, bulbs are good, but I need to attach ground wires on two bases and for that I will need forum help since the pot metal used on these doesn't accept solder--at least not my solder.

Photos of the two, newly painted bridges resting on their piers will be posted soon.


Apples55 posted:
 

Wow Mitch - they look very nice...

Thankee!  

and not a pantograph insight!!!

Oh, well.  Since you insist: 

GEDC1313

Now we're all set for the Bay area commuter rush!   

P.S. your switches need a really good dusting 

The whole layout could probably use a good dusting.   However,  since it's basically a test track with delusions of grandeur,  other things take priority.  ;-) 

P.P.S. and a very Happy Thanksgiving to you and the menagerie too.

And to you!  Many thanks once again for a marvelous gift!  My plan is for the Razorback Daylight (sans pantograph) to debut at the JRM Museum after the holidays...   

Mitch 

Attachments

Images (1)
  • GEDC1313

I started, a couple days ago, on another Carolina Craftsman Kit, of a country store (like grain elevators and country gas stations, l don't need any more of these) but l did. And while back in home farm country for the holiday, l drove past the old country store, now long closed, where l used to fill up my '34 Chevy coupe.  It would make a great model, so l need to go back and photo it all-around.  I should have looked at it closer in the past.  It is in the small town that my mother used to ride Jim Crow cars on an L&N branch to visit her aunt.  It would be an effort to bash the CCK kit into that, although there are similarities, so won't.


First off, Happy Thanksgiving everyone!

John, the bridge looks wonderful, I also have to say I find those Santa Fa war bonnets inspiring ! I know some day I will all so have some of that wonderful Silver and Red! Then will go great with my Black and Orange BNSF!

Brian, Wonderful pictures! I know you put those BNSF up there just for me! LOL You rock!

I hope everyone has a great day and a nice weekend!

Since we only have a 15 lbs. turkey, I was workin' on the railroad at 6 AM for 2 hours before my wife woke up. 

The project: getting the signal bridge on the outer loop (on the right side when watching the video below) to work:

The problem was that the red light (higher light) worked when the train arrived, but the green light (lower light) was not working before the train approached. 

I think the cause was some dirt or debris prevented the triggering device from making good electrical contact keeping the green light from coming on. I tried to clean it using brushes and electrical contact cleaner leaving the triggering device in place under the track. That did not work. What worked was taking the trigger device out from under the track with the wires still connected, and then applying a little WD40 in the nooks and crannies of the triggering device using a tooth brush and paint brush. 

The expression "it don't come easy" almost always applies whatever I do with the trains.

LOL, Arnold

Attachments

Videos (1)
20181122_134757
Last edited by Arnold D. Cribari
colorado hirailer posted:

It is in the small town that my mother used to ride Jim Crow cars on an L&N branch to visit her aunt. 

I'm minded of a Philadelphia streetcar story...

Back in 1975, the Woodland carbarn burned,  destroying about half of Philadelphia's streetcar fleet.  As a stopgap measure,  SEPTA purchased some used PCC cars from Toronto.  The 2200 series cars were ex-Kansas City cars, basically the same as ones PTC had bought from KCPS in the 1950s.   The 2300 series cars were ex-Birmingham cars built by Pullman.   These cars had holes in the backs of the seats,  which, as a lad,  I didn't understand.   It was only later that I was informed that these had been used in Birmingham for movable "Jim Crow"  signs... 

The part that still blows my mind:  The cars served in Toronto for decades, but nobody thought to fill in the Jim Crow holes... 

Mitch 

These are the bridges mentioned yesterday.  The first is a LIONEL bridge that was originally a shiny Oxide Red that was gifted to me by a forum member.  It came in shiny Oxide Red which I knocked down with Scalecoat I Dull Glaze.  But, that clashed with the Christmas red trestles.

Out came a very old bottle of Scalecoat I silver and the formerly Oxide Red bridge is now silver.

The second bridge is a Plastruct component truss bridge built from HO plans that I had enlarged years ago,  It was seriously damaged in a fall quite a while ago, and I made repairs earlier this week and painted this a.m.  It sits on shortened piers gifted by the same forum member who supplied the now-silver bridge.

Bridges painted 001Bridges painted 002Bridges painted 003

Attachments

Images (3)
  • Bridges painted 001
  • Bridges painted 002
  • Bridges painted 003

What a wonderful thread this is!! Since 2013. I have been re-reading all 623 pages over the course of this long weekend. 

I have been absent from the forums for a long time. Teaching at The University of Wyoming has been totally consuming. 

But! I have managed to get into the train room and do a series of updates which are summarized in this video: 

Dr Joe's Layout Mid-November 2018 Update

Happy Thanksgiving everyone!

Dr. Joe

LaramieJoe posted:

What a wonderful thread this is!! Since 2013. I have been re-reading all 623 pages over the course of this long weekend. 

I have been absent from the forums for a long time. Teaching at The University of Wyoming has been totally consuming. 

But! I have managed to get into the train room and do a series of updates which are summarized in this video: 

Dr Joe's Layout Mid-November 2018 Update

Happy Thanksgiving everyone!

Dr. Joe

Great video Dr. Joe.  Thanks for sharing your layout and train room.

Cheers, Dave

LaramieJoe posted:
mike g. posted:

Dr. Joe, thanks for the nice little update! Nice layout and train room! Thanks again!

Thanks, Mike! 

I just sent you an email. I figure you will have the answers I need to a vexing wiring problem. Hope I wasn't out of line emailing you!

Dr. Joe 

Hi Joe, I don't have a problem you emailing me! I hope anyone here feels free to email me anytime they would like! Its nice hearing from others into railroading!

Today l went back and took multiple photos of that country store.  And drove by another that is not as photogenic as l thought.  I need to cruise some more of the back road small towns, for others . I remember one abandoned store l drove by years ago that was then covered in those tin signs. Gone now.  But l need to find some more sheets of signs for model country stores?  Who got?

LaramieJoe posted:

What a wonderful thread this is!! Since 2013. I have been re-reading all 623 pages over the course of this long weekend. 

I have been absent from the forums for a long time. Teaching at The University of Wyoming has been totally consuming. 

But! I have managed to get into the train room and do a series of updates which are summarized in this video: 

Dr Joe's Layout Mid-November 2018 Update

Happy Thanksgiving everyone!

Dr. Joe

Magnificent layout, Dr. Joe!  Thanks for sharing with us!

Arnold D. Cribari posted:

Since we only have a 15 lbs. turkey, I was workin' on the railroad at 6 AM for 2 hours before my wife woke up. 

The project: getting the signal bridge on the outer loop (on the right side when watching the video below) to work:


The problem was that the red light (higher light) worked when the train arrived, but the green light (lower light) was not working before the train approached. 

I think the cause was some dirt or debris prevented the triggering device from making good electrical contact keeping the green light from coming on. I tried to clean it using brushes and electrical contact cleaner leaving the triggering device in place under the track. That did not work. What worked was taking the trigger device out from under the track with the wires still connected, and then applying a little WD40 in the nooks and crannies of the triggering device using a tooth brush and paint brush. 

The expression "it don't come easy" almost always applies whatever I do with the trains.

LOL, Arnold

Good job, Arnold! I save all my old tooth brushes now. Some are used to shine shoes with different color shoe polish. Others are used to clean scrub externals of rail cars with vinegar and baking soda. Still others are used to attack surface rust and to abraid grime and debris. Oh yeah...and sometimes I brush my teeth.

mike g. posted:
LaramieJoe posted:
mike g. posted:

Dr. Joe, thanks for the nice little update! Nice layout and train room! Thanks again!

Thanks, Mike! 

I just sent you an email. I figure you will have the answers I need to a vexing wiring problem. Hope I wasn't out of line emailing you!

Dr. Joe 

Hi Joe, I don't have a problem you emailing me! I hope anyone here feels free to email me anytime they would like! Its nice hearing from others into railroading!

Spoken like the wonderful Olympic Peninsula Man that you are!

I actually did somethings on my layout yesterday! Been a long time since I did more than look at it.

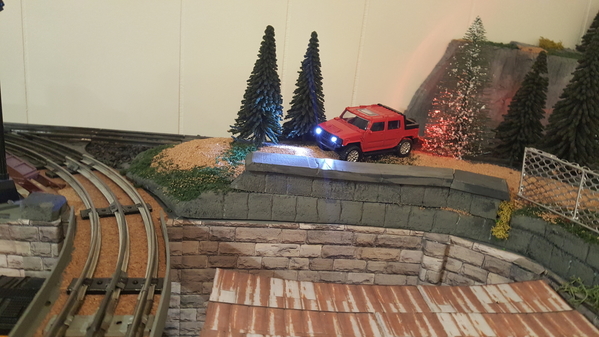
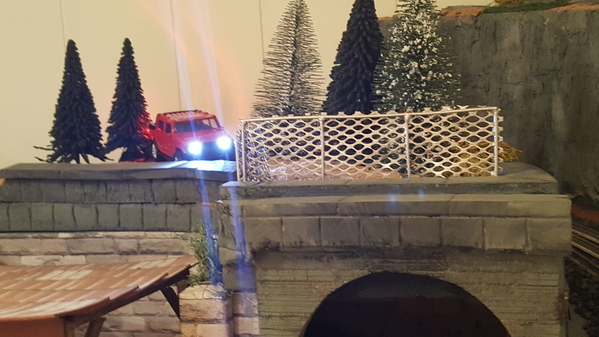
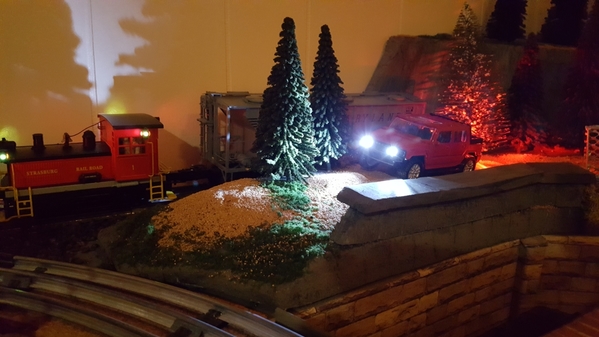
I while back I got the free Hummer from Menards. I only had a 5.5v wall wart which worked but was a bit too bright. I found a 4.8v from a cell phone recently and hooked it up yesterday. Much better now.

Before and after

2018-09-24 06.03.382018-11-23 16.36.34

2018-11-23 16.44.13

I also added a power drop to one side of my elevated loop. Been putting it off for a while but I was inspired by Arnold's recent efforts. Had a bit of a brain fart though and forgot to run the wire to the switch for the block instead of the buss bar right off the KW. Didn't take me long to realize I'm and idiot and fix it.

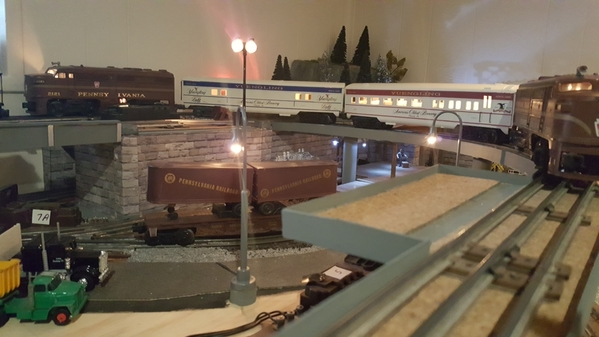
I'm also swapping out rolling stock and locos for the Holidays. Been running the same stuff for so long that it's been getting boring. I'm really trying not to overload my small layout with trains so I can do some switching. I think I'm going with a PRR theme for now, we'll see. Put out my Yuengling cars for the first time. Thought they would be a good match for my new PRR ALCO's.

2018-11-24 07.49.23

Now a bit of catching up

Mark- the Christmas layout is looking good

Dr. Joe- welcome back. The train room looks great.

Johan- another beautiful scene.

Mike- great to see some track work related progress in the train room.

Lee- another nice car project

Brian- If I was a west coast guy those BNSF locos would be on my layout for sure.

John- nice work on the bridges and gorge.

Arnold- glad you got the signals fixed. One of my winter projects is to start adding some signals to my layout.

Enjoy- Bob

Attachments

Images (4)
  • 2018-09-24 06.03.38
  • 2018-11-23 16.36.34
  • 2018-11-23 16.44.13
  • 2018-11-24 07.49.23
Last edited by RSJB18

I'm going to do some work on my trains today - specifically updating my Legacy command items.  I posted this on the Legacy page but since this gets the most hits thought to post here as well:


I have a bunch of questions and I am hoping to get some help or some links to where these topics have been covered.  I appreciate all the help in advance.

I don't think I have upgraded / updated my Legacy system for a while (understatement) and much of that is likely due to the fact that I have really enjoyed the MTH Wi-Fi app and how easy it is to use (and update).  

Some background - I am currently running version 1.52 on the remote and the base.  I have the Legacy WiFi LCS "box" and the LCS SER 2 "box".  These are already hooked up (done previously).  I have the LionChief app (downloaded but not used) and Lionel iCab app.  Both of the apps are up to date per the app store.  I have no Lion Chief engines.  I have several Legacy engines.

Here are my questions:

  1. In order to update to the current version of Legacy from 1.52 do I need to create a black chip, if so how is that done?  I know I have both black and orange chips.
  2. Is there a list of enhancements from Legacy 1.52 to current?
  3. After creating a black chip what are the steps to upgrade to the current version.  I have a Microsoft based laptop and an Apple, laptop.  I last used the Microsoft based on when I did my last upgrade.  
  4. Is there an "easy way" to down load the Legacy update using one of the Lionel apps?
  5. I know when I am searching for a Wi-Fi network I see there is a MTH Wi-Fi address as well as the "Lionel LCS-1047" address.  Is the LCS-1047 for both Lionel apps?  If the LCS 1047 is only for the Lionel iCab, what does LionChief use?
  6. Since I previously purchased the Lionel iCab app is there a reason I would want to use Lion Chief app as well?  I do not have any of the LCS bluetooth track installed on my layout.  I may or may not have some bluetooth engines, not 100% sure.
  7. Any experience, positive or negative using the MTH Wi-Fi and either the iCab or LionChief app?  I know I will need 2 separate devices since they are on two wireless networks.  (I use the proprietary MTH Wi-Fi network for running my MTH trains)

The Hummer and train look great, Bob!

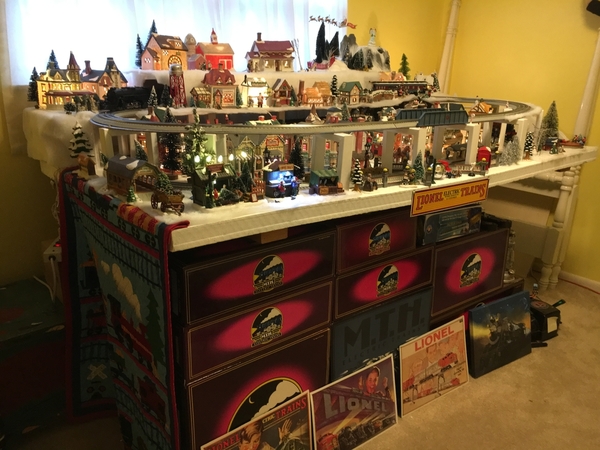
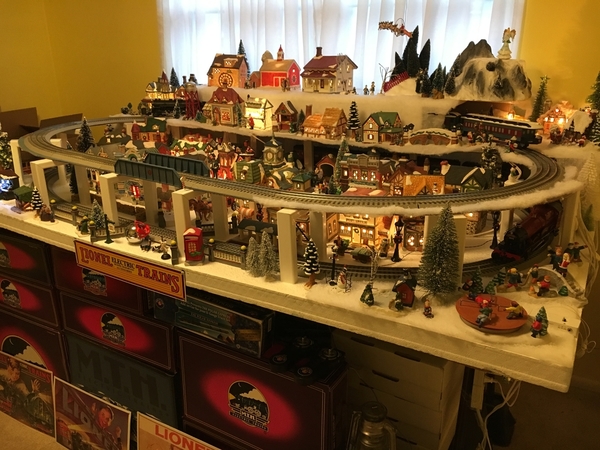
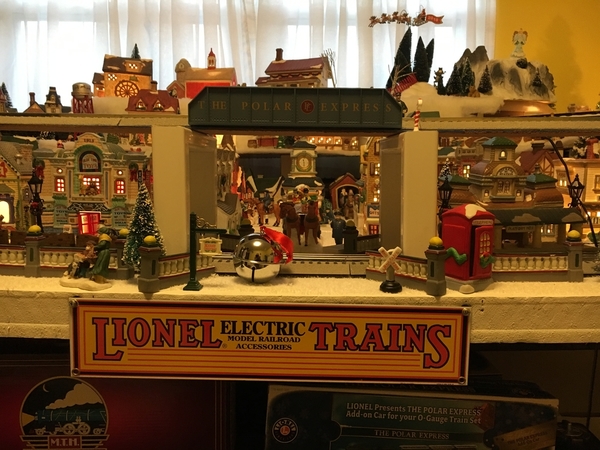
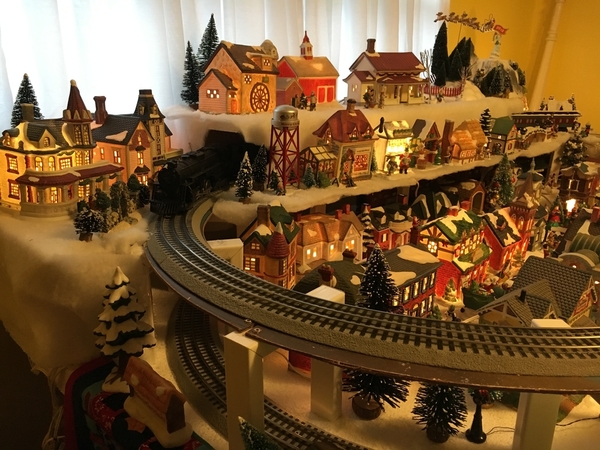
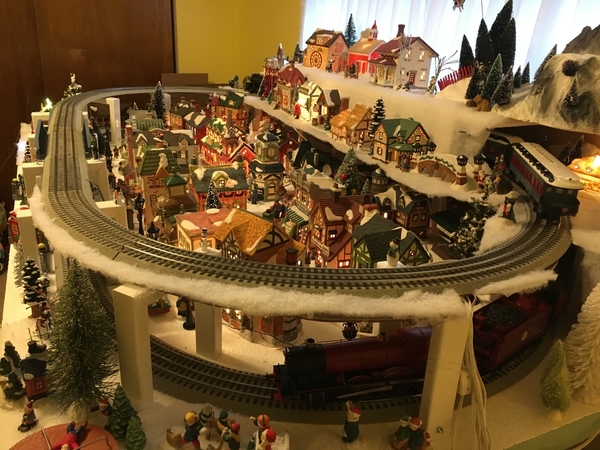
I finished the Christmas layout today.  I think.  

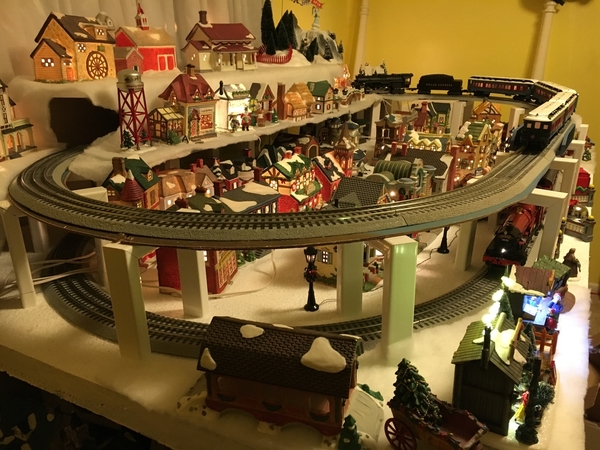
I bunched up the lighting cords and taped them to the back side of one of the upper level supports with clear packaging tape which worked out pretty nicely, I think.  As nicely as a temporary layout is going to get.    I then put out trees, people, horse drawn sleighs.  No motor vehicles on this year's Dickenville theme layout.  I ran the Polar Express on the top level and still have the Hogwarts Express on the bottom.  

I made two mistakes that I am going to live with, since this is a temporary layout.  I forgot to leave any space for the scenic backdrop to attach, so we will just have the white curtains for a backdrop.  Also, I forgot to leave headroom for the hobo on the top level.  He needs about 5 1/2 inches, and I made it 5 inches.  I'm not going to raise it, so no hobo while the PE is running on the top.  We have 6 inches on the bottom, so there is plenty of clearance for him there.  

2018-11-24 15.05.002018-11-24 15.05.222018-11-24 15.05.502018-11-24 15.06.032018-11-24 15.06.18

Attachments

Images (5)
  • 2018-11-24 15.05.00
  • 2018-11-24 15.05.22
  • 2018-11-24 15.05.50
  • 2018-11-24 15.06.03
  • 2018-11-24 15.06.18
Last edited by Mark Boyce

Thank you, John and Matt!!  Yes I quickly decided not to take Mount Brian apart for either oversight!  

That sounds great when you were a kid, John!  When I was in Cub Scouts in the mid ‘60s, we took a trip to Pittsburgh Northside to see the model railroad and village in the old Buhl Planetarium.  The model railroad still going strong but now in the Carnegie Science Center. 

Hi guys, seems like forever since I have had anything to post here. Patrick was supposed to come over today, but cancelled, so I had the day all to myself. I have been slowly working on a project, just a few hours at a time. This one has been on my to do for a couple years.

I bought a K-line 21" baggage car and and matching combine as a pair. They were Pennsy, but I can fix that. I'm just working on the combine for now. I'm turning it into an ex GN baggage / dormitory. Here's the car in its short lived BN paint, which is what I'm going to do.
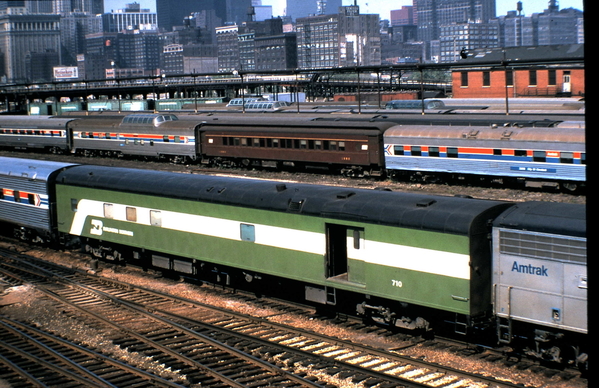
bnp710

I'll turn the baggage car into this one, by removing the long middle skirts and moving the doors and repainting.
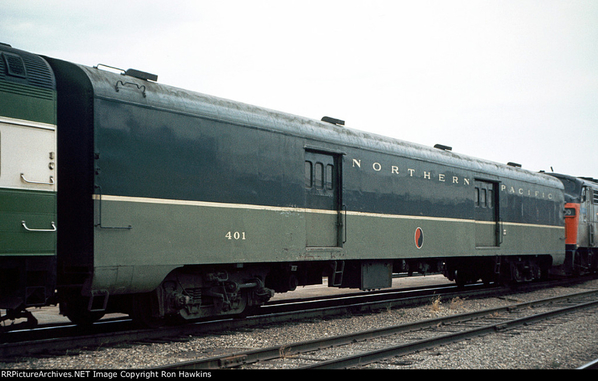
NP 401-1

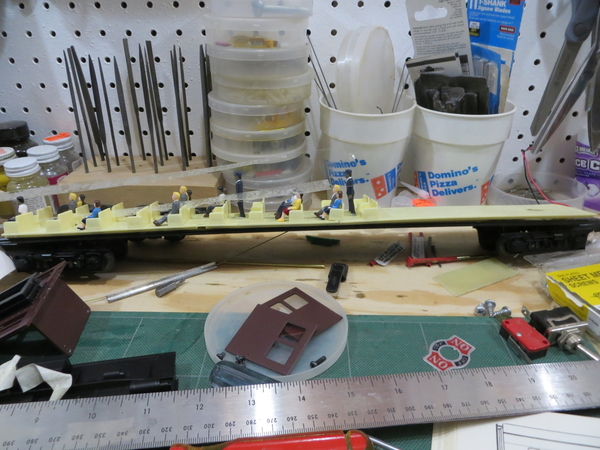
The car is first reduced to parts, leaving the aluminum extrusion.

IMG_8640IMG_8641

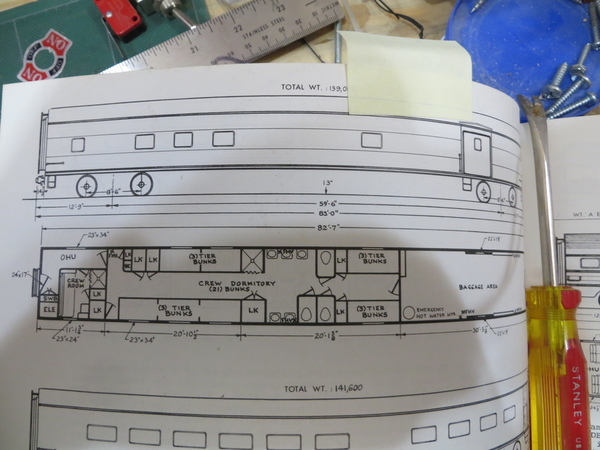
I have this book of early Amtrak car plans, and much to my surprise, this one was in it. It's nice having some dimensions to work from. Unfortunately, the car is a couple feet too long, and there's no good way to shorten it. The body would be easy enough, but the chassis is a huge can of worms. For a couple feet, I'll pass.

IMG_8642

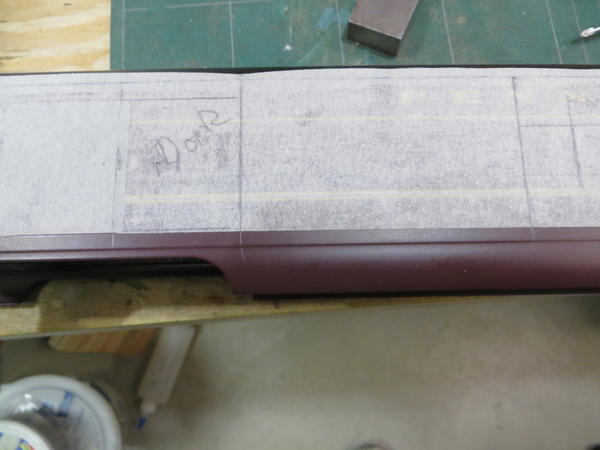
I put masking tape over the sides of the car, but in hindsight, it wasn't worth trying to mark out the windows and doors.

IMG_8643

It's not easy trying to draw on this thing when it has the rounded roof and skirts.

IMG_8644

Time to lose the skirts. I clamped the body to a saw horse, then took my saber saw with a metal cutting blade, they came right off.

IMG_8645

After some filing and grinding with my sander, the bottom edge is straight and smooth

IMG_8646

Next up, filling the windows and doors.

Attachments

Images (9)
  • bnp710
  • NP 401-1
  • IMG_8640
  • IMG_8641
  • IMG_8642
  • IMG_8643
  • IMG_8644
  • IMG_8645
  • IMG_8646

Ran trains for 5 hours for the tri-state layout open house tour.  Trains ran great, had a really good turnout for a rain soaked afternoon.  Had almost 50 guest view the layout.

I have been open for this tour since it began and this is the best turnout I have ever had for it.

Had guest from 4 states.  Maryland, Delaware, New Jersey, and Pennsylvania.

For me this is the best part of the hobby,  Sharing it with others.

I am now ready for my  14 Christmas open houses during the month of December.  This will be the 32nd year for these.

Karl

Big_Boy_4005 posted:

Hi guys, seems like forever since I have had anything to post here. Patrick was supposed to come over today, but cancelled, so I had the day all to myself. I have been slowly working on a project, just a few hours at a time. This one has been on my to do for a couple years.

I bought a K-line 21" baggage car and and matching combine as a pair. They were Pennsy, but I can fix that. I'm just working on the combine for now. I'm turning it into an ex GN baggage / dormitory. Here's the car in its short lived BN paint, which is what I'm going to do.

bnp710

I'll turn the baggage car into this one, by removing the long middle skirts and moving the doors and repainting.

NP 401-1

The car is first reduced to parts, leaving the aluminum extrusion.
IMG_8640IMG_8641

I have this book of early Amtrak car plans, and much to my surprise, this one was in it. It's nice having some dimensions to work from. Unfortunately, the car is a couple feet too long, and there's no good way to shorten it. The body would be easy enough, but the chassis is a huge can of worms. For a couple feet, I'll pass.
IMG_8642

I put masking tape over the sides of the car, but in hindsight, it wasn't worth trying to mark out the windows and doors.
IMG_8643

It's not easy trying to draw on this thing when it has the rounded roof and skirts.
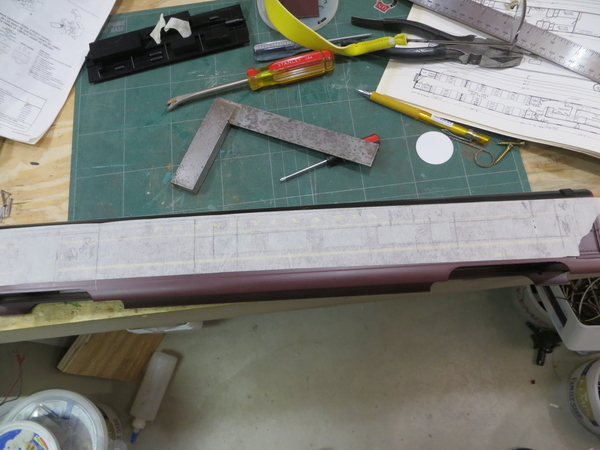
IMG_8644

Time to lose the skirts. I clamped the body to a saw horse, then took my saber saw with a metal cutting blade, they came right off.
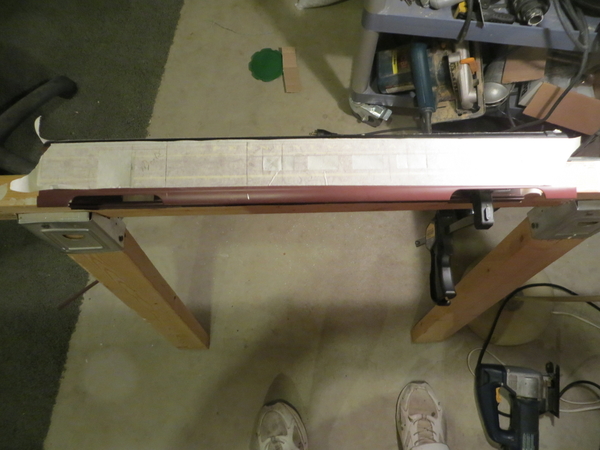
IMG_8645

After some filing and grinding with my sander, the bottom edge is straight and smooth
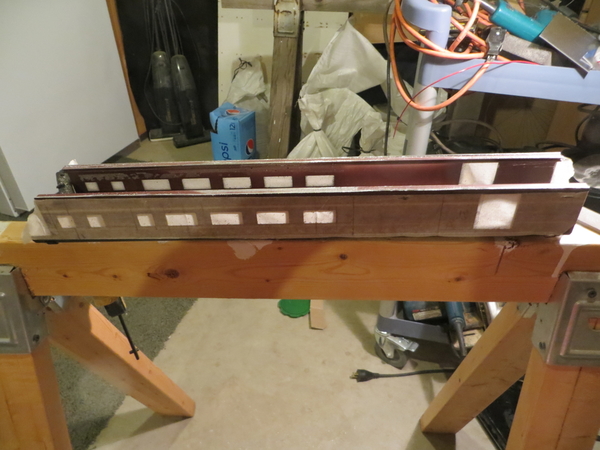
IMG_8646

Next up, filling the windows and doors.

Elliot, that sure is some wonderful work you have going on there! I would have a hard time doing that, not because lack of skills, but what if I did Screw up, That's where the money comes into play! LOL I cant wait to see the out come!

Elliot, I hope you will start a thread and describe (with photos) how you are going about this project--it would be an excellent stand-along thread.

For myself, I finished the third streetlamp repair--the post had separated from the base.  A tip posted on my thread led me to try some super glue gel by Locktite; AND IT WORKED.  So, on this minor repair project I went 3 for 3 in success.

Also went to Wal-Mart this evening a bought some flat white paint to paint the 4' x 6' board the Christmas tree will sit on and have two loops of track around it. 

Before the trip to WM, I test fit the Gargraves/Ross sectional track and GG flex track.  I thought this wise because the inner loop of 032 GG will include two bridges (one LIONEL and one Plastruct O scale truss bridge)  sitting on LIONEL piers which are fairly wide at the base which are by the lack of length (only 6') darn close to the exits of the outer loop curves.

Still need to test the LIONEL uncoupler/loader switches that I rewired for several PW accessories, as well as layout the LEDs for lighting some buildings--but, I'm having fun.

Our lives revolve around our puppy Sweet Pea right now, but I still managed some success today!
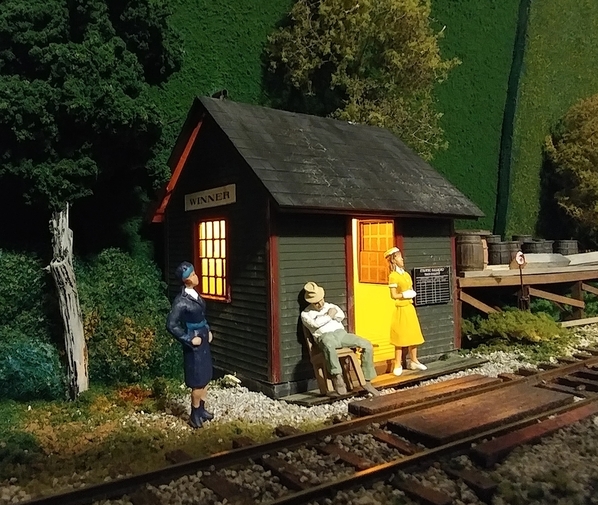
After drilling holes through the bottoms of each strcutre on the layout, just in case, I installed all the Woodland Scenics plug-and-play system for the lighting. All the controls are on the panel now. Next, it's just a matter of running the wires up to the structures. I'd had all the wiring stuff for a while now, and decided if waited long enough.
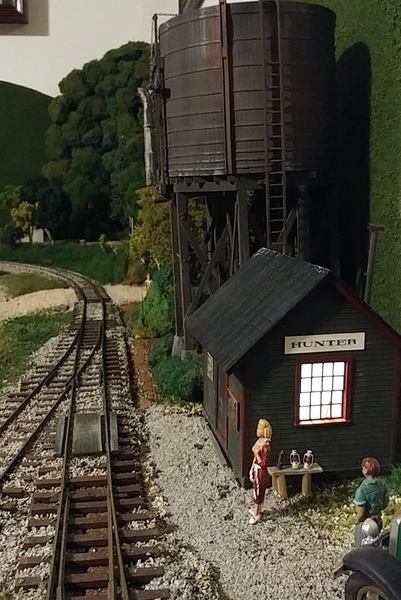
The flag stop at Hunter is almost directly above the master switch, so it only took just a few seconds to get the light into that structure. There's no interior inside, so I added enough fogginess to the windows so you couldn't really tell, with dull finish scotch tape from the inside.

1124181956-01

Can't wait to get to the other flag stop at Winner, which has a full interior and an open door...

Attachments

Images (1)
  • 1124181956-01

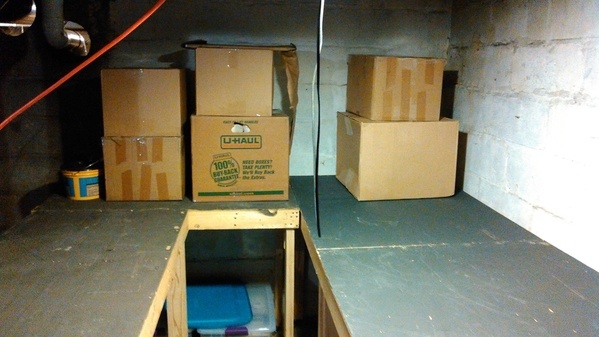
Doesn't look like much compared to what you folks have been up to this week, but this is the first step to getting around my furnace so I'm happy about it!KIMG1351 The original plan was to go behind the furnace, but that route is too close to the business end for comfort.  As a positve I've realized I'll get a longer run this way!  It actually looked a little like a layout before I put the boxes back up there.  As usual please excuse the photo. I have an older phone and barely any lights down there at the moment. 

Attachments

Images (1)
  • KIMG1351
Mark Boyce posted:

Dr Joe, Thank you for the video of your layout!  You have made some very nice additions.  The room and shelves full of cars looks great too!  

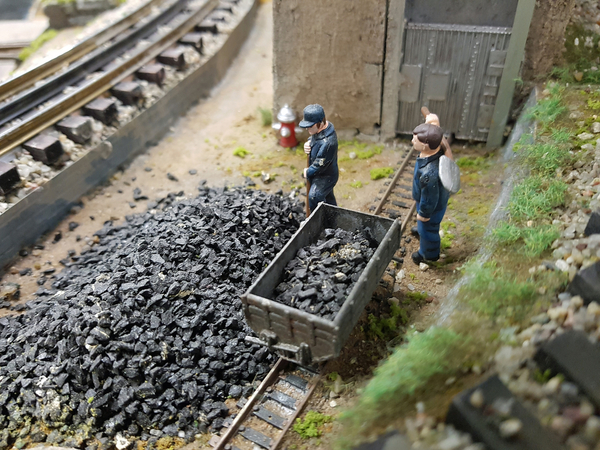
Johan, Nice scene of the coal car and area!

Colorado, You should be able to make a realistic scene from the photographs you have taken.

Mark: Thank you.

Johan

RSJB18 posted:

I actually did somethings on my layout yesterday! Been a long time since I did more than look at it.

I while back I got the free Hummer from Menards. I only had a 5.5v wall wart which worked but was a bit too bright. I found a 4.8v from a cell phone recently and hooked it up yesterday. Much better now.

Before and after

2018-09-24 06.03.382018-11-23 16.36.34

2018-11-23 16.44.13

I also added a power drop to one side of my elevated loop. Been putting it off for a while but I was inspired by Arnold's recent efforts. Had a bit of a brain fart though and forgot to run the wire to the switch for the block instead of the buss bar right off the KW. Didn't take me long to realize I'm and idiot and fix it.

I'm also swapping out rolling stock and locos for the Holidays. Been running the same stuff for so long that it's been getting boring. I'm really trying not to overload my small layout with trains so I can do some switching. I think I'm going with a PRR theme for now, we'll see. Put out my Yuengling cars for the first time. Thought they would be a good match for my new PRR ALCO's.

2018-11-24 07.49.23

Now a bit of catching up

Mark- the Christmas layout is looking good

Dr. Joe- welcome back. The train room looks great.

Johan- another beautiful scene.

Mike- great to see some track work related progress in the train room.

Lee- another nice car project

Brian- If I was a west coast guy those BNSF locos would be on my layout for sure.

John- nice work on the bridges and gorge.

Arnold- glad you got the signals fixed. One of my winter projects is to start adding some signals to my layout.

Enjoy- Bob

Bob: Thank you.

Johan

  Last night making a double reverse, single mainline connector carpet central dumbell layout, I used up every curve I own along with two new to me Marx switches I got from Pingman the other day. After adding some pins to help bridge the point gaps better, doing some track cleaning of those dregs of the bottom of the track box,, and isolating a few rails for anti derail triggers,  I got Grandmas fat wheel Commodoore Vanderbilt running flawlessly in turnouts for the first time ever... So I tore it down  and rebuilt in favor of an offset dogbone loop and a very long siding.  Today I'm going to look at my relays and see if I can't do two staged trains, maybe in opposite  directions.  

On the 4' x 6' board I painted flat white last night, I laid out the track and bridges so that I would know where to run the RGB LEDs; removed the track; laid the LEDs (3 reels worth); and, tested them--everything checked out.

Following this, the table and LEDs were covered with white snow/batting and the LEDs tested again, this time for the visual effect.  These LEDs were the ones mistakenly shipped to a number of OGRers a couple of years ago when the Chinese distributor ran out of warm white 3528 reels.  A neat feature is the remote control that gets the LEDs to light in various colors and patterns.

I'll post pics or a brief video tonight or in the a.m. after I get the track, trestles, piers, and bridges on the table.

Last edited by Pingman

Lee, the building lighting is looking great! I hope you keep posting as you get them lit up!

Dr. Joe, your Dept. 56 layout is looking wonderful! I am with Mark, is sure going to be the old flat layout around Christmas time!

I didn't get much don't this week or weekend as we had the kids and grandkids, plus had to work yesterday and today! I did manage to add 4" to my side yard, cause I had to widen it out to fit my new train station from a forum member! I will try and get some pictures tomorrow!

Finished disassembly of my two-color printing press to make room for a new layout.  Movers wanted a moving fee plus a monthly storage fee as they look for a customer for the press.  I decided the open ended monthly storage fee could get costly, and it provided no incentive for the movers to sell the press.

I hated to cut the press up, but progress sometimes takes sacrifice.  It took eight days to strip it down to parts.  Now I have a 15 x 18 room I can use for a HO or O-Gauge layout.

Sincerely, John Rowlen


Since I've got one of my cases of 0300 insomnia,  I decided to fabricate a couple of FastTrack actuators for the JRM Museum layout. 

GEDC1315

The Marx crossing ringer uses a short section of insulated rail to light the light and ring the bell. 

GEDC1316

This actuator, a former gi-raffe ramp track...

GEDC1317

...will be used to operate one of these: 

Naturally,  Norma Bates Kitteh had to assist: 

GEDC1318

And here's a demonstration! 

Mitch 

Attachments

Images (4)
  • GEDC1315
  • GEDC1316
  • GEDC1317
  • GEDC1318
Videos (1)
GEDC1319

Arnold, it kinda looks like a drain pipe from here! I think/hope it last!

John Rowlen, that sure is going to be a nice addition for trains either way you decide to go!

Lee, take the time and train hi good, what he learns now last a life time! I sure wish I would have done better with Tank! LOL

Mitch, nice work at 3 am, everyone has nights like that! But it sure is nice that Norma Bates Kitteh keeps you company no matter what time of the day it is!

Thanks guys!

Mark - Not sure which scheme you're talking about. This car may have had up to four different schemes over its lifetime.  First the classic GN green and orange, then the short lived big sky blue, of which I have photos. There's a possibility that some of these dozen or so cars, skipped over the blue and just went to the BN green, another short lived scheme, before a possible repaint to Amtrak before they were finally retired for superliners. This car is going to be BN green for two reasons. One, it's my absolute favorite paint scheme of all time (hi Mike), and two my rainbow Empire Builder needs a splash of it.
Dave - Thanks, I do recall saying that. That was quite the micro project you did. I'm reaching way down deep to muster the gumption for this one, but it is more of a macro project. With the neuropathy in my hands, it's twice the challenge. I have a hard time picking up small objects and tools, but so far, I'm getting it done.

Mike - Yeah, it is scary taking a $100 car and hacking into it like this. I worry about messing it up too. The secret is go slowly. When making cuts, leave excess material to remove with finer tools, and worst case, have some filler handy.

Carl - I'll do that when I'm all done.

---------------------------------------------------------------------------------------------------

More work yesterday. I whipped up a couple batches of epoxy, and glued in thin aluminum to cover the windows from the insde.

IMG_8647IMG_8648

I'm keeping the small window on the left end. I'm still scratching my head over how I'm going to deal with the vestibule. There's a lot to be done with that plastic insert. Still thinking.

IMG_8649IMG_8650

It's a little hard to see, but the four large windows on the right, now have thick aluminum slugs glued in place, bringing the fill nearly flush with the car side. I have eight more of these, then the two baggage doors, and I can lay out the new windows and start cutting.

IMG_8651

Attachments

Images (5)
  • IMG_8647
  • IMG_8648
  • IMG_8649
  • IMG_8650
  • IMG_8651
Last edited by Big_Boy_4005
Big_Boy_4005 posted:
mike g. posted:

I need to fine me one of those Seahawks Box Cars! LOL

Looks like we are going to have a problem two weeks from tonight, on national television. SKOL!

Its all good Elliot! I still like what your doing and respect you! Because of this you will have all my sympathy !

Elliot, nice video of an early Amtrak train. If you can't find what you want you find something else and build it to your plans. 

Mark, Christmas layout came out nice. Covered it and keep it.

Today I brought the last two units of the L & N diesels to the attic along with the last three cars of the passenger consist. Placed the cars on the track and they all lit. 6 for 6 100%. So I took a still and shot a video. The video is a tad bumpy...........shaky hand held drone LOL. Hope it works. Took forever to figure out how to do it. Plus I had to type in the videos numbers. Couldn't figure out how to get them highlighted.............Paul

DSCN2570

https:youtu.be/uZeMmw-n7jw

https:youtu.be/nMOFFVOBOoQ


Attachments

Images (1)
  • DSCN2570
paul 2 posted:

Today I brought the last two units of the L & N diesels to the attic along with the last three cars of the passenger consist. Placed the cars on the track and they all lit. 6 for 6 100%. So I took a still and shot a video. The video is a tad bumpy...........shaky hand held drone LOL. Hope it works. Took forever to figure out how to do it. Plus I had to type in the videos numbers. Couldn't figure out how to get them highlighted.............Paul

DSCN2570

https:youtu.be/uZeMmw-n7jw

https:youtu.be/nMOFFVOBOoQ


          https://youtu.be/uZeMmw-n7jw

          https://youtu.be/nM0ffV0BOoQ

          very nice,  GREAT looking train Paul 

Last edited by briansilvermustang

Mitch, Very productive time when you couldn't sleep.

Elliot, The paint scheme I meant was the green you said you plan to paint it when done.  That one and the orange and green are both nice, I think.  For some reason, I don't like the sky blue, but wouldn't turn it down either.

Paul, The L&N train looks great on the Attic Layout!  I plan to take the buildings off the Christmas layout in January, then stow it away on it's side against the wall, so we can use it next year with a different building configuration, but the same tracks and Mount Brian.

Dr Joe, That foam makes great results, you just have to keep the shop vac hose handy.  Some folks car really carve some great rock formations in it.


Last edited by Mark Boyce

Ok Arnold, Your hired to help me with my Wiring, come on down to Tennessee, and we will go to work.....Just a Little “ribbing”, you really have a Jungle Of Wire under your Layout.  I will post some pictures of mine soon.  Either way, your threads are always a delight to read, and I like the Music to....Happy Railroading. And Merry Christmas to....

leapinlarry posted:

Mark Boyce, I like your Double Decker Christmas Layout, very nice. I see you a lot on the Forum and your comments are always Upbeat....I will post some Christmas scenes on my layout soon....Merry Christmas... More comments coming to the many folks on our forum....

Thank you, Larry!!  It was a new layout design concept to me.  I try to be upbeat to help everyone enjoy their hobby!  I’m glad you appreciate it!  I’ll look forward to seeing your Christmas scenes!

Elliot,  How will you cut in the new windows without disturbing the filler pieces?   I would think it be easier to cut out the new windows in a new strip of aluminum and then insert the new strip into one larger section of space occupied by the larger windows.   I have never done this type of modification but it seems to me that it would be an easier approach.   Just a thought.   Neat project and I look forward to the end product.     SKOL, Dave

P.S.  Thanks for the early Amtrak Builder ride.  I wish that they were still using some of the old equipment such as the dome cars.   Had a nice overnight ride on the Canadian from Jasper to Vancouver a few years ago and spent the whole night in the dome car enjoying the moon lit view. 

Just had another thought:  Cut out the space between the first large window and the last large window and then insert filler spacers between to create the size windows you want to use.   Just another thought.  

Last edited by darlander

Add Reply

Post

OGR Publishing, Inc., 1310 Eastside Centre Ct, Suite 6, Mountain Home, AR 72653
800-980-OGRR (6477)
www.ogaugerr.com

×
×
×
×
Link copied to your clipboard.
×
×