
I'm at the point on the new layout where highway construction is on the horizon.  On my former layout, I used the Scenic Express product...mixed the paste and applied it, and when dry, applied the black overcoat.  It looked quite realistic.  I'd like to try another method this time.

For this layout, I'd like to build up the roadbed a 1/4" or so starting on Main St. to make the curbing height more realistic abutting the MTH buildings.  I can envision using a 1/4" sheet product, cutting it to size to the dimension of the road, and coating it or painting it flat back...maybe using the Scenic Express product for black coating.

Any thoughts?  Your opinions / options much appreciated.


Original Post

Replies sorted oldest to newest

I have adopted the "Durham's Water Putty" method described in Dennis Brennan's scenery book--applying it over foam core.  Attached is a build sequence.


Start by cutting out the road in foam core:

FAKRAgreen 2

Add a skim coat of Durham's putty with black paint added:

FAKRAgreen 3

Fit the road into the environs:

FAKRAgreen 4

Add railings:

FAKRAgreen 5

Weather with chalks:

FAKRAgreen 6

FAKRAgreen 7


Attachments

Images (7)
  • FAKRAgreen 7
  • FAKRAgreen 1
  • FAKRAgreen 2
  • FAKRAgreen 3
  • FAKRAgreen 4
  • FAKRAgreen 5
  • FAKRAgreen 6
Last edited by Avanti

I also use the roofing material, it gives a realistic look, can be custom cut to the contour of layout and the time, cost and effort are well spent. I use either a yellow or white marker picked up at Michael's, Hobby Lobby or a craft store for about $3 to do the center stripe to complete the look.

It has helped the kid's layouts tremendously, having roads and parking lots.

Capetrainman, I have used (and am very fond of) 3M Stairway Tread, which comes 3M stair tread road material3M tape siteIMG_0553IMG_4396IMG_4709IMG_5913b - Copyin rolls, with plenty of length on them. They come in different textures. These examples show you its use in situ as a variety of "pavements," as roadways and parking lots, etc. This photo...portal road ...shows you an unfinished area where the 3M Tape has been put into place as a rural roadway, leading out from the tunnel portal. I'm including the photo to give you an idea of the thickness of the tape as roadway. It is atop a strip of Masonite used as a base for the tape.

These is, of course, paper backing on the tape, but once you have removed it and emplaced the tape, it is very unforgiving and will not be peeled off too readily - it's pretty much permanent. So, when I have used it, I do all the configuring and scissor-cutting before I remove the backing to press the tape into place.

FrankM

Attachments

Images (7)
  • 3M stair tread road material
  • 3M tape site
  • IMG_0553
  • IMG_4396
  • IMG_4709
  • IMG_5913b - Copy
  • portal road
Last edited by Moonson
AGHRMatt posted:

We use asphalt roofing paper (underlayment). The roll size from Home Depot (about $38) is so big you can do all the roads and parking lots on your layout, your friend's layout, and several others. You can cut it using the "score and snap" method or scissors. Here's what it looks like:

2013-03-31 10.07.27

All my friends that have used any type of foam product ended up with divots where their vehicle sit. How is the surface texture Matt? 


Last edited by BobbyD

I used black "Darice Foam Sheets" (available from craft stores such as Joann Fabrics) which is available in various thicknesses, cut to size and glued down (I used white glue).

Cracks were made with a sail sewing needle, roads were sprayed lightly with Rustoleum "aged iron".  1/8" car pinstriping was used for the striping.  Weather with chalk powders and/or paint washes.  Tire tracks can be made with a pencil eraser.

When finished, spray with dull cote or matte finish.IMG_1975IMG_1975IMG_1976IMG_1977IMG_1980IMG_1981IMG_1982IMG_1983IMG_1984IMG_1985

Attachments

Images (8)
  • IMG_1975
  • IMG_1976
  • IMG_1977
  • IMG_1981
  • IMG_1982
  • IMG_1983
  • IMG_1984
  • IMG_1985

I use to use cardboard rather than Masonite or MDF because it's far easier to cut. Once painted and striped they look the same.

Now that I have a laser cutter I am using an MDF-like material. Can cut perfect intersections and curved roadways that match-up with scored or engraved control/construction jts as well as using a thicker material for curbing again prefect curved curbs with cutouts for curb gutters and manholes. 

Street crossing the tracks are made with cork HO switch pads. They are the same width as a two lane road in O scale and have beveled edges. I painted the cork with a diluted wash of Woodland Scenics Asphalt paint. I have done 3 separate modules now with grade crossings. I built them up using layers of cork glued down underneath.

In the first pic you also see a module behind that is painted with black textured rustoluem spray paint. My city is never setup quite the same way so I have not put down traffic lines yet.

Down by the depot 2 Austin Taylor Show 2019

In the back is a piece of cork just laid do to match the grade crossing. Notice it is not painted yet.

Grade crossing on D2 with road behind

3751 hits the same grade crossing and in the background I just used black poster board cut the same width to made the road go beyond. I used the pinstripe tape for road stripes but it peeled up eventually. The paint pens from WS don't like my cork either so still working on a solution.

ATSF going over grade crossing on D2

T&P 610 blowing threw a crossing.

610 at Great Texas Train Show 2 in Lewisville 2019


Attachments

Images (4)
  • Down by the depot 2 Austin Taylor Show 2019
  • Grade crossing on D2 with road behind
  • ATSF going over grade crossing on D2
  • 610 at Great Texas Train Show 2 in Lewisville 2019

I have used a variety of methods.  Most of them for mentioned.  Here is a project where I used Hydraulic cement, It was still wet when this pic was snapped.  When dry it looks just like aged concrete.  You mentioned curbs, similar to Durhams and spackle, this stuff is great for building up depth.

Not a great deal of work involved either.  Mix with water and apply.  A good method for stripes, is the white out roller wheels used for correcting documents.

Attachments

Images (2)
  • mceclip0
  • mceclip1

Hi Ron,  I tried a concrete product from "Arizona Rock & Mineral " .  The results were pretty much the same as using spackle  or water putty. ALso I tried one time, "Quickret" cement in a tube for patching cracks.  It would not spread  correctly and did not work.   But was does work is the Quickret' in the container.  It has vinyl in it and smooths very easy.  It can also be thinned and still gives very good results.  Lowes, Home Depot have theses products.  

You need to build 1/4" curb in the  chosen length with balsa or basswood and fill  with product.. Make sure you build a crown in the middle.  No road especially concrete if flat.  

There are so many methods and different materials used in model roads. I have tried just about all of them..  Here is a pic of  Blacktop, concrete, and cement...  I found that 1/8" cork also is very realistic and is the long portion of these samples...

This is all 1/8th" Fine cork.  A very lite coating, in spots of vinyl spackle. Raw umber, "Pan Pastels, for weathering.  Base coat of apple barrel "Blacktop" thinned out.  That's it...

Finished product'

mceclip0mceclip1mceclip2mceclip3mceclip4

mceclip5mceclip6

Attachments

Images (7)
  • mceclip0
  • mceclip1
  • mceclip2
  • mceclip3
  • mceclip4
  • mceclip5
  • mceclip6

So many great suggestions here to use for asphalt roads on the new layout.  After reading the suggestions for a second or third time I decided to conduct a study that was three weeks in duration...it was not a scientific study, but I believe the results are acceptable

I decided to purchase the 3/16" black foam sheet at Hobby Lobby in  20" x 30" pieces.  It is similar to the Darice product mentioned above by HMORGAN.  I actually had used the Darice product before for a roof replacement on my Korber engine house a few years ago.  The study was to place a Brooklin 1955 Chevy Nomad and a  Buby 1956 Mercury Monterey on the board and let them sit undisturbed for three weeks.  As some of you may know, the Brooklin is a very heavy piece compared to other 1/43 or 1/48th cars available on the market.

The good news is that tire marks were not present when I lifted up the cars.  Someone above had an experience where the cars had left tire imprints on the foamboard.   It could be that the Hobby Lobby product is more rigid with a harder surface than other brands?  I like the thickness of the product as well because it will reduce the high curbing appearance of the MTH buildings on Main Street.  Once the roads are cut with the help of my wife (she is very particular about such things), I will spray paint the board with the Rustoleum "Aged Iron" color mentioned above by HMORGAN.

Thanks again, and please comment further if you would like!  I'll let you all know how the finished product looks on the layout...

Last edited by Capetrainman

Great ideas, info and photos everyone!  

I used roofing shingles to create this country road.  I sprinkled some Woodland Scenics fine cinders down the middle of the roadway to give a leaked oil/grease over time look.  

I also used roofing shingles on some of my downtown roads  not shown ( couldn't locate photos ).  For other down town streets and industrial area I used Dept 56 brick paving.  The brick paving still needs some dullcote and simulated grease spots admittedly.   IMG_0152IMG_0124IMG_0017IMG_0255IMG_0255

Attachments

Images (4)
  • IMG_0152
  • IMG_0124
  • IMG_0017
  • IMG_0255
Last edited by trumptrain
BobbyD posted:
AGHRMatt posted:

We use asphalt roofing paper (underlayment). The roll size from Home Depot (about $38) is so big you can do all the roads and parking lots on your layout, your friend's layout, and several others. You can cut it using the "score and snap" method or scissors. Here's what it looks like:

2013-03-31 10.07.27

All my friends that have used any type of foam product ended up with divots where their vehicle sit. How is the surface texture Matt? 


It feels slightly rough to the touch like a road. It's relatively thin and flexible and doesn't get divots from being touched unless you mount it on foam or foam core. In my example, it's glued on top of a thin layer of dirt which is glued to plywood (it's glued to the ties in the track). I've finished the design on another layout I plan to build and will be using it again.

I've used a similar foam product to Darice called "Foamie"  I like it because it's very easy to use and it does not warp when painted and can easily be cut with scissors.IMG_3527

I also used a mix of fine and medium black ballast. I used a layer of about 1/4" and I like the result. I intend to use it in other areas of the layout and may use it as a final topcoat on the foamie...not sure.

IMG_3525IMG_3524IMG_3526

Forgot to explain earlier.  I mixed the ballast in a bowl, more light than medium.  Poured on the layout using insulation tape to mark the edges.  I would probably cut the thickness in half in the future.  once I was satisfied with how it looked I mixed 1 Part Mod Podge (white glue) to 2 parts water then sprayed the road with alcohol to beak up the surface tension of the water then applied a heavy dose of the glue mixture with an eye dropper. I started in the center of the road and worked out. I made sure the mixture bled out of the side of the road onto the bed of the layout. When it dried, I could drive a deuce-and-a-half, or a dump truck with coal on it. 1/48 scale of course! 

Attachments

Images (4)
  • IMG_3527
  • IMG_3525
  • IMG_3524
  • IMG_3526
Last edited by ToledoEd

Td, thanks. I just updated the post with a "how I did it."  The ballast is from Woodland Scenics.  I did not first lay down the Foamie. I do agree the Foamie roads are great but do look a bit wimpy...I think I'm going to go back and spread some of my ballast mix, on the roads because I really like the look.

IMG_3528

Attachments

Images (1)
  • IMG_3528
ToledoEd posted:

Td, looking at your logo....thanks for your service!  I wore Uncle's uniform  as well.

Thanks very much Ed'.  I appreciate your sentiments'... I must say though, Not sure when it became popular that service members were being thanked for their service'....  I volunteered , and was paid good money.  That was plenty of thanks'..........(LOL)   Combat Veterans, of the Vietnam war, will never forgive being spit on in airports by civilians when returning home.   Some wounds just don't heal .........and 50 years later'. hasn't changed a thing'..............

Anyway, on to more harmonious topics'.. I take it you are using a mix of the lite and medium ballast to get the look you like'... Are you using white glue/water, or  matt magic.... I am going to have to re-do all my roads now as I think your technique is the one'... I have tried so many different systems, but never the ballast'.........SO, a great big 'THANK YOU' heading~ your way'....


Quarter Gauger 48 posted:
ToledoEd posted:

Td, looking at your logo....thanks for your service!  I wore Uncle's uniform  as well.

Thanks very much Ed'.  I appreciate your sentiments'... I must say though, Not sure when it became popular that service members were being thanked for their service'....  I volunteered , and was paid good money.  That was plenty of thanks'..........(LOL)   Combat Veterans, of the Vietnam war, will never forgive being spit on in airports by civilians when returning home.   Some wounds just don't heal .........and 50 years later'. hasn't changed a thing'..............

Anyway, on to more harmonious topics'.. I take it you are using a mix of the lite and medium ballast to get the look you like'... Are you using white glue/water, or  matt magic.... I am going to have to re-do all my roads now as I think your technique is the one'... I have tried so many different systems, but never the ballast'.........SO, a great big 'THANK YOU' heading~ your way'....


Forgot to explain earlier.  I mixed the ballast in a bowl, more light than medium.  Poured on the layout using insulation tape to mark the edges.  I would probably cut the thickness in half in the future.  once I was satisfied with how it looked I mixed 1 Part Mod Podge (white glue) to 2 parts water then sprayed the road with alcohol to beak up the surface tension of the water then applied a heavy dose of the glue mixture with an eye dropper. I started in the center of the road and worked out. I made sure the mixture bled out of the side of the road onto the bed of the layout. When it dried, I could drive a deuce-and-a-half, or a dump truck with coal on it. 1/48 scale of course! 

Quarter Gauger 48 posted:

Okay, Ed, thanks for the additional information'..... I was wondering if you could possibly  get a few more close ups of your rodes if you get a chance.  As they are interesting to look at and compare notes to....

OK, will do in the morning. You’ve inspired me to post a YouTube video of a road build. 

ToledoEd posted:
Quarter Gauger 48 posted:

Okay, Ed, thanks for the additional information'..... I was wondering if you could possibly  get a few more close ups of your rodes if you get a chance.  As they are interesting to look at and compare notes to....

OK, will do in the morning. You’ve inspired me to post a YouTube video of a road build. 

That will be perfect'.......... Thank you' ...

I go simpler, like some others above...I have a bunch of leftover asphalt shingles and portions of shingles from a (real-life) shed roofing project.  They have a texture that seems scaled appropriately (they are actually asphalt LOL) and they come in various blacks and grays.  Reasonably priced if you have to buy them, considering one bundle is a LOT of 1/48 roadway.  Easy to cut and put down, not too thick, easily weathered and they accept paint (for road lines) well.  Note - you need to get the loose "pebbles" off in advance or it's a little messy.

Last edited by Worldtree
Quarter Gauger 48 posted:
ToledoEd posted:
Quarter Gauger 48 posted:

Okay, Ed, thanks for the additional information'..... I was wondering if you could possibly  get a few more close ups of your rodes if you get a chance.  As they are interesting to look at and compare notes to....

OK, will do in the morning. You’ve inspired me to post a YouTube video of a road build. 

That will be perfect'.......... Thank you' ...

Td, by roads I took it to mean those I made using the Foammie material.  Here they are.  Let me know if I missed the target.  What you can do to increase "realism' is scuff them ever so lightly with a fine grain sand paper, or even a scotch guard pad. I chose not to do it because, so often I start something like that and don't know when to stop and boom...it looks like I didn't know when to stop! 

IMG_3544IMG_3545IMG_3548IMG_3549

Attachments

Images (7)
  • IMG_3544
  • IMG_3545
  • IMG_3546
  • IMG_3547
  • IMG_3548
  • IMG_3549
  • IMG_3550

Thanks Ed for posting the additional photos'.. I appreciate you taking the time to do so'...  Actually ED, my bad, I should have been more clear.  I am really more interested in seeing the black ballast streets, parking areas, driveways, or whatever you have created .  To Me, the ballast looks the most like real black top...  The results you've achieved, is the look I'm looking for.  So I thought a few close ups would be instrumental in seeing exactly what I have obtain.... Sorry to be a pain in the...^&*()@#$%.... 

One thing that sticks out to me is the abrupt transition from the roadway surface to .the rest of the scenery.  The road shoulders are missing.  While a city street transitions at the curb, a country road will be bordered by a shoulder of gravel and grass/weeds.  There alo may be a drainage ditch.

Jan

ToledoEd posted:

Td, no problem. Actually, the only area I've completed so far using the ballast technique is the short road by the Coal Tower. I'm starting another short road and parking area tonight.  I intend to video it and post it to my YouTube channel. I'll keep you posted.  

Okay Ed, that sounds great...So looking forward to seeing what and how you put it all together.  

In spite of all the roads I've constructed using different techniques, I'm not completely satisfied  with the ones on my layout.  These were the first roads  I built  and now years later gaining experience I want to replace the originals....

Yellow lines separate traffic moving in opposite directions, white separates traffic moving bin the same direction, so on one line roads yellow down the middle and white at the edges.  Multiple lanes would be yellow down middle and white for each lane plus the edges.  For those of us with enough space for divided highways yellow on the left, white for each lane and right edge.

BobbyD posted:
Scotie posted:

pete

A great resource. It looks like they settled on yellow center and white right edge with no options in 1971. Many of us are probably mis-marking our roads.

We sure are. Have seen 40's-50's color images with yellow stop signs rather than red ones.

Yellow with black letters.  Recall well, this was the color of the only Stop sign I missed and ran in my life.  I, we were very lucky a very busy road.

Ron

Quarter Gauger 48 posted:

Thanks Ed for posting the additional photos'.. I appreciate you taking the time to do so'...  Actually ED, my bad, I should have been more clear.  I am really more interested in seeing the black ballast streets, parking areas, driveways, or whatever you have created .  To Me, the ballast looks the most like real black top...  The results you've achieved, is the look I'm looking for.  So I thought a few close ups would be instrumental in seeing exactly what I have obtain.... Sorry to be a pain in the...^&*()@#$%.... 

Td, I hope to have my YouTube video showing how I did this up this evening.  Here are some photos of the finished road.

IMG_3555

IMG_3557IMG_3558IMG_3559IMG_3560

The road between the tracks is a strip of that Foamie, flexible foam covered with a thin layer of fine ballast, secured with scenic cement.  Well, hope this helps if not let me know.

Attachments

Images (5)
  • IMG_3555
  • IMG_3557
  • IMG_3558
  • IMG_3559
  • IMG_3560
Capetrainman posted:

Ed, your foam roads look great...if you read my post above, I plan to go ahead with the foam product purchased at Hobby Lobby.  What marker or paint did you use for the yellow center lines...full and straight  Are you applying ballast to all roads, or just a limited number?

Paul, Thanks. I used a striping tape you can buy on the Bay from “RedLion Train Depot”. They have a variety of products. Somewhat tricky to use. The seller has a video, on YouTube I believe that demonstrates how to apply it. Good luck, and keep those trains moving!

ToledoEd posted:
Quarter Gauger 48 posted:

Thanks Ed for posting the additional photos'.. I appreciate you taking the time to do so'...  Actually ED, my bad, I should have been more clear.  I am really more interested in seeing the black ballast streets, parking areas, driveways, or whatever you have created .  To Me, the ballast looks the most like real black top...  The results you've achieved, is the look I'm looking for.  So I thought a few close ups would be instrumental in seeing exactly what I have obtain.... Sorry to be a pain in the...^&*()@#$%.... 

Td, I hope to have my YouTube video showing how I did this up this evening.  Here are some photos of the finished road.

IMG_3555

IMG_3557IMG_3558IMG_3559IMG_3560

The road between the tracks is a strip of that Foamie, flexible foam covered with a thin layer of fine ballast, secured with scenic cement.  Well, hope this helps if not let me know.

Wow Ed, the close ups look great'.. you've been busy'...  I appreciate the time you have taken to shoot these.  I look forward to the video as well.  I love the look of these rodes Ed'.. very nice work'... 

Quarter Gauger 48 posted:
ToledoEd posted:
Quarter Gauger 48 posted:

Thanks Ed for posting the additional photos'.. I appreciate you taking the time to do so'...  Actually ED, my bad, I should have been more clear.  I am really more interested in seeing the black ballast streets, parking areas, driveways, or whatever you have created .  To Me, the ballast looks the most like real black top...  The results you've achieved, is the look I'm looking for.  So I thought a few close ups would be instrumental in seeing exactly what I have obtain.... Sorry to be a pain in the...^&*()@#$%.... 

Td, I hope to have my YouTube video showing how I did this up this evening.  Here are some photos of the finished road.

IMG_3555

IMG_3557IMG_3558IMG_3559IMG_3560

The road between the tracks is a strip of that Foamie, flexible foam covered with a thin layer of fine ballast, secured with scenic cement.  Well, hope this helps if not let me know.

Wow Ed, the close ups look great'.. you've been busy'...  I appreciate the time you have taken to shoot these.  I look forward to the video as well.  I love the look of these rodes Ed'.. very nice work'... 

Td, here's the link to the YouTube video.  Feedback most welcome.  

https://youtu.be/sWtLqoPx790


Last edited by ToledoEd
ToledoEd posted:

Gred, thanks for the kind comments.  Most  appreciated.  Good luck and if I can be of any further help leave a message here or go to my profile. My email address is there.  Take care and stay frosty!

Ed, I watched the video again. The fine ballast top coat  finished it off perfectly'..  Great job with the camera'.  I wanted to ask you, what brand and model camera are you using, as it delivers excellent image and sound quality'... 

Capetrainman posted:

Ed, your foam roads look great...if you read my post above, I plan to go ahead with the foam product purchased at Hobby Lobby.  What marker or paint did you use for the yellow center lines...full and straight  Are you applying ballast to all roads, or just a limited number?

Paul, i didn't answer your second question.  I'm not sure.  It will depend on results of the cinder ballast street I'm working on now.  QUARTER GAUGER 48 and I have been exchanging ideas.  What I've found is markers don't work and the decal/tape for striping I used from Red Lion Train Depot will not adhere to the ballast. I'm going to try using an acrylic clear coat or lacquer to the top of the ballast followed by Dulcote as QUARTER GAUGER 48 suggested.  Hopefully it will then have a surface to which the striping will adhere. I'm also thinking of using office correction tape QUARTER GAUGER 48 suggested. Short answer, when I solve the striping challenge then I'll decide if I'll cover my current Foamie roads. I'll let you know.  Thanks for your comment and interest.

Thanks Gred. It does look very real.  Those are very impressive realistic scenes.  Once again, I see you are very innovative. The clear plastic base for your figures is exactly the solution I've been looking for...Two questions: Are the figures from Arista and did you glue them to the clear stand or  use wax to secure them?  Are they pre-painted or did you paint them?  Would you mind posting a few more pics of your layout to include a few wide shots?  Thanks.

ToledoEd posted:

Thanks Gred. It does look very real.  Those are very impressive realistic scenes.  Once again, I see you are very innovative. The clear plastic base for your figures is exactly the solution I've been looking for...Two questions: Are the figures from Arista and did you glue them to the clear stand or  use wax to secure them?  Are they pre-painted or did you paint them?  Would you mind posting a few more pics of your layout to include a few wide shots?  Thanks.

Hi Ed, thanks very much for the accolades'..... I have a mix of figures from all the many brands available.  I particularly  like Artista, and Prisher the best.  But even those have to be re-touched.  I have very fine tip markers and give all my figures a face job.  I use a # 2 mechanical pencil for eyes. the markers for brows, lips, and hair duos.  I also have many completely hand painted figures from China.  I enjoy doing the figures and try and get them to look somewhat lifelike.  Some are held down with wax. The ones I usually don't move around.  The ones on plastic bases I move around and use for different scenes for modeling photos.  If look at this thread. > 

Re: TRAIN THEME THURSDAY : close up shots around the layout......

You will see much of my layout in close ups.  It is a great thread, with many excellent photos from the many talented O Gaugers on this forum..... Also, here is another very good thread I think you will enjoy as well..... Take a look and let me know what you think'...

Re: Automobiles/ Trucks 1/43-1/50 scale let’s see them

Lots of little people on this one'.. I'm really big on the small details ''(oxymoron)'' even if the scene is not so terrific, if the details ar well done, it will look interesting'.... to the naked eye'... Our eyes will actually see and put things in order that the brain tells us should be in the scene...There is a word for it, but it escapes me at the moment...ALlhamers (lol) creeping in'..


Quarter Gauger 48 posted:
ToledoEd posted:

Thanks Gred. It does look very real.  Those are very impressive realistic scenes.  Once again, I see you are very innovative. The clear plastic base for your figures is exactly the solution I've been looking for...Two questions: Are the figures from Arista and did you glue them to the clear stand or  use wax to secure them?  Are they pre-painted or did you paint them?  Would you mind posting a few more pics of your layout to include a few wide shots?  Thanks.

Hi Ed, thanks very much for the accolades'..... I have a mix of figures from all the many brands available.  I particularly  like Artista, and Prisher the best.  But even those have to be re-touched.  I have very fine tip markers and give all my figures a face job.  I use a # 2 mechanical pencil for eyes. the markers for brows, lips, and hair duos.  I also have many completely hand painted figures from China.  I enjoy doing the figures and try and get them to look somewhat lifelike.  Some are held down with wax. The ones I usually don't move around.  The ones on plastic bases I move around and use for different scenes for modeling photos.  If look at this thread. > 

Re: TRAIN THEME THURSDAY : close up shots around the layout......

You will see much of my layout in close ups.  It is a great thread, with many excellent photos from the many talented O Gaugers on this forum..... Also, here is another very good thread I think you will enjoy as well..... Take a look and let me know what you think'...

Re: Automobiles/ Trucks 1/43-1/50 scale let’s see them

Lots of little people on this one'.. I'm really big on the small details ''(oxymoron)'' even if the scene is not so terrific, if the details ar well done, it will look interesting'.... to the naked eye'... Our eyes will actually see and put things in order that the brain tells us should be in the scene...There is a word for it, but it escapes me at the moment...ALlhamers (lol) creeping in'..


Gred, I think you are looking for the word “apophenia”. 😊. Thanks for the info and the great links. I’ll peruse them tomorrow. Your tip to use a clear coat over the cinders followed by dulcote worked very well. Thanks. Test patch is drying. The clearcoat gave enough surface for the striping tape to hold. I also used a paint marker for the side of the road and it looks pretty good also.   

Ed, thanks for the info and response above.  Looking forward to seeing more of your road project.  Just about to start mine on the  Main St. area of the city.  I've got a few switches to wire and then on to the scenery.  After being away from the hobby for a few years, it's almost like learning some of the particulars over again.  The forum has been a great help to me...

ToledoEd posted:
Quarter Gauger 48 posted:
ToledoEd posted:

Thanks Gred. It does look very real.  Those are very impressive realistic scenes.  Once again, I see you are very innovative. The clear plastic base for your figures is exactly the solution I've been looking for...Two questions: Are the figures from Arista and did you glue them to the clear stand or  use wax to secure them?  Are they pre-painted or did you paint them?  Would you mind posting a few more pics of your layout to include a few wide shots?  Thanks.

Hi Ed, thanks very much for the accolades'..... I have a mix of figures from all the many brands available.  I particularly  like Artista, and Prisher the best.  But even those have to be re-touched.  I have very fine tip markers and give all my figures a face job.  I use a # 2 mechanical pencil for eyes. the markers for brows, lips, and hair duos.  I also have many completely hand painted figures from China.  I enjoy doing the figures and try and get them to look somewhat lifelike.  Some are held down with wax. The ones I usually don't move around.  The ones on plastic bases I move around and use for different scenes for modeling photos.  If look at this thread. > 

Re: TRAIN THEME THURSDAY : close up shots around the layout......

You will see much of my layout in close ups.  It is a great thread, with many excellent photos from the many talented O Gaugers on this forum..... Also, here is another very good thread I think you will enjoy as well..... Take a look and let me know what you think'...

Re: Automobiles/ Trucks 1/43-1/50 scale let’s see them

Lots of little people on this one'.. I'm really big on the small details ''(oxymoron)'' even if the scene is not so terrific, if the details ar well done, it will look interesting'.... to the naked eye'... Our eyes will actually see and put things in order that the brain tells us should be in the scene...There is a word for it, but it escapes me at the moment...ALlhamers (lol) creeping in'..


Gred, I think you are looking for the word “apophenia”. 😊. Thanks for the info and the great links. I’ll peruse them tomorrow. Your tip to use a clear coat over the cinders followed by dulcote worked very well. Thanks. Test patch is drying. The clearcoat gave enough surface for the striping tape to hold. I also used a paint marker for the side of the road and it looks pretty good also.   

Aha ha, there it is'........ The old conspiracy theory'...Apophenia definition is - the tendency to perceive a connection or meaningful pattern between unrelated or random things (such as objects or ideas). 

Better know as seeing things that are actually not there'...

Moonson posted:

Capetrainman, I have used (and am very fond of) 3M Stairway Tread, which comes 3M stair tread road material3M tape siteIMG_0553IMG_4396IMG_4709IMG_5913b - Copyin rolls, with plenty of length on them. They come in different textures. These examples show you its use in situ as a variety of "pavements," as roadways and parking lots, etc. This photo...portal road ...shows you an unfinished area where the 3M Tape has been put into place as a rural roadway, leading out from the tunnel portal. I'm including the photo to give you an idea of the thickness of the tape as roadway. It is atop a strip of Masonite used as a base for the tape.

These is, of course, paper backing on the tape, but once you have removed it and emplaced the tape, it is very unforgiving and will not be peeled off too readily - it's pretty much permanent. So, when I have used it, I do all the configuring and scissor-cutting before I remove the backing to press the tape into place.

FrankM

Came across this product at Home Depot over the weekend and was ready to post it... until I realize that it had been posted 2 months ago by Moonson.  Mine was only 2-feet in length though.

That being said, my two photos here are an additional thumbs up on the 3M product.  I'll just trim off the side with the yellow line.

OGR Roadway 01

OGR Roadway 02

Attachments

Images (2)
  • OGR Roadway 01
  • OGR Roadway 02

I recently came across a video where the modeler demonstrated making roads using the 3/16" foam board product (mentioned above by a few posters) and gluing a 60 grit sandpaper to the foam board.  His next step was to spray either a gray or black paint over the sandpaper.  The final step was brushing a whitewash of sorts over the paint to create a weathered look.  

Anyone ever try this approach to making roads for the layout?

City 1

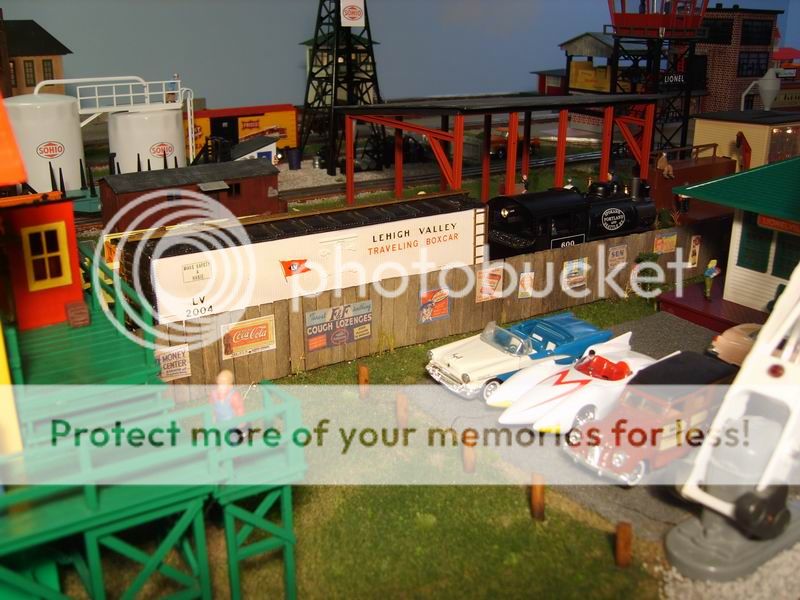
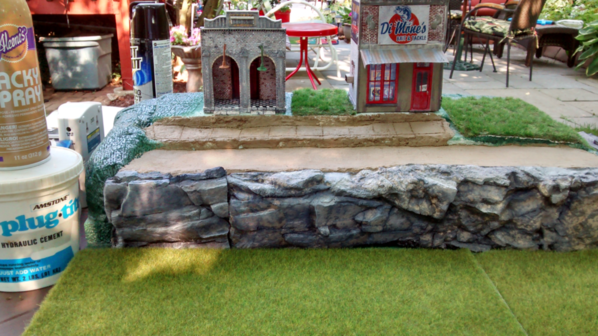
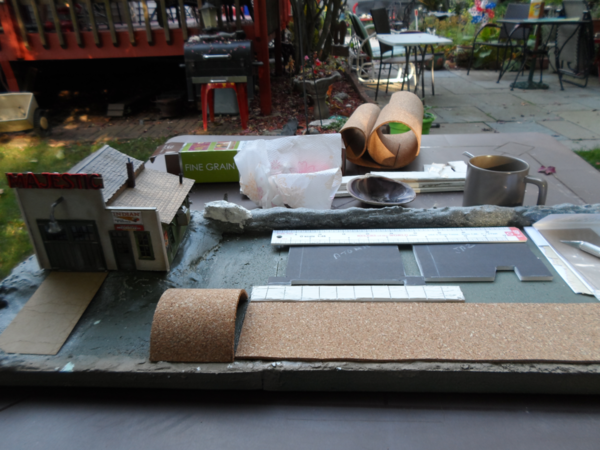
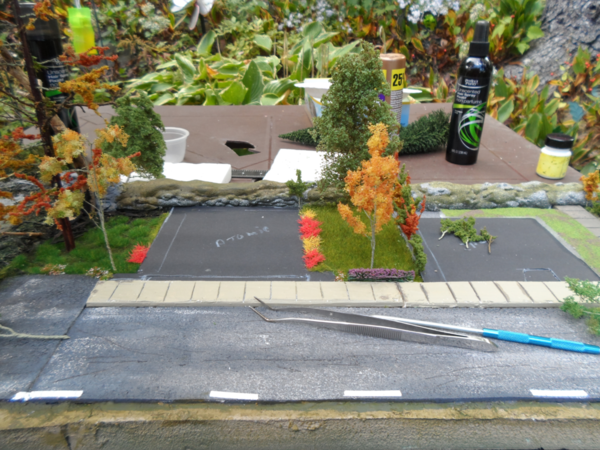
After some delay in getting the project moving, I've finally begun to start the scenery beginning with "Main Street."  For the road base, I decided to use Darice "Foamies" with a thickness of 6 mm.  The 6 mm, rather than the 2 mm, brings the road up higher against the curbing of the Main Street buildings in the picture.  I've experimented with using Rustoleum "Aged Iron" spray paint as a surface paint over the foam. This application gave a realistic road surface...a little raised and rough.  Once the road construction moves out of the Main Street area, away from the MTH buildings with high curbs, I'll use the 2 mm Darice Foamie product.  I'm gluing it down with the least expensive Liquid Nails product, without issue.

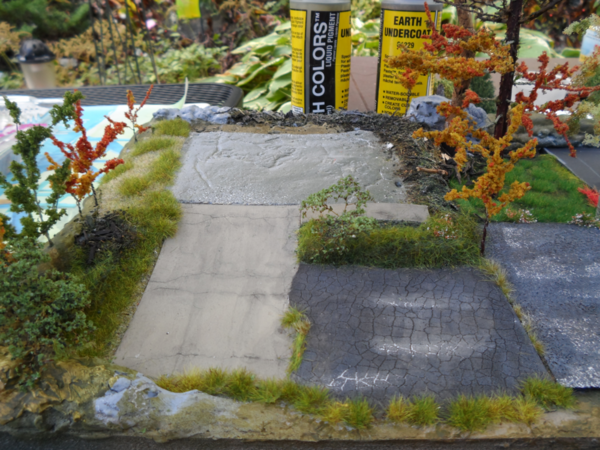
I'm testing a second road covering suggested in a video found on line, where the hobbyist used a product from Wal-Mart labeled "Apple Barrel" Matte Acrylic Paint in the color "Pavement."  According to the hobbyist, after applying with a brush, the next step is to run a fine sandpaper over the "Pavement" color to rough up the surface.  After the first coat and before sanding, the road resembles a newly paved road before the wear...flat black color and smooth surface.

The Apple Barrel paint goes on smoothly and dries quickly.  I purchased the striping product from Red Lion on E Bay.  The striping appears to be adhering better to the Foamie painted with Apple Barrel Pavement, rather than the rougher Rustoleum spray.   I'll follow-up more later.

Many thanks to HMORGAN posting above for guiding me toward the correct Darice product and all the other contributors on this thread noting many different approaches and methods for road and highway buildingCity 3City 4...all looking great.


Attachments

Images (3)
  • City 1
  • City 3
  • City 4
Last edited by Capetrainman
Quarter Gauger 48 posted:
David Minarik posted:

Just paint.

25D24089-1938-4015-A98B-6723D5402D2B

 Dave, I really like your color combination... Do you have any additional pics of your roads?  We'd like to see more'.... of your work'''...

Thank you.  Here is a different module.

The first photo is just the base with roads, sidewalks and foundations.

 IMG_6023


The second photo has the buildings sitting on the foundations.  You can see that the street is not flat.  There is about 1.5" rise from one end to another.

IMG_6094

Attachments

Images (2)
  • IMG_6023
  • IMG_6094
Last edited by David Minarik

David and Pete...great pictures of your layouts!  The road detail looks realistic...nice buildings and scenery too.  Even though trains are the real deal here on the forum, my eyes always turn to the cars and trucks first.  Pete, you've got some real classics there, and really enjoyed seeing the Ford V-8 billboard...nothing like a '50's Ford V-8 engine.  

David, great detail on your street scenes.  Sidewalks, parking meters, and curb height look real.  The pick-up coming up Main Street brings back some memories.

Nice job everyone and thanks for posting on this thread.

Last edited by Capetrainman

I was making a muck load from a wreck at a crossing for an MOW car, and wanted to include some damaged pavement. I used joint compound, flat black latex paint and sand, to make a mixture, and spread in on some wax paper to dry. I painted double yellow lines in the center, and a white line on each edge. I then broke the dried road section into chunks. This made a rather realistic looking road before I broke it up. There is a guy, Wilbur G Snyder, on several of the Facebook train forums who recently posted a short tutorial for making roads from thin cork sheet. 


Asphalt 001Asphalt 003Asphalt 006

Attachments

Images (3)
  • Asphalt 001
  • Asphalt 003
  • Asphalt 006

For smaller roads in older eras, I use Walthers HO Cornstone streets.    I have only used the concrete ones on my layout, but they make brick and asphault also I think.    they come in pieces, about 8 inch long straights, and then crossings.     There are also matching sidewalks.

While these are wide HO streets, I found that they make  decent single lanes for O scale.     Used directly, there is no parking lane.    I also used the sidewalks, and laid double widths (side by side) which looked good to me.    

The streets would not be so good if you want on street parking, unless you cut off the curb edges and used two side by side.

David Minarik posted:
Quarter Gauger 48 posted:
David Minarik posted:

Just paint.

25D24089-1938-4015-A98B-6723D5402D2B

 Dave, I really like your color combination... Do you have any additional pics of your roads?  We'd like to see more'.... of your work'''...

Thank you.  Here is a different module.

The first photo is just the base with roads, sidewalks and foundations.

 IMG_6023


The second photo has the buildings sitting on the foundations.  You can see that the street is not flat.  There is about 1.5" rise from one end to another.

IMG_6094

  Very nice Dave',  I see the elevation.  It makes a very realistic scene'. Excellent modeling'... and very nice work'....

Here's an idea that I have used in the past .  Its roll roofing or sometimes called mineral paper .  Its pretty cheap considering how much you get in a roll , maybe split it with a buddy if he or she lives close enough. It is HEAVY  and it does cut okay  with the proper  tools and if it is kept warm . Being that each roll is 3' in width , one can easily make long winding seamless roads .  Hope this idea helps out someone on this thread .IMG_2469IMG_2468IMG_2467IMG_2466

Attachments

Images (4)
  • IMG_2469
  • IMG_2468
  • IMG_2467
  • IMG_2466
JohnnieWalker posted:

Here's an idea that I have used in the past .  Its roll roofing or sometimes called mineral paper .  Its pretty cheap considering how much you get in a roll , maybe split it with a buddy if he or she lives close enough. It is HEAVY  and it does cut okay  with the proper  tools and if it is kept warm . Being that each roll is 3' in width , one can easily make long winding seamless roads .  Hope this idea helps out someone on this thread .IMG_2469

That looks GREAT!. With what did you cut the mineral paper?

Randy Harrison posted:
JohnnieWalker posted:

Here's an idea that I have used in the past .  Its roll roofing or sometimes called mineral paper .  Its pretty cheap considering how much you get in a roll , maybe split it with a buddy if he or she lives close enough. It is HEAVY  and it does cut okay  with the proper  tools and if it is kept warm . Being that each roll is 3' in width , one can easily make long winding seamless roads .  Hope this idea helps out someone on this thread .IMG_2469

That looks GREAT!. With what did you cut the mineral paper?

I actually used a razor knife with both regular straight blades and hooked blades , lots of them and I also used an old pair of shears .  I had made a template of my town and curved road  leading into it using paper taped together , then traced it onto the roll roof using a colored marker . after cutting the roof material I placed one large roadway onto my O gauge  layout .  

Add Reply

Post

OGR Publishing, Inc., 1310 Eastside Centre Ct, Suite 6, Mountain Home, AR 72653
800-980-OGRR (6477)
www.ogaugerr.com

×
×
×
×
Link copied to your clipboard.
×
×