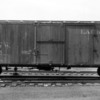
I just completed an interesting little project.  Looking at vintage photographs of trains from the golden age of steam, I have noticed the variety of wood side cars in their consists. So I decided to try and see if I can make one.  I had this Weaver/CMP woodside reefer that I wanted to make into a double sheathed boxcar. I chose this model because they are plentiful and relatively cheap. I also wanted to try painting this car with inexpensive craft paints. Nothing ventured, nothing gained.

Here is the subject car. I had already removed the ladders from the sides and ends...

IMG_3610IMG_3611IMG_3612

Here is the prototype I am trying to replicate...

dlw45715

For the conversion process, I removed the roof walk and ground down all the reefer hatches. I removed the end and side stirrups. The reefer door is cast into the shell. I have a choice at this point to model a working boxcar door. I chose to model the door closed. It was good enough for the original car so it thought it was good enough for this conversion. Therefore I ground down all the door hardware flush with the car sides. Referring to my prototype photo, I wanted to have a similar door. The door I chose also came from a Weaver outside braced boxcar. I acquired one from Ebay and used it as a template for scratching building my own. The door Hardware came from Grandt Line. With the door completed I glued it onto the car sides.

I filled in the ladders holes with styrene rod an sanded them flush with car sides. I added Tichy group grab irons to the sides and ends and Tichy group stirrup steps.

Back on the roof, over the sanded down roof hatches I added end roof walks, which I scratch built. Here are modifications prior to painting...

IMG_0506IMG_0507IMG_0508IMG_0510

IMG_0512

With the changes completed, I washed the model with some soapy water and wiped the surface with Isopropyl alcohol and proceeded to prime priior to painting...

IMG_0513IMG_0514 

On to paint. For some time I have been wanting to try and paint with cheap craft store paints. For this project, I mixed up my version of freight car red using these paints in a ratio of 2 Parts Brown Iron Oxide to 1 Part cinnamon...

IMG_0515

So here it is out of the paint booth...

IMG_0516IMG_0517IMG_0518

After a few days drying time a sprayed a light coat of gloss and let that dry for another week.

I've had the decals for quite some time and went on without any problems...

IMG_0552IMG_0553IMG_0554

After sealing the decals with a flat finish, weathering was applied. Extra weight was added to the car. Weaver trucks were added and here is the final results...

IMG_0564IMG_0565IMG_0566IMG_0567IMG_0568IMG_0569

All in all I don't think it came too terribly bad. It was fun to do and I will being doing a few more of these in the future.

Attachments

Images (24)
  • IMG_3610
  • IMG_3611
  • IMG_3612
  • dlw45715
  • IMG_0506
  • IMG_0507
  • IMG_0508
  • IMG_0510
  • IMG_0512
  • IMG_0513
  • IMG_0514
  • IMG_0515
  • IMG_0516
  • IMG_0517
  • IMG_0518
  • IMG_0552
  • IMG_0553
  • IMG_0554
  • IMG_0564
  • IMG_0565
  • IMG_0566
  • IMG_0567
  • IMG_0568
  • IMG_0569
Original Post

Replies sorted oldest to newest

Thanks for your comments. Dave and Joe, yes I airbrushed the craft paint. I used a Badger 150 for this project. I have also used a Paasche model H, using a #5 tip or a #3 tip for weathering with diluted washes. So far, to make this work I have found a couple of things are necessary. First is the primer. I have found that using Rust-oleums Plastic primer makes the paint application go on smoothly...

IMG_0448

Secondly, and this is where some experimentation comes in play, is the thinner. Use can probably use commercial acrylic thinners such as Vallejo or Tamiya, but they are both pretty expensive. Or, you might consider making your own, as I did. In that case you need to get Model Railroad Hobbyists "Guide to Acrylic Painting". This document available for free from the MRH website, describes how to make and use thinners for Acrylic paint...including craft paint. For the record, I used the super economical (i.e. cheap) thinner formula, except I substituted denatured alcohol and distilled water for the Vodka. Confused? Read the guide and then you'll understand.

In addition the June 2015 Model Railroad Craftsman has an article that goes into length on thinning craft paint for airbrushing including all the necessary additives. 

So I thinned my paint about 50% paint, 50% thinner/additives to airbrush.

Thirdly, You need to use a paint filter...

airbrush filter

to successfully airbrush this stuff. I can't over emphasize the importance of this little piece of hardware. This filter is to airbrushing craft paint as the flux capacitor is to time travel. To quote Back to the Future..."the flux capacitor is what makes time travel possible". And so it is with this filter and airbrushing. 

Lastly, Don't be in a rush. It may take several coats to completely and satisfactorily cover a piece of rolling stock. To get the depth of color that you are looking for,especially if you make the paint really thin.

I hope  this helps clear up any questions you might have. I have the MRH guide and the RMC article. Contact me offline if you want help getting this information.

Attachments

Images (2)
  • IMG_0448
  • airbrush filter

A friend of mine in an HO modeler, and he, too, used the "cheap" craft paint when it fills his color needs. Not sure if he knows about the filter, but he does say that it takes him more coats. His results are good, however.

I love that "cheap" craft acrylics - so many colors, available, flat, inexpensive. I don't use an airbrush very often, but the stuff is great for buildings, brush-painting/-weathering parts (especially freight car trucks), touch-up. 

The boxcar looks great.

Add Reply

Post

OGR Publishing, Inc., 1310 Eastside Centre Ct, Suite 6, Mountain Home, AR 72653
800-980-OGRR (6477)
www.ogaugerr.com

×
×
×
×
Link copied to your clipboard.
×
×