


Attn: Swanny, I am interested in your 3D figures expierence. I was looking to print 2 football players and a Shakesperean "Hamlet" figure.
Try looking on Shapeways .com
Good luck, John
L.J. posted:One of the questions I have had about 3D printing is if you scale a 3D file up, will it lose detail or resolution like a photocopy does when trying to scale a paper original up on a copy...
On a word, NO. The file will not lose detail when scaled up.
This is because the files used in these systems are "vector" files, which are essentially just a series of mathematical equations. Scaling the file up to a larger size just changes some of the numbers. None of the detail will be lost when the file is scaled up to a larger size.
Tom M posted:AMCDave posted:Tom M posted:AMCDave posted:Looks great Tom.....are you going to sell them r are they available in the Shapways public library???
Sent you an email.
I did not get a e-mail......thx
check profile for addy
The only email see on your profile is amx3 at hotmail. That's the one I sent it to.
nothing in inbox or junkbox....plez send again thx
That she'll turned very nice. Hopefully you will be showing us the rest of the project as you move into the paint shop next!!!
NYC,SUBWAY TRANSIT SIGNAL posted:

What possible connection to the topic does this random picture have? ![]()
I contacted shapeways and they agreed to reprint the model with some modifications I made to prevent future damage. Another printing for no extra cost? Don't mind if I do. I'll try to repair and reinforce the model I have and then voila twin GE Shovelnose diesels.
I tried to fix the plow although it is still very frail. I'm trying to figure out how to reinforce it. I've thought about gluing some styrene to the leading edge, kind of like plow reinforcement in the real world. I probably won't get the reprint for another month but I'm going to start working on this one in case I need to do something different on the reinforced model.


Attachments
Images (2)
Perhaps forming vertical braces, then dropping a piece of styrene behind so you can use resin to cast the pilot solid?
I'd build it up from the rear. Perhaps some small straps for strength and JB-Weld to hold it all together.
That's a pretty substantial size, no surprise they're having issues printing it.
Thin 010 styrene on the rear of the plow and angle iron from the bottom Front edge
gunrunnerjohn posted:I'd build it up from the rear. Perhaps some small straps for strength and JB-Weld to hold it all together.
That's a pretty substantial size, no surprise they're having issues printing it.
Does JB weld apply hot? I wouldn't want to melt it. It's made out of melted nylon powder.
prrhorseshoecurve posted:Thin 010 styrene on the rear of the plow and angle iron from the bottom Front edge
Angle iron? What is that?
on thing i have learned in my limited use of my 3D laser printer is that it wont build everything in one piece. I would build the shovel as a separate piece with pins or holes to reconnect it to the main body.
As to small details I cannot build smaller than .035" or about 2-3/8" in 1/48 scale.
This is still real small.
JB-Weld is an epoxy, it goes on cold.
This was printed as one piece using a laser sintering process by shapeways.com
I need to sand the model before paint but overall it is a great model. I hope I can work out all the kinks though.
So I bought a dremel tool the other day to try a few little modifications to the original model. I attached a cutting wheel and got to work. The only problem is that when you get the cutting wheel going fast enough to cut it starts melting the nylon material the model is made out of. It got a little messy but I'll try to figure it out.
In other news the second print arrived yesterday and it is perfect. All the steps printed correctly and the removal of the lift rings on top make the model look a lot better. I used the free 3d modeling software that comes with Windows 10 to beef up the plow and it looks great and is really sturdy now. I also increased the width of the model by 2mm to help it fit better on my chassis. I tried it out and it slid on like a glove!


I'm going to see about modifying the chassis to accept the 3 axel trucks I bought. My worry is clearance issues with the front ladders. I might have to remove it, but I hope not.
Does anyone have any ideas or suggestions?
Attachments
Images (3)
I sometimes use the sanding drum for work, it works better than the cutting tools on some soft materials. I also have a Dremel 4000 with speed control, so I can set the speed very low and it doesn't stall out while you work.
Really interesting stuff. I suppose it would be the "wrong" to suggest using it to make a mold for a metal version?
Illustrative example: http://www.boosealum.com/alumi...casting-process.html
Ok so that's probably pricey -- instead something you could do yourself in your backyard, not get burned, and not destroy the plastic original too. And what the heck: requires little skill, and is highly likely to produce reasonable results without spending a lot dollars. So little to ask for ...
gunrunnerjohn posted:I sometimes use the sanding drum for work, it works better than the cutting tools on some soft materials. I also have a Dremel 4000 with speed control, so I can set the speed very low and it doesn't stall out while you work.
Thanks John, I'll give that a try!
Congrats on what looks to be a successful project, and thanks for sharing and discussing with the forum.
Severn posted:Really interesting stuff. I suppose it would be the "wrong" to suggest using it to make a mold for a metal version?
Illustrative example: http://www.boosealum.com/alumi...casting-process.html
Ok so that's probably pricey -- instead something you could do yourself in your backyard, not get burned, and not destroy the plastic original too. And what the heck: requires little skill, and is highly likely to produce reasonable results without spending a lot dollars. So little to ask for ...
The model isn't my original design, so I can't sell it. 3d printing will be good enough for my uses. I was however given permission by the original designer to print a select few for myself and a few others.
I know one thing......I LIKE IT!!!! NICE work.
Curious about how your shell fits on the Alco chassis - does it sit atop the chassis with the rolled lip still showing like Lionel's did? I would think a better choice would be the earlier PW die-cast chassis or a Williams 'Golden Memories' chassis that fit within the shell for better appearance...
c.sam posted:Curious about how your shell fits on the Alco chassis - does it sit atop the chassis with the rolled lip still showing like Lionel's did? I would think a better choice would be the earlier PW die-cast chassis or a Williams 'Golden Memories' chassis that fit within the shell for better appearance...
My shell sits on top of the metal frame just like the postwar ALCOs did. I would have to do a reprint in order to make something like that work.


So I attached the 3 axle trucks to my postwar alco frame. I had to modify the trucks by cutting off steps and removing the coupler from one of them.
I had to remove the front ladders from the body as they were interfering with the 3 axle trucks.
I have to modify the E unit to fit correctly in the alco frame.
Tonight I plan on sanding the cut points where the ladder used to be. Then I think I'll try a primer coat tonight.
Attachments
Images (2)

Well the past few days I have worked to primer and paint my model.

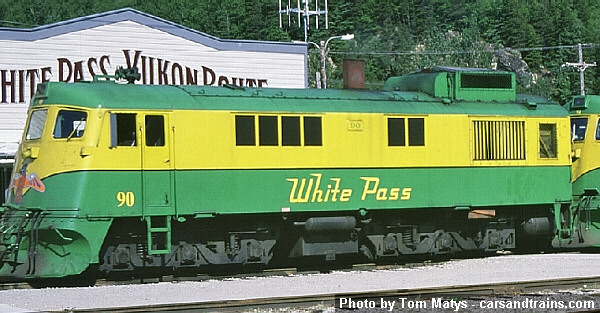
I then used some 3m pinstriping tape to separate the paint job on the lower section of the model. I also added a custom thunderbird decal to the front.

After that I added some yellow White Pass decals from Ozark Miniatures, CDS line. And voila there's my finished shell.


I still need to paint the truck side frames, mount the shell, work on lighting, and figure out the windows.
I'm really pleased with how this model came out. Here it is next to a caboose I started a few years ago. Still not done yet.

Attachments
Images (9)
Wow, that looks fantastic.
I can see why you used the F-unit Alco frame as you needed the integrated C-truck motor. The integrated C-truck motor fits nicely into the Alco frame. The Alco's with the die cast frame used 622-type motors that are separable from the truck.
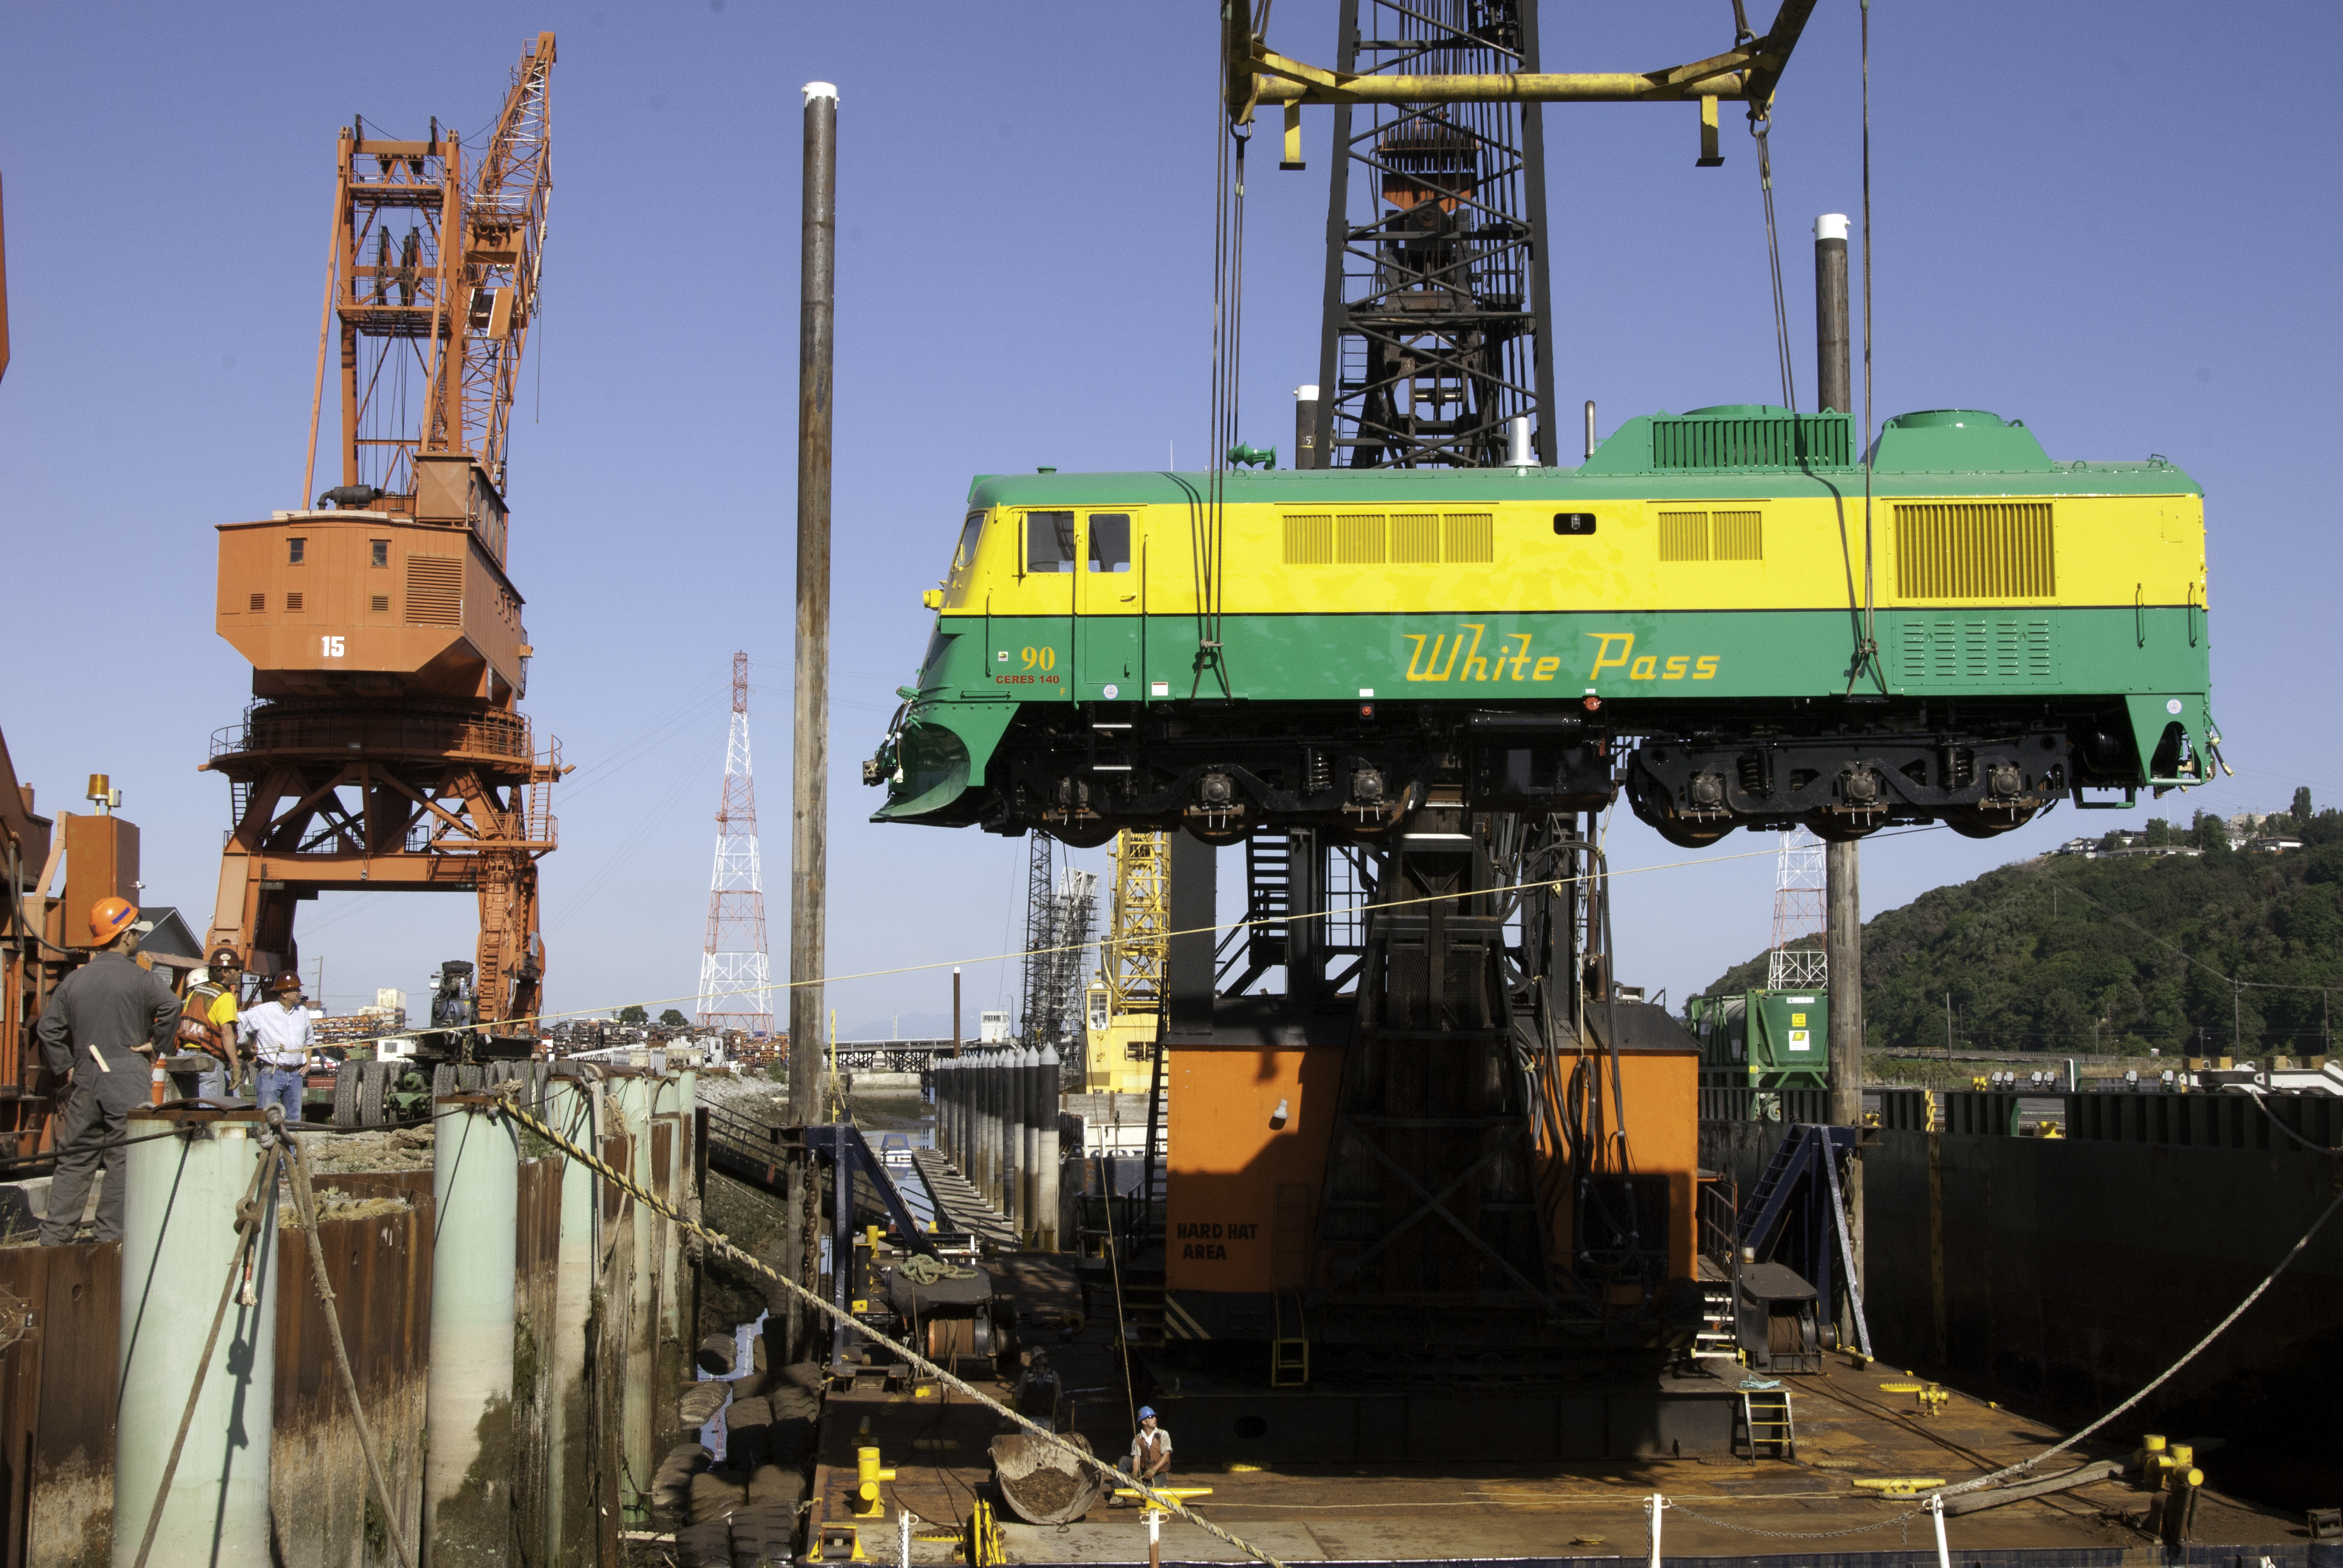
Looking at pictures of the GE box cab from the internet:

reveals the trucks.
The FM H-24-66 Train Master has very similar trucks and a very similar square fuel tank. The problem is the frame is way too long. I wonder if there is a way to cut the frame and fuel tank to size and just place a couple of air reservoirs on either side of the fuel tank. You get heavier trucks with the better 2321-100 motor. Here is a picture of a Lionel Train Master.

Either way, it looks great.
Attachments
Images (2)
I forgot about the fuel and air tanks. I'm planning on 3d printing those up in the near future. I'm hoping that once I paint the side frames that they will be close enough.
My question is, when are you going to add the trailing A-Unit? ![]()
Very nice job Tom. And it looks like you have just enough room for the fuel and air tanks.
gunrunnerjohn posted:My question is, when are you going to add the trailing A-Unit?
That other diesel needs a little more work, and it's just a little smaller. But it will be getting a paint job soon.
coach joe posted:Very nice job Tom. And it looks like you have just enough room for the fuel and air tanks.
There's not alot of room there, but I hope I can make something work.
The model is a little short (or the trucks are a little long) but I'm sure something can be stuck in there between the trucks. It's not a very big assembly on the real ones, as you know.
The model length is about right, it's the trucks that are a little long. I'm going to start working on the fuel tank and air tanks today.
VERY NICE WORK!!!
Excellent job on the paint, love it!
Thanks John, thanks Dave! I really value your opinions, and appreciate your help with this.

Add Reply
Sign In To Reply
