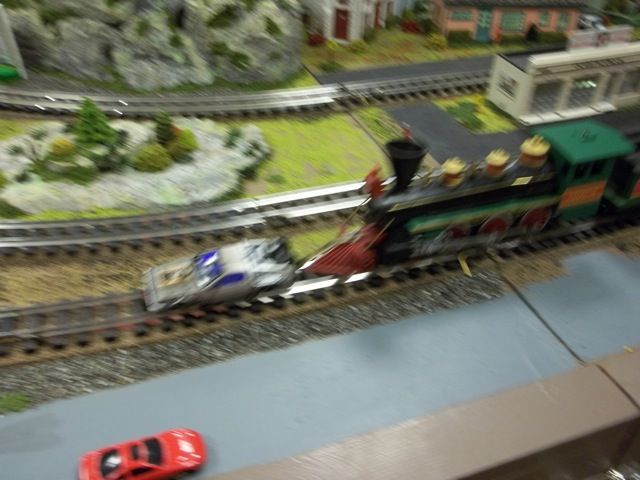
Replies sorted oldest to newest
Alan-
I just purchased this car, can you give some details on how you modified it to fit the rail?
Thanks
That is really cool and really back to the future. Thanks for sharing.
Joe
I saw a write-up on a meet of these cars (prototypes) somewhere, and remember a
Chrylser dealer who also was briefly a dealer, and whrere I looked at one in the
showroom.
It's a bit blurry, but DeLorean apparently also made his car in S gauge:

This was at the TCA Natl Convention last year in St Louis. That S gauge club was in my opinion about the best thing about the convention; a great layout and a very friendly bunch of guys.
J White
Roger
it was real easy. The Vitesse De lorean from BTTF III is the one I used.
Remove the top body by unscrewing the bottom frame carefully because there are a lot of small parts attached.
Look at the wheels note that the front wheels are smaller than the rear wheels; why I dont know.
Next carefully separate the spoked rims from the wheels without damaging the spokes.
You note the nice axle troughs in the bottom frame for each axle. Take a standard Lionel wheel set and place it in the troughs ( I did cut away the existing axle hold-downs and then I glued a small 1/2 tube to fix the new wheels in the frame.
Next I glued the spoked rims over the Lionel wheels - large rear with smaller front.
Screw the top shell back on and your done.
Delorean's ran a 14" tire up front and a 15" out back
Thanks Alan- That is the one I purchased. I look forward to it arriving! I have been a BTTF fan for 29 years!
Got to doubleback again!
Nice work Alan, always been a huge Back to the Future fan, including of course part 3. ![]()
Roger. Alan
Is this the one you are talking about?
Back to the future 3 Delorean Railroad version 1/43
Larry
Oh yes, the super time traveling snow mobile, should have done them in white.![]()
Very nice.
HERE IS A MORE DETAILED INSTRUCTION:
The 1/43 DeLoren BTTF III version wheel spacing is just slightly off.
So what I did was unscrew the two bottom screws and open her up, carefully, since a lot of fragile time-travel plastic is fastened to the outside.
Then I removed the gold wheels from the frame and from the axles carefully again to avoid damaging the spokes. Using small trailer trucks from any steamer ( I bought just the trucks on eBay) as a template, I cut out around the car frame to fit the train wheels ( see underside photo above) I never changed or cut any part of the top of car.
Next I separated one wheel off of each truck; then I used a small brass tube that would easily allow the wheel axle to spin; I epoxy glued the tube into the trough that formally housed the axle of the existing removed wheels. I sanded the trough a bit so that the center of the train wheel axles would be in the same position as the axle of the gold wheels. After the glue dried I reattached the wheels; I gave the axle a lot of play (1/4" each side) to accommodate track radii, that is why you cannot see the tube from the underside.
Next, using a Dremel with a grinder bit, I carefully ground down the inside of the existing gold wheels not to harm the spokes.(LOOK CLOSE: the DeLoren logo is laser printed in the center of the gold wheels)
Note that the front wheels on the DeLoren are slightly smaller than the two rear wheels. Using the resulting wheels as "wheel covers" I attached those to the outside of the train wheels.
Lastly, I found the two screws and reattached the top of car to the frame.
Thanks for the info Alan-
This is something I will use on our seasonal community layout. I like to toss crowd pleasers in the mix. It is awesome the smiles & conversations you see.
I don't have anything on my layout related to BTTF. But I hope to have Rescue Mater parked inside the fire station this year...
This is the Delorean we are both talking about.
yes
My Delorean arrived from Amazon- I am not a die cast guy, but I was really impressed with the amount of detail on this thing. But, there as a broken spoke on a wheel, so I am returning it.
The conversion will start with a new unit, at a later time...
Wow, I didn't think you could run 1.21 gigawatts through the center rail! ![]()
Car looks fantastic, by the way.
George
Roger
it was real easy. The Vitesse De lorean from BTTF III is the one I used.
Remove the top body by unscrewing the bottom frame carefully because there are a lot of small parts attached.
Look at the wheels note that the front wheels are smaller than the rear wheels; why I dont know.
Next carefully separate the spoked rims from the wheels without damaging the spokes.
You note the nice axle troughs in the bottom frame for each axle. Take a standard Lionel wheel set and place it in the troughs ( I did cut away the existing axle hold-downs and then I glued a small 1/2 tube to fix the new wheels in the frame.
Next I glued the spoked rims over the Lionel wheels - large rear with smaller front.
Screw the top shell back on and your done.


