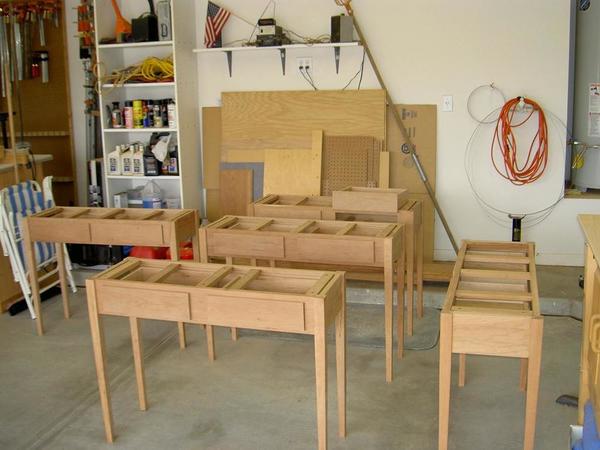
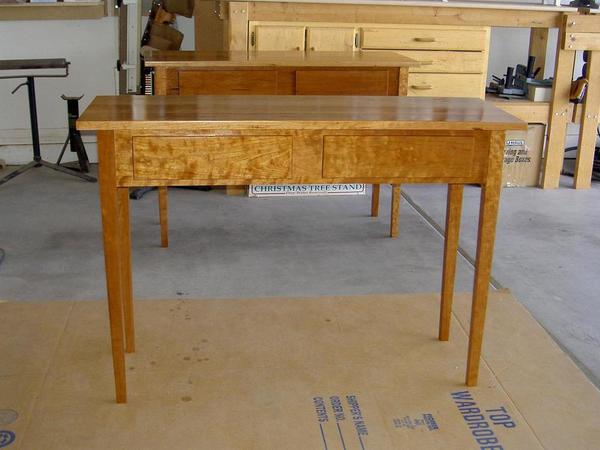
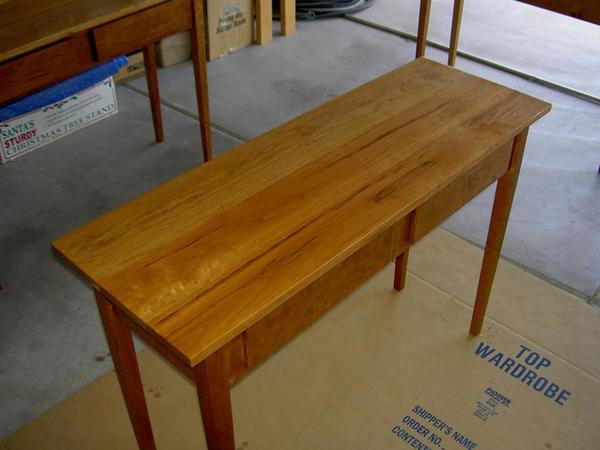
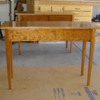
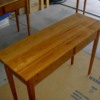
For the last 8 years I have been storing all my Plastruct product in boxes. I decided to take some time to build a shop cabinet to store the product in. I have Sundays only so this will hopefully be a weekly update.

The construction method is one I have used many times in the past for other shop structures. Platforms are built with corner blocks glued and screwed to each rail. There is a hole in the center of the block for a carriage bolt. The posts have holes drilled in them so they can be bolted to the platforms. The shape of the posts is such that they can be pulled tightening to the platforms when the bolts are tightened and are pretty much self centering. All angles are 45 degrees so the cutting is actually fairly easy.

Since the posts are simply bolted to the platforms this construction system would make for a good knock down train table table for traveling shows.

Hopefully next week I will start the drawer system. 

The stocking system as it now exists.

Shop Cabinet 1Shop Cabinet 2

A cross section of the post - all angles are 45 degrees

Shop Cabinet 3

A corner block. The dado in the rails are for a shelf - platform is upside down

Shop Cabinet 4

The bottom platform bolted in place

Shop Cabinet 5

The basic carcase

Shop Cabinet 6Shop Cabinet 7

I had an old top that fortunately fits

Shop Cabinet 8

Drilled a hole then tapped in a threaded insert for leg levelers 

Shop Cabinet 9Shop Cabinet 9aShop Cabinet 9b 

Attachments

Images (11)
  • Shop Cabinet 1
  • Shop Cabinet 2
  • Shop Cabinet 3
  • Shop Cabinet 4
  • Shop Cabinet 5
  • Shop Cabinet 6
  • Shop Cabinet 7
  • Shop Cabinet 8
  • Shop Cabinet 9
  • Shop Cabinet 9a
  • Shop Cabinet 9b
Original Post

Replies sorted oldest to newest

Did some more work on the cabinet. I cut all the rails for the drawer slides and one drawer to make sure everything was correct. Hopefully next Sunday I will be able to finish all the drawers.

Cutting the 45 degree angles on the drawer rails

Plastruct Parts Cabinet 003

Drilling the pocket holes on the rails. Set up unit is along side

Plastruct Parts Cabinet 004

All the rails sitting on top of the cabinet

Plastruct Parts Cabinet 005

Next came the draw front, back and sides. The front and back are connected to the sides with simple overlap joints. Besides glue there are also some brads nailed parallel to the front and back to make the joint more resistent to pull out when opening the drawer. You can also see grooves for the drawer bottoms. I am using 3/8 inch hardboard because of the size of the drawers. 

Plastruct Parts Cabinet 007Plastruct Parts Cabinet 008

The rails and slides have been mounted for the first drawer.

Plastruct Parts Cabinet 009

A perfect fit! Actually the first time for me............

Plastruct Parts Cabinet 010Plastruct Parts Cabinet 011

I am using a a piece of plywood to register the rails. 20-20 hindsight instead of the separate rails I should have used one solid piece of plywood for the slides. This would have saved me from using hardboard on the outside for the sides.

Once all the drawers are in I will work on fancier drawer fronts and more importantly a divider system for inside the drawers for the various Palstrut parts. 

Joe

Attachments

Images (8)
  • Plastruct Parts Cabinet 003
  • Plastruct Parts Cabinet 004
  • Plastruct Parts Cabinet 005
  • Plastruct Parts Cabinet 007
  • Plastruct Parts Cabinet 008
  • Plastruct Parts Cabinet 009
  • Plastruct Parts Cabinet 010
  • Plastruct Parts Cabinet 011
Last edited by Joe Fauty

Did not get too far this Sunday - disaster struck. I took the drawer out to work underneath the shop cabinet. When I tried to put it back in I ruined one of the drawer slides. I spent about an hour trying to find a bunch of steel balls that went everywhere then tried to fix the runner for another hour - no go. It looks like I was too optimistic about the drawer being the correct width. It turned out to be about 1/4 inch to wide. I will need to run it over the jointer.

I did manage to install the other drawer slides minus one I need to repurchase and cut some more plywood for drawers.

Bench [1)

Bench [2)


Attachments

Images (2)
  • Bench (1)
  • Bench (2)

Did some more work this Sunday.

I trimmed the first shelf by about 1/8 inch. It now slides in and out a lot easier. surprisingly the 'soft close' mechanism works on a drawer this heavy.

Plywood for the other drawers have been cut and all dadoes and grooves made. Next week I will cut the drawer bottoms and hopefully have all drawers assembled.

The fun part will be building all the draw dividers to fit the various Plastruct  piece parts and sheets.

Joe

Shop Cabinet 12

Shop Cabinet 13

Attachments

Images (2)
  • Shop Cabinet 12
  • Shop Cabinet 13

The drawers are finally in though I made a measuring mistake - position of drawer four. Hopefully I can hide it with the drawer fronts. Otherwise I will need to lower the case drawer slides and cut down the bottom drawer.

Next weekend I plan on adding the side and back panels to stabilize the cabinet so it won't rack. Then the drawer fronts followed by the fun stuff - making generic dividers so I can start placing the Plastruct stuff in the cabinet.

Shop Cabinet 001Shop Cabinet 002

Attachments

Images (2)
  • Shop Cabinet 001
  • Shop Cabinet 002
Last edited by Joe Fauty

finally got the back and side panels on plus the drawer fronts. I routed a small roundover on all fronts. to attach the fronts Rockler woodworking makes a handy pair of drawer clamps - forgot to take a picture of them but they work great at making sure the drawer front ends line up well. next week the draw pulls go on and I start the insert system. I want to try to design the inserts so I can move them around as product inventory dicates.

Shop Cabinet 001

Shop Cabinet 002

Shop Cabinet 003 

Attachments

Images (3)
  • Shop Cabinet 001
  • Shop Cabinet 002
  • Shop Cabinet 003

Rex:

Thanks - when I read through my wood working magazines especially Fine Woodworking I am amazed that a lot of 'shop cabinets' are actually high end cabinetry. I assume this is a great way for a cabinet maker to show off his/her skills for visiting customers.

After this job is complete I need to rebuild a bunch of table saw jigs (mostly cross cut sleds) then I hope to begin a rolling cabinet to house more Plastruct items. I will probably post the small parts cut off sled for the scratch builders on this forum since it will work on any table saw. It's a design I found in Woodsmith magazine (one of my favorites).

Joe

The drawer pulls are in place - took longer than I thought so the insert system will be built next Sunday and hopefully this project is done.

I made a small jig to ensure proper alignment. I drilled the first hole using a drill press then used the alignment jig to mark the second hole which was drilled using the press.

Joe

Plastruct Parts Cabinet [1)

Plastruct Parts Cabinet [2)

Attachments

Images (2)
  • Plastruct Parts Cabinet (1)
  • Plastruct Parts Cabinet (2): Drawer pull alignment jig

Good news - it's done (see photos)

Bad news - I got to empty 2 of 4 four boxes. Looks like another cabinet. This one will be a rolling cabinet I can pull up to the work bench. It be hold all of the small packets of detail parts like valves, pipe connectors, etc. plus the 8x10 patterned sheet goods.

Plasruct Parts Cabinet 001


Plasruct Parts Cabinet 002


Plasruct Parts Cabinet 003


Plasruct Parts Cabinet 004

Attachments

Images (4)
  • Plasruct Parts Cabinet 001
  • Plasruct Parts Cabinet 002
  • Plasruct Parts Cabinet 003
  • Plasruct Parts Cabinet 004
Model Structures posted:

For the last 8 years I have been storing all my Plastruct product in boxes. I decided to take some time to build a shop cabinet to store the product in. I have Sundays only so this will hopefully be a weekly update.

The construction method is one I have used many times in the past for other shop structures. Platforms are built with corner blocks glued and screwed to each rail. There is a hole in the center of the block for a carriage bolt. The posts have holes drilled in them so they can be bolted to the platforms. The shape of the posts is such that they can be pulled tightening to the platforms when the bolts are tightened and are pretty much self centering. All angles are 45 degrees so the cutting is actually fairly easy.

Since the posts are simply bolted to the platforms this construction system would make for a good knock down train table table for traveling shows.

Hopefully next week I will start the drawer system. 

The stocking system as it now exists.

Shop Cabinet 1Shop Cabinet 2

A cross section of the post - all angles are 45 degrees

Shop Cabinet 3

A corner block. The dado in the rails are for a shelf - platform is upside down

Shop Cabinet 4

The bottom platform bolted in place

Shop Cabinet 5

The basic carcase

Shop Cabinet 6Shop Cabinet 7

I had an old top that fortunately fits

Shop Cabinet 8

Drilled a hole then tapped in a threaded insert for leg levelers 

Shop Cabinet 9Shop Cabinet 9aShop Cabinet 9b 

 Sweet Wow nice Joe love the craftsmanship. 

Model Structures posted:

Good news - it's done (see photos)

Bad news - I got to empty 2 of 4 four boxes. Looks like another cabinet. This one will be a rolling cabinet I can pull up to the work bench. It be hold all of the small packets of detail parts like valves, pipe connectors, etc. plus the 8x10 patterned sheet goods.

Plasruct Parts Cabinet 001


Plasruct Parts Cabinet 002


Plasruct Parts Cabinet 003


Plasruct Parts Cabinet 004

Sweet Sweet Wow Wow, Joe you out did your self cannot wait to see it my self. 

Add Reply

Post

OGR Publishing, Inc., 1310 Eastside Centre Ct, Suite 6, Mountain Home, AR 72653
800-980-OGRR (6477)
www.ogaugerr.com

×
×
×
×
Link copied to your clipboard.
×
×