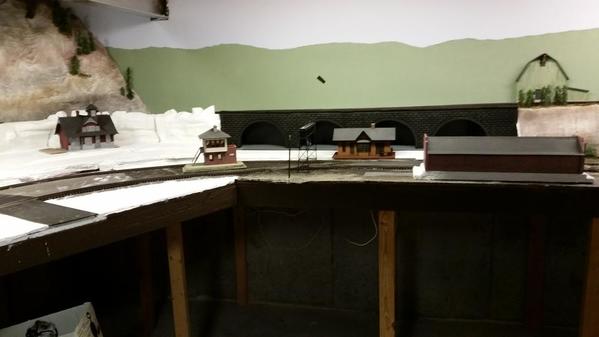
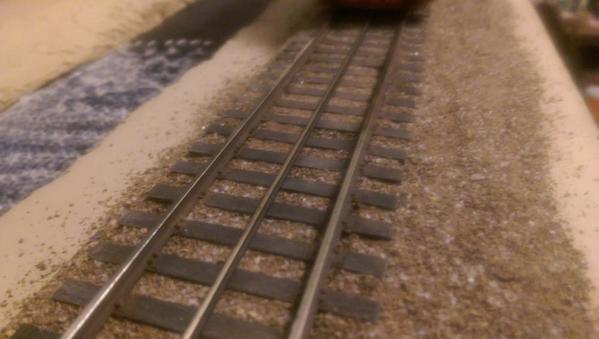
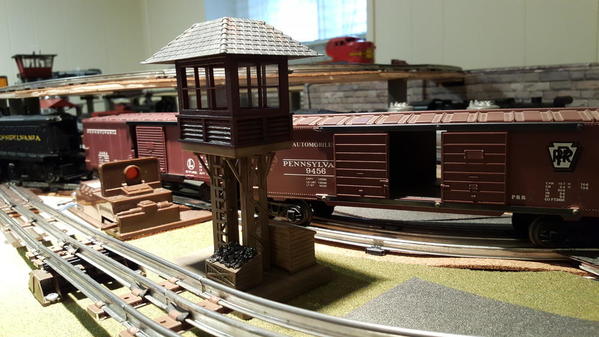
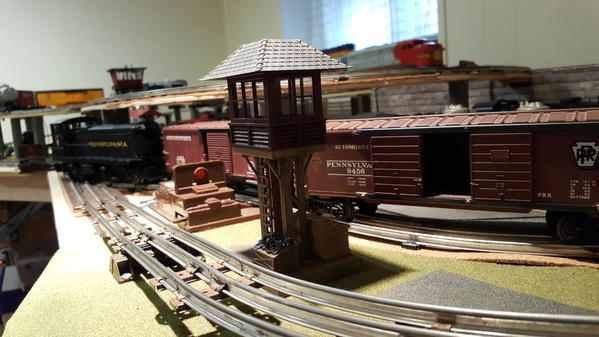
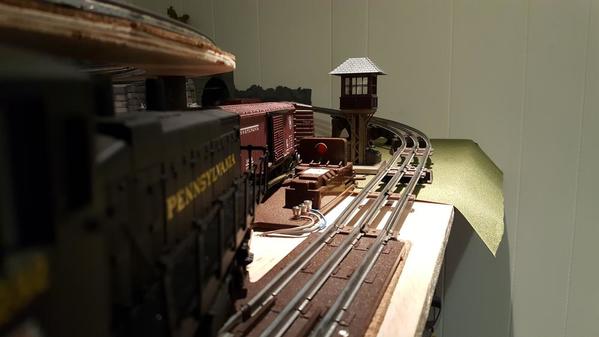
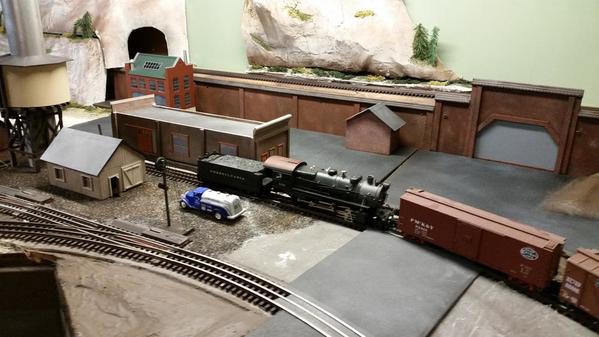
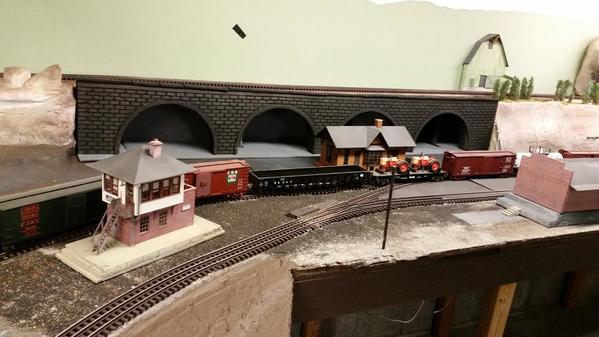
I have finally got my new train-room squared away and most of my stuff in place. The layout is basically two 4'x5' sections joined by a 2'x3' section. I kept about 18" away from the wall so to be able to reach all areas and get under the layout for storage. Still some more construction/destruction to do before I start laying track, Super O.

DSC05111DSC05112DSC05113

Attachments

Images (3)
  • DSC05111
  • DSC05112
  • DSC05113

I put in a couple hours last night. I started by running that 2" foam through the table saw to create these strips.

IMG_7249

Then I glued and stacked them onto the section 2 base.

IMG_7246

The ends still need to be trimmed, and then some irregularities carved into face with the oscillating saw.

IMG_7248

I used drywall screws to hold the pieces in place while the glue dried. I'll remove those today.

IMG_7250

Here's the real bluff in winter...

TRAINS_0280

and in summer.

TRAINS_1380

Attachments

Images (6)
  • IMG_7249
  • IMG_7246
  • IMG_7248
  • IMG_7250
  • TRAINS_0280
  • TRAINS_1380
mike g. posted:

Looks like a good start Elliot, I hope your fingers didn't hinder your work to much! My little cut still hurts every time I bump it. LOL, Cant wait to see how you do the face of your bluff.

Thanks Mike, actually the fingers are doing quite nicely, all things considered. I've had plenty of those types of cuts too, fortunately these aren't them.

When you look at the winter picture, you can see that the ground is fairly regular, so it won't take much carving. I'll be modelling summer, so plenty of green to cover the hillside. It's getting there.

I'm going to head down in a bit and throw the last of the mud on the wall, then keep working on these sections.

Big_Boy_4005 posted:

I put in a couple hours last night. I started by running that 2" foam through the table saw to create these strips.

IMG_7249

Then I glued and stacked them onto the section 2 base.

IMG_7246

The ends still need to be trimmed, and then some irregularities carved into face with the oscillating saw.

IMG_7248

I used drywall screws to hold the pieces in place while the glue dried. I'll remove those today.

IMG_7250

Here's the real bluff in winter...

TRAINS_0280

and in summer.

TRAINS_1380

Elliot,

Looking good!

Couldn't you have just cut one piece, and trimmed the sides to 45? Unless they aren't 2x2 square, but they look square in the pics. It would still be the same concept, just with a lot less gluing. Maybe save yourself some work in the future, depending on how much more you are going to.

Just a thought. Stay motivated, I'm enjoying your progress!!

Chris

Elliot and CHUGMAN your layouts are coming along great. Today, for myself, the backdrop is in and done. And that area is on hold till I get my order from Plastruct.  I found they had corrugated sheets of siding which I'll cut down to fence size for around the scrap iron yard. Plus they had some chain linked fence for my gate across the tracks. So till that gets here back up to the attic to figure out why my one mainline won't accept Proto 2 engines.........Paul 

Yeah Mike, I've always been a DIY kind of guy. I used to watch This Old House with Bob Villa. I'm not a great book learner, I get things a lot better by watching and doing. I would have ben done with the mud a long time ago, if it hadn't been for all the work above my head. Hate that part.

Chris, you're probably right, a single piece would have worked. I already have the strips cut for this, but I suppose it's not too late to use them on other parts of the layout. I guess I thought I was going to want more of a stepped look, but the real photos don't support that.

John Rowlen posted:

I finished detailing a new Atlas O Amtrak Dining Car and ran it on the layout.  I ran out of white paint and ordered some on-line because all my local hobby stores have closed in the last year, or do not handle Testors flat acrylic paint.

Boxed up five new Legacy engines: 2 Allegheny, 2 GG1, and a Heisler to go to Lionel Service.

Five new Legacy engines have to be repaired?  That's a LOT!  What happened to them that they need Lionel to repair them?

Elliot - I love the pictures of the real area that you are modeling, it adds a lot to the appreciation of the finished model for me.  I assume that you will plan to cover the slope with vegetation for a summer scene?  If so, it will take a lot of it.  I am going to have some of the same issues.   We need to start a model nursery to supply our layouts with affordable foliage.


Art

Mo985 posted:
Big_Boy_4005 posted:

I put in a couple hours last night. I started by running that 2" foam through the table saw to create these strips.

IMG_7249

Then I glued and stacked them onto the section 2 base.

IMG_7246

The ends still need to be trimmed, and then some irregularities carved into face with the oscillating saw.

IMG_7248

I used drywall screws to hold the pieces in place while the glue dried. I'll remove those today.

IMG_7250

Here's the real bluff in winter...

TRAINS_0280

and in summer.

TRAINS_1380

Elliot,

Looking good!

Couldn't you have just cut one piece, and trimmed the sides to 45? Unless they aren't 2x2 square, but they look square in the pics. It would still be the same concept, just with a lot less gluing. Maybe save yourself some work in the future, depending on how much more you are going to.

Just a thought. Stay motivated, I'm enjoying your progress!!

Chris

Eliot

Looks good.  You can also define the strata of the bluff by mixing some 1" X 2" X 4' strips between the angled 2" strips. Just set the angled strips back by 1/4" or so to give some ledges for the brush to grow from.  It's just another way to skin a cat.  I used only 1" strips, but I like your 2" angled idea as well.

Good luck enjoy seeing the progress.

Eight more trees on the logging railroad.

Kept them around the building area and away from the turnouts where hands may need to go.

There's a mesh on one side of the natural furnace fiber material that I remove.

I found that one can just use the cheap hair spray (instead of a paint can) to secure the foam foliage to the limbs.

I like the 'furnace filter' trees, especially where they may be bumped, as they are quick to make, and sturdy.  I think the 'asparagus fern' pines look the best but take longer to make, having to drill holes and glue in each limb: not an overly lot of time, especially for a good looking pine, but a lot longer than the 'shake a box'  'furnace' trees.

I really like how they enhance the railroad scene.

GN logging 14GN logging 15GN logging 16GN logging 17GN logging 18

Attachments

Images (5)
  • GN logging 14
  • GN logging 15
  • GN logging 16
  • GN logging 17
  • GN logging 18
samparfitt posted:

Eight more trees on the logging railroad.

Kept them around the building area and away from the turnouts where hands may need to go.

There's a mesh on one side of the natural furnace fiber material that I remove.

I found that one can just use the cheap hair spray (instead of a paint can) to secure the foam foliage to the limbs.

I like the 'furnace filter' trees, especially where they may be bumped, as they are quick to make, and sturdy.  I think the 'asparagus fern' pines look the best but take longer to make, having to drill holes and glue in each limb: not an overly lot of time, especially for a good looking pine, but a lot longer than the 'shake a box'  'furnace' trees.

I really like how they enhance the railroad scene.

GN logging 14GN logging 15GN logging 16GN logging 17GN logging 18

You know at the rate your going, you going to have to start logging here pretty soon! LOL Looks great!

This morning I painted the flat surfaces of the foam panel inserts left over dark brown. When dry, I'll come back and paint roads and spray color on the rock faces.

Earlier I was skyping with my 2 year old grandson and tried to run a short train around the town loop. I got sound but no action on command. I had unplugged my command base and transformer a few weeks ago for some reason. So, I went through the startup process and replaced the loco id's.  It was a good time to clean wheels, rollers and dust off my 5 steamers. While the paint cures, tonight I may start cleaning track and vacuuming. I have not run a train in over 2 months and it is really dusty.

(left) My resuscitated 1688 posing with a Pennsy "chuff chuff" tender.  (right) One of the first O scale trolleys I ever owned, a deckroofed Pittman which I painted circa 1980, and which hasn't seen rail until I horse-traded my way into a Bowser floor the other day...

GEDC2780

A reminder:  If the tire on your chuff-chuff loco tender has disintegrated,  a couple of wide rubber bands will do the trick!

GEDC2781

Mitch

Attachments

Images (2)
  • GEDC2780
  • GEDC2781
Last edited by M. Mitchell Marmel
Big_Boy_4005 posted:

Good to see you back here Jim. We've been keeping your topic warm for you. Alan Arnold was asking about where you were last year. I pointed him to some of your last posts and told him that you hadn't given up on trains, but that life was just getting in the way.

So are you using the same space that we had discussed?  Did you ever settle on a track plan? Anxious to see the pictures!

Thanks For everyone welcoming me back! 

It is good to get back into model trains. 

The room I am using is the same one I had posted about a few years ago.  A 11x12 space.  This time around I am on a small budget and plan on building slowly.  

I didn't get as much done this past week as I had hopped but by the next of next week I plan to have all the paint on the walls and the clouds painted.  I will then start adding lights and moving the existing ones so they are over the layout.  In about a month I hope to have the benchwork started. 

Pics to come soon along with a rough track plan.  

Jdevleerjr posted:
Big_Boy_4005 posted:

Good to see you back here Jim. We've been keeping your topic warm for you. Alan Arnold was asking about where you were last year. I pointed him to some of your last posts and told him that you hadn't given up on trains, but that life was just getting in the way.

So are you using the same space that we had discussed?  Did you ever settle on a track plan? Anxious to see the pictures!

Thanks For everyone welcoming me back! 

It is good to get back into model trains. 

The room I am using is the same one I had posted about a few years ago.  A 11x12 space.  This time around I am on a small budget and plan on building slowly.  

I didn't get as much done this past week as I had hopped but by the next of next week I plan to have all the paint on the walls and the clouds painted.  I will then start adding lights and moving the existing ones so they are over the layout.  In about a month I hope to have the benchwork started. 

Pics to come soon along with a rough track plan.  

Ah, just about the same size as my room!  Looking forward to seeing what you have going on.

Barrett-Jackson Auto Auction Live

Watching the Barrett Jackson Classic Auto Auction - Live on the Discovery Channel or Velocity Channel or on their Web Page / You Tube

http://www.barrett-jackson.com/ - Link to live coverage.

Also repairing some die cast vehicles for the layout, vans and construction equipment.

                                                                  and  

Trainroomgary Pan Shot OGR Signature A               

Attachments

Images (2)
  • Barrett-Jackson Auto Auction Live
  • Trainroomgary Pan Shot OGR Signature A

A day well spent

Got the bulk of the trees in for the logging railroad and it only took a half a day (12 hours!).

Besides the 'furnace filter' and 'asparagus fern' pines I used the 'caspia' with it's own main stem as the tree trunk and used a lighter color foliage for the leaves.  Since they are sparse and thin, I thought they would be good for the rock cliffs where it would difficult for trees 'to make a living'.  Not sure if they look like trees but no harm in trying (plus it's cost effective!).

GN logging 19GN logging 20GN logging 21GN logging 22GN logging 23GN logging 24GN logging 25


Attachments

Images (7)
  • GN logging 19
  • GN logging 20
  • GN logging 21
  • GN logging 22
  • GN logging 23
  • GN logging 24
  • GN logging 25

Spent the evening trying to get another engine to run on my last mainline. First I had a MTH 3.0. Ran on all three mainlines but not on the fourth. So I got out another engine but it is 2.0. Same thing nothing. Hand held would not find it. After some doing I got it to sort of fire up. Sounds were garbled and all I got was smoke unit and lights. Took the top off and discovered that I had not changed out the battery for a BCR. So after putting one in I tried it again and I got it to run but no sounds. Tried to reset through the hand held but no luck. When I went to try it again it was not even found on the track. So rather then keep trying I'll call it a night and get a fresh start in the morning. Maybe while I am sleeping the good little fix it fairy will come and everything will be okay tomorrow.....LOL..........Wishful thinking on my part........Paul

Chugman posted:

Elliot - I love the pictures of the real area that you are modeling, it adds a lot to the appreciation of the finished model for me.  I assume that you will plan to cover the slope with vegetation for a summer scene?  If so, it will take a lot of it.  I am going to have some of the same issues.   We need to start a model nursery to supply our layouts with affordable foliage.


Art

Thanks Art. My whole railroad is a series of scenes from the real world, so there will be a lot more of this kind of thing as I start to get into scenery. There will be plenty of greenery, which I already have on hand. There are boxes full of Woodland Scenics trees under the layout, leftover from enterTRAINment. There are buckets full of ground foam down there as well.

Matt, I have thought about ledges and outcrops, that's why that that thin cap piece is still overhanging the slope. That section doesn't have much, but as I move further west (left on the layout) there are some rather spectacular examples that I will include. This is a favorite shot of mine, too bad it's summer in this scene. If I'm not mistaken, that is a limestone cap protecting the soft sandstone below. Water seeps out from between the layers forming those icicles in winter.

TRAINS_0388

Attachments

Images (1)
  • TRAINS_0388

Elliot, you and Chugman and others are amazing with big layouts and the amount of work involved. Its taken me 6 weeks I think to just get to this point on the corner, 2 retaining walls, foam foundations and some new rock face and 5 bldgs. Seems like a full time job and no trains running forever. But this evening I spray painted some roads and added some color to the rock face and after the paint was dry inserted the panels and the bldgs.

The real treat was running a train. A consolidation switching some freight backing into my problem corner

20170121_23164620170121_23165520170121_231710

Attachments

Images (5)
  • 20170120_204542
  • 20170120_204551
  • 20170121_231646
  • 20170121_231655
  • 20170121_231710
pennsynut posted:

Elliot, you and Chugman and others are amazing with big layouts and the amount of work involved. Its taken me 6 weeks I think to just get to this point on the corner, 2 retaining walls, foam foundations and some new rock face and 5 bldgs. Seems like a full time job and no trains running forever. But this evening I spray painted some roads and added some color to the rock face and after the paint was dry inserted the panels and the bldgs.

The real treat was running a train. A consolidation switching some freight backing into my problem corner

20170121_23164620170121_23165520170121_231710

Pennsynut- Looks to me like problem solved . I just joined last Fall so I don't know the backstory to the "Problem Corner", but everything looks great.

Thanks RSJB18.  I have dubbed it problem corner because of the scenic deficiences it has had ever since I built this layout extension. The problem was the cardboard based prior scenic elements warped a bit and it was just another rock face without much life to it.  I ignored it while I improved other areas where I had already had imagined a plan. I have been redoing scenic elements for about 2 years now. Still have a lot of grass and other greenery to plant.

pennsynut posted:

Elliot, you and Chugman and others are amazing with big layouts and the amount of work involved. Its taken me 6 weeks I think to just get to this point on the corner, 2 retaining walls, foam foundations and some new rock face and 5 bldgs. Seems like a full time job and no trains running forever. But this evening I spray painted some roads and added some color to the rock face and after the paint was dry inserted the panels and the bldgs.

The real treat was running a train. A consolidation switching some freight backing into my problem corner


Thanks Pennsynut, your layout is coming along nicely too.

We should never lose sight of the fact that this is a hobby. Patience and persistence are rewarded with beauty, pleasure and satisfaction. You won't find that in a video game.

--------------------------------------------------

I didn't exactly get done what I set out to do yesterday. I got what I hope is the last of the mud up. I went to start the door trim, and found out that I was a piece of wood short, so it was off to Menards. When I got home, the phone rang, and it was my new train buddy. So he came over and we ran trains in an effort to try and smooth out the signal glitches.

Walt is an HO guy, but he is a fast learner. He had a great idea regarding why so many engines are having trouble in the big helix. He pointed to a bunch of unfinished wiring where ground leads are just hanging loose. I need to get in there and button those up to see if that's the problem.

More later.

Last edited by Big_Boy_4005
paul 2 posted:

Worked on an engine from last night to get it to run on the last mainline. Managed to get it to run but I had no sounds just a lot of garble coming out of the speaker. On top of that it threw a traction tire. Will work some more on the problem this afternoon................Paul

Most of our locomotives are "of age" now, and we're experiencing more and more thrown traction tires.  Looking at the black goo tire substitute method for ending the problem.  It got to a head when the active engine threw a tire and the next one out of the roundhouse to go fetch the train did the same thing.  The language which followed from the Head Mechanic wasn't pretty ...

Just finished removing TMCC from my 2343 Santa Fe F3. I had installed TMCC in about twenty post-war  engines many years ago and have been selling them off the last couple years. Unfortunately nobody wants to buy a TMCC capable post-war engine so I've had to remove the electronics. I still have four more to go- a 2360 GG-1, FM Trainmaster, and non post-war Susquehanna RS3 and a Dash 8. 

Just finished removing TMCC from my 2343 Santa Fe F3. I had installed TMCC in about twenty post-war  engines many years ago and have been selling them off the last couple years. Unfortunately nobody wants to buy a TMCC capable post-war engine so I've had to remove the electronics. I still have four more to go- a 2360 GG-1, FM Trainmaster, and non post-war Susquehanna RS3 and a Dash 8. 

     Elliot I don't know if you would be interested in trying something out or not? I was given this tip from a fellow model rail roader from a train club I belong to. He suggested using a straight 1in. long router bit in a drill and running it along the face of the foam board. I know I really liked it and that is what I am going to use on my tunnel walls and top to look like cut out stone. Give it a try on a scrap piece and see if it is the look you are going for. Hopefully you don't mind my 2 cents worth! Choo Choo Kenny

Add Reply

Post

OGR Publishing, Inc., 1310 Eastside Centre Ct, Suite 6, Mountain Home, AR 72653
800-980-OGRR (6477)
www.ogaugerr.com

×
×
×
×
Link copied to your clipboard.
×
×