John,
It looks like your storage/train running solution was well thought out! Your workmanship looks handsome as well. When there is a will there is always a way!


|
|
John,
It looks like your storage/train running solution was well thought out! Your workmanship looks handsome as well. When there is a will there is always a way!
Bruce, your choice of materials for the catenary was spot on. Really is looking good............Paul
John, great start. For me getting past the planning and procrastination stage is usually the hardest and definitely the most time consuming. It looks like you have an interesting and creative solution, it will be fun to watch it evolve.
Art
Thank you for all the compliments on the catenary.
Instead of quickly responding to questions about construction methods, a detailed description with pics might be in order. I will try to compose something formal within the next few days, as I return to the bench to assemble more of the supports and stringers.
Pat: The visual improvement under wire has me wondering why I ever debated whether to install it or not. Once there's enough cat assembled, I'll try getting a video, since photos of running under wire just doesn't cut it with these VL locos.
Randy: It helps to have ample tunnel clearances built into the layout, but the spring loaded pans easily follow the trolley wire where it dips into a tunnel. I'm afraid there's no easy way of installing cat into existing scenery...which is why I'm tackling this on my layout now. I have a different treatment for cat intunnels and will post on the method used once I complete a section.
Bruce
Bruce,
This would make a good standalone topic. IMHO
Kerrigan posted:Gary E posted:Boo Man posted:Kerrigan posted:Boo Man posted:I am currently busy installing the Atlas Signal System (12 of 20 installed). They are working wonderfully on a stand alone basis. They really add to the fun of the layout. I am going to make my own connecting cables to get them connected so they work interchangeably. That will actually add to the cosmetic appeal by having them functionally more important during operating sessions.
Is this the system which connects signals together with phone-type cord so they interact (Red, Yellow previous block, green two blocks back?)
I've been looking for those type.
Yes it is. I have 14 connected now and have them integrated. I am doing some scenery before installing the rest. If you are interested in them, check out this post on the forum.
If you're using the Atlas signal system and want to have the signals work prototypically around turnouts then check out Custom Signals (customsignals.com) . Terry was authorized by Atlas to build and sell Atlas signal system compatible circuit boards. His Turnout Control Module is plug compatible and controls the signals around turnouts.
Custom Signals website says he is going out of business in the middle of 2016 .... yes/no?
I just emailed with Terry. He said he closed as of 9/2016 and is trying to sell the business.
Made some pine trees. 3 different types: Caspia, furnace filters and asparagus fern. These three are 15"-17" tall.
For how to, see:
https://ogrforum.ogaugerr.com/t...76#70974704484727076


Pat Kn posted:Bruce,
This would make a good standalone topic. IMHO
Pat,
I'll do just that, after I'm a bit more experienced and confident at tackling all the complicated aspects. With progress, my assembly methods are changing as my skills increase. So far, the results are satisfactory enough to leave what is already assembled as is. I'm documenting the steps in photos.
Although the cat is constructed so that it could be electrified, for now, they're just show.
Bruce
Played around trying to get the engine to run on the fourth mainline. Then after many attempts I decided to put it back on another mainline and now I can't get it to run at all now. Turns on, lights and fan motor come on and nothing else. I am folding up my tent for the night. The only thing good about the day so far is I got a package from Scenic Express but haven't opened it yet. .........Paul
First test run last night was a success. I currently have two 022 switches at the back of my small layout (reach concerns, it'll be up against a wall once painted and the carpet is down) and four 042 manual switches up front. Ordered two more 022s to put on the sides up front and will leave the 042s right in the center...I need the auto anti-derail feature. ![]() But...the 042s are incredibly fun and I'll throw an extra one inside one of the figure 8 loops.
But...the 042s are incredibly fun and I'll throw an extra one inside one of the figure 8 loops.
Really enjoying my 3.25' x 6.5' micro.
Very nice Twehttam!
It is always nice when things work like they are supposed to!
I am working on getting the inside of my tunnel the way I want it before we put the tops on it. I am using 1/8" pink foam (like I used for my stone arch bridge) for the liners. I am thinking I will just paint it flat black so that they disappear rather than try to get too fancy about it. I liked the crinkled aluminum foil idea, but am worried about interference with train signals. Will paint just about everything inside the tunnel flat black for the same reason. Portals will be painted an old concrete color as they are poured concrete portals. Will post some pictures when I get a chance.
Art
Art, That is what I would do. Maybe I would carve some blocks in the foam a few inches into the tunnel to match the portals
brwebster posted:Pat Kn posted:Bruce,
This would make a good standalone topic. IMHO
Pat,
I'll do just that, after I'm a bit more experienced and confident at tackling all the complicated aspects. With progress, my assembly methods are changing as my skills increase. So far, the results are satisfactory enough to leave what is already assembled as is. I'm documenting the steps in photos.
Although the cat is constructed so that it could be electrified, for now, they're just show.
Bruce
I'm going to try to build the cat on ours with the Marklin parts I've accumulated ... like that guy in Hawaii ... :-)
Today after an unsuccessful attempt to get my engine to work on the fourth mainline yesterday which left me cursing a bit, I hate electronics, I opened up the package which came yesterday from Scenic Express. I bought two mill backdrops for behind the scrap Iron Yard. They are too long together but I am going to work them in together overlapping them. Two bridge abutments for short girder bridges I bought to go on the ends of the Lionel die cast bridge, this is still a work in progress because I don't have the tables built for that yet. Also after following ORINDS topic on the marsh I decided to get some different colors of tall grass to try. All and all a good day so far, especially since I ordered more things today. That definitely always makes me feel so much better. Pics of the items..................Paul


I hate electronics too! Maybe that is why I tried changing careers several times over the years. Never worked, I always wound up back there. Now after 41 years, at least all I have to do is document telecom circuits in the computer.
Good idea to take a change of pace on the scenery! That's fun, and opening neat Scenic Express item will whet your appetite to even forget about trains for a while!
Got quite a few trees done and installed.


Hi there, just wanted to say the trees look wonderful. Did you make them yourself or buy them? Really shows some skills to do suck a nice job!
Mike,
thanks. They are easy to make. Unlike buildings, trees don't have square corners, straight roof lines, etc so the 'more creativity' when building, the better.
See following thread on 'how to'
Thanks for the information, I hope you don't mind I decided to fallow you. You have a great looking layout! Now I have to go back to page one and start reading! LOL
Chugman posted:I am working on getting the inside of my tunnel the way I want it before we put the tops on it. I am using 1/8" pink foam (like I used for my stone arch bridge) for the liners. I am thinking I will just paint it flat black so that they disappear rather than try to get too fancy about it. I liked the crinkled aluminum foil idea, but am worried about interference with train signals. Will paint just about everything inside the tunnel flat black for the same reason. Portals will be painted an old concrete color as they are poured concrete portals. Will post some pictures when I get a chance.
Art
FYI Regarding tunnel walls: check out my post, page 168, 11/3/15, 11:35am, showing my method for constructing tunnel walls.
Dave
Mike,
thanks. welcome aboard.
There is another posting later on with additional info on the trees on the GN thread.
Corps: 1969-71.
Sam
FYI,
Orders from China came in: from different venders.
Toggles: bought on Jan 3, delivered on Jan 17
People, sitting: bought on Jan 6, delivered on Jan 17.


Dave - Thanks, that's a very interesting method for tunnel walls.
Art
I'm waiting for my son, Jim, to come over to work on completing the tunnel tops today. I am anxious to get this done so I can start a phase of scenery soon. Will post pictures after we are done today.
Art
samparfitt posted:Mike,
thanks. welcome aboard.
There is another posting later on with additional info on the trees on the GN thread.
Corps: 1969-71.
Sam
Thanks Sam, what is the GN thread?
Corps 83-88
samparfitt posted:Got quite a few trees done and installed.
Interested in your catenary overhead wire system. Did you build it yourself? If yes, using what materials and jigs? Getting ready to do cat and need input. Thanks!
Kerrigan,
I did the 'cat' about about 25 years ago. Pictured are the jigs and wire that I used.
This was for HO. All the poles, etc are all from brass stock so easy to solder and carry juice. I used inverted code 100 nickel silver rail for the catenary in tunnels, etc so save on time and maintenance. I was surprised at how fast the electricity was lost so I had to run feeder wires about every 3-4'. I had to put wires on the telephone poles to help carry the current and keep the voltage from dropping so fast. At 28 gauge, the wire was so thin that resistance was high.
I used an article in model railroader (Oct, 1973, my cat may be a lot older than 25) and it was by Robert Hegge on his Crooked mountain lines. I'm sure you can get copies from MR.
It was a lot of work (and a lot of soldering) and I put it in after all the scenery was in place. Didn't have a choice on that but I'm glad the scenery was in as the cat would probably get a lot of damage while installing scenery.
I used some beads from a craft store for the insulators.
I remember several years ago, someone did cat in O gauge. It might have been in OGR or in a TM video (I think it was this).
I remember that he had milk jugs weighted down below the layout to keep the cat taught.
I've heard that marklin HO cat has been used for O gauge plus MTH had some out.
Sam


No work unless you call spending some $$$$$$$$$$$$$$ at Mario's on track and switchs for the elevated line work. ![]()
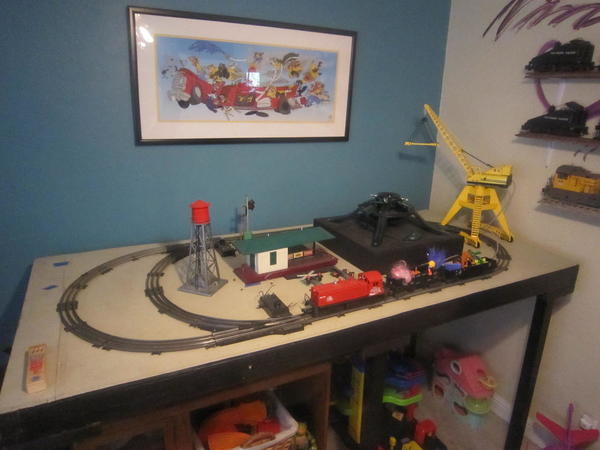
Well flowing our Christmas this year I decide to leave the under the tree layout up and added it to the grand kids room. I added some legs to lie tit off the floor, removed the tree stand an d let my grandson advise me of what he wanted on the layout. The results are the barrel loader and the tunnel. The track layout, turnouts and signal lights were already apart of the layout. As was the bumbling water tower. I added the four spot light tower and Aiden added some of his Radiator Springs things from his wooden RR.
The tunnel is from my original Christmas set given to me by my grandfather whenI was 6. The power is supplied by a PW ZW transformer and I have used the updated switches you see.
Of course it is far from finning. I intend to add a background pice that will have 3/4 relief buildings on it with LED lighting. Once i find my Plasticville building they will occupy the space IFO the tunnel.
Added benefit, the wife loves the idea and the grand kids now can use their layout anytime they wish. Yes, I still have my PW layout in the "train room" and it is getting an update as well. I am truly blessed to be able to share this with my family and see how much they also enjoy the hobby. The older grands sons, 9 yo, will soon be dong some scenic and paint work.
This forum has given me wonderful ideas, solutions an enjoyment reading and seeing what everyone is doing.


jeff


Not exactly "layout" work; more like "workbench" type projects:
Got this pair of Intermountain boxcars quite a while back; both need a bit of work...

They (Intermountain) are beautiful models, but all that fine detail I find to be very delicate; the same thing applies my Red Caboose GP9: "Handle With Care..." ![]()
Mark in (wet) Oregon
Buncha little stuff. Repainted the #53 bulbs in an old signal. Test benched an LTI Pennsy Flyer 4-4-2 and spotted a glow down in the smoke generator, which suggested the packing had packed it in. Packed some pink fiberglass down the chimney, and now the little beggar smokes up a storm with no burning smell...
Mitch
I've been working on the bluff the last few days, and it is really starting to take shape.
I was told that you can't use a water based glue on foam, because it won't dry. But that advice only applies to foam on foam applications. I used Titebond to glue on scraps of OSB and some corner blocks.

Section 5 is almost ready for its angle braces.

Section 3 is ready to get its foam build up.

So is section 2. I also started working on the sandstone face. I don't throw much away, and those scraps of ceiling tile are finding a use on the layout

This scene is coming together nicely. My next big problem is how to cut the 2" foam. I've tried a variety of knives, and a keyhole saw with limited success. I'm open to ideas here.
BIG BOY 4005 Elliot it is just my own opinion but I built a hot wire cutting table for cutting the foam board. I got an old piece of 4ft. long counter top from a cabinet shop and framed it with 2 X 4 pine boards and the same for the 4 legs. Between the counter top and 2 X 4 framing I used a piano hinge so I could lift the top and connect the cutting wire underneath easier I looked at a bunch of videos on You Tube for help with my table and with everything included I think I have about $60.00 into building it. I am not good at looking up old threads on here but I posted pictures of the table I made and maybe you could find it and take a look. I used a 12v. 2a. DC power supply from RS but if you want to use a bigger power supply 15 - 18v. 2a. it might cut faster because with the 12v. you can't cut the 2in. foam board very fast or you will break the cutter wire.Just my 2 cents worth Take care! Choo Choo Kenny ![]()
Today, we had a train running day in Clarksville... Train friends from Owensboro Ky, Hawesville Ky, Nashville Tn, Madisonville Ky, and Clarksville Tn, came to simply Have Fun....We ran the new VL GG1, and a new VL Clinchfield Challenger among many other engines and trains. The latest Lionel Sound Cars were tested in two long freight trains and sounded fine...We had a great lunch and talked trains...


 p
p
Thanks Kenny, I remember that topic now, that was a neat table.
Here's a link to your topic. I had put a like on it so I could find it again.
I'm not really looking for a table, but a heavy duty hot wire would be great. I'd like to be able to cut strips of the 2" foam at a 45° angle, so they can be stacked forming a slope without a lot of waste.
Maybe I need to take a step back and rethink my method as it is looking rather impractical.
I will look at today's posts on this thread later. I worked on grade crossing in problem corner and made foundation to elevate freight house. Tomorrow I will finally hydrocal cloth the foam work in the corner and adjacent areas. Nothing worth a photo today. I did buy an MTH corner bldg for this area and it will help finish the scene. It's one of my favorite MTH bldgs.
Big_Boy_4005 posted:I've been working on the bluff the last few days, and it is really starting to take shape.
I was told that you can't use a water based glue on foam, because it won't dry. But that advice only applies to foam on foam applications. I used Titebond to glue on scraps of OSB and some corner blocks.
Section 5 is almost ready for its angle braces.
Section 3 is ready to get its foam build up.
So is section 2. I also started working on the sandstone face. I don't throw much away, and those scraps of ceiling tile are finding a use on the layout
This scene is coming together nicely. My next big problem is how to cut the 2" foam. I've tried a variety of knives, and a keyhole saw with limited success. I'm open to ideas here.
Elliot- I used a Dremel Multi max with either a straight or curved wood blade. A little neater than a saw. Hot wire cutters would be my next choice. I used Titebond wood glue to glue the foam. Worked fine. Before and after shots of my recent project.


Access to this requires an OGR Forum Supporting Membership


