
Originally Posted by Steamer:

got it at Home Depot. My Uncle was working on the seat of his back hoe one day, and the swivel was shot. He stumble onto this at HD, and I thought that would make me a great turntable. $25 and a couple Lionel bridges, and it works great. 

Layout #1

Ideal!  Either leave as is or dress it up like Tim W says...almost endless possibilities.  Sure suits a PW themed layout and seems to be able to handle the largest of PW motive power.  WTG Dave


Bruce

On June 9th, I posted some photos which included a transformer distribution strip I created.  The long bolts were all over the place as though I was "on the wrong sauce".


See Photo 1.


Photos 2, 3 and 4 are the NEW strip I finished this afternoon.  My wife Suzie said to forget it.  No one will see it!  Well, I will, and it bugged me.  So I tore apart the old one and THIS time, instead of drilling free-hand, I used my Atlas bench drill press for both drilling and countersinking the back side for the flat head bolts.  Made all the difference in the World.


Photo 2 shows the new strip.  From Left to Right, the first FIVE bolts are for A, B, C, D and U for PW--  ZW # 1.   The next FIVE bolts are for A, B, C, D and U for PW-- ZW # 2 and the next FOUR bolts plus single bolt BELOW them will be for A, B, C, D and U for my PW-- KW transformer.  The two bolts at far LEFT below other bolts are (+) and (-) terminals for my 12vdc Regulated, 30 Amp power supply.


TVS diodes will be wired across various terminals as required.  Soldered power leads to track will be utilized as well as Lockons.  TVS diodes will be installed across EACH separate control block.  I have several Proto sound equipped locos but I refuse to try them out until these Diodes are in place.  Thanks for your attention!


KRK

100_0652

100_0663

100_0664

100_0665

Attachments

Images (4)
  • 100_0652
  • 100_0663
  • 100_0664
  • 100_0665
Last edited by keyrouteken

That thread running about losing dropped parts sure applied today.  I was drilling the

back of a brass casting of a headlight for this kitbashed gas electric, and the thing

slipped out of pliers when the drill snagged, three times....the third time it grazed my

cheek and went into oblivion.  I can use the original wiring and bulbs for the car, at

this length...longer ones will need wiring spliced..but I only had two brass headlight

castings one for the front, and this for the back.  I then hunted through my parts

stash.....and found no more.  Will have to fabricate one out of styrene tubing...well

maybe I have some brass tubing.   Before that I had successfully gotten  the roof and sides mated and had bell and horn, ventilators and roof exhausts, ready to mount.  Any

shop with this headlight casting would be in Chicago or Detroit, IF there.

Previous post:

I wanted to run a tank car train (9 tankers, one 2 bay coal hopper and cabin car) pulled by a Lionel Consolidation.  I quickly found places where recent ground cover installation trackside left a film on the track.  I cleaned that track and as the train moved along a kept finding more places that needed cleaning.  But I also thought that the loco wheels and pickup rollers might need a cleaning so I put the Lionel Consolidation on my bench.  When I inspected the rollers on the loco and tender, they were dirty but I also found the front loco roller to grind a little when I tried to move it.  It did not spin freely.  I had no Lionel roller so I replaced it with an MTH roller from a long dead railking Consolidation.  Two little wings on the roller base interfered with it seating flat and firm so I removed those with a dremel.  The bolt that holds the roller base is over an inch long and is secured with a nut inside the loco. I had to remove the shell, find the nut, remove a wiring terminal screwed just aft of the smoke stack to screw the bolt into the nut.  It worked!


So now another thing on my maintenance list is checking rollers for free spin and lubrication.  BTW, are Lionel pickup rollers difficult to find.  I might invest in a couple back ups. 


Update: I used an MTH roller and base for this relatively minor fix. The MTH roller base I used was shorter than the Lionel base and the roller did not extend forward enough to allow the roller to swing into a dimple on the underside of the chassis.  That coupled with a slight misalignment of the roller frame prevented the roller to swing leading to the pilot wheels derailing and shorting. So I retrieved the Lionel version and found by slightly bending the frame near the roller, the roller could spin freely.  Should have tried that initially. Sorry for the tedious explanation, but I wanted to advise about problem with my first fix. Now the engine operates well.  Time to run another train.  Let's see, how about a string of reefers headed by an M1a?

I ran these through the table saw. I tightened up the spacing so the gap between the windows was uniform. This is always a pet peeve of mine with the way Ameritown flats look when placed next to each other. I'm going to add another floor below it.


 Now that I am posting I see I need to alter the cornice. I missed a spot.

imageAnd I started a repaint on a junker 520.


image

image

image

Attachments

Images (4)
  • image
  • image
  • image
  • image
Last edited by Silver Lake

After a fairly thorough discussion with my wife Suzie, we're thinking about changing part of the track plan so as to eliminate a LOT of the 45 and 90 deg crossings seen in the attached photo, before I start wiring and otherwise, get too far down the line.

The "crossings" are causing too much stuff to either derail or hop up and down.

I'll keep you guys advised !

Cheers.

KRK

100_0628

Attachments

Images (1)
  • 100_0628

Actually did this last Sunday, but forgot to take a photo. We had a problematic older Atlas turnout on the primary mainline causing some derailments and bumpy operation. What had happened was it was deteriorating (rails coming loose/misaligned). Since we're running and open to the public Saturdays, we met on Sunday to yank out the old one (and strip the ballast and road bed) and replace it. It works much better than the old turnout. Now we have to track down AGHRHowie and have him give a clinic on track ballasting for the new guys.


2015-06-13 12.23.55

Attachments

Images (1)
  • 2015-06-13 12.23.55
Originally Posted by keyrouteken:

After a fairly thorough discussion with my wife Suzie, we're thinking about changing part of the track plan so as to eliminate a LOT of the 45 and 90 deg crossings seen in the attached photo, before I start wiring and otherwise, get too far down the line.

The "crossings" are causing too much stuff to either derail or hop up and down.

Crossings will do that, partcularly with lighter weight cars (modern Lionel Birneys, for example, don't like crossings in the least)...


Mitch

off the shelf at Home Depot. about 8 years ago my Uncle Jim had bought an IH backhoe. the seat swivel was shot. he went to HD and found this. Identical to what was on the backhoe. I don't know if the PO of the backhoe had got the seat swivel from HD..or IH used the same thing....but it makes a great turntable for me.

My Lionel Metro North M-7 set's been on the shelf for a few years now because a) derailing issues and b) some little Gomez-Addams-in-training knocked the window out of one of the doors.  So, I decided to have a go at it: 


A look under the hood, showing the door operation mechanism. Lionel obviously went all out with the motor.  Somewhere, a battery powered fan weeps because its motor is missing...  Plenty of traction weights, though.


GEDC1491

At least Lionel doesn't spare the screws!


GEDC1492

Door, meet window.  Window, door.


GEDC1493

All better!


GEDC1494

I will say this:  Nice interior!  One day, when I'm feeling masochistic, I may put people in all four cars...


GEDC1495

The graphic details are fantastic!


GEDC1498

The derailing issue was dealt with by removing a jammed bight of wire from under one of the trailing cars' trucks.  The little scrap of plastic is from the original wrapping.


GEDC1502

After a bit of tuning of my layout trackage (the lead car simply refused to go past one joint without derailing!), the Metro-North train charges towards Grand Central Terminal!


GEDC1505

Mitch

Attachments

Images (8)
  • GEDC1491
  • GEDC1492
  • GEDC1493
  • GEDC1494
  • GEDC1495
  • GEDC1498
  • GEDC1502
  • GEDC1505
Last edited by M. Mitchell Marmel

    Still cleaning, trimming, and neatly refastening, the last of the spaghetti wiring.

I clipped out about 20 ft of loose excess all together and most wires can easily be followed visually from one knee, without going under.


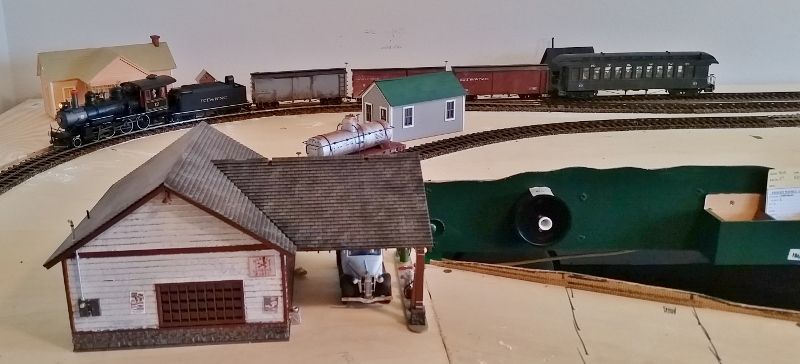
 Played with adding a couple of lights to darker areas.

 The culvert loader has a lit office interior now, and a homemade yard floodlight fashioned from a plastic top hat is being mounted on, or at least near, the water tower tonight.


  Drilled 12 closely oriented holes in a 2x4 on the layout frame and mounted a dead subwoofers thumb screw terminals, for a neat and clean transformer input to the 4 tracks. 

 I have a few spring loaded speaker terminals that will take on the lower amp constant low, med, high voltages for lights, turnout, and accessory inputs.


Since I lowered the layout, my shelves wont fit under anymore. Not without losing 1 of 5 shelves, and they will hinder moving the layout easily again.

   After adding wheels to the layout, I don't think I like my shelves so much anymore, but they were also my transformers mount. So I dug out a unused scrap of chrome piano hinge about 3 ft long, and I'm going to experiment with a shelf that will flip up, hang down behind the "curtain", or flip up & under to store.

  If it works out well enough, each of the four 1033s will get its own fold away shelf. 

Finished retooling some of the track on the main lines. Everything runs smoothly now. Next is sprucing up some of the scenery and adding a CAT water tower, some of Jack Pearce's lighted vehicles, and work on the refinery with new Miller Engineering signs.


We are working hard to be ready for guests who are visiting us on July 11th.

I have been moving buildings and temporary roads around to see what placement gives me the most real estate for a town on my 4x8.  I like the look of streets placed at an angle to the track straights, but that didn't give me as much space as making everything parallel and perpendicular.  I'm including one photo of how I have it now.  This isn't final, but look at this one whole area in the foreground waiting for the realtors to get buyers.  The large MTH white house on the right will get a sign as an inn or bed and breakfast.  In the far left, I have the AmeriTown store under construction.  I just received River Leaf Models drug store that my wife is giving me for Father's Day.  I just ordered some Task Board that was mentioned on another topic to try as streets and sidewalks.  I wanted to get the best street layout first before making something permanent.  Right now I am using sections of roofing paper, which doesn't look half bad for asphalt.


image

Attachments

Images (1)
  • image
Last edited by Mark Boyce

I had to make another panic retreat, but didn't go AWOL.  I found when lining up the

walls on this gas electric, that the roof sloped to the back due to mounting tabs' location on the Williams pass. car end I used.  Had to take end off, cut tabs, beef up attachment location, and remount with glue drying now.  Did get all the bells and whistles (bell, horn, ventilators, headlights, etc.) on the roof and have it painted.  Wiring for lights as existed on the bashed trolley work.  Not happening fast.

I had a real milestone today, my first op session ever.

The guy who did most of my DCC wiring and a guy with a very well-known HO layout in the area who really is into operations came over and we had a session for just shy of 3 hours.

I knew ahead of time I was out of my depth and told them so, in that this was a work in progress and was mostly to determine the best course in operations.

They seemed to enjoy themselves, and gave me a lot of really good ideas. I can't imagine anyone comes up with a good operating scheme on their own, and with these guys I now have a much greater grasp of how to keep two people solidly busy even on a layout the size of mine.

We totally changed my initial idea, and I really liked where we went. I deleted passenger runs in favor of mixed trains. It worked pretty well. It was also odd to watch two other people run my layout, as before it's been pretty much me alone.

Even my pup, Charlie, was on the same page. Instead of bugging everyone for loves and treats, he actually curled up in the door of the layout room, something he's never done before.

Thanks to Steve and Brian (and Charlie the wonder pooch as well as my Wife) for a wonderful afternoon!

PS: I'm not kidding, I had the window open for the layout room and while we were talking about train flow, one of the guys pointed out the window and said, "Hey, there's a blimp!"

Seriously, the Goodyear blimp was heading North, not far from my back porch. The US Open starts next week just North of here, I can only assume they were heading up there for that...

Originally Posted by p51:

I had a real milestone today, my first op session ever.


The guy who did most of my DCC wiring and a guy with a very well-known HO layout in the area who really is into operations came over and we had a session for just shy of 3 hours.


Thanks to Steve and Brian (and Charlie the wonder pooch as well as my Wife) for a wonderful afternoon!

Congratulations Lee!

Sounds like Charlie is like our Annie.  Maybe she will take a lesson and cooperate if someone comes over to see my layout.

Add Reply

Post

OGR Publishing, Inc., 1310 Eastside Centre Ct, Suite 6, Mountain Home, AR 72653
800-980-OGRR (6477)
www.ogaugerr.com

×
×
×
×
Link copied to your clipboard.
×
×