As you may know at the NJ Hi-Railers we have quite a large layout.  We have over 7500 ft of track and the layout is about 185' x 35'.  This leads to all kinds of command control issues.  We been working on improving the TMCC/Legacy signal for years.   I'd like to share our latest technique.

What we've done in the past includes:

  • Run numerous ground wires above and next to tracks.  (Never below!)
  • Separated the U terminal signal wire as much as possible from the power and ground wires.  
  • Acquired Dale's original TMCC signal tester to ensure our command bases were good.
  • Built Jim Lefebre's original tube 455khz signal booster.  This made a TREMENDOUS difference.  
  • Acquited an oscilloscope to visualize the TMCC waveform and PPV voltage levels.
  • One of our members (Bob DeGuarde) build a signal strength meter car by tapping off the signal strength pin on a Lionel R2LC radio board and displaying the amperage on a multi-meter.  This enabled us to check the signal strength on local areas of the layout.  We have found that on the meter display a value of less than 35 is problematic for many steamers.  A few steamers have problems between 35-40 and all diesels have problems below 30.  40 and above is generally good.
  • Acquired and installed Gunrunner's build of Dale's solid-state signal booster.  
  • And I'm sure a few other things I've forgotten!


All this has made it possible to run TMCC/Legacy engines reliably.  But we still would have occasional "mysterious" problems.  A while ago we had a thought that if we could find a sensitive enough Bluetooth enabled multi-meter perhaps we could run it around the track and record a continuous signal strength.

Well, Bob De Guarde has built it and we are having fantastic results.    We can record a baseline of the signal strength around an entire line and then see the bad spots, extend our ground wire system to them and record the resultant changes in signal strength. 

Below is a graph showing our results after just one fix session.   We decided to work on our Yellow Line first as it's very popular and has been giving us issues lately.  Now we know why!   The blue line was the 1st measurement we took.  After a couple of updates, the yellow line shows the improvements.  The next step will be to extend our ground wire network to the area on the line represented by the low spots on the right side of the graph.  And then work on the other weak spots.

The X-Axis is the number of samples normalized to 1000 and the Y-Axis is the signal strength as captured by the multi meter.

I'll post an updated graph after our next fix session.


Attachments

Images (2)
  • mceclip0
  • mceclip1
Last edited by Chris Lord
Original Post

Replies sorted oldest to newest

The exact cause of the low  signal areas is hard to determine.   Usually we just address the symptoms not the root cause by adding TMCC ground wires above the track (if possible) or next to the track (not optimal.)  Some of that low signal area is above ground and some is below. Many of our tunnels are chicken wire which does a GREAT job of blocking the signal.   For the above ground track portion we try to install telephone poles and then run the ground wire between then.   If we can't install poles we just run the wire a couple of inches or so away from the track and if concerned with appearances we ballast over it.  The below ground track portion is easier as we can just run the ground wire above the track along the tunnel ceiling.  

We've installed what I call a ground buss network (aka "The Green Wires".)  We tap off of pin 5 on the Legacy Base DB-9 connector.  This connects to an insulated wire that runs around the outside of the layout.  Every 20 feet or so we've installed a terminal  block which allows us to tap off the buss and run a ground wire to where we need it.  We use 18-22 gauge uninsulated copper wire for the ground wires. 

The "never below" statement comes from a long series of conversations I had with a Lionel Engineer when we started this journey.  He was adamant that the ground wire needed to be above the track for best results.  Two reasons:  1) If the ground is below the track then the outer rail signal blocks it.  2) If next to the track then the outer rail interferes with it and the shell of diecast engines can block the signal.  Remember, the antenna for steamers is usually the handrail and on some diecast diesels (Centipedes for instance) the antenna is on the top of the engine.  In the past this ground wire acquired the nickname "ground plane" and people put it under the track.  It was better than nothing but not optimal.  Mike Reagan had a video up on YouTube explaining how to run a ground wire next to the track.  When I spoke to him about this he said it was not optimal but the easiest to explain. 

I've attached a Hints and Tips doc I put together after speaking to the engineer.

Hope this answers your questions.  I'll be at the club Monday and will try to get some pictures.

One final thing.  We have a BIG track joint soldering event scheduled for the spring.  We're hoping it will help the DCS & TMCC signals.  Some of the tracks have been in place for more than a dozen years and there's probably corrosion in the joints.  I will definitely do a before and after signal strength run.  

Attachments

GVDobler posted:

What if you ran a second ground wire in the "unmodeled" airspace above the layout/track? ...say 5-6 ft

Or, am I not understanding how it works?

5 to 6 feet is too far away  It needs to be about 6 inches to make a difference   When Chris said we have been trying to improve signal for years he wasnt kidding  Its like 15 years  We tried alot of different ideas and the last year has been the best  This new car with the bluetooth meter actually pinpoints the problem areas   One of the things we tried in the past that actually caused more problems than it fixed was copper foil under the track connected to ground   We are still ripping that stuff out in spots  

bluelinec4 posted:
GVDobler posted:

What if you ran a second ground wire in the "unmodeled" airspace above the layout/track? ...say 5-6 ft

Or, am I not understanding how it works?

5 to 6 feet is too far away  It needs to be about 6 inches to make a difference   When Chris said we have been trying to improve signal for years he wasnt kidding  Its like 15 years  We tried alot of different ideas and the last year has been the best  This new car with the bluetooth meter actually pinpoints the problem areas   One of the things we tried in the past that actually caused more problems than it fixed was copper foil under the track connected to ground   We are still ripping that stuff out in spots  

Ben is spot on.  Our experimentation has shown the ground wire works best about 6-9 inches above the track.  We have a 20 track staging yard below a mountain.  I ran a ground wire along the ceiling and didn't get much improvement.  After running 3 of them equally spaced horizontally and about 8 inches above the track we saw a marked improvement. 

The foil under the track was certainly a non-starter knowing what we know now.   One of the problems you have is getting too much stray capacitance between the outside track and earth ground.  That's what kills the signal amplitude.  It's also why the TMCC buffer makes such a difference, it's low impedance drive can drive many times the capacitance that the command base can.

Signal anomalies began to crop up as construction of my layout progressed.  Without the technical ability to diagnose problem areas I only had observations to go on.  

Lower level signal strength are adversely affected where rails cross under others. Upper levels seemed unaffected and lower levels that paralleled but not directly underneath uppers suffered little.  The ground wire remedy is a sound one, as I discovered after installing sections of catenary and connecting it to house ground.  I recommend these grounds built into tunnels or where access and visibility are limited.  

As trackage increases, which is now approaching 400ft. I hope to have hit the threshold of signal issues, unless the addition of an engine facility somehow messes things up. With the addition of the Dale/John solid state booster another perceived improvement was the disappearance of finicky stalling on Legacy control engines. 

I sure can appreciate the work involved attempting to solve all signal issues given the complexity of club layouts.  No small feat!

Bruce

gunrunnerjohn posted:

That's very cool Chris, can you get Bob to tell us exactly how he built this car?  Looks like a great tool!

Hi Guys

Sorry I am joining this party late, but I has been a busy several days.

Information on the TMCC earth ground signal strength test car  

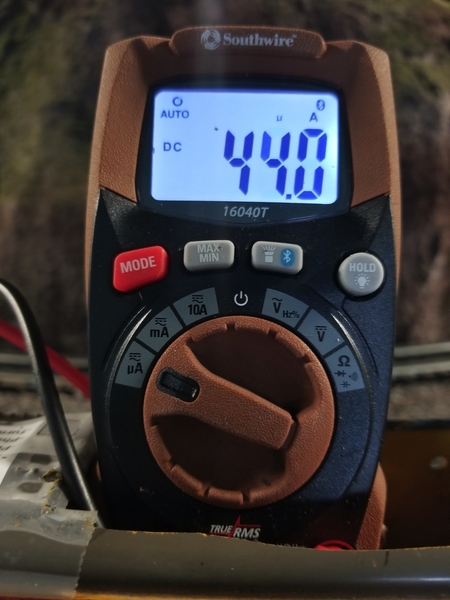
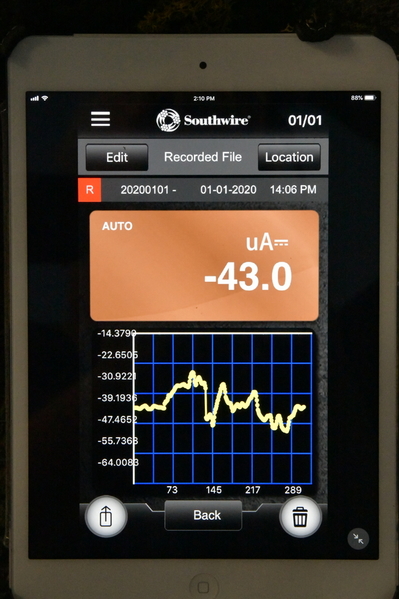
The TMCC earth ground signal strength test car is an updated version of the one I and others posted years ago using a R2LC radio board and a Harbor Freight meter.  The change I made to the previous version is now I am using a Southwire 16040T Bluetooth meter instead of the HF meter.  The big advantage is the bluetooth capability which now relays information to a smart device and we can see real time what is happening in all the spots that we could never see before on our 30'x 200' layout.  The Southwire meter also has data storage capability which provides CSV file information which can be used in other programs, one being like what Chris Lord posted above.

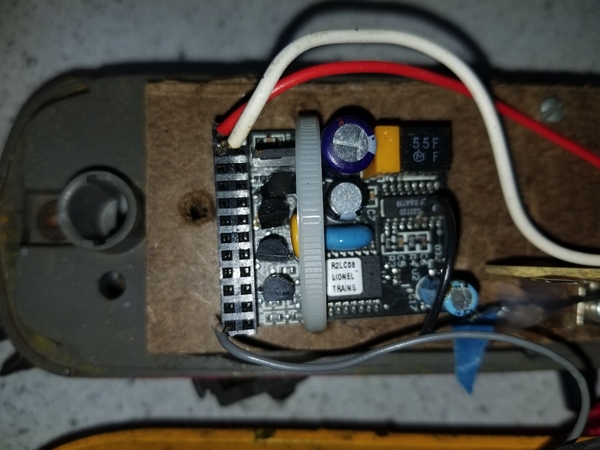
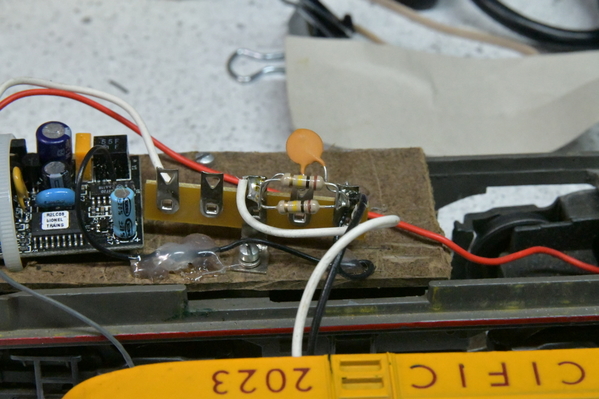
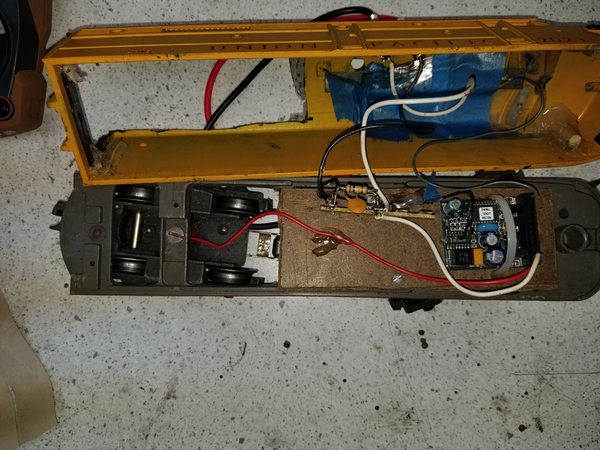
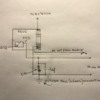
The TMCC earth ground signal strength tester consists of a Lionel R2LC radio board, .1uf cap, 51K resistor, a meter which reads low uA (20-60uA) and rolling stock which has AC electrical pick up connection.  On the R2LC board, I tapped off of pin 13 of the MC3373 IC.  Pin 13 provides an RSSI output signal reading.  See the spec sheet for the MC3372 IC for further information for the RSSI pin 13 connection.  You also need track voltage and an antenna in the rolling stock to connect to the R2LC board. 

I currently don't have the pictures, video and wiring diagram of the current earth ground test car with me, but I will update this thread in the next day or two when I have access to the information.

Bob D


Here's an update to work we've done at the NJ Hi-Railers on TMCC Signal Strength now that we can graph the results.   We've had dramatic improvement in multiple areas by adding ground wires both on telephone poles and on the under side of tunnels (above the track.)  The below graph shows the difference between when we started on 12/18 (Green Line) and now (Red Line.)

The area to the left (between 200 and 400) has decreased because we removed old "Ground Plane" copper foil that was under the track.  It seems it was actually helping the signal level a little bit.  We've going to run new above ground wires this week and that should take care of that.

If anyone's interested I attached the Excel Spreadsheet I'm using to generate the graph.

Pictures of Signal Strength Car still to come. 


Attachments

Images (2)
  • mceclip0
  • mceclip1
Files (1)
rad400 posted:
gunrunnerjohn posted:

That's very cool Chris, can you get Bob to tell us exactly how he built this car?  Looks like a great tool!

Hi Guys

Sorry I am joining this party late, but I has been a busy several days.

Information on the TMCC earth ground signal strength test car  

The TMCC earth ground signal strength test car is an updated version of the one I and others posted years ago using a R2LC radio board and a Harbor Freight meter.  The change I made to the previous version is now I am using a Southwire 16040T Bluetooth meter instead of the HF meter.  The big advantage is the bluetooth capability which now relays information to a smart device and we can see real time what is happening in all the spots that we could never see before on our 30'x 200' layout.  The Southwire meter also has data storage capability which provides CSV file information which can be used in other programs, one being like what Chris Lord posted above.

The TMCC earth ground signal strength tester consists of a Lionel R2LC radio board, .1uf cap, 51K resistor, a meter which reads low uA (20-60uA) and rolling stock which has AC electrical pick up connection.  On the R2LC board, I tapped off of pin 13 of the MC3373 IC.  Pin 13 provides an RSSI output signal reading.  See the spec sheet for the MC3372 IC for further information for the RSSI pin 13 connection.  You also need track voltage and an antenna in the rolling stock to connect to the R2LC board. 

I currently don't have the pictures, video and wiring diagram of the current earth ground test car with me, but I will update this thread in the next day or two when I have access to the information.

Bob D


Attached are the pictures and wiring diagram for the TMCC earth ground signal test car and a bluetooth meter.   

As chris indicated above, using the TMCC earth ground signal test car and a bluetooth meter with data recording capabilities is a handy tool to visually see where you are having signal issues and a easy way to compare results after you make changes on the layout.  This is especially true for large/very large layout with TMCC signal issues, where now you can obtain signal readings for those hard to get to places on your layout.

For the Nj-HI railers layout, we found we needed readings of at least in the low 40 ua range for typical steam engines with metal shell to run w/o issues and readings in the high 30s ua range for typical diesel engines to run correctly.  I would suggest that anyone using the TMCC earth ground signal test car, first check to see what reading are best for their layout.

Hope this information helps,

Bob D

NJ HI- Railers

-----------------------------------------------------------------------------------------------------------------------------

TMCC earth ground signal test car and bluetooth meter pulled with #546 engine20191230_105539

--------------------------------------------------------------------------------------------------------------------------

Southwire bluetooth meter with data recording capabilities

Image 1-5-20 at 6.03 PM

-----------------------------------------------------------------------------------------------------------------------

Southwire app used on your smart phone/tablet to receive real time measurements.

Recordings are twice a second.

DSC_5135

-------------------------------------------------------------------------------------------------------------------------------------

Wiring diagram of the TMCC earth ground test unit.

Google "MC3372 IC specs" for further information for the RSSI pin 13 connectionIMG_7518

-----------------------------------------------------------------------------------------------------------------------------------

R2LC board connections

Image 1-5-20 at 6.01 PM

----------------------------------------------------------------------------------------------------------------------------------

R2LC board with resistor & capacitor

I did not have a 51K resistor, so I used 2 100K resistor in parallel  

DSC_5138

--------------------------------------------------------------------------------------------------------------------------------------

Image 1-5-20 at 6.02 PM

Attachments

Images (7)
  • Image 1-5-20 at 6.03 PM: Southwire bluetooth meter with data recording capabilities
  • Image 1-5-20 at 6.02 PM
  • Image 1-5-20 at 6.01 PM: R2LC board connections
  • IMG_7518: Wiring diagram of the TMCC earth ground test unit.  Google "MC3372 IC specs" for further information for the RSSI pin 13 connection
  • 20191230_105539: TMCC earth ground signal test car and bluetooth meter pulled with #546 engine
  • DSC_5135: Southewire app used on your smart phone/tablet to receive real time measurements.  Recordings are twice a second
  • DSC_5138: R2LC board with resistor & Capacitor  I did not have a 51K resistor, so I used 2 100K resistor in parallel

Add Reply

Post

OGR Publishing, Inc., 1310 Eastside Centre Ct, Suite 6, Mountain Home, AR 72653
800-980-OGRR (6477)
www.ogaugerr.com

×
×
×
×
Link copied to your clipboard.
×
×