
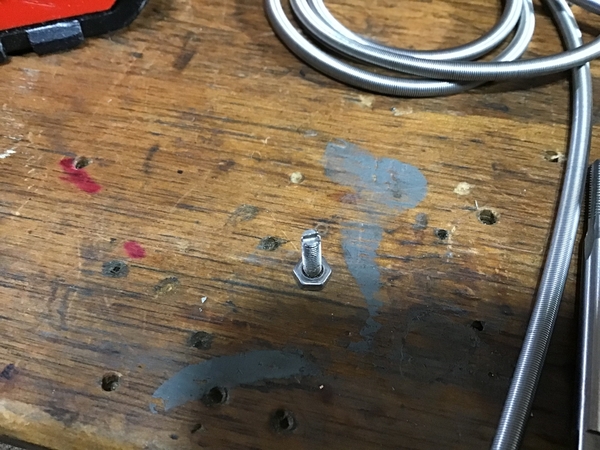
In the real world, the tender of a steam locomotive is connected to the engine not only with a drawbar, but also with all kinds of hoses, electrical connections, augers, etc,…..A cool DIY project when building our models can be the addition of the flexible hose connections carrying water to the engine, and steam towards the rear of the train, …..steam driven augers, and steam for heat, etc, are carried through these flexible connections…..brainstorming with my buddy Pete ( Norton ) he suggested some extension springs that some of the manufacturers actually did use on a limited basis on a couple models,……wanting to expand on this ( no pun intended ) I starting searching for extension springs sold in long lengths, and a good looking O.D. ….I found what I think is a good match to fit the bill with 3mm OD, X .3mm wire extension spring, sold in 100mm length…..for pretty small money!….So we’ll begin this neat project with the tools, and materials you’ll need to tackle this project yourself!….if I can do it, anyone can!….this isn’t something out of reach, that requires all kinds of crazy machines, tooling, etc,…the basic list is: 3mm X.3mm wire expansion spring, a variety of 3-48 machine screws, a drill bit & tap for 3-48, a drill, a dremel tool, some pieces of scrap brass, or your favorite medium, ( styrene, etc ) and some basic hand tools, ….the idea is the extension spring pushes onto the 3-48 machine screws so perfectly, but not so tight it can’t be easily removed for servicing or transport!….So looking at your own model, look to see how the flexible connections are routed, and begin plotting your routing, trying to keep in mind snag points, etc,…the expansion spring is very limber, so it’ll swing, stretch, and pivot with the engine as it navigates curves …..I did this project in a DIY fashion so all can see it’s not out of reach, …..For the tender I made some simple “bulkhead connectors” from brass scraps, and threaded them so I have a stud to stick the spring on,….on the engine side, I drilled a couple blind holes in inconspicuous places, tapped them, and made some studs from 3-48 machine screws,……I figured the best “drape” for my new hoses, then darkened my new parts …..you can either chemically darken, or just paint them at your preference ……this cool little project adds a new level of detail to a growing segment of realism in the 3 rail hobby!!…

Pat CEC75972-57C1-432E-B81D-58FAA29F56301F9109AF-77B2-4397-AAD9-3295BDC8EEAC94617BA8-8636-47DF-AA9E-0BC9FCDB1E1DC7433A40-0FD8-4736-B8A5-AF63987E48D3D2FEB889-9A2D-4416-A3BB-C5FFC1AAD6CA2EEDD70C-2562-4C43-97E4-966CEF40083ADB978629-4BA0-4952-B6EE-43B1DB6FF20FA6484CC2-D47A-4F25-8720-E83FDC7AFF47B505EFE8-8BF0-4541-B3F9-2AEA9082567B55A2B22B-865B-4116-8157-14E47A5FC0C9E498443A-36F5-439F-8864-5BF775CE3904F30DB922-3C88-4B7A-8989-A94BBA833E4D

Attachments

Images (12)
  • CEC75972-57C1-432E-B81D-58FAA29F5630
  • 1F9109AF-77B2-4397-AAD9-3295BDC8EEAC
  • 94617BA8-8636-47DF-AA9E-0BC9FCDB1E1D
  • C7433A40-0FD8-4736-B8A5-AF63987E48D3
  • D2FEB889-9A2D-4416-A3BB-C5FFC1AAD6CA
  • 2EEDD70C-2562-4C43-97E4-966CEF40083A
  • DB978629-4BA0-4952-B6EE-43B1DB6FF20F
  • A6484CC2-D47A-4F25-8720-E83FDC7AFF47
  • B505EFE8-8BF0-4541-B3F9-2AEA9082567B
  • 55A2B22B-865B-4116-8157-14E47A5FC0C9
  • E498443A-36F5-439F-8864-5BF775CE3904
  • F30DB922-3C88-4B7A-8989-A94BBA833E4D
Original Post

Replies sorted oldest to newest

@coach joe posted:

Pat, I second Bob's comments word for word.  I guess you used your special blackening recipe on the springs.  So for us radially challenged folks will there be enough friction between spring and bolt threads to keep the springs from pulling off?

2EEDD70C-2562-4C43-97E4-966CEF40083A

What are you showing us with this photo?

Coach, yes, the 3-48 machine thread is a perfect friction fit, and the spring will not slide or fall off, …but, on the flip side, a slight tug gets them moving for removal when servicing, or moving the locomotive to a shelf is required,…..I try my darndest to not only show you guys cool projects, but also keep serviceability, & longevity in mind…..😉

Pat  

@coach joe posted:

Pat, I second Bob's comments word for word.  I guess you used your special blackening recipe on the springs.  So for us radially challenged folks will there be enough friction between spring and bolt threads to keep the springs from pulling off?

2EEDD70C-2562-4C43-97E4-966CEF40083A

What are you showing us with this photo?

I missed your last question Coach, …..that is a picture of a stud I made from a 3-48 machine screw for the locomotive side. With a dremel tool, I simply lopped off the head of a long screw, then with the same cutoff wheel, I cut a slot in the top so I can use a flat head screw driver to tighten the stud in the blind hole. I threaded a nut on the other side so I could stand it up for picture purposes…..

Pat

This was on my to do list. Can’t believe It took me this long to get around to it looking at the posting date.  I ordered the wrong size. 2mm instead of 3. Which scales out to about 4”. I couldn’t come up with a tight enough slip fit. They thread easily onto a 2mm screw. Kind of looks like a Heli Coil when done. When servicing you can remove one screw to free it up. A little experimenting found the proper length. The screw on the tender would have been a really tight fit with a bracket in place. I found some 6 32 brass stand offs the correct height that solved that. I thought the pan head screw might be shaped to tall to clear the truck pivoting. But it seems fine.

This is an older TMCC Lionel Mountain. Re detailed to look a little more like a Rutland. Looking at my fleet. No 2 models are the same as far as what needs to be done. This one anyways required no drilling or tapping in factory components. Just fabricating some brackets.

48C28223-44B8-44BA-B4B6-5BE5FE262A5C3EC66DF5-260E-4267-BC53-8F8C2252468F

I may pickup some 3mm spring. It would be just a matter of drilling and tapping the brackets to accept the proper screws. Looking at prototype pictures from the Rutland. They didn’t seem as robust as the ones I saw on the NYC.

Pat and Pete. Thanks for the how to.  This was a fun rainy day project.

Attachments

Images (2)
  • 48C28223-44B8-44BA-B4B6-5BE5FE262A5C
  • 3EC66DF5-260E-4267-BC53-8F8C2252468F
Last edited by Dave_C
@harmonyards posted:

I straight tether everything I build, and route them right where the auger would be……I can’t stand the giant Anaconda doing a loopty loop between the cab & tender,…..the tether should be heard from, but not seen,….🤣🤣🤣🤣🤣🤣

Pat

Great idea Pat, if Lionel did a model of the R-46 subway cars the spring idea is exactly what the New York City transit authority used between the cars in place of the sprung gate.

as for the tether I could never understand why the transmitter and receiver could not be built into each body. Below the drop plate.  Then again this is Lionel….


PennCentralShops

@harmonyards posted:

I straight tether everything I build, and route them right where the auger would be……I can’t stand the giant Anaconda doing a loopty loop between the cab & tender,…..the tether should be heard from, but not seen,….🤣🤣🤣🤣🤣🤣

Pat

Pat, I am intrigued by the idea of a straight tether, I really dislike the Anaconda.  I have a few questions:

1.  Does the straight tether limit the minimum curve diameter the engine will navigate or is that already set by the draw bar?

2.  Does it make it significantly harder to plug the tether into the engine since there is less tether to manipulate?

3.  Is there any way to just push the excess tether into the tender once the connection is made?

@coach joe posted:

Pat, I am intrigued by the idea of a straight tether, I really dislike the Anaconda.  I have a few questions:

1.  Does the straight tether limit the minimum curve diameter the engine will navigate or is that already set by the draw bar?

2.  Does it make it significantly harder to plug the tether into the engine since there is less tether to manipulate?

3.  Is there any way to just push the excess tether into the tender once the connection is made?

Consider that Lionel prior to the wireless tethers, K-Line, Weaver, and 3rd Rail all use straight wire tethers. The key is to make sure the opening in the tender does not constrict movement of the tether, vertically or horizontally.

Pete

  Jim, I’ve seen small magnets used to attach simulated air hoses together. One issue with my installation. Is removing the hoses for servicing. I have to remove the 2 screws on the tender side seeing the spring acts basically as a nut on mine. While the spring itself is stainless. You could thread a steel flathead screw into the spring and glue the magnet to the bracket. Maybe surround the magnet with a short piece of brass tube to guide the spring to it. A pair of tweezers grabbing the spring right where the screw portion is would keep it from being damaged. The bracket could be tweaked to give it a bit of an angle downward. I noticed the Rutland steamers I looked at were angled at about 45 degrees.

@Dave_C posted:

  Jim, I’ve seen small magnets used to attach simulated air hoses together. One issue with my installation. Is removing the hoses for servicing. I have to remove the 2 screws on the tender side seeing the spring acts basically as a nut on mine. While the spring itself is stainless. You could thread a steel flathead screw into the spring and glue the magnet to the bracket. Maybe surround the magnet with a short piece of brass tube to guide the spring to it. A pair of tweezers grabbing the spring right where the screw portion is would keep it from being damaged. The bracket could be tweaked to give it a bit of an angle downward. I noticed the Rutland steamers I looked at were angled at about 45 degrees.

Dave,
The magnets come in many sizes, so, depending on the inside diameter of the spring, it shouldn't be hard to cement one on the inside. Or, cut the head off of a screw, cement a small length of thread to the magnet the same diameter of the spring and cement it into the end of spring.
I'm sure there are many manufacturers of rare earth magnets. The one that I use is Apex Magnets < Check them out there.
In using magnets you wouldn't have to remove screws.

Add Reply

Post

OGR Publishing, Inc., 1310 Eastside Centre Ct, Suite 6, Mountain Home, AR 72653
800-980-OGRR (6477)
www.ogaugerr.com

×
×
×
×
Link copied to your clipboard.
×
×