I need to attach plastic patterned sheets to masonite. 3m spray adhesive is not working. What do other folks use?
Original Post


|
|
Replies sorted oldest to newest
Did you try cleaning the plastic with some type of solvent? IPA, acetone... out side of course.
What kind of plastic? Different plastics work with different adhesives. Some don't work at all.
To the smooth side of the Masonite, I presume?
Interesting that you should ask! I just did the same process on an O scale church I'm building. I attached Plastruct embossed sheet plastic to Masonite (yes, Martin....smooth side.) using this...
....which I've done on many a similarly-built project. And none has ever let loose.
It comes out of the tube rather thickly. I just smear a few daubs around thinly on the backside of the plastic sheet abd then press it in place on the Masonite. It's sort of viscous in the short term, so you can move it around a bit....if necessary....for final positioning. But it likes plastic, it likes Masonite...it's been my go-to for sheathing a model substructure for some time.
Goop is readily found at the large home improvement stores that have a wide range of adhesives offered. I imagine specialty hardware stores would, too. Maybe even Walmart?.....dunno....never checked.
There ya go.....FWIW.
KD![]()
I glued Plastruct shingle sheeting to a plywood roof on the Victorian station using acrylic adhesive caulk. I don't like using contact cements since they seem to dry out and let go after time passes. I had some spots with the caulk that didn't hold, but generally it's working pretty well. I liked too that it's not rigid when dry. 3M makes a high-strength adhesive that might be able to work in laminating.
It's called "3M 90" and it's a high strength spray, much stronger than 3M 77. I haven't used any yet, but the RC guys use it for permanently laminating G-10 fiberglass sheeting to balsa. If it works in that application, it should work well for ours. I'm going to get some for the next major laminating job I'm doing.
Rogerpete,
I would use the spray adhesive that Plastruct recomends (3M I think). In addition, I would put drops of CA glue probably every square inch. I would then push the flat sheets down onto the backer and put a weight on them to cover the entire surface. I try to avoid gluing disimilar materials, but when I do, I always try to use two different type of glues.
Alan Graziano
I am attaching pattern shingles to the smooth side of masonite. I used the high strength 3m, because I had it on hand. Sprayed both sides, held nice, but after 2 weeks, the edges are lifting.
I did wash the plastic prior to spraying with dawn soap & water.
I used JTT plastic sheeting, because I reached out to plastruct 3 times via email with 2 questions, NEVER to get a reply. I then called them, and was told to email someone else, so I did, twice, with no reply. Not a yes/no/maybe/go fly a kite/pound salt...nothing. So I decided to not use their product.
So back on track, The edges that lifted I put some locktite 414, (because I had it on hand), clamped & viola, it stays put.
I have some additional projects coming up, and just want to avoid double work.
Thanks for the replies.
go to the big construction guys stuff.......
use
"Liquid Nails for projects"


Rogerpete,
Te ends sealing perfectly can always be a problem. CA glue all around the ends is good but not perfect. If you can use .060 to .125" styrene backing sheets instead of masonite, you will be able to use solvent cement and you will not have a problem. Styrene sheets can be purchased from Evergreen or Plastruct in pieces as large as 12" x 24". Plastruct even sells 36" long pieces.
I am sorry to hear you did not get a good response from Plastruct. I have dealt with them for at least thirty years and they have always been top shelf.
Alan Graziano
go to the big construction guys stuff.......
use
"Liquid Nails for projects"
Works for me . . . Frankly, I've used just rubber cement (original formula). I've noticed the key is to; a) coat the masonite twice with it. Ones a big heavy coat that soaks in and is absorbed by it, and then a second coat that does the job, and b) letting the second coat dry a long time (hour+). Put it on the plastruk, let it dry, to, and whamo.
But Liquid Nail: heavy duty stuff. Just make sure you never need to take it apart again.![]()
The clamped edges are staying down nicely after my 414. I just hate doing things twice. Unless they're fun things, then do them at least twice...
![]()
Like Walther's Goo, rubber cement dries out and lets go after time passes. I have a ship model with copper plates contact cemented below the water lines. While it's been many years, the contact cement dried out and those plates have almost all fallen off. I don't think liquid nails does this otherwise many homes in this country are in for BIG trouble. Sheet rock is almost always glued place now with only an occasional screw holding it until it sets. No nail pops!
Like Walther's Goo, rubber cement dries out and lets go after time passes. I have a ship model with copper plates contact cemented below the water lines. While it's been many years, the contact cement dried out and those plates have almost all fallen off. I don't think liquid nails does this otherwise many homes in this country are in for BIG trouble. Sheet rock is almost always glued place now with only an occasional screw holding it until it sets. No nail pops!
Liquid nail is awesome and does not let go (that I know of). I used something like 72 tubes of it on my layout: holds all of it together - along with the sheetrock on the walls.
But rubber cement is awesome, too. Not saying its perfect, but it definitely holds 45 years. As I said earlier on, I apply two coats an hour apart to any wood (masonite, too, anything possibly porous) surface. HMS Resolution below is the first wooden ship I built, finished around 1969. I was in college and on a budget and so the copper bottom is just small pieces of alum foil cut and glued on one by one, then painted with copper paint. Still strong. Later on I switched to copper tape and a ponce wheel but this is what it looked like then, and now.

Contact adhesives that are used for laminate surfaces are very aggressive and a last resort usually with good results. They can destroy thin plastic sheets.
Note this pink brick veneer installed between the tracks with contact adhesive. Contact adhesive usually requires application to both surfaces/let dry and then stick in place. Some use a small wax paper interim sheet between the two contact applied surfaces to position the two piece to be glues. Once stuck, it's not moving.
Contact adhesive also worked very well for Doll House shingles.


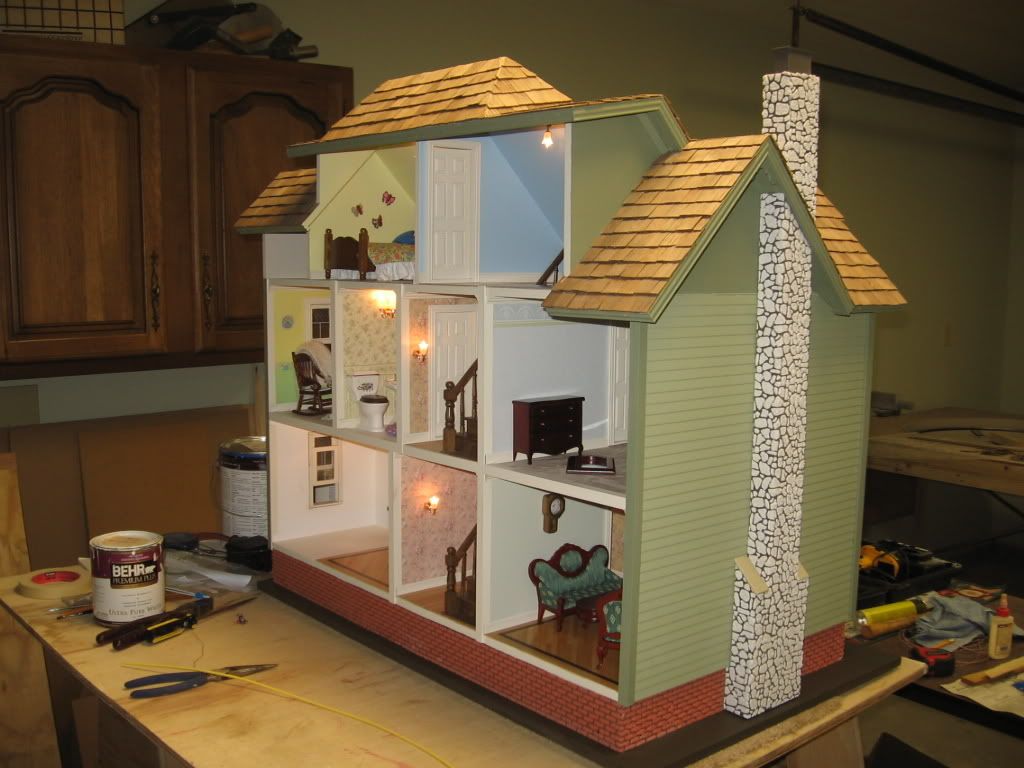
Wow, that is a beautiful dollhouse!
Wow, that is a beautiful dollhouse!
Thanks Lee,![]() It was a kit. The company is no longer in business, though there are lots of doll house kits out there. The brick foundation and stone chimney were an interesting sticky-back tape application. Then you troweled-on either the red brick mixture or white stone/chimney. The red brick powder/white stone chimney powder were mixed with white Elmers glue. As the glue/powder mix is setting, removing the tape provides the brick mortar lines and the stone pattern on the chimney. I always thought that to be layout applicable. Same with the cedar shake shingles.
It was a kit. The company is no longer in business, though there are lots of doll house kits out there. The brick foundation and stone chimney were an interesting sticky-back tape application. Then you troweled-on either the red brick mixture or white stone/chimney. The red brick powder/white stone chimney powder were mixed with white Elmers glue. As the glue/powder mix is setting, removing the tape provides the brick mortar lines and the stone pattern on the chimney. I always thought that to be layout applicable. Same with the cedar shake shingles. ![]() There is also interesting doll house wiring that could be used for a layout.
There is also interesting doll house wiring that could be used for a layout.
Whereas I have been using thinly applied Goop to bond plastic embossed sheets to a structure core of Masonite, acrylic, plywood, etc., I don't know why I haven't tried this alternative...
I've used this non-volatile (low, low aromatics) contact cement on the layout for a few years....mostly to bond cork roadbed to plywood sub-roadbed, for which it's been excellent. I've got half a quart left. Hmmmmmm......
I would agree that the active ingredients of regular (Red can for the DAP product) contact cement would distort the thin sheet plastic. Not a viable choice. BUT, the linked version (Green can DAP) should have less proclivity for distorting the plastic. I think I'll give it a try tonight on some scraps. I'll report tomorrow....
The lingering concern I'd have is how aggressive the coated surfaces will be in final placement. When using the green can DAP on the cork roadbed, it didn't seem nearly as aggressive on first contact as I remember when using the red can volatile stuff on a woodworking project (THAT stuff, indeed, is right NOW! on contact). We'll see....
TBC....
KD
The next day... ![]()
Not as good as good ol' Goop. The good gnus is that there is, indeed, zippo distortion of the plastic (Plastruct 1:48 shingle stock scraps). I took an extra piece, put a BIG gob of the green can contact adhesive on the back side, and the next morning...after the glue had dried clear...the face of the plastic had nary a wrinkle.
But the bad gnus is that the plastic-to-Masonite adhesion was not nearly as aggressive as with Goop. Now, it's possible that the half quart can was old and had lost its zippity-doo-dah (And I personally can relate to that, brother!!!![]() ). One of the tell-tale signs of how long the used can had been sealed was the copious amount of rust on the lip seal....VERY common for opened-then-stored water based product.
). One of the tell-tale signs of how long the used can had been sealed was the copious amount of rust on the lip seal....VERY common for opened-then-stored water based product.
On the other hand, the smallest quantity I could find of the low-volatility DAP was a quart....not very practical for the amount and frequency used in laminating plastic to building shells.
I'm sticking with Goop. Of course, as usual, TEHO. Ya go with what you've learned works for you.
Meanwhile, back at the ranch....
![]()
That is a great idea. You may be right. I look forward to the results of your test. It would be great if it works. Contact cements I used will bubble really thin plastic, which means I have to use much thicker stuff -- harder to work and trim.
The Doll house kit is an interesting story. Purchased for my first Grand daughter (Felicity) when she was (2). Remained boxed for (2) years when it returned to my shop/garage, where assembly began. It didn't take long before all the input from everyone changed a simple assembly to constant remodels. Stairs were replaced, an additional stair to the third story was added, an expensive electrical up grade with very nice lights and receptacles was installed. A detailed trim package was added. Yes, you can buy pre-hung doll house doors. I was told recently I had not installed the door knobs, Last remodel, some participants said I forgot to add a door between the third story rooms. Tear it apart one more time, carefully cut the door opening and re-assemble again. One more door. ![]() Paint colors were adjust and then flooring and interior decorating began. Yet to be done, is the kitchen. My daughter the architectural engineer has done a great job of interior decorating.
Paint colors were adjust and then flooring and interior decorating began. Yet to be done, is the kitchen. My daughter the architectural engineer has done a great job of interior decorating.
Felicity is (11).
Loaded the Doll house in my truck along with a few boxes of un-installed accessories and delivered it to Philadelphia about a month ago. ![]()
![]()
![]() Great build experience, with many different fillers, paints and adhesives. Noted fastener that got a lot of use was Atlas track screws.
Great build experience, with many different fillers, paints and adhesives. Noted fastener that got a lot of use was Atlas track screws.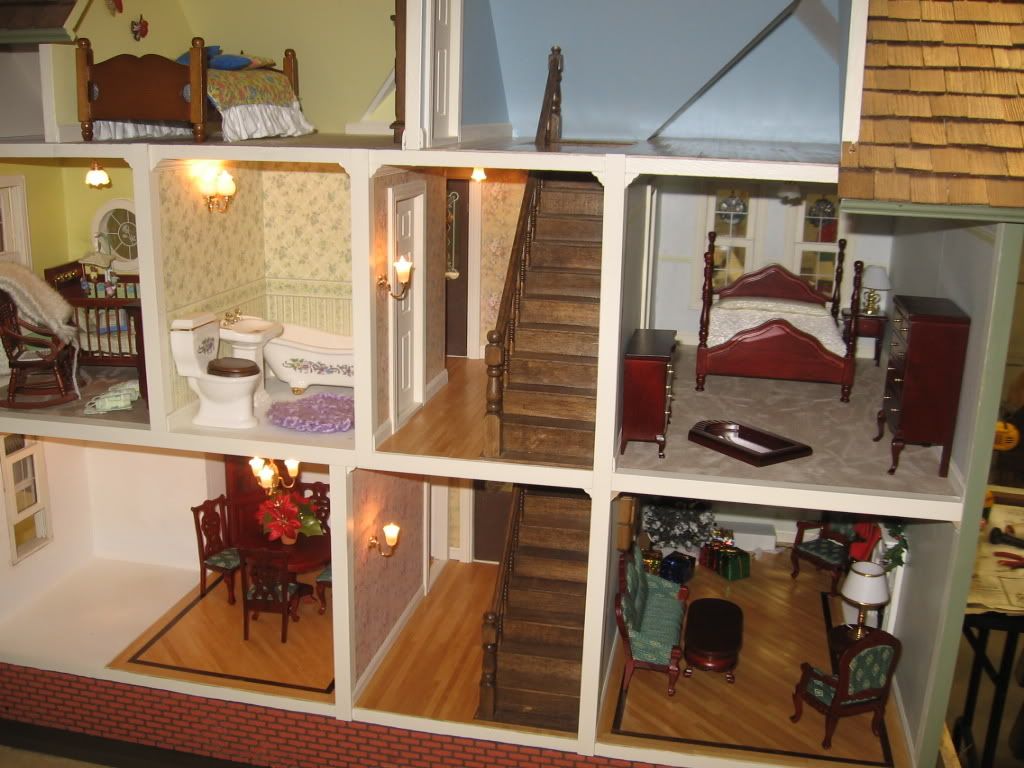
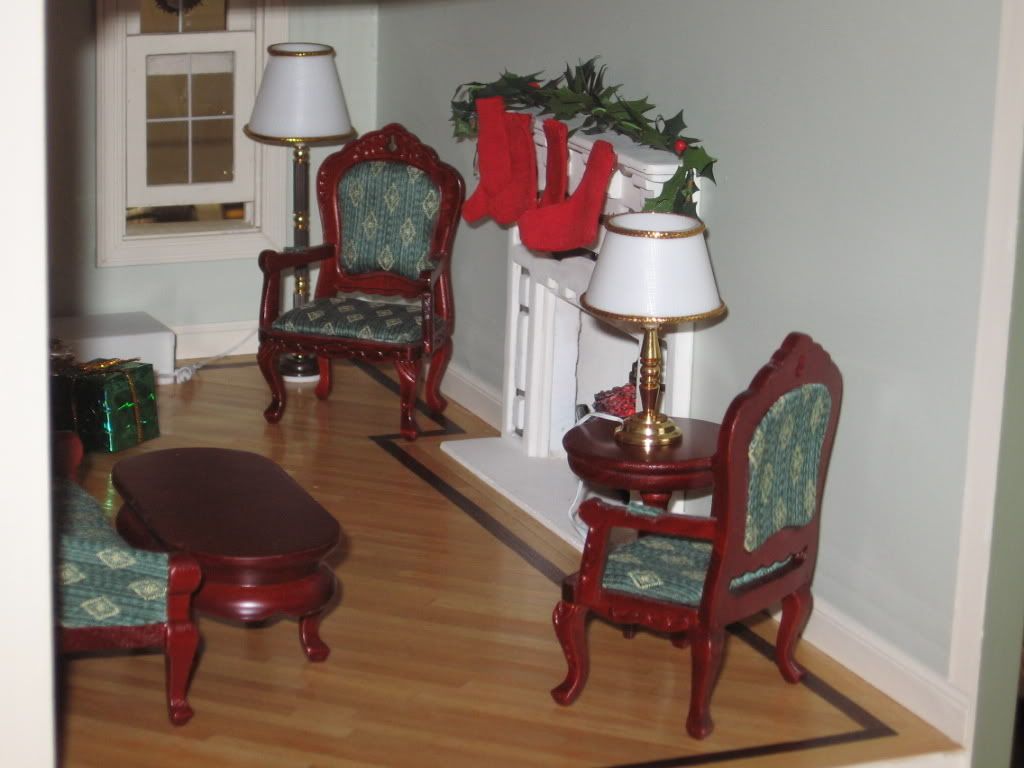
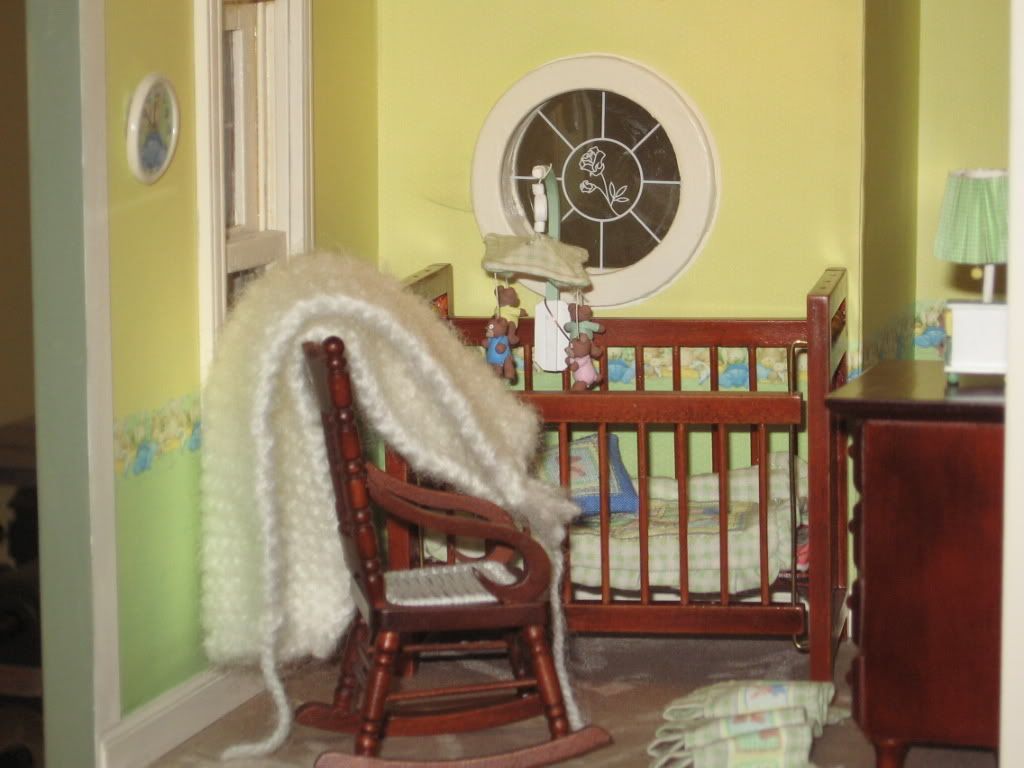
Most of the furniture is purchased. This is 1 ft. to 1 inch scale. The mobile hanging on the crib was made by daughter Tammy. She also did all the beautiful floors one piece of wood at a time.
The fireplace has an insert that glow. Access to build pictures.
Note the control panel upper left. There are at least (4) pages, and other files. Click on the underlined phrase to access. Click on thumbnails to enlarge. You can do a slideshow from the control panel.
Mike CT ![]()
The Doll house kit is an interesting story. Purchased for my first Grand daughter (Felicity) when she was (2). Remained boxed for (2) years when it returned to my shop/garage, where assembly began. It didn't take long before all the input from everyone changed a simple assembly to constant remodels. Stairs were replaced, an additional stair to the third story was added, an expensive electrical up grade with very nice lights and receptacles was installed. A detailed trim package was added. Yes, you can buy pre-hung doll house doors. I was told recently I had not installed the door knobs, Last remodel, some participants said I forgot to add a door between the third story rooms. Tear it apart one more time, carefully cut the door opening and re-assemble again. One more door. ![]() Paint colors were adjust and then flooring and interior decorating began. Yet to be done, is the kitchen. My daughter the architectural engineer has done a great job of interior decorating.
Paint colors were adjust and then flooring and interior decorating began. Yet to be done, is the kitchen. My daughter the architectural engineer has done a great job of interior decorating.
Felicity is (11).
Loaded the Doll house in my truck along with a few boxes of un-installed accessories and delivered it to Philadelphia about a month ago. ![]()
![]()
![]() Great build experience, with many different fillers, paints and adhesives. Noted fastener that got a lot of use was Atlas track screws.
Great build experience, with many different fillers, paints and adhesives. Noted fastener that got a lot of use was Atlas track screws.
Most of the furniture is purchased. This is 1 ft. to 1 inch scale. The mobile hanging on the crib was made by daughter Tammy. She also did all the beautiful floors one piece of wood at a time.
The fireplace has an insert that glow.Access to build pictures.
Note the control panel upper left. There are at least (4) pages, and other files. Click on the underlined phrase to access. Click on thumbnails to enlarge. You can do a slideshow from the control panel.
Mike CT ![]()
That is really cool. I'm not into dollhouses, but it is easy to see how one could get addicted. I love the standing lamp, by the way.
I use liquid nails and the shtuff sticks to anything
I've been using Liquid Nails for years now - holds well and lasts.
jackson
Access to this requires an OGR Forum Supporting Membership
