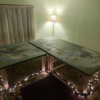
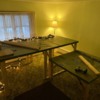
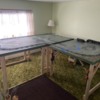
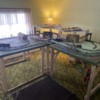
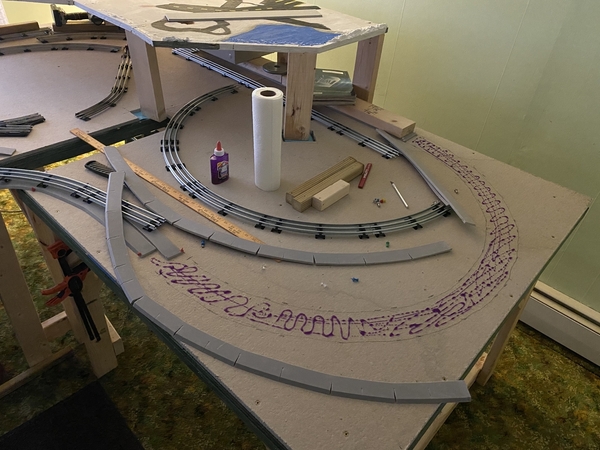
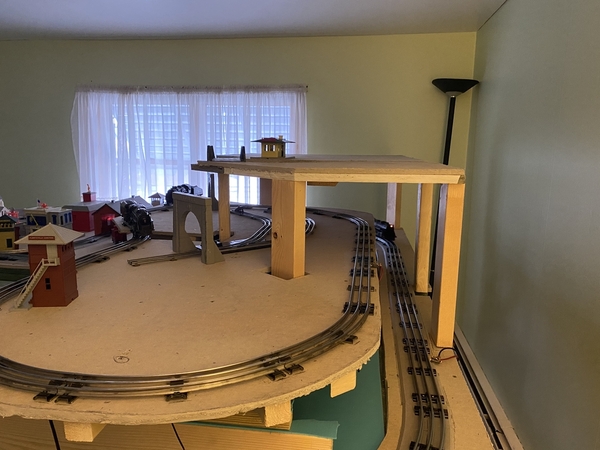
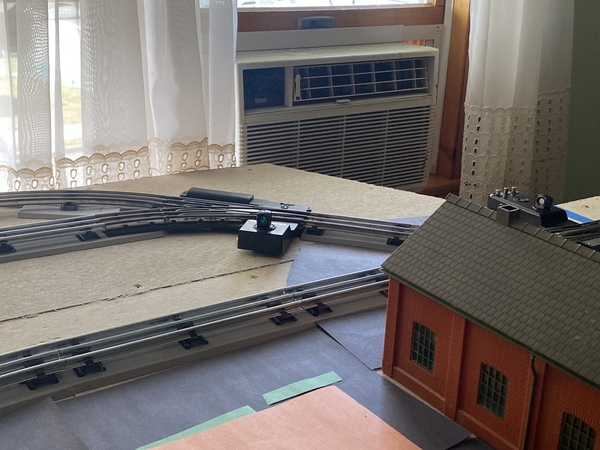
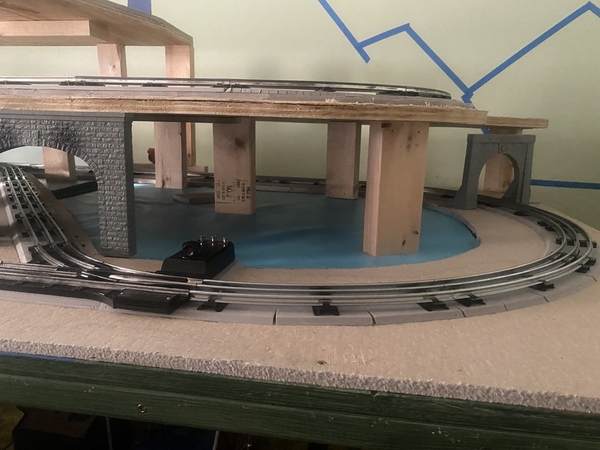
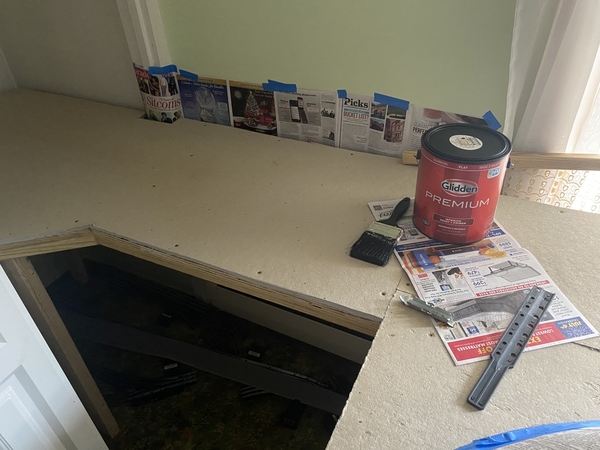
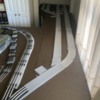
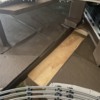
Hello everyone! Great forum and I’m thrilled to be here! Figured I’d make a thread with the progress of my layout remodel project.

Since 2008 I’ve had an 8x8 L shaped layout set up in a spare bedroom. Has sentimental value since it was the last thing my late father and I worked on together before his passing from cancer.  I’ve been into trains ever since I could crawl, all starting with Thomas The Tank Engine little diecast toys (which are stashed in the attic) but every Christmas Dad’s Lionel 2035 would get taken out of the closet and set up on a simple 4x8 plywood platform underneath the Christmas tree. But in 2007 the train was handed down to me as a little side graduation present, yet it’s sentimental value to me is beyond measurable. The next year the train bug bit me considering we built the layout. It consisted of 3 separate lines, 1 of which was elevated for the snow scene on the mountain. Buildings were mainly Dept. 56 buildings, and landscape was just paint, several trees, and some white ballast (I still have no idea why I chose white). Lots of streetlights but a few went out. I also use matchbox vehicles considering I already had a bunch and with the limited space, I can get more scenery and stuff happening IMO. It’s far from any phenomenal layouts like I’ve seen, but it’s what fits together with my limited space and my layout desires.

Now onto the fun part….

Reasons for demolition/remodel:

-I’ve wanted to redo my scenery for quite some time now but just haven’t pulled the trigger on the project. Learning so many tricks and money friendly innovative ideas. I’m entering the world of foam and chicken grit!

-I’m also learning that we constructed the benchwork too low for my liking at 24” so I’m raising it to 36” (any higher and I’m blocking a window I’d prefer not to).

-With a few streetlights out, there’s no better time then now to upgrade my lights to LED. Plus my wiring job was horrendous so it’s being completely redone straight from the outlet. I’ll be adding dimmer switches, using terminal blocks, making separate power sections, all new wire, etc. FUN FUN FUN!


I’m sticking with the same benchwork layout except I’m separating the one 4’x4’ section about 5 inches to make a dropped down river. I am though highly considering removing a closet door and extending the layout into the closet as a yard or possibly a coal industry. It’s a closet filled with clothes I haven’t used in nearly 8 years so instead of losing the space in front of the closet door, I’ll just use it all for the layout! hahaha.

Lots of things still under consideration. Figured I’d make a thread that I’ll keep updated if anyone would like to follow. I know a few others are currently redoing their layouts or building one for their first time so sharing methods is ideal. Advice is always appreciated!

Attachments

Images (6)
  • 5312DAF6-4400-4DE1-9A49-D76FE27050B8
  • 8F5A040B-0D88-4363-AECB-B81627121B6A
  • 50CB7C2E-F083-42F1-A277-65EE0B59285A
  • F7B569E2-BF31-4CAF-A5A8-C470094B313D
  • 4B328E86-C821-4157-B798-69319D67ABCF
  • 7E2BF13A-247A-4479-B1B8-CEE331420CC8
Last edited by Richizzle07
Original Post

Replies sorted oldest to newest

Nothing wrong with white ballast:  some RRs had access to nearly pure white limestone, at least in some regions, and their rights of way looked very white.  Back when such things mattered to them, they made sure the edges were crisp and straight and very eye-pleasing.  We don't see that kind of thing today, really, but many roads took great pride in their mainlines near cities, especially, once upon a time.

@RSJB18 posted:

Hi Rich- welcome to the forum. Looks like you are off to a roaring start.

Please keep us posted as you progress.

What's the new plan going to look like? Are you staying post-war theme or going with more modern stuff? Lot's of fun toys out there now

Bob

Thanks Bob! I’m probably sticking with the same track layout, just adding on where I decided the closest would be more useful this way (there’s another closet on the other corner of the room but let’s just justify one at a time 😂). Most likely sticking with postwar but who knows, things may always change. Need to stick with o31 curves though. As for scenery era, that’s still also debatable. Going to paint a couple plasticville switch towers in PRR colors. My matchbox vehicles on the old layout were a wide range in years so that’s not helping narrow it down. I am trying to stick with all warm led lighting though.

Updates will definitely be provided for everyone throughout this journey and as always, any advice will be greatly appreciated!

MOVING ON UP!

Day 2 Update #2

I didn’t get as far as planned but had a great day. Temperature was 54 here in NEPA so I decided to take a little ride to the local train shop. Didn’t leave with any goodie’s this time.

I did get the rest of the ballast removed and cleaned up, moved all the sections around the room and cleaned the floor, tipped over 2 of the sections and removed the old 24” legs and added the new 36” legs. Ran out of wood for the third section. I did have enough supplies but my neighbor had a roof leak so I lent him two 2x4’s to help with holding his tarp down.5EBC6BDA-48FD-4C5D-B138-0933D9DCB8B1

The height difference sure seems higher than  a foot but it’s perfect! I’m glad I decided to raise the benchwork and my back is even more thrilled! (Photo shows the new height compared to the old) Not to mention getting underneath is much easier now also. I’ll be adding some new cross support bracing too.

off for more supplies tomorrow

Attachments

Images (1)
  • 5EBC6BDA-48FD-4C5D-B138-0933D9DCB8B1
Last edited by Richizzle07

Update #3

Spent a portion of Saturday getting supplies and of course had to venture out to the Anthracite Hi-Railers display. Gathered some more scenery idea’s and talked with a member about landscaping tips and buildings.

Finally got back to the layout on Sunday. Finished raising the benchwork, secured the sections together, split 2 of the sections apart 4 1/4” for my waterway to run below the tracks. Pulled out the outer loop of track, temporarily secured it down and pulled out locomotive 2035 for some test trials. Everything went great! Only running off 1 lock on for now, but will be adding more once the foam roadbed I ordered last night is delivered.

Hitting pause for the moment as I’m starting to debate different track plans. I was trying to incorporate my previous mountain in but now I’m considering adding some more track action to the layout. Being a very undecisive person doesn’t help in these situations.

Attachments

Images (3)
  • 955E4C0A-4423-47FF-952B-5DD1B1C3376E
  • 5B620556-9826-4FD0-9CC3-ED735D4F7CD4
  • 80B944A9-1739-4BC5-A9AD-33162DC9CF25
Videos (1)
trim.384FA684-CEBF-49A6-BF29-85E195A085E4
Last edited by Richizzle07

Update #4

Didn’t really accomplish much today. Still undecided on track plans so I’ll probably just pull out a pile of track tomorrow and just see where it takes me. I did notice a slight wobble in the table when I bumped it with some force. I may have gone overboard adding all the leg braces but it’s not budging now! I kept the short leg braces from the old height and just added a few longer ones. I’d rather some overkill for extra peace of mind.

Attachments

Images (2)
  • E0200097-1C31-47ED-B25B-BCCF62A76DFE
  • F659CB35-F74B-45B0-8874-074EA1CAC4FB

Update #5

Well after a few days of both using SCARM and just throwing together some junk track pieces and trying to find a track design I liked, I believe I found one. I’m losing some space for buildings but it’s a good trade up for adding more track action and a second engine house.  I’ve also decided to add some height to the inside line. I think this will look great with a mixture of rock cuts and retaining walls between the 2 lines. Another upgrade is that the former mountain was 7 1/2” high, I raised it to 12” this time.

I’ve taken some photos of the trash track on the foam(please note it’s not connected and I’m missing pieces and also misusing curves for straights just for reference). I’ve also taken a photo of the SCARM design. Ran out of free track on SCARM so it’s not complete on the sidings. The green line is tubular track with the black ties (train will go clockwise). The blue line is tubular track with brown ties(train will go counter clockwise). It doesn’t line up completely on the program, but does for me on the layout. I’m utilizing the inside of the mountain for a small yard for the blue line. A third line will go on top of the mountain eventually. The side line made of a darker green and red will be added in the near future once more of the main layout is completed.

The SCARM design has O42 curves and 031 switches (green line) compared to the o31 curves and o22 switches in the photos. I’m split on which to go with.

What’s everyone’s thoughts? Suggestion’s?

Attachments

Images (5)
  • 3904DD56-F2C8-4D2F-A33B-15DC1F119907
  • 38AD7781-0FE0-4EF8-B8D5-1149CB61B80D
  • B7968981-F491-4087-82D7-25C443C68DC1
  • 2754B3A7-31F0-477C-AFD3-53C4C2B4A676
  • 2FF62EF2-607F-497A-B4A7-D7E06383C33C
Last edited by Richizzle07

I put together a SCARM this morning with the o31 curves and o22 switches for comparison (once again it doesn’t line up on the program, but I make it work).

My question is, do the o42 curves really have many advantages over the o31 curves? I’ll be running mostly smaller engines and cars. The o31 curves provides more space for buildings on the inside of the layout which is really important since town real estate is disappearing fast to all the railroad rights!

Attachments

Images (1)
  • 46707EE2-0328-4915-8595-F41377E554E3

Update #6

I haven’t updated in a month for two reasons: 1 is I wasn’t completely certain on a few aspects of what I wanted and 2 is the shipping delays.

With that said, I have made some good progress and finally had to make some of those uncertain decisions. First off, I went out and picked up 2 sheets of homasote to place on top of the plywood to help with the sound deadening. I decided to screw it down so it’s able to be removed if needed.

8636682E-CCBF-4CEC-811F-96F43637D27A

Next up I have ordered, received, and glued down the foam roadbed I purchased off eBay from Sparks00033. This item was highly recommended in a few other posts on the forum so I did the free sample first. I was sold! I’m very satisfied with the product and the price. Used the purple Elmer’s glue that resulted in me eating a PB&J sandwich afterwards lol.

EE190752-52F9-482A-9765-BB2DA655B1A178800AAB-C496-4EED-9CBE-DF5EB48DEB61C4F442E0-2B3C-4382-B657-260CC5049C1247D39B94-92D0-45B1-A169-1E95FA1A73EA
E8AC2127-A8B9-46C1-B454-FC54B479F7CF

I’ve also made a decision on my curve radius and decided to step it up to the 042 rather then the 031 I previously had. After seeing the prices for track from Menards, I had to grab a case of 042 curves plus a case of straights (not needing them yet). This will help out “down the track” when I start with the side yard and industries I’ll be adding on.

EEA56318-B289-410F-BFC8-2C9851B106C2

Instead of using the Lionel lock ons, I’ve decided to separate the underside of the rails and inserted spade connectors for the feeder wires. This is another trick I picked up off this forum. Just received the Wago electrical connectors yesterday for connecting the 7 feeders to the buss wire I’ll be running under the outside loop.

F7B6679D-5635-4BBF-957E-3FC1F99C2C2CE2403136-4C5B-4E69-B055-5236296CE64B

That’s all the progress for now.

Attachments

Images (10)
  • 8636682E-CCBF-4CEC-811F-96F43637D27A
  • 0BF02238-9988-453E-84FD-CAB8EF8AEE5E
  • EE190752-52F9-482A-9765-BB2DA655B1A1
  • 78800AAB-C496-4EED-9CBE-DF5EB48DEB61
  • C4F442E0-2B3C-4382-B657-260CC5049C12
  • 47D39B94-92D0-45B1-A169-1E95FA1A73EA
  • EEA56318-B289-410F-BFC8-2C9851B106C2
  • E8AC2127-A8B9-46C1-B454-FC54B479F7CF
  • F7B6679D-5635-4BBF-957E-3FC1F99C2C2C
  • E2403136-4C5B-4E69-B055-5236296CE64B
Last edited by Richizzle07

GAD!  It took me a lot longer to get where I am, you're doing in days what it took me months!

I’m determined to get the trains running again at least on one of the 3 lines. Once I hit that mark, I’ll slow down especially on the scenery. The nice weather will also have the train project slowing for a few months. Then again, all these train shows might keep me in overdrive. Attended my first show last Sunday and had a blast! Didn’t take any money as I wanted to just get a feel of it. Sure regret that logic…

Well, that's what stopped me as well.   I can run trains, but I'd like to start improving the look as well.


Wow John that’s an impressive layout you have! I don’t blame you for running trains and holding off on the scenery, not to mention all those choices in trains too. Your yard is practically the size of my layout! You probably have some great ideas brewing up while running those trains.

@Richizzle07.

I put up my 50s/60s Lionel stuff in the mid 80s when my kids were little.  I custom built platforms for that and put it in my garage and it had about 96 square feet.  That only lasted 5-6 years and its been packed away since then.  After being retired for 3 years, out of sheer boredom I brought them out in November, and like you installed it in a spare bedroom, but on a carpeted floor.  It didn't matter that the carpet got dirty since we're replacing it in a month.  I'm about to tear it down for the carpet install, and will be putting together a table layout after it's done.  My new layout will be perhaps a little bigger than yours, and I have enough 2x4s that I used for the mid 80s layout.  I live north of Houston, there are no basements and I need to keep my garage space open for the cars in case of a hail storm (couple times a year).

So some questions and comments;

  1. I looked at your pics, and couldn't find where the transformers and perhaps manual controls were located.  Are they just on a side table that wasn't in the pics?  Are you going to do anything like make a sliding platform under the table and have that kind of stuff on it?
  2. Based on what you said, I'm guessing you didn't look into any custom benchwork, right?  If you did, perhaps you could send me an email (address in OGR profile) and I'd like to ask you some more questions.
  3. The O31 vs O42 is a persistent issue with me as well. For my current floor layout I went with O31.  I was in the market for a new diesel and was limited beyond my comfort level for locos that worked with O31.  I bought one and I'm happy with what I bought, but I think I'll go to O42 for the platform layout in order to give me some flexibility for my next diesel purchase.
  4. I went with fastrack instead of tubular.  The 145C and 153C connections drive me nuts.  I know you can use insulated track sections but that is yet another thing to do.  I'm a firm believer in the adage 'buy, don't build', at least to a point.
  5. That being said, tubular will have a place on my layout for my #60 trolley, #50 gang car, tie ejector, and fire car.  The motorized units seem to interest my grandkid more than the trains, so I will be putting a run for them.

Good luck, and keep us posted.

Looking good Rich!  yea one of the first things I did after getting the trackplan figured out on my layout was get a loop on there to have something going around while working on something else. its motivational to be able to at least have some fun running while building at the same time.  it will also allow you to take your time and make it nice and not rush to run trains. good stuff......

@Richizzle07 posted:

Wow John that’s an impressive layout you have! I don’t blame you for running trains and holding off on the scenery, not to mention all those choices in trains too. Your yard is practically the size of my layout! You probably have some great ideas brewing up while running those trains.

It's translating those "great ideas" into action that's my downfall!

We have a walk-out basement, that's where my layout is.  So maybe it should be called a "half" basement.   The door to the outside is on the right, and there's a window next to the end of the layout.

Here's my original plan when we moved in, this is when I was figuring out where everything went.  I pretty much adhered to the plan.  Obviously, the big open space is where the layout is.

Basement Plan

This is a shot from the workshop end (left in the layout above), you can see the window and the door to the outside.  The two blue posts in the layout are the columns you see in the foreground.

Layout View From Workshop

Attachments

Images (2)
  • Basement Plan
  • Layout View From Workshop

I was in Houston for a week on business many years ago in August.  The weather was stinkin' hot with humidity about 110%.  It's also the only place I've been up close and personal with a real tornado!  I was north of Houston and stopped to look when I saw the tornado off the road about half a mile.  It went close by a house and destroyed an adjacent shed, then I realized it was coming right at us on the road!  We jumped back in the car and left a warp speed, not an experience I care to repeat!

No way I get my wife to leave the area, so we're here for the duration.

Last edited by gunrunnerjohn

I know from experience, it’s tough resisting running the trains, especially when you have an awesome running railroad, like John’s. Once I got the track down & trains running, that’s all I wanted to do. I threw down some buildings and just dreamed about what’s next. The most important thing is getting the railroad running flawlessly. Everything else are just details.

John, I promise, it’s coming. I hope to get the final kinks out of your background this weekend. I know from experience, it’s tough resisting running the trains, especially when you have an awesome running railroad.6C4E2F7D-66E2-44B2-AF26-435AF675EF4A

Attachments

Images (1)
  • 6C4E2F7D-66E2-44B2-AF26-435AF675EF4A

@texgeekboy going from a floor to a table layout will be a big difference! I’m already thrilled with raising mine up a foot. My transformers and switches were all placed under the backside of the previous setup. I’m thinking of putting them off to the right side this time. A slide out shelf is a really great idea! I’m already squeezing every inch out of the room so this would really help. As for my benchwork, it’s 3 separate pieces of 4x4 plywood with 2x4 legs and 1 1/2x1 1/2 bracing added that my late father built with me many years ago. We didn’t use any blueprints or anything when building it. I recently loaded it up with more leg braces after raising the height so it may have some overkill but it’s not moving now. Haha   With that said, there’s benchwork methods out there that would use much less wood. Choosing the 042 for future purchase flexibility is smart too. Even if you could pull off the 054 I’d suggest it. My limited space is preventing me from doing that. A trolley though might be something I’m going to consider further in the future.

@Richizzle07 posted:

A trolley though might be something I’m going to consider further in the future.

Funny thing, Tom and I are working on a small subway addition that will be under my 10-track freight yard.  The subway platform will be in the center on the straight stretch, the loops of track will be under the yard.  I'll be running the MTH subway with automatic station stops programmed to stop in the station each time through.

Attachments

Images (1)
  • mceclip0
Last edited by gunrunnerjohn

Update #7

Nearly another month since my last update so there’s a few things to add including more changes due to my uncertainty! I’m finding that as I go along, there’s little adjustments and improvements being added to the plans.

First up is I drilled out holes for the feeder wires to drop down. Then I laid all the track and used zip ties to secure it down. This is another trick I picked up off this forum for helping with reducing the sound transmitted into the plywood.

8F163288-0BCD-4783-89B3-7444A8BE14B2CF03B40F-F95D-4EE3-B2DF-BBCB1C88725B

Next up, I cut out the homasote for the inner loop and decided to put down underlayment on top of the plywood that will be under the mountain. This will help with the sound vibrations within the mountain. I added some supports for the inner loop to be elevated, adding more dimension to the layout, and also cut pieces of the underlayment and glued them onto of the supports. I’m hoping in theory that this will help with deadening the sound vibrations traveling downward through the supports. Overkill? Nearly every aspect so far has been overkill so why stop now. Hahaha

64403AE0-703F-4909-943A-7EA64550164835446679-0738-4FAE-A300-AA636E2EF5ED841BCCFC-2CC4-4CA7-AE59-A2419F94EB5E

Now here is where the uncertainty kicks in and changes begin. I just felt that the inner loop wasn’t elevated enough, plus all that wasted space below it now. I also realized that I can use my 031 track now on the inner loop since I upgraded the outside loop to Menards and to 042. It’s going to be a cliffhanger, but by doing this, it’s adding a small amount of space for more buildings which every little bit matters. With these changes, I added more height to the inner loop supports and tested out the 031.
F6DB84B6-15C2-4085-A2B0-7DBC9E818B69039FC672-30B1-4269-8340-C93C5F5C13D6E7248149-80D2-43D0-9908-04A919831C23

Since the inner loop has had an elevation change, the top mountain is going to need adjustments. The original layout was 7 1/2 inches high, then it was 12 inches, and now I raised it to 17 inches. Homasote was also added to the top mountain with a larger stream cut out.

F2D2686A-361F-4B9F-9815-7FD4CEDBDC5DBD6036D7-D8FA-46F2-9A13-162DCF2C3E3960654A36-D5E1-4E59-A5C4-31C9EA0CA0613BE2A6A4-31EA-423C-80D4-B33E8FA9C07A

Installation of the inner loop roadbed was the next item checked off. Once again, this foam roadbed is really easy to use. I cut more slices for the curves this time and I’m really pleased with the outcome. Zip ties and 4 feeder wires were also added during this stage. 8EA48168-71DE-4018-9AC3-40990560314B42248CA7-54B4-4BC7-A53D-009607E8AED1

As of now I have 2 separate lines up and running. Mountain line won’t be ready anytime soon. Need to finish up the bottom level “closet extension” next. More updates to come!

Attachments

Images (15)
  • 8F163288-0BCD-4783-89B3-7444A8BE14B2
  • CF03B40F-F95D-4EE3-B2DF-BBCB1C88725B
  • 64403AE0-703F-4909-943A-7EA645501648
  • 35446679-0738-4FAE-A300-AA636E2EF5ED
  • 841BCCFC-2CC4-4CA7-AE59-A2419F94EB5E
  • F6DB84B6-15C2-4085-A2B0-7DBC9E818B69
  • 039FC672-30B1-4269-8340-C93C5F5C13D6
  • E7248149-80D2-43D0-9908-04A919831C23
  • F2D2686A-361F-4B9F-9815-7FD4CEDBDC5D
  • BD6036D7-D8FA-46F2-9A13-162DCF2C3E39
  • 60654A36-D5E1-4E59-A5C4-31C9EA0CA061
  • 3BE2A6A4-31EA-423C-80D4-B33E8FA9C07A
  • 79B9138A-683F-425B-B819-55476EF1F9E1
  • 8EA48168-71DE-4018-9AC3-40990560314B
  • 42248CA7-54B4-4BC7-A53D-009607E8AED1
Last edited by Richizzle07

Update #8

Yes, two updates in one day!
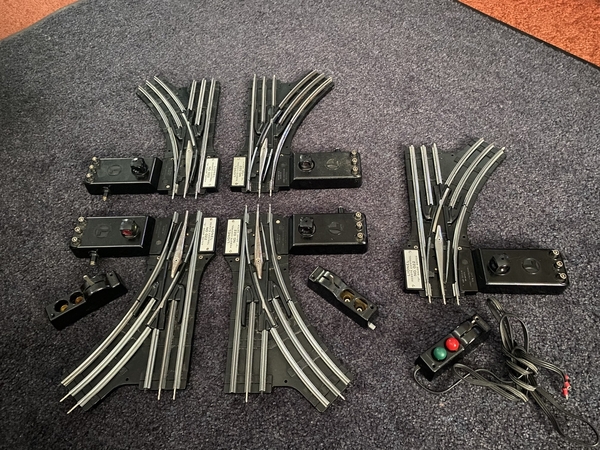
Picked up six 022 switches and four 031 switches last week. Spent a good portion of the day taking scotchbrite pads to the tracks and cleaning them up, air hosed them off, and whipped them down with some CRC electrical cleaner. They really weren’t bad at all and they work better than the one 022 I already have. Well, all but one of the 022R switches which isn’t powering up at all. Just need to open it up and check it out. Ideas on what to check for anyone??

Also will need some LED bulbs, 4 light housing covers (probably just 2 though since others will be in an underground yard), and I’ll need six controllers unless I opted out and do my own switch board. I do like the Lionel controllers with the lights though but they need the caps as covers. I don’t like the controllers with just bulbs (yes I’m picky). The switches came with three controllers I can rebuild so we will see what I come across at York. The one 031 switch is missing the short straight extension too but that doesn’t matter to me. I’ll have to grab some pins and insulator pins at York also. Less then 3 weeks away! It’ll be my first York!!!6CF39FD1-6D71-488E-8214-512FCE6DD061A0F01EB9-5050-451F-B32E-45A7D6E6FA4A

Attachments

Images (2)
  • 6CF39FD1-6D71-488E-8214-512FCE6DD061
  • A0F01EB9-5050-451F-B32E-45A7D6E6FA4A
Last edited by Richizzle07

YORK PURCHASE'S UPDATE!

I had a blast for my first York ever! My mom decided to tag along for the traincation so it added to our bonding over trains which was extra pleasant. Talk about a bit overwhelming at first, but we eased into it just fine. The wonderful people at registration helped us with the guest sign ins and it took only minutes!

Day one (Thursday) consisted of me gathering a bunch of building, multiple water towers, and so much more. I had someone bump into me resulting in minor damage to a nicely weathered Lionel water tower but that's an easy fix. It was probably my fault though due to my sheer amazement of the entire event, I was still slightly overwhelmed. We made it to all the halls except for Blue Hall on day one. I planned on my first York to be more of a learning experience which resulted in me running out of money on day one because I wasn't expecting to luck out so much on some excellent deals. However, this did result in me knocking out several items on my list.

My second day at York was even bigger and better! Day two (Friday) began with me quickly powerwalking back to several halls that I wrote down items I was interested in. Once again I gathered up even more buildings, my first ever passenger set, a Hershey freight train set, a beautiful Pennsylvania NW2 switcher, a gorgeous Pennsylvania Beep GP Diesel, and many misc. parts. It was more packed Friday compared to Thursday but still didn't seem very clustered in the isles which made slowing the pace better and talking with sellers more enjoyable.

All in all, I had a great first York experience. The sellers and members in general were all very friendly. I knocked out a large portion of my list and another list I wasn't even aware I needed. HAHAHA! Many sellers would see that I was a guest and the friendly conversations would pursue. I was even holding a fragile item I purchased two isles earlier and a separate seller called me over and pulled out bubble wrap and double bagged it for me. Just such an amazing atmosphere with wonderful people and some extremely low prices! I went down for Thursday and Friday but should have taken advantage of the final day on Saturday too. As others have said, York can be a bit overwhelming at first. Once I got the grove after doing two isles, everything started to flow smoothly, including my money! I'm proud to say I'll be joining the TCA without hesitation! I already could hardly wait for October!

THANK YOU to everyone in the EDTCA, volunteers, vendors, sellers, members, etc. that made all of this possible!

Here are some photos of my York haul:

Day 1 purchase’s:

9B1ADD0D-2541-4A27-8011-C9B3DB6FAD95D8644154-6476-43B5-9595-9F2086C88AE1444F68D0-865B-4C76-B114-769CE3BCE7C59C39F0F6-2CAB-469C-8C7F-2BD1F664B66F574E340A-CE62-45FE-98A2-3BABB9F012C60BEA0F88-F9FF-4F7A-A353-0AB25E8CF62A9678FD94-8ED2-4248-A596-91B029CABDBECFFAD160-C340-4DB0-A726-789B88A8A5A0DA787217-FFEB-4095-AF4D-416B22B120F3
2D211F55-9E07-4603-8BCF-FC77A0182293


Day 2 purchase’s:

99B746C8-6310-4818-9CE3-002F9B557F43F0E87247-65CC-45A2-941C-EB35E90716423EABF3E9-EC62-43EA-AB06-DB6774E91EC53360AA39-4F19-4759-BC53-A9EAB0FC365F6BF96697-C8A3-4CE2-88E4-E612C11D96AE13FE2256-2450-48EB-A040-C4A4271761986D9060DB-31DA-4A38-84FE-06D6806621DBC2DE1FA9-41F5-4513-A1F7-677E51D0BAF8
923DF98F-DAEA-472A-86EC-6366D793AE74


The entire York haul!0992E39C-96C8-407C-9ED2-B3D19070992A

Attachments

Images (20)
  • 9B1ADD0D-2541-4A27-8011-C9B3DB6FAD95
  • D8644154-6476-43B5-9595-9F2086C88AE1
  • 444F68D0-865B-4C76-B114-769CE3BCE7C5
  • 9C39F0F6-2CAB-469C-8C7F-2BD1F664B66F
  • 574E340A-CE62-45FE-98A2-3BABB9F012C6
  • 0BEA0F88-F9FF-4F7A-A353-0AB25E8CF62A
  • 9678FD94-8ED2-4248-A596-91B029CABDBE
  • CFFAD160-C340-4DB0-A726-789B88A8A5A0
  • DA787217-FFEB-4095-AF4D-416B22B120F3
  • 2D211F55-9E07-4603-8BCF-FC77A0182293
  • 99B746C8-6310-4818-9CE3-002F9B557F43
  • F0E87247-65CC-45A2-941C-EB35E9071642
  • 3EABF3E9-EC62-43EA-AB06-DB6774E91EC5
  • 3360AA39-4F19-4759-BC53-A9EAB0FC365F
  • 6BF96697-C8A3-4CE2-88E4-E612C11D96AE
  • 13FE2256-2450-48EB-A040-C4A427176198
  • 6D9060DB-31DA-4A38-84FE-06D6806621DB
  • C2DE1FA9-41F5-4513-A1F7-677E51D0BAF8
  • 923DF98F-DAEA-472A-86EC-6366D793AE74
  • 0992E39C-96C8-407C-9ED2-B3D19070992A
Last edited by Richizzle07

Hi Rich, congrats on moving forward on redoing your layout!  Really like your MPC purchases from York!! It looks like you have relatively low-pile carpet so you may be able to add some shelve on wheels that you can roll away from the layout.

in the picture below, the shelves on the left are hinged to the left leg and are on two wheels that allow for the shelves to be rolled away from the layout to provide access to the storage under the layout. The right side has some shelves and some desk drawers, there is also a slide out tabletop and a light.  That unit is not attached to the layout, so it can be easily moved if needed.   The Lionel boxes all stacked up look nice as well! I the note cards under each car on the shelf are inventory cards.  I have spent tons of hours doing an inventory of my equipment, including the boxes.  I also took pictures of each item.  Its a massive excel worksheet, and even includes the prices I paid.  Over the years, I did get rid of the crappy boxes,  but I did keep the flap with the name and product number. 

20220506_203936

The shelve have o gauge track which are wired to allow the passenger cars to be lighted.  I used project boards for the backing. And yes, that is a vintage Topps baseball card set from 1966 in the background (between two modern sets).   

20220506_204012

The picture below shows the stuff under the layout.  much of it is on wheels (mostly small dollies from Harbor Freight). 

20220506_203958

Below shows the lighted shelves. 

20220506_204502


Keep us posted on your progress! Best, Dave

Attachments

Images (5)
  • 20220506_203936
  • 20220506_203958
  • 20220506_204012
  • 20220506_204501
  • 20220506_204502
@Former Member posted:

It looks like you have relatively low-pile carpet so you may be able to add some shelve on wheels that you can roll away from the layout.

You can also use carpet glides on the bottom of the shelves for any style carpet and be able to move them.

This is my work chair for under the layout, the same technique would work well for shelves you want to move on the carpet.

Attachments

Images (1)
  • mceclip0

NEW PURCHASE UPDATE! (From April)


Just realized I didn’t provide a previous purchase update from the beginning of April.

I’m sure many of you are in the same category as me with those Menards emails luring us in. Well back towards the end of March they sent out an email saying their strip mall was ALMOST GONE and that there was ONLY A FEW LEFT. After seeing this building in person at the Anthracite Hi-Railers modular layout back in January and February, I knew I wanted it since it has 5 businesses squeezed into one which helps with my lack of space. So after waiting about two weeks I finally took the bait and ordered one in April.  I’m definitely pleased that I did and glad that I didn’t let it slip away.
C165F4C6-98C6-4A0F-9D8B-EE25E0FA1195

Attachments

Images (1)
  • C165F4C6-98C6-4A0F-9D8B-EE25E0FA1195
Last edited by Richizzle07

NEW PURCHASE UPDATE!

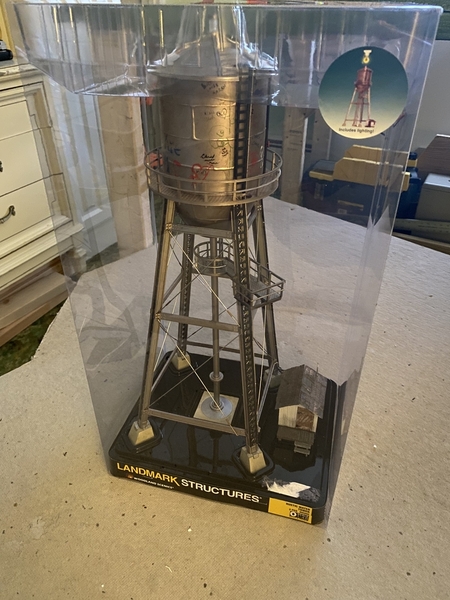
This item has been on my wish list since the first time seeing it on my LHS shelf back in January. The details on it are excellent! Introducing my new Woodland Scenics Rustic Water Tower.

AB08A0EC-FE12-4F50-8548-399E8CEE7756

Yes I know, yet another water tower. The multiple levels on the layout will have them split up. I’m probably even going to add another track side water tank for the top level. Steam engines need water after all.

Attachments

Images (1)
  • AB08A0EC-FE12-4F50-8548-399E8CEE7756

NEW PURCHASE UPDATE!

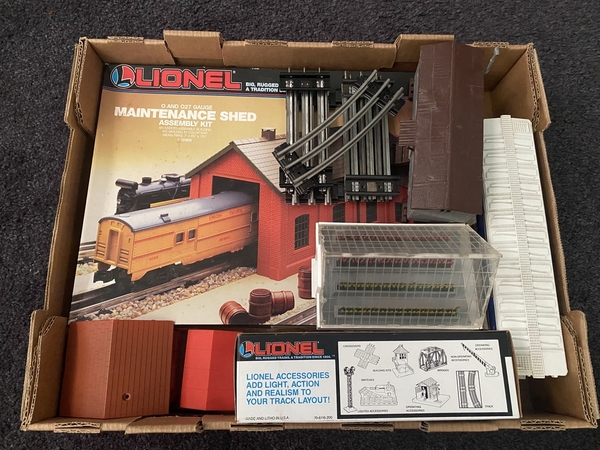
Last week I stopped by Grzyboski’s for my monthly visit ONLY expecting to pick up some short tubular track sections. Needless to say that didn’t go as planned. I found several items to my liking and almost left the store without getting the initial track sections! Ended up leaving with a box of goodie’s and feeling relaxed from some good train therapy.

71DF4CBA-2799-4F42-ACE6-00B0D91A44EF

First up is the Lionel Maintenance Shed. I built  one of these over 20 years ago with my Mother and late Father. I still have it and decided I wanted a second one on my second level of my layout.
8A30AEBA-0775-4668-8EB8-BBDE0A43078E

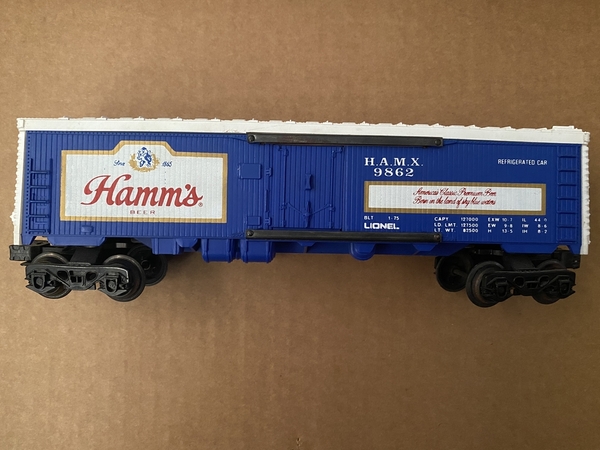
Next up is a boxcar that has some meaning behind it. It’s a Lionel Hamm’s Beer boxcar. This was my late brother’s beer of choice so I simply couldn’t set it down. He would have loved seeing this running behind our late Father’s Lionel 2035.

3D01D050-AF07-48C7-B061-62BD6E0245D8

Following that meaningful find, I set eyes on a Lionel PRR ORE car. Introducing my first ever ORE car.
0B7CDF33-B69C-4110-B490-2D8D77349DE3

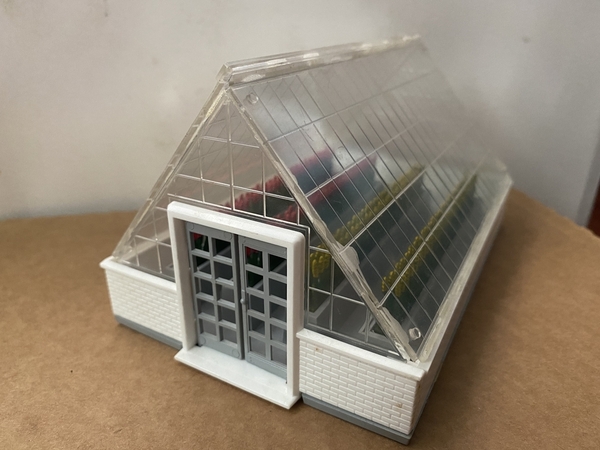
The rest of the items are Plasticville, Mattel, and a few sections of track. The chicken coop and greenhouse will be perfect addition’s to my farm scene. The garage is a 1972 Mattel.
37FCDC5A-2156-4E55-A322-8165617CDA2FE04D64B7-1F30-4B22-8CF0-F324B044543E146DD73F-221C-4629-BBD8-404A71AA9D36067F697F-8538-4C89-B4EF-B58245DC8F89

It seems I’m posting new buys almost weekly so I might calm it down for a bit (until that Menards email comes hahaha).

Attachments

Images (8)
  • 71DF4CBA-2799-4F42-ACE6-00B0D91A44EF
  • 8A30AEBA-0775-4668-8EB8-BBDE0A43078E
  • 3D01D050-AF07-48C7-B061-62BD6E0245D8
  • 0B7CDF33-B69C-4110-B490-2D8D77349DE3
  • 37FCDC5A-2156-4E55-A322-8165617CDA2F
  • E04D64B7-1F30-4B22-8CF0-F324B044543E
  • 146DD73F-221C-4629-BBD8-404A71AA9D36
  • 067F697F-8538-4C89-B4EF-B58245DC8F89

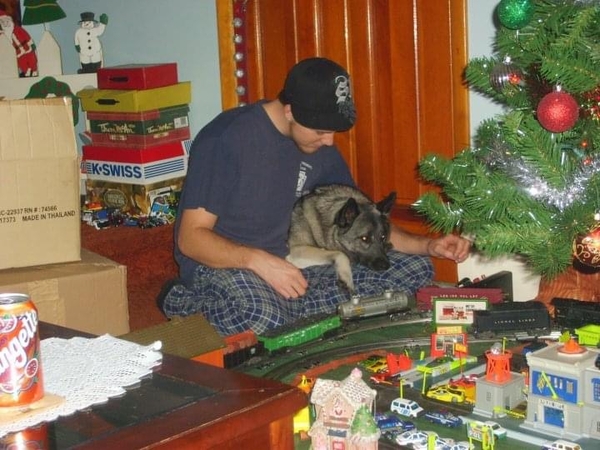
So it’s been awhile since I’ve done any actual work on the layout. Reason being I had to say goodbye to my sweet baby girl Dream back in mid April. She was just a month and a half shy of her 14th birthday. I came across this photo of us running trains under the Christmas tree from 2009. 2CAFB27A-8F75-4FB7-891B-7EBA0B3304A3
She was always right next to me during every activity I did and it’s just been difficult falling back into my regular routine. This can also explain the increase in my recent purchase’s. It’s a mixture of retail therapy along with train therapy.

RIP my beautiful Norwegian Elkhound. SweetDreams Dream.

Attachments

Images (1)
  • 2CAFB27A-8F75-4FB7-891B-7EBA0B3304A3
@Richizzle07 posted:

So it’s been awhile since I’ve done any actual work on the layout. Reason being I had to say goodbye to my sweet baby girl Dream back in mid April. She was just a month and a half shy of her 14th birthday. I came across this photo of us running trains under the Christmas tree from 2009. 2CAFB27A-8F75-4FB7-891B-7EBA0B3304A3
She was always right next to me during every activity I did and it’s just been difficult falling back into my regular routine. This can also explain the increase in my recent purchase’s. It’s a mixture of retail therapy along with train therapy.

RIP my beautiful Norwegian Elkhound. SweetDreams Dream.

Sorry to hear.  She was beautiful.   It seems that pets are as much of our model railroad hobbies as the trains themselves.  Between the kitties and the dogs that hang out with us while we fiddle and build it's amazing.  My guys spend a lot of time with me in the basement while tinkering.

NEW PURCHASE UPDATE!

So much for cutting back on the purchases! I posted the other week saying I was going to calm down on the train purchase’s. Well a flea market and another unexpected trip to Grzyboski’s sure didn’t help with that.

First up are the couple of items I grabbed at Grzyboski’s. Here is a reefer car I felt I needed to add to my collection. It’s another Hamm’s Beer car. This was my late brother’s beer of choice so I now have the 2 of 3 cars that I’m aware of.
7236FD94-4A6F-4BB7-A601-E17D3D7369DB

Here’s the other few items I picked up at the train shop. One is a plasticville house under construction and the other is a Lionel lumber shed. Picked up the remainder of short tubular track sections they had too.
B0990DD2-577C-448F-89B0-BF5BCE757EB58B34B8D8-2AEA-4158-9CD0-F1E54637196D

Up next are my two flea market finds. Three packs of Life Like trees I picked up along with a Hershey Tractor Trailer to add to the large assortment of Hershey items I’ve been gathering. It’s not to scale which works with my layout since I use matchbox vehicles due to the limited space.
8509FE3E-F281-4770-BFE9-A152827B6A554C9FD15E-C68B-4BE1-9A88-B08C9BA27CCF

Attachments

Images (5)
  • 7236FD94-4A6F-4BB7-A601-E17D3D7369DB
  • B0990DD2-577C-448F-89B0-BF5BCE757EB5
  • 8B34B8D8-2AEA-4158-9CD0-F1E54637196D
  • 8509FE3E-F281-4770-BFE9-A152827B6A55
  • 4C9FD15E-C68B-4BE1-9A88-B08C9BA27CCF

NEW PURCHASE UPDATE!

Two purchase updates in a week so I’m clearly not calming down on the purchases. 😂

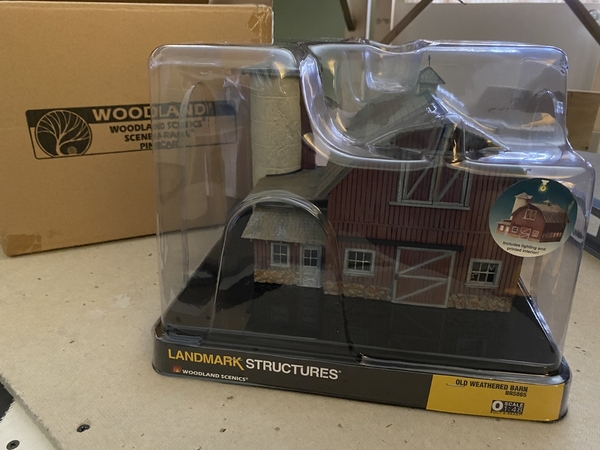
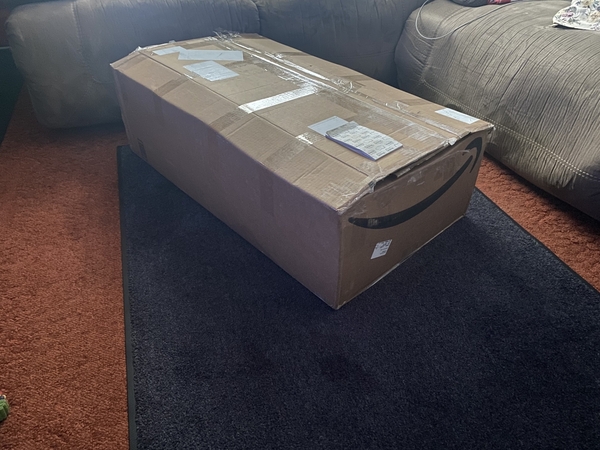
I’ve been wanting this item for my future farm scene for awhile now so I went down to a LHS yesterday and picked up the Woodland Scenics Old Weathered Barn. Amazing details! (I even received the shipping cardboard too! 😂)
6190A887-2196-4F46-960A-F5EEA37983B3

Attachments

Images (1)
  • 6190A887-2196-4F46-960A-F5EEA37983B3
Last edited by Richizzle07

UPDATE #9

So it’s been nearly 3 months since I’ve done my last layout update. As some of you may know from a previous post, I had to say goodbye to my Norwegian Elkhound Dream back in mid April and it’s just been difficult for me to focus and really get much of anything done in the train room since. I guess you can say I turned to “retail therapy” for a bit since I’ve made quite a few purchases over the past 2 1/2 months, including my first ever York trip. I have recently been able to proceed with my layout progress though.

This past week or so I decided to take the second and third level off, quite the opposite of progress! 😂
48D44241-8A48-49DD-9A44-3895A516771B

Yes I know, more uncertainty! After reading a thread about people getting bored of their layouts, I decided to take care of this potential issue before it was too late. I was able to add two crossover tracks in that empty space on my bottom level which will be under the mountain. This will allow for all types of different operations along with directional changes instead of a simple loop. Yes, by doing this I will have to raise the second and third levels just a little bit more. I then glued down more foam roadbed and installed the 022 switches.
6AC81501-2B62-48F6-908A-EA1CA135E5F9

Next up I was able to clear out the closet that wasn’t being used and extended my benchwork into the closet creating my much needed yard extension. I then cut more homasote and screwed it down. I have to say, I’m extremely pleased with doing this extension upgrade.
83DAC68E-B75C-4B71-B25F-CF45CD938B9E6E39CC17-6276-4630-A79C-C947D87BB719


I just placed an order on more foam roadbed from Sparks00033 on eBay so that will be up next along with making my first attempt at cutting some tubular track. More updates to follow.

Attachments

Images (4)
  • 48D44241-8A48-49DD-9A44-3895A516771B
  • 6AC81501-2B62-48F6-908A-EA1CA135E5F9
  • 83DAC68E-B75C-4B71-B25F-CF45CD938B9E
  • 6E39CC17-6276-4630-A79C-C947D87BB719

NEW PURCHASE UPDATE!

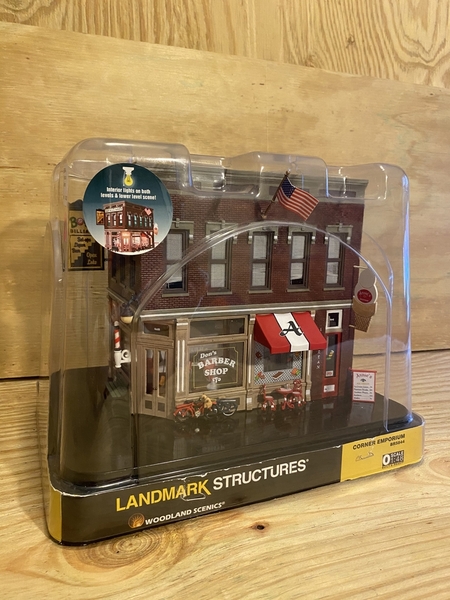
I’m back with more new purchases this week! 😂 I ordered 5 more Woodland Scenics buildings from the website Hobbyspeed.com last week and they came safely packaged.

0B0A0944-BB73-4AF2-B1BA-02C70D9429910F5FC4B5-0B49-4157-94D4-10E9F703F35E


The first two buildings are the Grillin’ & Chillin’ trailer along with the Sunny Days Trailer. I absolutely love the little details on these two pieces! Growing up, I had a summer/weekend trailer at a year round campsite on a farm so I’m going to incorporate these into something similar with my farm scene on the second level.

DD90F748-3C81-4FE4-8067-351265D9F2E53A76370D-8D93-4B3A-B8CF-1AD10C8E01FA


The next two buildings will also go alongside the farm scene. One being the Old Homestead and the other being the Country Store Expansion. Even more amazing details with these two buildings!

F5CA7980-C7A4-4926-BDF1-F8FF945FF45D154F85C9-6F46-4E25-A24A-782D31CEFB93


The fifth and final building I purchased wasn’t even on my list. I believe there was an error with the online price listed, so I added it to the cart and went to checkout. I don’t normally mention the prices of something I obtained, but getting the Records and Recruiting building for $52.84 is worth the brag in my opinion! That’s the N scale price for this item! It’s correctly listed now, which I noticed they fixed within minutes of my order being shipped.

16E88519-88AB-4852-AAE9-39072B4F9C72

Here’s a photo of them all together.

FEEE17B7-2380-4677-B26E-6AD3972ACA12

This leaves just one more Woodland Scenics building on my list and then there’s three smaller Menards buildings I’ve been eyeing up. (I think I’m going to need a second train room 😂🤣)

Attachments

Images (8)
  • 0B0A0944-BB73-4AF2-B1BA-02C70D942991
  • 0F5FC4B5-0B49-4157-94D4-10E9F703F35E
  • DD90F748-3C81-4FE4-8067-351265D9F2E5
  • 3A76370D-8D93-4B3A-B8CF-1AD10C8E01FA
  • F5CA7980-C7A4-4926-BDF1-F8FF945FF45D
  • 154F85C9-6F46-4E25-A24A-782D31CEFB93
  • 16E88519-88AB-4852-AAE9-39072B4F9C72
  • FEEE17B7-2380-4677-B26E-6AD3972ACA12
Last edited by Richizzle07

UPDATE #10

I made my first attempt at cutting tubular track and they come out fairly ok. I was getting angled cuts at first using the dremel but figured out the technique. After doing some more reading up on it, I’m going to get the flex shaft dremel tool to help eliminate the angled cuts.
447298A2-5DB8-4275-AE80-761F8C5C218E

Now that I had my custom fit pieces, I was able to finish the two new crossover sections. I drilled holes and secured the track down with zip ties again. I also added a feeder wire to each section.

BB15A435-BC9B-4AB4-98A0-3B8B4EDD61E2

When I was down York in April, I picked up lamp covers for the switches along with LED bulbs. I still have to order some of the bulbs for the 031 switches. Here’s the 022 switches lit up along with a bumper in the maintenance shed. (Lights aren’t actually this bright, it’s the photo.)
451ED5CB-0BE0-43C8-A6AA-FBF8B00003BC

Another thing I got around to doing was setting out how I’m most likely doing the yard extension. This yard will consist of a Railking double stall engine house on the far left two tracks, an industry or two or three along the right wall using building flats, and a Railking Train Station squeezed in across the mainline from the Fire Dept. and the first side track on the extension. I’m cramming a lot in I know. Let me know what your thoughts are.

F581B6F1-A20F-404F-B67B-2A33C234807E577CE00E-17AB-4161-8F9D-C4C9AEF7C6B3635A3077-5099-4CBA-B93D-BB4E71BAB672

Attachments

Images (6)
  • 447298A2-5DB8-4275-AE80-761F8C5C218E
  • BB15A435-BC9B-4AB4-98A0-3B8B4EDD61E2
  • 451ED5CB-0BE0-43C8-A6AA-FBF8B00003BC
  • F581B6F1-A20F-404F-B67B-2A33C234807E
  • 577CE00E-17AB-4161-8F9D-C4C9AEF7C6B3
  • 635A3077-5099-4CBA-B93D-BB4E71BAB672

Good progress, instead of the wand, you might want to look at the Dremel 90 Degree adapter.

IMO, far more utility will be gained if you put one or two more long tracks in here, you can never have too much yard storage.   FYI, you can move that switch switch stand or even remove it without affecting the function of the switch.

Attachments

Images (1)
  • mceclip0

Thanks @gunrunnerjohn! That adapter was mentioned in another thread too so I might as well get both. IMO the best part of working on stuff is having all the necessary tools available when the task arises. The Dremel was a gift this past Christmas so getting the accessories and adapter’s is a priority. I already picked up a nice sized accessory kit for it.
As for the switch stands, some adjustments are possibly in order. If I did try for a third long track, I’d lose out on the space for the station. I’m already eyeing the other closet for a yard storage similar to yours but that closet is somewhat used at the moment but it’s over double the size of this one! Creative thinking though should resolve that. In time, in time 😂.

For what it's worth, I highly prefer the Dremel flex shaft tool over the 90 degree adapter.  The small flex shaft hand piece is much easier to control than trying to hold and guide the fat Dremel tool itself.  I cut all of the track (Gargraves flex and also some Ross) with a flex shaft tool.  The cuts all came out nice and vertical.

UPDATE #11

With the summer heat hanging steady🥵, the train room has been getting too hot for much of any progress especially being on the second floor. I had a feeling this day would potentially come, and it has. My train room has gone without an air conditioner up until now. Since I really wasn’t fully grasping the entirety of the hobby up until this year, it really wasn’t needed. So yesterday I installed an extra A/C I had sitting around. What a difference! 🥶 Might need an Alaska train to fit the new climate. 😂  

CBCBA9A7-FE81-4FD4-B4AD-0488E08B61CC

Attachments

Images (1)
  • CBCBA9A7-FE81-4FD4-B4AD-0488E08B61CC

UPDATE #12

It’s been a very productive day all thanks to the recent air conditioner installation. I find myself really letting time get away from me but that’s fine because I’m beyond pleased with the outcome thus far.

I realized now that with the I second level being raised higher, I was able to adjust the placement of the entire second level which will add much needed space for scenery and better looking cliffs. By doing this, I needed additional support for the homasote piece I cut out from the first level, so I grabbed a sheet of plywood for the second level. I taped out the cuts for a better visual.
0B5416F5-DED5-408C-8CB1-51C2548C6723

Followed up, I took a jigsaw to the plywood, of course after I covered everything.(Didn’t capture any photos during this process) Next up the support legs for the second level were added and secured. Each screw was labeled underneath to make any future changes/demolition easier.
D37EF64D-3785-4648-B4EB-252D23CD2E29

Finally, I placed the third level back in place just for more visual reference’s. I’m really happy with the progress and all the little adjustments I keep doing that keep improving the layout.
8A52EE0C-203A-43E4-922C-152A04EB4ADA49C93930-509F-404A-8BFA-283C7F95BA748707F102-EB5E-4333-9ED1-67A874D12D7C952F11DD-E6BD-4C52-B541-DECE0A29FC625C85C3BF-21ED-466C-9BE7-4DF51BD43002

Attachments

Images (7)
  • 0B5416F5-DED5-408C-8CB1-51C2548C6723
  • D37EF64D-3785-4648-B4EB-252D23CD2E29
  • 8A52EE0C-203A-43E4-922C-152A04EB4ADA
  • 49C93930-509F-404A-8BFA-283C7F95BA74
  • 8707F102-EB5E-4333-9ED1-67A874D12D7C
  • 952F11DD-E6BD-4C52-B541-DECE0A29FC62
  • 5C85C3BF-21ED-466C-9BE7-4DF51BD43002

KEEPING INVENTORY

With the paint still fresh from yesterday, I’ve decided to start the daunting but necessary task I’ve seen discussed numerous times on this forum, the task of keeping an inventory list. It’s a perfect time for me to start doing this considering this past January I just started getting back into the hobby. So I got a notebook with graph paper and drew up my own spreadsheet’s, one category for Structure Inventory and another for Train Inventory. Next up is the fun part of filling it in!A78E3DCC-16D5-4222-8D32-60E889A24FB2E020C13B-AA82-48E7-822F-575E5320629E

Attachments

Images (2)
  • A78E3DCC-16D5-4222-8D32-60E889A24FB2
  • E020C13B-AA82-48E7-822F-575E5320629E

Inventory Update - Structures

Finished up the inventory spreadsheet for the 34 structures I currently have. I know I can get the plasticville dates, as for the rest, I’m missing the dates manufactured and the original MSRP. Any leads on obtaining these would be greatly appreciated! I know they’re not necessary but I’d still like to have the information.
B4C3FF9D-C40B-403D-8E10-82759481C404C2469813-019E-43BC-994C-7491C975EB12

Attachments

Images (2)
  • B4C3FF9D-C40B-403D-8E10-82759481C404
  • C2469813-019E-43BC-994C-7491C975EB12

NEW PURCHASE UPDATE!

I made my first visit to the Renningers Flash Train Meet in Kutztown, PA this past Saturday.  Awesome show with a much bigger selection than I was expecting. There’s also several other vendors there for the Farmers Market so lots of foods, crafts, antiques, etc. for everyone. Anyway, I picked up this K-Line PRR boxcar in near excellent condition. I know, nothing special but it’s my first PRR boxcar. I’m definitely keeping these Renningers Flash Train Meets marked on the calendar. They hold a few each year.
508324DB-AF53-4611-9C98-73886419FAC2

Next up I grabbed a RH 022 switch with controller from a LHS that’s specializes in HO but have a decent O selection. I also did a combined deal on eBay which really dropped the price on 2 more sets of 022 switches, one set with controllers and one set without. Grabbed a small bag of reproduction coal as part of the bundle deal too.
BDA6DAA8-4DBD-4B1A-BEBA-5D5E6BED1E2C
333ACD27-9C8C-4F81-9626-BD2B0844FB31

Off to clean these 022 switches up!

Attachments

Images (3)
  • 508324DB-AF53-4611-9C98-73886419FAC2
  • BDA6DAA8-4DBD-4B1A-BEBA-5D5E6BED1E2C
  • 333ACD27-9C8C-4F81-9626-BD2B0844FB31
Last edited by Richizzle07

UPDATE #14

I’ve completed the service/cleaning of the switches I recently purchased. Here’s some photos of the before and after with the slides being cleaned. DC41F540-C342-4428-9075-FE6AB2224D986BAC562A-F9DD-4EAF-AE76-D199A2414B88482A9AE1-4BF0-490A-AE1C-F8E88F48E90864ADA397-668D-4644-B2C9-ECECFBEAB77E

Finally came across a switch with the non derailment feature not working. Actually it was two of the RH switches that needed the joints soldered. This was my first time soldering in over 20 years. C2104B85-4A99-478C-975C-4C15067D83E5

I also cleaned up some short sections of track and a bunch of track pins. The track to the right has been cleaned up compared to the left piece.E10A6066-A93C-43BF-830B-D680224B4C5B46838EBF-B3DA-4750-900C-CDA2530A5F9850793901-A60E-42C9-A012-C5C5E5B01481

Now I just have to swap out one of the RH switches I’ve already had on the layout. Reason is the one track has a slight bend in it and it’s causing a bump to occur. I’m also reading up on the fixed voltage feature since I’ve only ever used track power.

Attachments

Images (8)
  • DC41F540-C342-4428-9075-FE6AB2224D98
  • 6BAC562A-F9DD-4EAF-AE76-D199A2414B88
  • 482A9AE1-4BF0-490A-AE1C-F8E88F48E908
  • 64ADA397-668D-4644-B2C9-ECECFBEAB77E
  • C2104B85-4A99-478C-975C-4C15067D83E5
  • E10A6066-A93C-43BF-830B-D680224B4C5B
  • 46838EBF-B3DA-4750-900C-CDA2530A5F98
  • 50793901-A60E-42C9-A012-C5C5E5B01481

You may well need some extra real estate with your building boom.

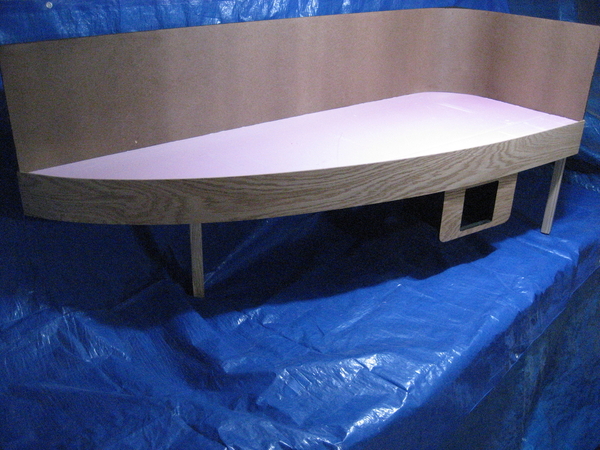
One such late member here had me build a  ultra light weight 2' X 8' non RR corner module for his train room just for his structures.   I believe his handle was Pennsy k-4.   This had no track, just n assortment of buildings in a corner  opposite his layout.

The lower cut out shelf was for a power pack to handle the lighting.

This was fabricated to fit between two door frames and the curved edge allowed natural traffic flow between door ways.

Thursday 10 PM 002Just an idea.

EDIT,  A few fabrication shots:

This was built to be a home display positioned in place with square brass dowels from Freeman mfg co.    Male on the chair rail frame, female on the module bottom.

winding down over view 004

Another consideration was to have temporary screw on legs for train show display purposes.

winding down over view 002


7 wood shots 0027 wood shots 003Handles to carry in for show set up.7 wood shots 005Perimeter slots for removable backdrop7 wood shots 007Augustineous Rex 003

Attachments

Images (9)
  • Thursday 10 PM 002
  • 7 wood shots 002
  • 7 wood shots 003
  • 7 wood shots 005
  • 7 wood shots 007
  • Augustineous Rex 003
  • winding down over view 002
  • winding down over view 004
  • winding down over view 002
Last edited by Tom Tee

Thanks for the ideas @Tom Tee! Beautiful craftsmanship! I’m planning on having a few lightweight lift out sections along the walls in the back. They will only have buildings and scenery on them for the second and third levels. The square dowels will definitely help with keeping these lined up. The rest of the room has furniture along the walls so no more expansions along walls, for the time being🤔. I am considering adding a piece on each front corner just to expand my corner real estate. The work I’ve seen shared by you is quite remarkable! Thanks again!

You are welcome.  The dowels I use are the #4.  Make sure you get the Freeman male/female tool that perfectly fits that size dowel.  It is the best way to get a good installation.  Also spot face the area first with a Forstner bit so as to recess the mounting flange.  Use the Forstner pilot hole to start your through hole.   I find a  jig to maintain a plumb drill center line helpful.

Freeman Manufacturing   contact  440.934.1902

Last edited by Tom Tee

UPDATE #15

The past 2 days I’ve bounced around getting a few different things done.


The main project I worked on was measuring, cutting, and glueing of the foam roadbed on the closet extension I recently added.C464FE86-2D4D-48FA-8826-8C6F545F374FAAFB6FDD-3E48-4407-853E-456AFA1BA247F66D4289-F37E-461E-B82F-4DD43AF0E0D8FAC290EB-4C8C-4D2A-881A-3F3BB328DAC8

While I was waiting for the glue to dry, I cut two plywood pieces and installed them underneath the benchwork. These will have power supplies, terminal strips, dimmers, etc. 07C326F1-8395-4959-95B0-BEB53C717A73C828A6D3-0780-4156-A85F-082107C9AC2F

I also cut out a piece of plywood and installed it for the base of the stream/waterfall. I even cut out some blue craft paper for water. A2F7ADEF-A3F8-4442-AD8B-6A5AF23A005D5EDB8FE8-E21C-40AF-B3CD-EBB9230E8C43

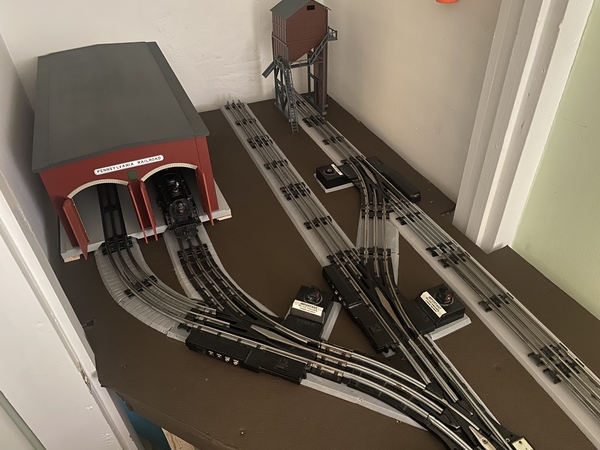
Final few things I got to do was put down the track on the extension (not secured yet), swapped out the one 022 RH switch, and was able to open up some of my purchases from York!!! It was like Christmas in July on this 97 degree day (real feel of 103 degrees!). I placed the MTH PRR double engine shed and the MTH passenger station with dual platforms. AF619D36-1FD7-4104-BB34-1366AF1BE1EA973F5E8F-A376-42D5-B568-BEC007AF6B5B

It’s all starting to really come together!! More updates to come! Happy Railroading everyone!

Attachments

Images (10)
  • C464FE86-2D4D-48FA-8826-8C6F545F374F
  • AAFB6FDD-3E48-4407-853E-456AFA1BA247
  • F66D4289-F37E-461E-B82F-4DD43AF0E0D8
  • FAC290EB-4C8C-4D2A-881A-3F3BB328DAC8
  • 07C326F1-8395-4959-95B0-BEB53C717A73
  • C828A6D3-0780-4156-A85F-082107C9AC2F
  • A2F7ADEF-A3F8-4442-AD8B-6A5AF23A005D
  • 5EDB8FE8-E21C-40AF-B3CD-EBB9230E8C43
  • AF619D36-1FD7-4104-BB34-1366AF1BE1EA
  • 973F5E8F-A376-42D5-B568-BEC007AF6B5B

Add Reply

Post

OGR Publishing, Inc., 1310 Eastside Centre Ct, Suite 6, Mountain Home, AR 72653
800-980-OGRR (6477)
www.ogaugerr.com

×
×
×
×
Link copied to your clipboard.
×
×