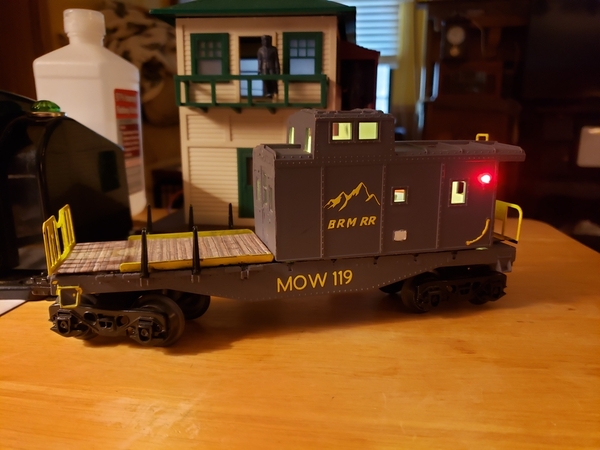
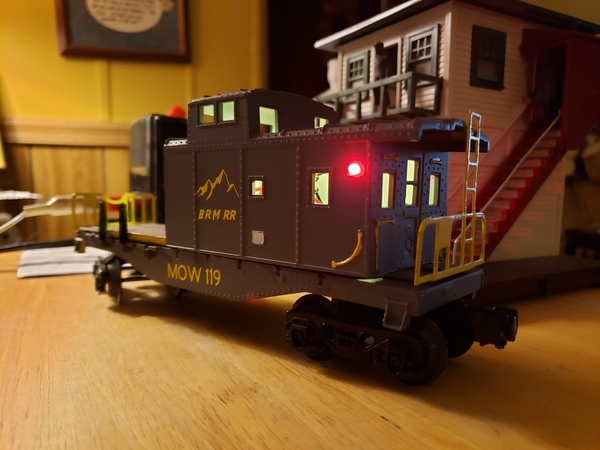
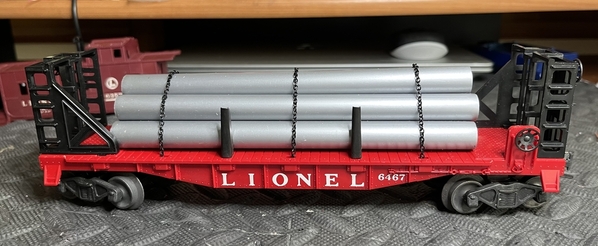
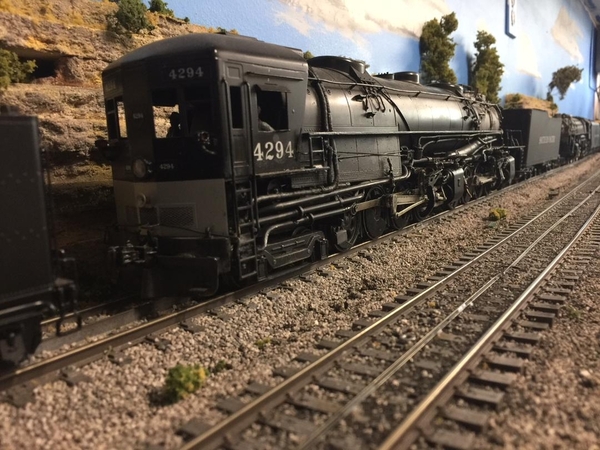
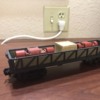
I recently completed this conversion of a K-Line speeder to a command controlled version complete with full sound.  This is the smallest motorized unit I've ever managed to cram sound and command into.  The rear cavity behind the cab was enlarged to fit the ERR Mini Commander 2 and the ERR RailSounds Commander.  It features directional lighting and a command controlled strobe.

I just picked up one of the Hallmark JD 2020 tractors as it looked like a nice model (it is).  first thing when I got it home was measure it to see if is close enough to 1/48 to use on scale flat cars.

Measured without taking account the drawbar, lift arms and center link which most likely would ship unattached. the model is amazingly close to scale.

Dimensions in inches  L - 140.6 prototype vs 144.6 model, W - 88 prototype vs 93 model.  Close enough for me.

Production was 1965 to 1971.

@NHVRYGray posted:

I just picked up one of the Hallmark JD 2020 tractors as it looked like a nice model (it is).  first thing when I got it home was measure it to see if is close enough to 1/48 to use on scale flat cars.

Measured without taking account the drawbar, lift arms and center link which most likely would ship unattached. the model is amazingly close to scale.

Dimensions in inches  L - 140.6 prototype vs 144.6 model, W - 88 prototype vs 93 model.  Close enough for me.

Production was 1965 to 1971.

NHVRYGrat - FYI. The plastic tires on the tractors reacted with the plastic in the flat car that I used. I suspected it might and was verified a few minutes ago when I attached the elastic tie downs. I borrowed a trick from Lionel and used a sheet of clear plastic (Evergreen) and placed that on the flatcar first and then the tractors on top of that.

Steve

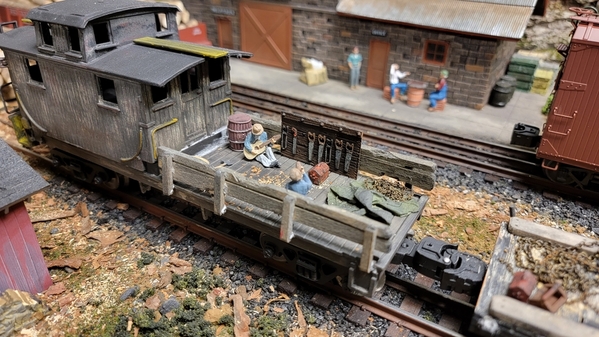
7195CAD1-951E-4144-8AB8-79414406D851DEDBDADB-3213-4F69-969E-C2C9F8BEE275I built a gondola and caboose probably 20 years ago, and I haven’t seen them in at least 15 years… I’m visiting my parents for Christmas and I was digging around in my room and I found them!!!

The gon has a brass square tube frame with a styrene and wood body, with a scratch built crate and two HO scale motor/flywheel assemblies on scratch built skids for the load, and the caboose is mostly wood with a few styrene bits… both cars have various details made of brass wire… both cars ride on Atlas industrial rail trucks from a set I purchased about 25 years ago…

Attachments

Images (2)
  • 7195CAD1-951E-4144-8AB8-79414406D851
  • DEDBDADB-3213-4F69-969E-C2C9F8BEE275

I had a Legacy unpainted SD90MAC and painted, lettered and lightly weathered it in Canadian Pacific colors.

Another unpainted engine is the SD 40. It is a Legacy engine that I painted and weathered in my favorite road Burlington (CB&Q). I added the lower duel head light, and removed the "brake" wheel that Lionel added to the original model. These changes now match the Burlington prototype.

RAY

Attachments

Images (7)
  • CP SD90 MAC (1)
  • CP 9142 sd90 MAC (1)
  • CP 9142 sd90 MAC (2)
  • CP 9142 sd90 MAC (4)
  • IMG_4905
  • IMG_4906
  • IMG_4911

Post a write up and pictures of Homemade Lionel (or other) style cars or engines you have made or modified or scratch built.

I have made homemade copies of several Lionel cars when I cannot find them or afford them at the time.  I will start with my recently completed Lionel 6413 Mercury Capsule transporting car.  This is a Junk CarBash.

After looking for a reasonable or inexpensive Lionel 6413 Mercury Capsule transporting car or raised-center flat car body (they are rather hard to find and I have never seen one at a train show) I decided to make one.

I have the other two center raised-center flat cars.  The first car is the Lionel ACMX 6519 Allis-Chalmers condenser car and it needed a raised-center flatcar deck to handle the tall height of the condenser (made 1958-61).  Then Lionel made the Lionel TLCX 6544 Missile Firing car using the raised-center flat car body from the 6519 (1960-64).  Later, the Lionel TLCX 6413 Mercury Capsule car (made 1962-63) was made from the Lionel Allis-Chalmers Condenser raised-center car body and the Mercury Capsule from the Lionel 3413 Mercury Capsule Launching car Missile.  This let Lionel use the body molds from the Lionel Allis-Chalmers car for to two new cars, and to double use the Mercury Capsules, a typical thing Lionel does.

IMG_2297IMG_2298


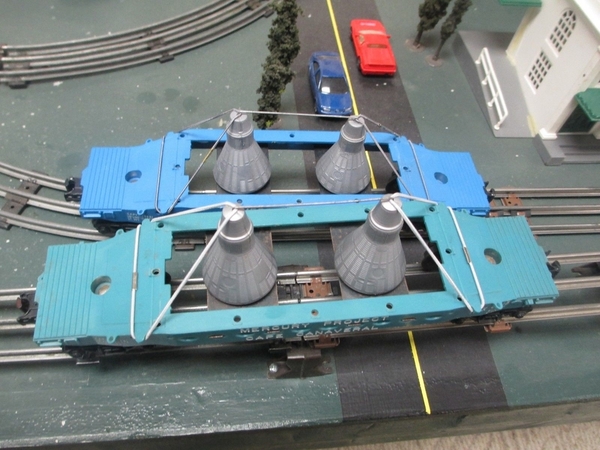
Here are a couple of the Lionel 6413 Mercury Capsule transporting cars I want to home make (picture from the internet).  The slightly aqua green blue car in the front is rarer and brings more money.  Notice the track can be seen in the openings between the two metal straps holding up the Mercury Capsules.

Lionel 6413 aquamarine 1 2-16-2018


Zero money was used to make the car.  A Lionel 6800 flat car, with a broken corner (the plastic  was harder than normal after being stored in the hot attic) and no trucks and wheels were found.  The second car used was a small Lionel un-numbered flat car complete with trucks in my junk box.  Plastic from a discarded daily desk calendar base and a plastic paper easel were used.  On hand glue, blue paint, two toy optical viewers and letter decals and rub-on numbers were used.  I did get to spend many hours of fun time building the car. IMG_2111


For the body of the Mercury Capsule car, the Lionel 6800 flat car was used upside down to make the raised centered car and cut out the middle of the brown flat car leaving the trucks.  IMG_2112


The ends of the small Lionel flat car with trucks were band sawed off to add to the cars height.  I patched the broken corner of the 6800 car and added plastic to extend the skirts of the trucks.

IMG_2120


I decked the top ends of the car with decking left over from the short flat car.  Two small lugs were glued on to the edge to act as hooks for the elastic cord that would hold down the Mercury capsules.  I added in some seams to the side of the raised center car and added skirts to the trucks and extended the raised hump as seen in black plastic in picture below.

I made the rest of the top decking from plastic with holes for the Mercury capsules.  The deck was make a little wider than the car so personal can walk on the deck alongside the capsules.  The Lionel 6413 is wider in the middle than at the ends.

IMG_2148


The Lionel 6413 holds the capsules via two metal brackets across the near bottom of the car with opening from the top to the tracks, presenting a unfinished look.  The Lionel Mercury capsules have cylinder on the bottom to simulate the mercury capsule retro rockets and the capsule is the same one used on the Lionel Mercury capsule rocket with the Lionel  3413 Mercury Capsule Launch Car and Rocket.  The real Mercury capsules would never be transported with the retro rockets attached.  My capsules set on the bottom of the car and the bottom is enclosed, the kind of job one would expect from NASA and the US Government.  The real Mercury capsules are only 6 ft in diameter and 6 ft tall and would easily fit in a gondola or box car with wide doors so the Lionel Mercury Capsule cars is a fun item and allowed Lionel the use of existing molds to make and sell another interesting car.

My Mercury capsules are made from two toy optical viewers that lets the the grand kids see diamonds moving around when viewed and rotated.  I took out the clear plastic end to make the cones lighter.

IMG_2157


I added some heavy paper strips to make the cones look more like they had heat shields on the sides and show the door and window.  The astronaut sits with his back to the bottom heat shield and views through the window.

IMG_2167


I painted the car with Model Masters 35183 F  S Bright Blue paint which I had and is fairly close to the Lionel 6413 color.  I then added “NASA” decals as I did not have room or letters for “Mercury Project Cape Canaveral” that Lionel used.  I also added press on numbers of 6413, not as neat as I wanted and all I had room for.  Clear glossy spray was used to seal on the lettering. 

I added a metal washer to the top of each Mercury Capsule with clear caulking to allow the Lionel Gantry Magnetic Crane to lift them up and give another load for Gantry Crane operation.

IMG_2296

IMG_2285


I think the Mercury Capsule car came out very well and it can serve as another car and load to use my Gantry Crane, to become sort of an action car after all.

IMG_2291


Let’s hear from a few of you car and engine builders about your cars and engines.  I find fixing up a common car into something more special or useful a satisfying part of the model train hobby.  I have several more to share as the topic moves on but do not have the pictures of the building process like the 6413.  Most of them are painting and lettering projects.

Charlie

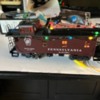
Pretty simple here, my wife wanted a Christmas Train other than the MTH Southern Pacific I own, so I added led lights to a K Line caboose and she picked the other cars at the store……….you know when mama is happy….LMAO

Attachments

Images (2)
  • 6180F2CB-5D30-4C75-9959-43742EA2B027
  • 87451711-DAD9-4CB3-89BD-C00A0A9A3B4C

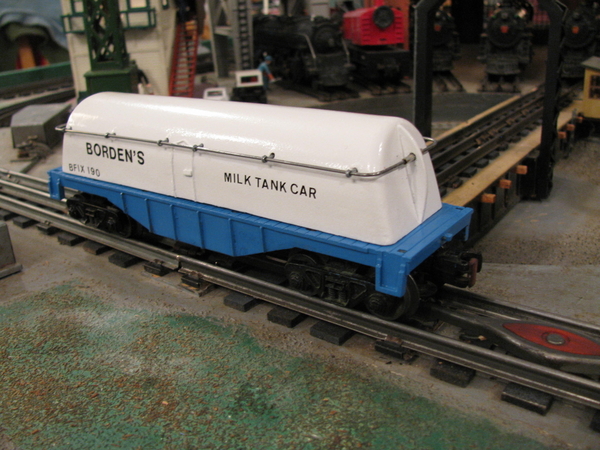
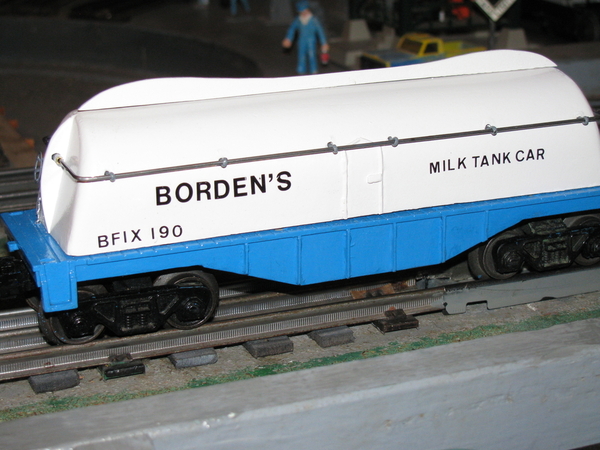
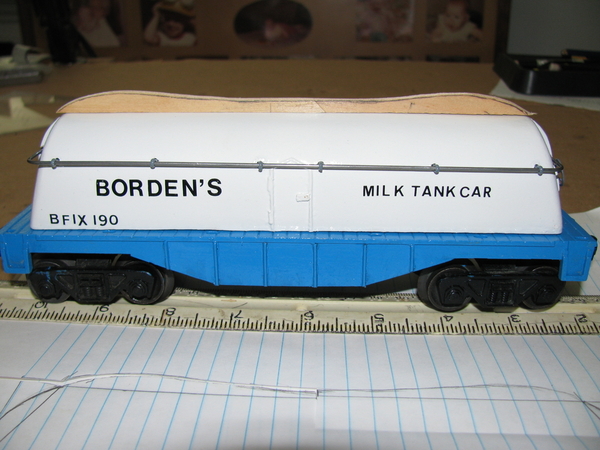
Homemade Borden's Butterdish Milk Tank Car

I have recently learned about Borden’s Butterdish Milk Tank Cars and their use, and that Lionel 6-19479, 6-19445, 8 inch long cars and American Flyer 412 were made in the past as well as numerous models in HO and N scale.  These cars can be googled to see what they look like.  The real Borden’s Milk Tank Cars have a unique Art Deco design and look very modern and unique, especially the some of first ones with extra fins on the top.  The Art deco top fins were removed during WW2 as the metal was needed for the war effort some report.  This little project turned into a learning experience and had more little stumbling blocks than I expected.

Picture of my Homemade Borden’s Milk Tank Car, BFIX 520
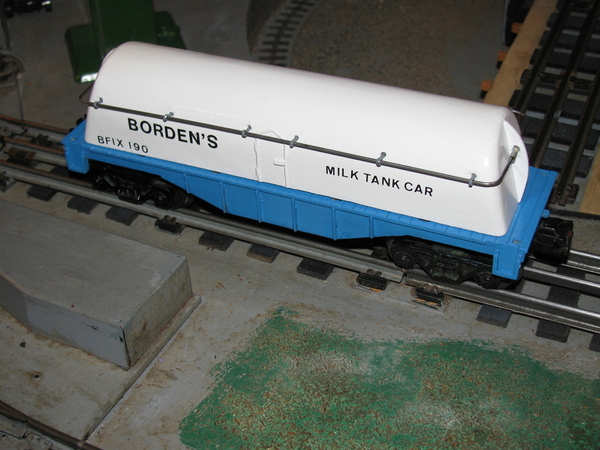
IMG_2479


The Borden company had 35 or so Milk Tank Cars made in the late 1930s to transport whole milk from small rural train stations to the creamery.  The Borden’s Company press release of February of 1936 noted, the ‘Butterdish Car’ is “the first all-metal, stream-line milk tank railroad car ever built”.   Dairy farmers must milk each cow daily and transported the milk with tank trucks or hauled it in 10 gallon cans to the train depot each day in the Northern Midwest and Northeastern states.  Fresh whole milk can last 24 hours if kept cool.  Borden’s cars had two 3000 gallon glass lined tanks mounted on a flat car.  The cars were designed in an Art Deco style popular at that time.  The tanks had a insulated tanks or insulation under the frame which was made to surround the tanks and the cars were not refrigerated.  These cars were picked up daily and transported to nearby creameries.  Only one Borden’s Milk Tank Car, the BFIX 520, still exists and it has been restored and is in the Illinois Railway Museum in Union, Illinois.


I had all the materials to build the tank car on hand except the music wire for the handrails.  Much time was taken to decide on the measurements of the car.  A small cheap, 8 ¼ inch long X 2 1/8 wide flat car with trucks was chosen.  Side pieces of plastic were added to the bottom of the flat car deck to reinforce it to take the weight of two 3000 gal tanks.  I thought Lionel’s Borden’s Milk Tank Car tank body was either too high or too short making it look too fat compared to pictures of the real car.  I found a strong cardboard mailing tube that was 1-11/16 inches in diameter and at least 9 inches long, to use for the car tank body.  The 8 ¼ inch car I chose is 33 ft long for the real 40 foot long car or 82.5% of the real car.  This is close to 027 Toy trains cars percent of O scale at ¼ inch to the foot.  If I had used as standard Lionel flat car that is 10 inches long it would have been 40 ft real car length or O scale at ¼ per one foot.

I found two write-ups on making an HO Borden’s Milk Tank car that were made by making a solid wooden mold of the car body and heating a thin sheet of smooth styrene plastic over the mold to make the body.  Since I had a good cardboard tube, it was decided to make the body by steaming a piece of 1/16 inch thick medium hardness balsa wood over the tube.  Some 60 year old Medium hard balsa wood seemed to be both somewhat hard and yet flexible enough to bend without breaking or splitting.

I made a base out of 1/8 inch Masonite, the same width as the tube I then glued the tube to the base. This total width, including 1/8 inch for the balsa wood,  would leave ¼ on each side of the tube body when put on the flat car base which was necessary room for personnel to walk on the sides of the car.  The balsa was glued to the top of the tube with two sheets being used.  The balsa was slowly bent around the tube, with a gloved hand and a clothing steam iron supplying the steam, and the balsa was pinned in place.  When cooled and dry, the balsa was glued the tube and to the base, with Elmer's glue and pinned until the glue dried.
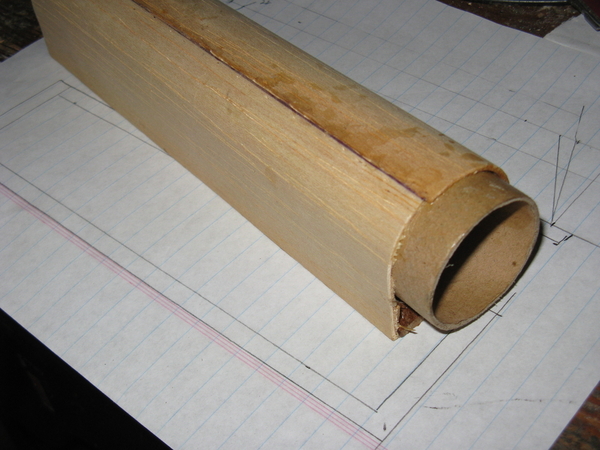
IMG_4170


The pieces of Popsicle sticks were glued inside the cardboard tube and behind the balsa wood on the sides between the base and the tube with Elmer's glue to strengthen them both.  Some wood blocks were glued in the bottom ends inside the tube to allow screws to be used to hold the tank body to the flat car.

When all was dry, the ends of the tube tank body were cut off at an angle of the real car, 15 degrees, with a band saw giving the neat, angled end of this unique car. The total length was made to give a 1 scale foot or ¼ inch of walkway at the end of the car and is 7 3/8 inched long.  Then, the tank body was placed on the car flat car body.  Observations showed the car tank was too high and the car looked too fat, versus the real car.  So much for for all that planning to make a slimmer car than the Lionel fat boy.
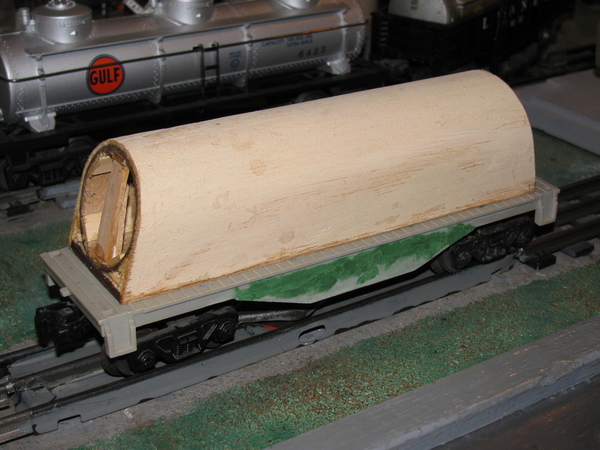
IMG_2451


It was decided to cut 3/8 inches off the bottom of the tank with the band saw, a 2 minute job.  This looked much better, and part of the cardboard tube was cut off too, which was not a problem.  So much for all that planning with rulers and pencils.

Picture of car with the 3/8 inch removed- looks slimmer and closer to the real car
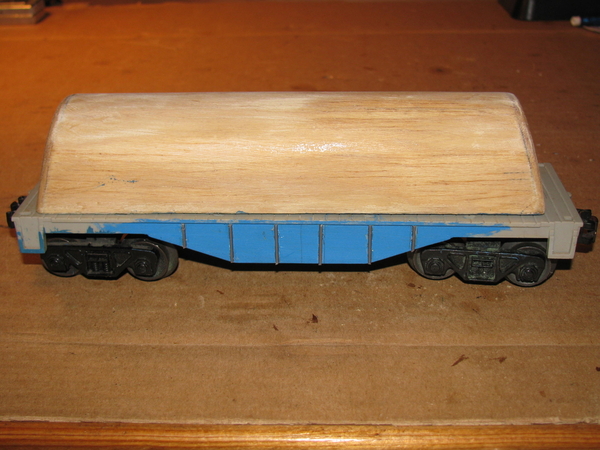
IMG_2454


This picture shows the car with the 3/8 inch cut off piece re-inserted to where it was cut from, on the bottom where it came from, for comparisons sake.
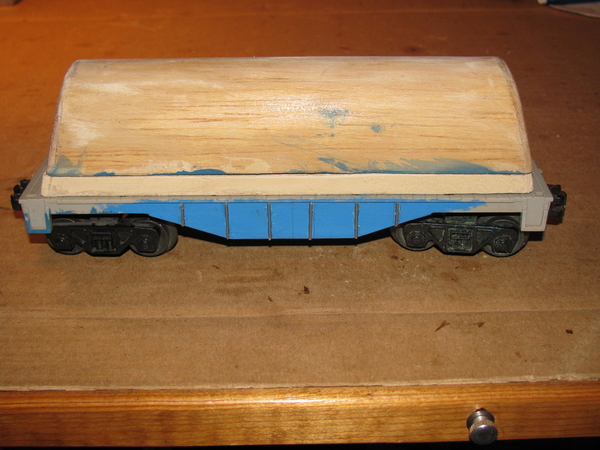
IMG_2453


Wood filler was used to smooth out the balsa wood and fill in the seam on the top. Pieces of 1/8 inch balsa wood was added to the ends of the car.  A small 1/8 inch piece of balsa was added on the end of the tank to be the hand brake housing to allow a brake wheel to shorten a chain that would apply the wheel brakes.  Two Art Deco tank end fins were hand sketched and transferred to Popsicle sticks and glued to the ends of the tank car body to be the art decor touch and hold the ends of the wire handrails.

A few pieces of plastic stripping were added to the tank side to be the two door outlines.  The doors are used to get access to the valves and hose connections to load and unload milk.  Holes for the handrail stanchions were located and drilled.  Twelve small cotter keys, with diamond shaped loops, were bent to circles and painted medium gray.  Holes were drilled in the flat car to attach the tank and a hole was drilled for the brake chain.
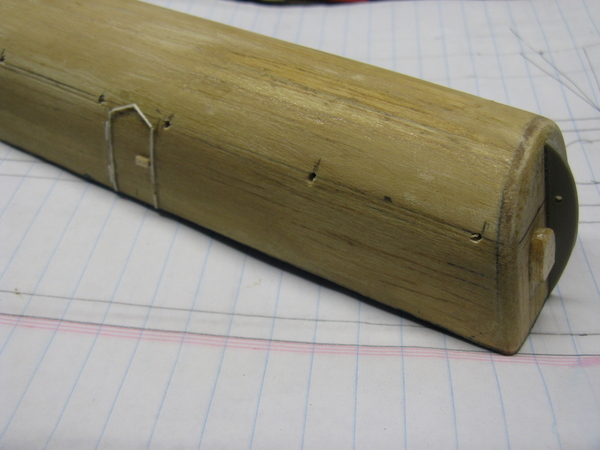
IMG_4180

There was concern that the balsa would be too soft to use the rub on letters & numbers I had in place of decals.  I considered making decals, as I have an HP laser jet printer that uses black toner that could make black letter decals.  Further reading lead to an article that laser printers, that use black toner, will yield black letters that will turn brown in time, so I was stuck with rub on letters.  I made up a couple of batches of five minute epoxy, to finger on the balsa, on the tank car balsa top and sides to harden it up more.

The flat car was painted medium blue, and the tank was painted with several coats of glossy white, with Rustoleum being better than cheap Walmart paint I tried first.  Walmart paint had problems covering the old Green Squadron wood filler I used some places.

The rub on letters and numbers were applied, very gently.  It was found easier, quicker, and  more accurate, to leave all the numbers and letters on the 8.5 x 11 inch sheet than to cut it up into small strips.  The numbers and letters were sprayed with glossy clear paint as each sides letters were finished, to keep from messing up the letters when handling to do the next side.  Glossy clear paint was also applied to the flat car as the blue paint used was had a flat sheen.

Music wire was bent to be the hand railings. Two small brass tubes were made to join the two handrails at each end of the car.  The stanchions and tubes were not glued in and remain in place quit well without glue.  A brake chain was made from 2 inches of coarse cotton thread and knots were tied close to each other, to be the links and the chain was painted silver.  The hand brake wheel is from an old Lionel boxcar.  I painted it light gray as well as the stanchions as that allowed them to show up but not as much as black.  The handrail was left natural steel (painted with clear) as I did not want have them show up as much as the black handrails in some of the pictures of the real car.
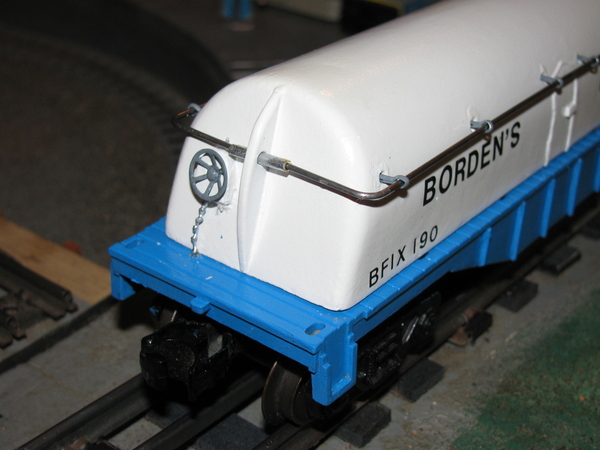
IMG_2473

IMG_2480

IMG_2472

The Butterdish (the correct name should be Butterdish Cover) Milk Tank Cars rarer than some cars especially the Lionel 3664 Automatic Operating Milk car, which is properly the most popular operating car Lionel ever made and the favorite of all the young layout visitors.

The original Butterdish cars were made with Art Deco metal top fins that were removed during WW2 ,to get the metal for the war effort.  These top fins make the Butterdish car more Art Deco-ish and unique.


A few pictures of the real car and many of models made of the original Borden's Milk Tank Car seem to show two types of top fins.  Therefore, two sets of Art deco TOP Fins were made from two Popsicle sticks glued together, end to end for each set, one Higher and one Lower.  They were hand sketched on paper and transferred.  They were sawed out on a 50 year old, recently restored Delta 24 inch jig/scroll saw, which saws much more accurately than my old 18" Craftsman saw I use in my shop.
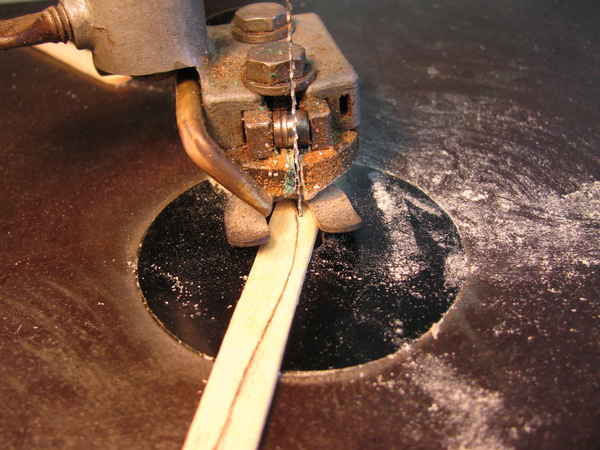
IMG_2533

IMG_2535

The fins are put on the car with thin two sided tape.  For now, I will vary the top fins as none, High or Low but the Low sized top fins are my favorite for now .

Higher Fins

Borden Hi Fin 6-17-2023 2023-06-17 002

Lower

Borden Low Fin 6-16-2023 2023-06-16 001

IMG_2541

Charlie

@coach joe posted:

I picked up An early MTH RK N&W Y6B and wanted an auxiliary tender to go with it.  I just couldn't justify the going rate for such items so I tried my hand at making one.IMG_1490IMG_1491IMG_1492 Years back I picked up a couple of the Lionel separate sale whistling tenders, swapped out the frames for some starter set tenders so one was a perfect candidate.  I cut out the coal load, laid in some styrene sheet trimmed to fit inside the sides and around the water hatch.  The treads are actually cut from sanding sheets, added a ladder and acostume crystal for the back up light lens.

I started a thread about this homemade auxiliary tender when it finally met the Y6b it was in-tend-ed for.  Comments on the white decals used not matching the gold on the Y6b resulted in a do over.  Here it is today.

IMG_2650IMG_2652IMG_2653

Attachments

Images (3)
  • IMG_2650
  • IMG_2652
  • IMG_2653

Add Reply

Post

OGR Publishing, Inc., 1310 Eastside Centre Ct, Suite 6, Mountain Home, AR 72653
800-980-OGRR (6477)
www.ogaugerr.com

×
×
×
×
Link copied to your clipboard.
×
×