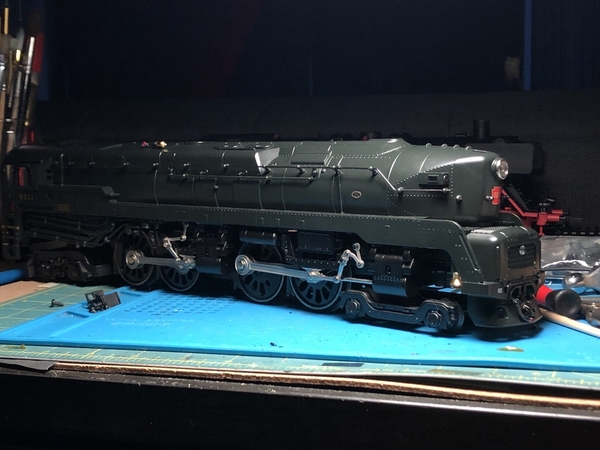
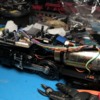
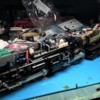
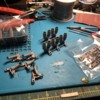
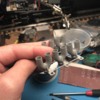
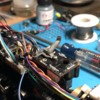
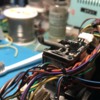
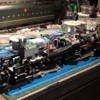
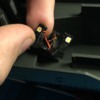
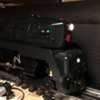
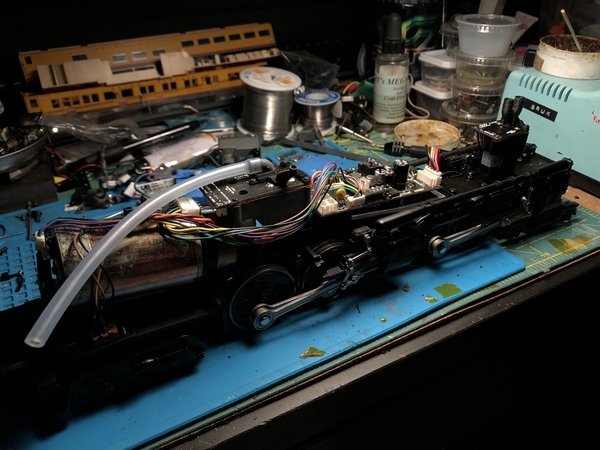
It’s time for another Legacy conversion. We have this beautiful Scale Pennsylvania T1. This is another locomotive from the MTH Lionel lawsuit. “Lawsuit series” I’m calling it. This once again is another engine we might not see from Lionel anytime soon. It be a surprise if they did, and if they did expect to pay 3k for it...... Ill be using the sound board from the Legacy LionMaster #5511 from about 10 years ago. Little more expensive route but it should be worth it.

This thread will be dedicated only to the conversion of this Loco to Legacy. Sit back and enjoy for the next coming weeks.

Enjoy!

96063E36-2FCA-4C8D-A60F-576BF0DD12DD

Attachments

Images (1)
  • 96063E36-2FCA-4C8D-A60F-576BF0DD12DD
Last edited by Bruk
Original Post

Replies sorted oldest to newest

Bruk posted:

It’s time for another Legacy conversion. We have this beautiful Scale Pennsylvania T1. This is another locomotive from the MTH Lionel lawsuit. “Lawsuit series” I’m calling it. This once again is another engine we might not see from Lionel anytime soon. It be a surprise if they did, and if they did expect to pay 3k for it...... Ill be using the sound board from the Legacy LionMaster #5511 from about 10 years ago. Little more expensive route but it should be worth it. 

This thread will be dedicated only to the conversion of this Loco to Legacy. Sit back and enjoy for the next coming weeks. I believe I have all the necessary parts to convert it. If not ill be dead in the water till Lionel opens back up again. 

Enjoy! 

96063E36-2FCA-4C8D-A60F-576BF0DD12DD

Can't wait to see the progress.

Update: 

This conversion will be a slow one. The tender will be pretty straight forward. I have chipped away at that first.  But the engine has been a struggle. Due to the way things are lining up, It will require 3d printed parts. Custom Brass parts as you have seen in the past are possible to make, but if I have multiple units coming through for upgrades, I want to save some time and just go with the 3d printed part.

These parts I can draw up on my computer with some ease, but my printer will not be able to print in the required materials for certain items needed. Light holders or board holders I can make at home in PLA or ABS but anything around the smoke units such as a exhaust funnel will have to be done 3rd party in material that I can not print. 

Here is an example of what I have been working on. I was not happy with the smoke volume out of the “stock” smoke unit through the stack. I will not be using the DSMK for this project due to the fact that there is not enough airflow from one fan to vent the smoke properly. I dont think the circuit can support two smoke motors and two resistors. Nothing is official yet, but the concepts are close. (And yes these items line up when the shell is on) 

Attachments

Images (2)
  • A1FE8480-69EB-4728-BD89-8FEAF123FC6D
  • 7B785D06-3185-4A41-8139-108E6B43560C
Videos (1)
ADDFCD37-A749-4DD0-8D0A-32E1FB9B3737
Last edited by Bruk
@Bruk posted:

Update: 

This conversion will be a slow one. The tender will be pretty straight forward. I have chipped away at that first.  But the engine has been a struggle. Due to the way things are lining up, It will require 3d printed parts. Custom Brass parts as you have seen in the past are possible to make, but if I have multiple units coming through for upgrades, I want to save some time and just go with the 3d printed part.

These parts I can draw up on my computer with some ease, but my printer will not be able to print in the required materials for certain items needed. Light holders or board holders I can make at home in PLA or ABS but anything around the smoke units such as a exhaust funnel will have to be done 3rd party in material that I can’t not print. 

Here is an example of what I have been working on. I was not happy with the smoke volume out of the “stock” smoke unit through the stack. I will not be using the DSMK for this project due to the fact that there is not enough airflow from one fan to vent the smoke properly. I dont think the circuit can support two smoke motors and two resistors. Nothing is official yet, but the concepts are close. (And yes these items line up when the shell is on) 

Looks great Bruk.

@Bruk posted:

Update: 

This conversion will be a slow one. The tender will be pretty straight forward. I have chipped away at that first.  But the engine has been a struggle. Due to the way things are lining up, It will require 3d printed parts. Custom Brass parts as you have seen in the past are possible to make, but if I have multiple units coming through for upgrades, I want to save some time and just go with the 3d printed part.

These parts I can draw up on my computer with some ease, but my printer will not be able to print in the required materials for certain items needed. Light holders or board holders I can make at home in PLA or ABS but anything around the smoke units such as a exhaust funnel will have to be done 3rd party in material that I can’t not print. 

Here is an example of what I have been working on. I was not happy with the smoke volume out of the “stock” smoke unit through the stack. I will not be using the DSMK for this project due to the fact that there is not enough airflow from one fan to vent the smoke properly. I dont think the circuit can support two smoke motors and two resistors. Nothing is official yet, but the concepts are close. (And yes these items line up when the shell is on) 

If you are going to be using the older style modular sound boards for this engine, are you then going to have use the older motor driver boards?

The sound serial communication from the RCMC is different than the R4LC.  Jon Z. is really the guy to ask, but from my recent conversation with him, I think there may be a disconnect or two between the older modular board and what the RCMC says to the RS board.  I know that trying to drive the new Legacy RS-Lite boards with a Legacy R4LC is a no-go, that's why I mention it.  You get a few functions, but many sound effects aren't happening without having the RCMC drive the serial data to the RS-Lite board.

In the past if its IR to IR it should not be a problem using a RCMC with the older Legacy Railsounds. There is always issues if you try and hard wire the serial data lines as we all know.

In fact the the 700e Hudson is equipped with an RCMC board and this same Legacy RS6 board set up from the Vision Steam LM T1. Same idea I am using. 

@Norton posted:

FYI you can get small diameter aluminum tubing, 1/8"-5/8" OD that you can bend by hand without a tubing bender. If it would work it would be less expensive than 3D printing the parts.

https://www.mcmaster.com/flexi...end-aluminum-tubing/

Pete

I have seen this stuff before and used it. its great stuff. But my problems are that I already have 3 people interested in having this conversion done to their T1's. I need a better process for my end product that can be consistent every time. So far on my list to be able to convert 6 locos it will cost me $55 dollars for all the parts from Shapeways. (subject to change)

I agree with John. My uncle used to say if I show you once, I shouldn't have to show you again. When I was much younger, it would be twice. The older I got, I only needed to be showed once. Of course there were few occasions where he wasn't completely clear, and that became a mess.

Bruk, the way you show is the best detailing possible probably in just about everyone's opinion. I know I wouldn't be worth a you know what because I'm sure I would crush, split, mar and destroy something. It's just best for me to pull out my wallet and let the pros handle stuff like this.

Update: 

More 3d Printed Parts: 

-Main Smoke Unit Funnel and “Bracket”

-LED Holder for the Number board and Headlights.

I attached a video of the Main Smoke unit. A quick test before the PLA funnel starts to melt to show the improved smoke output. 

I’m working on the Whistle Steam Smoke unit currently. 

There are lots of test fitting, re-measuring and reprinting, restarting way the part will fit best .... all very time consuming but will make my life easier in the end. 

Attachments

Images (3)
  • FCB34B1B-511F-469A-BE5A-745370A3ED52
  • DDF01F4A-5847-4607-B452-4380456AE61C
  • 0ADD3A64-003B-4178-9D3B-5A2CF01D1972
Videos (2)
0A1E4EE5-EEEC-4072-A652-E5F56A5F6C9B
3B861C64-0518-4AE0-A70C-3F0D50366C11
@Bruk posted:

Update: 

More 3d Printed Parts: 

-Main Smoke Unit Funnel and “Bracket”

-LED Holder for the Number board and Headlights.

I attached a video of the Main Smoke unit. A quick test before the PLA funnel starts to melt to show the improved smoke output. 

I’m working on the Whistle Steam Smoke unit currently. 

There are lots of test fitting, re-measuring and reprinting, restarting way the part will fit best .... all very time consuming but will make my life easier in the end. 

Looks great. I don't know much about 3d printing, so correct me if I'm wrong, isn't there types of printing material that are more heat resistant?

Looks great. I don't know much about 3d printing, so correct me if I'm wrong, isn't there types of printing material that are more heat resistant?

There is, but my printer is not capable of doing that. So I’m just test fitting everything before I have it professionally printed in the proper materials instead of me buy a whole new printer. 

Update:

I have been slowly chipping away at this project. I’m not in any hurry. I’m waiting for my Shapeways prints to show up later this week. Hopefully those fit. I got the tender all wired up. The locomotive is mostly wired up less the lighting. I am still working on how to mount those properly. Everything functions between the engine and tender, that means full Legacy control. Some of you doubted that the older generation of Legacy electronics wouldn't work, but it does via IR. So here is proof that it does. I had a defective speed encoder so the locomotive took off like a rocket first time around. Thankfully John here was able to supply me with a replacement and everything worked as it should. Thanks again John!

More to come this week. 

Attachments

Images (4)
  • 42FAE3EE-76D1-408D-9AE7-E4397DDA7CC8
  • EC92A962-F2B2-4D56-9FB9-4016355F944F
  • AA67693E-7B9F-4057-80EF-E171256C90E2
  • DFE51C1E-9420-4E49-9650-F0867B9184A1
@Bruk posted:

Update:

I have been slowly chipping away at this project. I’m not in any hurry. I’m waiting for my Shapeways prints to show up later this week. Hopefully those fit. I got the tender all wired up. The locomotive is mostly wired up less the lighting. I am still working on how to mount those properly. Everything functions between the engine and tender, that means full Legacy control. Some of you doubted that the older generation of Legacy electronics wouldn't work, but it does via IR. So here is proof that it does. I had a defective speed encoder so the locomotive took off like a rocket first time around. Thankfully John here was able to supply me with a replacement and everything worked as it should. Thanks again John!

More to come this week. 

Looks great as always Bruk👍

Bruk, my experience has been that the older Legacy RS 5.5 and RS 6.0 boards work with the RCMC, but the new RS-Lite boards don't work properly with the R4LC.  You lose commands in the process.

It some point I will have to take a look at this. I would think I have experimented with that before. Ill have to look at that sooner than later. 

Jon Z. explained to me that the issue is they actually made the RS-Lite a little less smart, so stuff like the bell is handled by the RCMC, and not like the old TMCC where the bell starts and keeps ringing in the sound card until you stop it.  The Legacy RS-Lite just does a single operation when you command it, if you want the bell to keep ringing, you keep sending ring commands to the sound board.  This was to concentrate all the "smarts" in one place, the RCMC.  That way things don't tend to get out of sync.

Jon Z. explained to me that the issue is they actually made the RS-Lite a little less smart, so stuff like the bell is handled by the RCMC, and not like the old TMCC where the bell starts and keeps ringing in the sound card until you stop it.  The Legacy RS-Lite just does a single operation when you command it, if you want the bell to keep ringing, you keep sending ring commands to the sound board.  This was to concentrate all the "smarts" in one place, the RCMC.  That way things don't tend to get out of sync.

I wish John Z would write a book 

Update:

3D printed parts are in and fitment couldn't be any better! I am very happy with that. I have attached a video. 

I got all the parts needed and installed. I have wrapped up the remaining wiring for the lighting in the loco which include; upper and lower headlights, marker lights, number boards, and cab lights. The Number boards are being powered off the track power and everything else is driven by the RCMC board.

On my T1 model I used (Warm White) 3528 SMDs for the number boards and headlights. For customer upgrades I will be using 3mm MTH bright white LEDs for the lighting. I also added green markers/lens instead of the red ones. I used green 0603 SMD's to light them. The original way they where lit was with the number boards. I will most likely not offer this as an option for future customer conversions due to the delicacy of installing them. I had to use a 15k resistor on top of the RCMC board output to dim them down enough to not be blinding bright. 

I also spruced up the cab and painted a few items on the back head and installed a single 0603 LED for the cab lighting. 

Attachments

Images (13)
  • A12B3A9E-D5CE-4ACB-A298-0445B1568DDF
  • 64F823BE-79EC-4E86-B0B9-A0CF749D9FD1
  • AF7D0E23-911D-4CA6-B889-BE8E154765D5
  • 7B428C36-938B-4FF4-A3A9-F14A7855DE24
  • 3718D238-9021-4068-8994-9EC5E89CBD68
  • 8B6B073A-9913-47F0-BDE4-CF9C1A60889E
  • 9565A579-C394-4FED-B4FB-819FF634ADFC
  • A068B7C8-EB5E-4060-9DC5-C2A8767EBF9A
  • 1C887A60-0782-4A6A-9794-A66E60E31D65
  • DEB53E58-728D-49E1-9373-76580C9394EC
  • CCFC9AB4-2A7D-45C1-9F0F-47EEFC14082A
  • 07EBA8BD-604C-4562-B501-5FCC1235D380
  • FAA3DC07-4FB3-4087-9247-31C33526C0C7
Videos (1)
B39FB39F-358B-4552-8BEA-9D87394D0B14
Last edited by Bruk
@Bruk posted:

Update:

3D printed parts are in and fitment couldn't be any better! I am very happy with that. I have attached a video. 

I got all the parts needed and installed. I have wrapped up the remaining wiring for the lighting in the loco which include; upper and lower headlights, marker lights, number boards, and cab lights. The Number boards are being powered off the track power and everything else is driven by the RCMC board.

On my T1 model I used (Warm White) 3528 SMDs for the number boards and headlights. For customer upgrades I will be using 3mm MTH bright white LEDs for the lighting. I also added green markers/lens instead of the red ones. I used green 0603 SMD's to light them. The original way they where lit was with the number boards. I will most likely not offer this as an option for future customer conversions due to the delicacy of installing them. I had to use a 15k resistor on top of the RCMC board output to dim them down enough to not be blinding bright. 

I also spruced up the cab and painted a few items on the back head and installed a single 0603 LED for the cab lighting. 

That looks amazing Bruk. Love the 3D printed parts and the led work. Looks great and sounds great as well. Amazing work as always. 

That's amazing Bruk, the 3D parts are the icing on the cake, they work great!  Did you do the design work on those?  Who printed them, and what material are they made from?

I see Jon took you up on the funding offer.

I'm guessing you've already done a test fit of the boiler shell, right?

Yes, I designed all those with my 3d CAD Fusion360. I had Shapeways print them in their PA12 Glass infused material. Ill probably use their “Versatile Plastic” next time...(higher temperature resistance) thats why this conversion took so long...lots of trials and errors. 

-Yeah I saw that....we can start a gofundme 😂

-oh yes everything fits. Ill make another video later tonight. 

Update:

Here it is!!! Some video clips with the shell on!! 

Don’t mind my floor, I have cats. 😂

-I’m running into issues using the OG smoke unit. After a few minutes of running it is giving me a fault. I was having issues before. During testing. I’m probably going to have to switch it over to a matching smoke unit that was used for the whistle steam and redesign the smoke funnel to fit. Oh well....tried to save some cash. Didn’t work out. 

I have a fat order coming from Lionel, so ill wait till then to start dealing with it. 

Attachments

Videos (2)
D6A65B78-A695-44C6-BF89-7216DB9D72C7
3E36307C-2B97-49C1-98F0-4C1147137CA6

I don't understand why you can't use any smoke unit, as long as the resistor is 8 ohms and the motor is good, how would the electronics even know?

See I thought so too! I swapped it out the 27ohm with an 8ohm. It get so hot (on High) it melts the solder, and I replaced the fan motor right before the video because it failed. It ran for about 10 minutes then failed again while I was filming.

Maybe, I have a defective RCMC board. With a bad smoke output. Ill will test later will an “updated smoke unit” see if does the same thing. 🤷🏻‍♂️

I have another coming for Valpac’s T1, ill see if that operates differently when it shows up. 

Impressive work Bruk. Regarding the smoke unit, does yours have a thermistor? If it doesn't and the smoke control board is looking for one that might be what is causing the error. The early RCMC Legacy engines did not use thermistor smoke units but most of the later Legacy engines with RCMCs have thermistor smoke units.

Pete

It shouldn't get that hot, but you may have to use higher temperature solder.  Also, perhaps your resistor leads are a bit too short, maybe too much heat getting up there.  I have noticed that MTH smoke units must use high temperature solder, I have to turn my temperature up for those to remove the old resistors.

Alloy Temperature Chart - Kester


I've been looking for a chart like this, I was running into similar problems with my 3rd Rail T&P conversion.... I just acquired a  roll of Sn63Pb37 but that's mid range says the chart. 

@Norton posted:

Impressive work Bruk. Regarding the smoke unit, does yours have a thermistor? If it doesn't and the smoke control board is looking for one that might be what is causing the error. The early RCMC Legacy engines did not use thermistor smoke units but most of the later Legacy engines with RCMCs have thermistor smoke units.

Pete

I used a earlier RCMC without the thermistor.  I originally I wanted to reuse the OG smoke unit, So I knew that a newer board that supports the sensor wouldn't be acceptable. 

I don't understand why you can't use any smoke unit, as long as the resistor is 8 ohms and the motor is good, how would the electronics even know?

After I cooled down from disappointment. I swapped the whistle steam and main smoke unit plugs on the board last night to see what was going on. The whistle steam smoke unit did the same thing. (Ran for a few seconds then stopped. The cab light doesnt flash anymore. So its the board. Shortly after messing around with it. It completely failed. So ill have to order another one at some point. 

It had to have been defective from Lionel. 

Last edited by Bruk
@Norton posted:

Its beginning to look like these fan control boards are the Achilles heel  of Legacy. I had one fail in my Vision Hudson and a friend had lost two in his Vision Niagara. Just like the AC regulators failing on older engines.

Pete

Well if Lionel offered training classes and technical data for this generation of Legacy...we could repair a lot of this at home! 2 hours looking over the board and testing everything in the circuit  

@Bruk posted:

Well if Lionel offered training classes and technical data for this generation of Legacy...we could repair a lot of this at home! 2 hours looking over the board and testing everything in the circuit  

Component level repair was never part of Lionel Service training in the past. It was only how to diagnose bad boards and replace them. Boards are treated like black boxes with inputs and outputs. Anyone who does do component level repair has to reverse engineer the boards themselves. With boards even harder to repair these days with everything surface mounted I doubt these skills will ever be taught. 

Pete

@Bruk posted:

I found reading some pennsy operations info that Red was only used for end of train or reverse operation. But it can be easily fixed if its wrong???

You are correct.  But green class lights means it is a section not the complete train.  I guess it was possible that a PRR T1 might be pulling a section but with it's power it would had to be one long train.  I would have used clear and that actually would be for night time.  Daylight hours clear lens not illuminated.

Ron

As information concerning prototype operating practices, regardless of railroad:

1) White  =  Extra train (during daylight hours the locomotive would be displaying white flags, and at night, white class lights).

2) Green  =  Second section following (during daylight hours the locomotive would be displaying green flags, at I night the class lights would be changed to green).

3) Red  =  Rear, i.e. the locomotive would be operating in reverse.

4) No class lights, and no flags  =  regularly timetable scheduled train. 

Bruk, Hot water as an actual Railroader in 100% correct.  And by the way he is a fantastic modeler.  He Models the very best track weathering for steam/ steam-diesel era.

But in our toy train world not practical and do not believe a remote controlled system could be made that would let us deploy a white and/or green flag set at will.  So as said I prefer using clear (white light) for the front end class lights.  Even in a well lighted train room they are somewhat subdued and in the dark well they be indicating an "Extra."  Years ago Lionel impressed me with a GG1 that had clear class/marker lens.  Depending on the direction of the Motor's travel they would illuminate white or red.

Now as a majority MTH runner, MTH's DCS system has a soft key (for some locos) feature that that allows turning the class/marker lights out.

One question for Hot Water if he will jump back in.  Prototypically are marker lights illuminated day and/or night when a consist is coupled up to the rear of a locomotive???????

Ron

@PRRronbh posted:

Bruk, Hot water as an actual Railroader in 100% correct.  And by the way he is a fantastic modeler.  He Models the very best track weathering for steam/ steam-diesel era.

But in our toy train world not practical and do not believe a remote controlled system could be made that would let us deploy a white and/or green flag set at will.  So as said I prefer using clear (white light) for the front end class lights.  Even in a well lighted train room they are somewhat subdued and in the dark well they be indicating an "Extra."  Years ago Lionel impressed me with a GG1 that had clear class/marker lens.  Depending on the direction of the Motor's travel they would illuminate white or red.

Now as a majority MTH runner, MTH's DCS system has a soft key (for some locos) feature that that allows turning the class/marker lights out.

One question for Hot Water if he will jump back in.  Prototypically are marker lights illuminated day and/or night when a consist is coupled up to the rear of a locomotive???????

Ron

New Lionel engines are going to have the ability to change the color of the marker lights, so this will allow for the desired control some of us would like. It also gives everyone the color they would like.

@PRRronbh posted:

Bruk, Hot water as an actual Railroader in 100% correct.  And by the way he is a fantastic modeler.  He Models the very best track weathering for steam/ steam-diesel era.

But in our toy train world not practical and do not believe a remote controlled system could be made that would let us deploy a white and/or green flag set at will.  So as said I prefer using clear (white light) for the front end class lights.  Even in a well lighted train room they are somewhat subdued and in the dark well they be indicating an "Extra."  Years ago Lionel impressed me with a GG1 that had clear class/marker lens.  Depending on the direction of the Motor's travel they would illuminate white or red.

Now as a majority MTH runner, MTH's DCS system has a soft key (for some locos) feature that that allows turning the class/marker lights out.

One question for Hot Water if he will jump back in.  Prototypically are marker lights illuminated day and/or night when a consist is coupled up to the rear of a locomotive???????

If you are referring to a double header steam locomotive consist, no the class lights on the second or third locomotives are turned off. This also applies to an MU'ed consist of diesel units, where all the lights, i.e. class lights, cab lights, headlights, walkway lights, and ground lights, are (or should be) turned off on each trailing unit. Having all those extra lights turned off really helps crew visibility to the rear at night.

Ron


@Hot Water posted:


Think my reply got lost!

No what I am referring to are the marker (red) lights on a tender or even the last diesel in Mu right in front of the coupled passenger or freight consist.  Is thee any reason and/or rule that requires these to be lit.   It seems to be no since they are not visible since the passenger/freight consist would bloke the view.  But there might be a rule.

Ron

@PRRronbh posted:

Think my reply got lost!

No what I am referring to are the marker (red) lights on a tender or even the last diesel in Mu right in front of the coupled passenger or freight consist.  Is thee any reason and/or rule that requires these to be lit. 

No. They should be turned off. Those rear marker lights are only for when the locomotive, steam, electric or diesel, is running light, i.e. without a train, or if in helper/pusher service when coupled behind the caboose ( the locomotive then being the end of the train).

  It seems to be no since they are not visible since the passenger/freight consist would bloke the view.  But there might be a rule.

Nope. No rule.

Ron


On the class lights discussion, I believe the PRR stopped using class lights sometime before WW2.  What looks to be class lights in the traditional location on the top of the smokebox are actually marker lights and should be red.  They would only be illuminated at night and for reverse movements when the front of the engine represents the end of the train.  Maybe some Pennsy afficianados can chime in in this topic.  As a modern steamer the T1 would have marker lights, not class lights, in the front of the locomotive.  

@Bruk posted:

John this is the LED that I bought. Guess it isn’t white. But amber. I bought it months ago. 

https://www.digikey.com/produc...54-2151-6-ND/7597115

Interesting LED, I hadn't seen those.  It might actually slide into the class light fixture if you use really fine wire.  You will have to insulate the bottom connections.  The whole unit is only .1" long and half that wide, it'll be fun soldering four wires to it.

Add Reply

Post

OGR Publishing, Inc., 1310 Eastside Centre Ct, Suite 6, Mountain Home, AR 72653
800-980-OGRR (6477)
www.ogaugerr.com

×
×
×
×
Link copied to your clipboard.
×
×