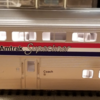
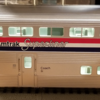
I just picked up this set of Superliners to go with my other four, makes a nice sized passenger train. I noticed the lights were much brighter in these than the other ones, these are the 1998 version, obviously made for conventional operation. Since I am going to do LED's for all my stuff anyway, and I want to run these next week at the Oaks Modular show we're setting up for, I decided it was time to do the LED upgrade.
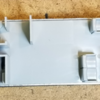
The chassis got two 2mm JST-PH connectors for the track pickups, and one side also goes to the lighting regulator. To absolutely no one's surprise, I selected my very own regulator product. ![]() The output of the regulator module goes to the spring pads (upper level lights) and to a Molex 2.5mm connector.
The output of the regulator module goes to the spring pads (upper level lights) and to a Molex 2.5mm connector.
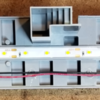
The middle piece, the upper level seats, has the actual LED strip for the lower level mounted on it. I just soldered the Molex connector on one end of that strip and super-glued it to the top. Also, you see the jumper that mates with the two JSB-PH connectors for track power, those connectors are also glued down and the wires are tacked down as well. This construction allows me to completely and easily separate the pieces so the lower chassis can be worked on, and of course, populated with passengers, the next step.
The car shell has the full length strip along the top center-line, and I just used the existing wires from the spring contact wiring to connect to the upper LED strip. This makes it a very easy affair to remove the shell, just take out the four screws and lift off!
As with any project, there always seems to be some "residue" left over when you're all done, seems you can't avoid it! ![]()


![20190103_193109[1] 20190103_193109[1]](https://ogrforum.ogaugerr.com/fileSendAction/fcType/0/fcOid/82100772933590836/filePointer/82100772934800834/fodoid/82100772934800828/imageType/MEDIUM/inlineImage/true/20190103_193109%255B1%255D.jpg)
![20190103_193140[1] 20190103_193140[1]](https://ogrforum.ogaugerr.com/fileSendAction/fcType/0/fcOid/82100772933590836/filePointer/82100772934800835/fodoid/82100772934800829/imageType/MEDIUM/inlineImage/true/20190103_193140%255B1%255D.jpg)
![20190103_173238[1] 20190103_173238[1]](https://ogrforum.ogaugerr.com/fileSendAction/fcType/0/fcOid/82100772933590836/filePointer/82100772934800836/fodoid/82100772934800830/imageType/MEDIUM/inlineImage/true/20190103_173238%255B1%255D.jpg)
![20190103_193109[1] 20190103_193109[1]](https://ogrforum.ogaugerr.com/fileSendAction/fcType/0/fcOid/82100772933590836/filePointer/82100772934800834/fodoid/82100772934800828/imageType/SQUARE_THUMBNAIL/inlineImage/true/20190103_193109%5B1%5D.jpg)
![20190103_193140[1] 20190103_193140[1]](https://ogrforum.ogaugerr.com/fileSendAction/fcType/0/fcOid/82100772933590836/filePointer/82100772934800835/fodoid/82100772934800829/imageType/SQUARE_THUMBNAIL/inlineImage/true/20190103_193140%5B1%5D.jpg)
![20190103_173238[1] 20190103_173238[1]](https://ogrforum.ogaugerr.com/fileSendAction/fcType/0/fcOid/82100772933590836/filePointer/82100772934800836/fodoid/82100772934800830/imageType/SQUARE_THUMBNAIL/inlineImage/true/20190103_173238%5B1%5D.jpg)
