Hi, all!  Long-time lurker, first-time poster.

I have primarily modeled N-scale, but have always been drawn to larger trains - and O in particular.  Our home is smaller and, unfortunately, I don't have a dedicated train room.  My wife and I just welcomed our first into the world 2 weeks ago (we waited a bit longer and, wow, it's an incredibly experience/feeling) and he pretty much owns the house and any free space.  N has always enabled me to work small...

But, I'd like to move to O.    One big reason is my new little guy (while much too young to operate trains today) will have an easier time seeing all of the action.  And accessories are a huge plus.

So, where to put it?  I could do a micro layout (say, 3x4), but instead I've decided to take part of an empty wall in the garage.  It's a bit cold in the winter, but I'll survive.    I'd like to keep the layout to 3' deep for reach concerns (against the wall), but can easily go to 10' wide (maybe wider if necessary).

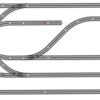
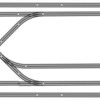
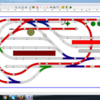
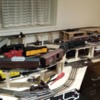
Here are a couple ideas I've come up with.  First, I want to thank MANY members and posts in this forum for any inspiration that may show up.  You guys are great!

Please let me know what you think any if you have any suggestions I should consider.  Track is O27...I don't realistically see any other option at 3' deep.  Both plans have a figure 8, which I'd really like to include.  Lastly, I'd like to operate two trains - thus the larger runaround or the independent loop.

Thanks for any advice in advance!
Matt

Attachments

Images (2)
  • 121016_Lionel-09: #1 (Runaround)
  • 121016_Lionel-10: #2 (Loop)
Original Post

Replies sorted oldest to newest

I'm doing just the opposite. I'm limited to 30" wide and doing a L shape that will be 5' x 8' that will leave enough room in the 5' x 8' for me to have other things that need to be in the same space.  

This is just for a couple of years while I convert a garage with a storage room into a Train room. It will take time and $$ to do it correctly.

Last edited by rtraincollector
RSJB18 posted:

My vote is plan #2. Add a crossover with 4 switches so you can move trains between both tracks.

Matt,

RSJB18's would be my suggestion too, but if I used the right tracks in SCARM, there is no way to add crossovers and keep the layout at 3'x10' for reach, it is simply not deep enough. And I'm not sure there's enough track separation the way it is for 2 trains to pass each other around the curves. The straights appear to be 3.5" apart, but the engine overhang on the inside loop will almost certainly cause problems if/when 2 trains meet at the corners.

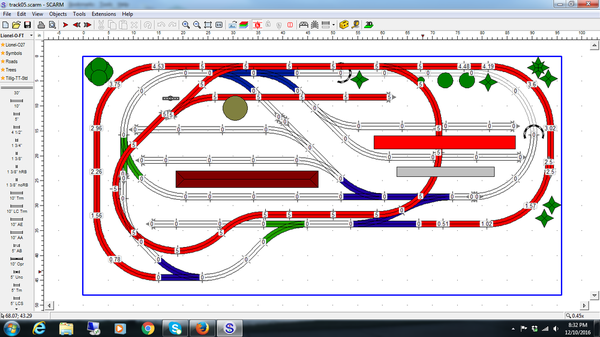
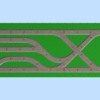
So, I played with turnouts a bit and came up with this design. Unfortunately, it's about 40" deep, but needs to be closer to 45" deep for clearance front and back. I raised the track along the back 2" to help with reach, but I don't know if that's something you'd care to do. IMHO, the problems with the rear tracks should be minimal because there are no turnouts. You probably can't reach that far without stepping on a small stool. I'm 6'1" and have a test 4'x4'x41" table set up. I can reach 34" standing on the floor and 40" standing on a 10" stool. I still have to place one hand on the table to do that though. Still, it would be easy enough for me to pull a derailed car off the layout, but hard to do any serious maintenance. Of course, that's hard at 36" or even the recommended 30" at times.

3x10

3x10⁻²


Attachments

Images (2)
  • 3x10
  • 3x10⁻²

Thanks, all, and appreciate the plan mock-ups!! Awesome.

I am limited to 3' deep, however. It's a single car garage and am squeezing as much as I can in.

It seems I'll need to forget the outside loop, but I do want to at least maintain a runaround to park one train while another rumbles by...

I'd also like to keep this one level, primarily so our little guy can easily operate it (hopefully soon!), but do want a lot of action and accessories. There's just so much you can do in 30 sqft.

Matt

Matt,

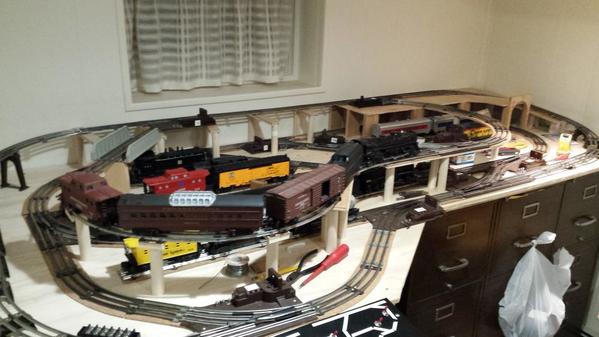
I built a similar layout to your layout #2, I elevated the outside loop and pushed the inner loop under the outer at the back of the layout.  It helped me to use larger radius curves on the inner loop and the bridges I used to elevate the outer loop add interest.  I hid some of the lower loop under mountains supporting the upper loop.                           Hope it helps.

Chris

Matt,

The narrow side of my layout is 36". All of my curves are 027. All switches are 027 except the two switches for the crossover which are 036. Its tight but it does work. I did the same as Chris suggested and elevated the outer loop so that the inner loop runs below it. My bigger problem is that my grades are too steep and some of my engines can't make it to the top.  I did my plan in SCARM too.

Hope this helps.

Bob

I will add, get the remote versions of Lionel's O-27 switches, their anti- derailment is a real help. Unfortunately O-27 engines are getting a bit scarce. I would suggest an engine you can speed cap, like the low end Lionchief engines which lack cruse. Most come in sets don't run on O-27, but being able to keep the top speed down on a small table over cement flooring I would assume would make life much easier. Just remember to tape over the speaker cover, so the bell is not too annoying. Also when the little one gets older, it will safe guard against him accidentally breaking an engine from too much speed, or you having to drop the layout to find out what he is up too, only to come back and find a mess.

Last edited by Allin

Kudos to the many ideas posted. Keeping in mind your original post, I'd some how figure a way to keep it flat. You mentioned wanting to use accessories, I'll assume you mean operating accessories.  These may keep you sons attention and interest vs. just watching trains going around loops of track. Be sure to keep the activation buttons within easy reach for your son.

Steve

What is missing from the software plans is the footprint of the switch base and switch motor. It's like 8.75" long and 5.25" wide.

Too bad you can't get to 41" wide. Then, you could use O track and O31 curves for two loops.

A single loop of O with a figure 8 fits nicely and leave a lot of space for spurs, accessories and scenery.


Attachments

Thanks! After much back and forth, I'm going to reduce track a bit and move to O31. Your image is what I was thinking as a baseline and with a couple switches. Pretty simple, but should work well. I'm going to play around a bit to see if there's anything more ideal in the space (possibly losing the '8') but am going to keep it single-level.


If you want some switching action, those are both good, but I like the 2nd one better because both runs are longer. They both force you to drop a car and run around to push it into at least one siding depending on your direction of travel. With the longer inside run on the 2nd, you could run 2 trains, stopping one to let the other pass and then moving on. It also lets your son eventually run one while you run the other.

DoubleDAZ posted:

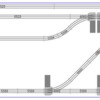
Good point, Carl. The switches will work, but they do take away landscaping space. I drew a polygon around the switch based on the photos in your link.

FWIW, RRT switches include the base, so it's easier to see what space is left.

3x10 switch


I was thinking about it when I looked at some of the more complex plans offered earlier. yes, I went to RRT and measured the base outline.

Twehttam posted:

Thanks, Dave!  Really appreciate the design and SCARM file.  I may just go with that.  

After browsing Thor's site (again), I came up with the following as well.

Edit: Added design "04.

No.'s 2 & 4 are setup nicely for accessories.

You see that if you make the O31 loop, you can add and rearrange the switches and inner track plan as you wish, when you wish.

You are talking about a door layout for a 3 x 8. Put it on some kit sawhorses. Put a piece of light brown indoor/outdoor carpet on it. leave the 2 feet on the end for the transformer and such. New track from Menard's(inexpensive) and switches wherever you find them. Get new.

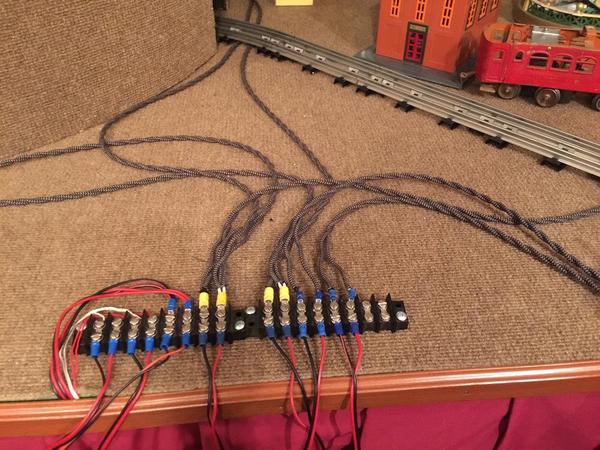
Here's what Steve "Papa" Eastman's table looks like. He does pre-war-so over the top wiring looks ok.

Barrier_Strips_Papa_Eastman


Attachments

Images (1)
  • Barrier_Strips_Papa_Eastman

I got my first train at birth. Over time, I discovered I liked watching switching more than doing it. I'm a looper. I just like to run them and watch. I wish I had #1 done reverse loops and siding. #2 a ladder type yard you can simply pull into and out of for storage of more trains on the layout. #3 a long industrial stub siding and a passing siding for storage and less switching overall.

What I'm glad I did for watching, (and with big wheel flanges, it's just not as big a deal as with HO, N or Z), was an S turn, though adding a short straight would have allowed a few cars to run there I hadn't considered yet (Marx passenger cars, the couplers are direction pointed buy the turn the truck is on)

Also a level elevated line added character and once a train is on it, it usually stays there longer before I remove it though I swap out the engine more often.

You know already what you like right? That should help you decide.

Thanks, Adriatic.

My various N scale layouts have shown me that I prefer operations while allowing the option of a simple continuous run.  #4 provides that for me.

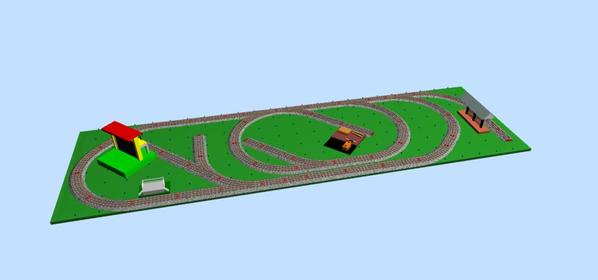
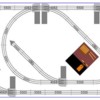
I've made some minor tweaks (below).  I also picked up all benchwork supplies including some nice, green indoor/outdoor carpet (a little heavier, darker) and ordered most of the track from a forum sponsor today (I'll try to source the switches from ebay for a bit less $).

Time to get going!

121516_O31_04cO31_4c_3D

Attachments

Images (2)
  • 121516_O31_04c
  • O31_4c_3D

I have a siding on each side of the log loader. One with an operating track to dump logs to the chain loader and one on the other side to load loads into a car.

I can see your dilemma with the switch motors getting in the way. Little guy will still like it. Put an activator track in there to remind you and get an MTH log car. They dump real nice. The small plastic logs that come with the car work in the loader.

Nice find on the SCARM structures. We don't have enough of them.

Have you run the simulator on the layout? In 2D view, select Extensions on the menu bar, then select Model Train Simulator. Select a track, (highlight), then select the engine. Next add some cars. The controls are easy enough. Click on a switch to throw it. It has non-derail if you forget to throw one back. The timer is real time. It will show you how much run time you can get doing everything on the layout. Oh, I almost forgot...you can go to 3D after starting it in 2D. Very cool. The gray X will exit the simulator mode and return you to normal mode.

You'll be pleased with this design as it has a lot of play value. Nice touch on the angled corners. I always forget that Postwar technique. it adds a good look and breaks up the constant curve. Many times it provides enough room on the corner for the transformer and switch control bank.

Have fun and keep us updated.

Last edited by Moonman

You could go with Gargraves or Ross track and switches, use the 031 or 032 curves with Gargraves and Ross switches. With either Gargraves or Ross switches (the switch, a DZ-1000, is mounted on the side similar to an H.O. switch)the switch machine won't be in your way as much as with the 027 switches by Lionel. You can cut down the Ross or Gargraves switch a little on the end to fit your area without any worries.

Lee Fritz

Howdy, Matt.

Congrats on the wee little one.

I'm a little late jumping in here but if just a bit more depth could give you a LOT more operation/fun, I highly recommend a Topside Creeper (Amazon, Northern Tool, and many other sources for $250 to $300). It is a rock solid stool/ladder for working on big trucks.

My layout is 12x24 and has a couple of areas that are as much as 48" from the edge of the table. I built my deck strong enough to walk on but that was not practical once scenery was in place. I debated the at-the-time $250 back and forth, and then finally caved in and ordered it. The instructions were a bit puzzling at times but once I had it up there was no going back. I'll never build a layout without one again. When not using it, it folds up and goes under the layout.

Good luck, and God bless you, your wife, and baby.


Add Reply

Post
The Track Planning and Layout Design Forum is sponsored by

AN OGR FORUM CHARTER SPONSOR

OGR Publishing, Inc., 1310 Eastside Centre Ct, Suite 6, Mountain Home, AR 72653
800-980-OGRR (6477)
www.ogaugerr.com

×
×
×
×
Link copied to your clipboard.
×
×