We are moving around to the west side of the layout and want to construct a 30 inch or so wide river. Suggestions on how you would do the water?
Original Post


|
|
Replies sorted oldest to newest
Flat window glass, spray-painted on the bottom with a deep green camo paint and waves painted on the top with Mod Podge. Many people like wavy shower-door glass, and it is true that this makes the surface easier to clean. But with the Mod Podge you can put the waves wherever you need them and modulate their density.
I really like the method Dennis B covers in his book. I used the aquatex glass, and it worked well for me, Camo green paint on the bottom.


Hey Muffin,
Probubly see ya in a few weeks.
Anyway my favorite way to model water is with envirotex. Mostly because of the reflection and you can see the bottom contour depth transitions as well as make ripples (like behind a canoe)or splashes where you want.
Piers and rocks look and are submerged as well as the wet look.


Patrick
did ypou check out that guys fishing license?
Beautiful work!
On a previous incarnation of my layout, I used an irregular sheet of 'regular' glass that I sprayed unevenly with Dullcote and placed over a few small circular 'blued' mirrors I placed a bit randomly. I did this purely for the effect it made with the overhead lighting that darkened the glass nicely and sparkled or twinkled on the mirrors....
Great pictures! I like that harbour like character from the pics above as wel as the pond -like solution on the "fisherman" pictures.
Kieffer
Patrick....WOW!!
Guys....I just ordered my "water" a little while ago. One sheet of Aquatex 60" by 84". It cost me $217.00 and I will be using it in two scenes. One will be a 30" by 84" long canal along side the central part of the city. The other half is going to be my harbor scene in front of the same area. In order to give that wet look to which Patrick refers, I am using a high gloss spray enamel over the top of the glass and along the edges. The Aquatex has almost a satin finish so the gloss spray will increase its reflectiveness. I get started on this project this weekend!!!
Alan
Jerrman,
Auqatex is a type od glass typically used on shower doors qnd other such things where you wnat light but not a clear view. it is textured. The side with the small ripples up makes a great water. The back is painted a dark color.
This can be purchased locally at most glass shops.
I hope this helps.
.....I will be using it in two scenes. One will be a 30" by 84" long canal along side the central part of the city. The other half is going to be my harbor scene in front of the same area.
Alan, how will you cut the Aquatex, or will it be cut & shipped in two pieces?
I've always used Envirotex Lite and have been fully satisfied with the results. I'll be using it again on the layout I'm now building, but admittedly will have a very small "water" feature compared to what some of you folks have.
Hi Brian...
We have two large glass shops in my area and the one I ordered from is having a standard size piece shipped from their supplier to the shop. Then they are going to cut the glass in the sizes I need. Aquatex is available in both tempered and annealed with the later being able to be cut. The price I got includes them cutting it for me...
Alan
Jerrman, I'll look for some photos.
I had the local glass shop cut the glass for me. I built the harbor first, then measured out the specific size I needed. They sanded the edge such that there were not any sharp edges. Worked out great.
And Rich...your project came out beautiful!
Alan
"favorite way to model water?"
Steve, Cindy Crawford would be a good choice. ![]()
Thanks Alan and Rich! That's good to know when I get to that point.
Hey Muffin,
Probubly see ya in a few weeks.
Anyway my favorite way to model water is with envirotex. Mostly because of the reflection and you can see the bottom contour depth transitions as well as make ripples (like behind a canoe)or splashes where you want.
Piers and rocks look and are submerged as well as the wet look.
Beautiful effect! Is that a single application/pour or multiple, and how "deep"is the "water"?
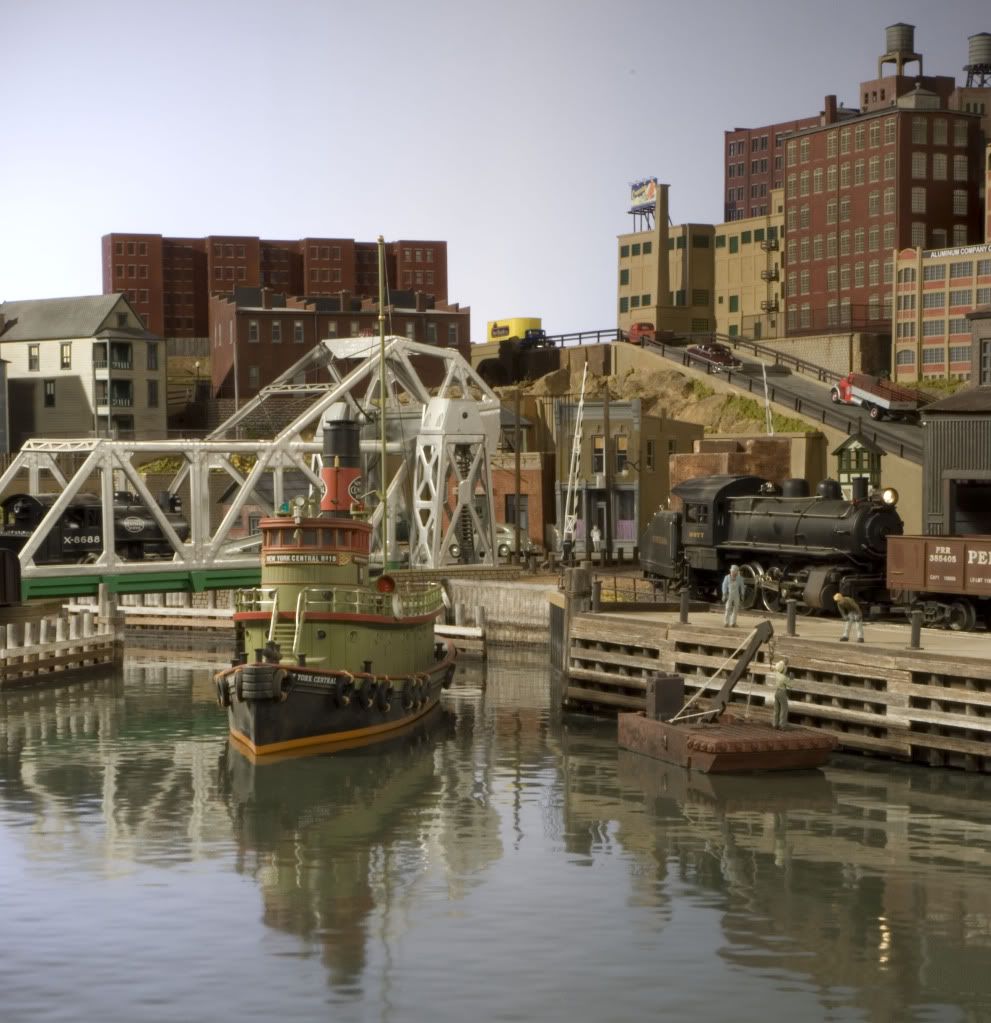
I just completed the water portion of my harbor scene and now am laying out the rows of canneries, shippers, etc. The "water" area is 2 feet wide by 7 feet long. Once I am satisfied with the locations of each, I will then go back and begin building each of them including a boardwalk / wharf / dock in front and along each structure. Sorry for the tug, etc. sitting on top of the water...I will use clear silicone to help with placing everything "in" the water. Also, the large "concrete" bridge supports will be wrapped in what will represent large cut stone or blocks.....still have a ways to go!!
Thanks,
Alan


Hey Muffin,
Probubly see ya in a few weeks.
Anyway my favorite way to model water is with envirotex. Mostly because of the reflection and you can see the bottom contour depth transitions as well as make ripples (like behind a canoe)or splashes where you want.
Piers and rocks look and are submerged as well as the wet look.
Beautiful effect! Is that a single application/pour or multiple, and how "deep"is the "water"?
Thanks,
All the pictures are one pour except the first one with the canoe, is 3 pours. Only because i didnt like a section where i had sand .So I painted over the whole thing again. Then the second pour, even though i waited 6 hours to make the ripples ,the next morning they where gone. So the third poured again i waited 8 hours and they barely showed up but is nice the way they are suttle.
Ive seen others where they use a dental pick and put waves in certain areas of the lake which is also a cool effect.
I would say each pour is about 1/16" (if that)
Right On Pat,
Envirotex Lite.
Color and finish area tobe casted then go for it.
Thin pours is must, moving water cab done with
latex or silcone chaulk then painted with latex paint
and brush.
Bob from AltoonaModelWoks.


For painting directly on a board surface consider G1S or G2S sign board. Perfect for appling oil or latex paints, smooth with no wiskers.
Thank you everyone and especially thanks for the pictures. Looks like we will be putting ours in right after York.
I used quarter inch Masonite as the surface to paint on. I found that it is very smooth yet supports the glass quite well. Also, I experimented by painting the bottom of a scrap piece of glass and then compared it to just sitting the glass on a painted surface. I preferred the later since to my eyes the water looked deeper...
Alan
Has anyone considered or tried window tinting between the aquatex glass and normal glass, and then placing some kind of illumination underneath? I was thinking of a string of multifunction Christmas lights set on slow glow.
This afternoon on my way to the train shop I discovered a Stain Glass shop. The lady there showed me some different types of tinted glass some of it textured just like the Aquatex and the price seemed close too.
Well here is what not to use. E-Z water. Mine ended up cracking, I worked the cracks out with a heat gun and they kept coming back.


i like magic water and caulk. Magic water is a bit less brittle then evirotex and handles modules and moving around real well. its applied in thin layers. Four layers here

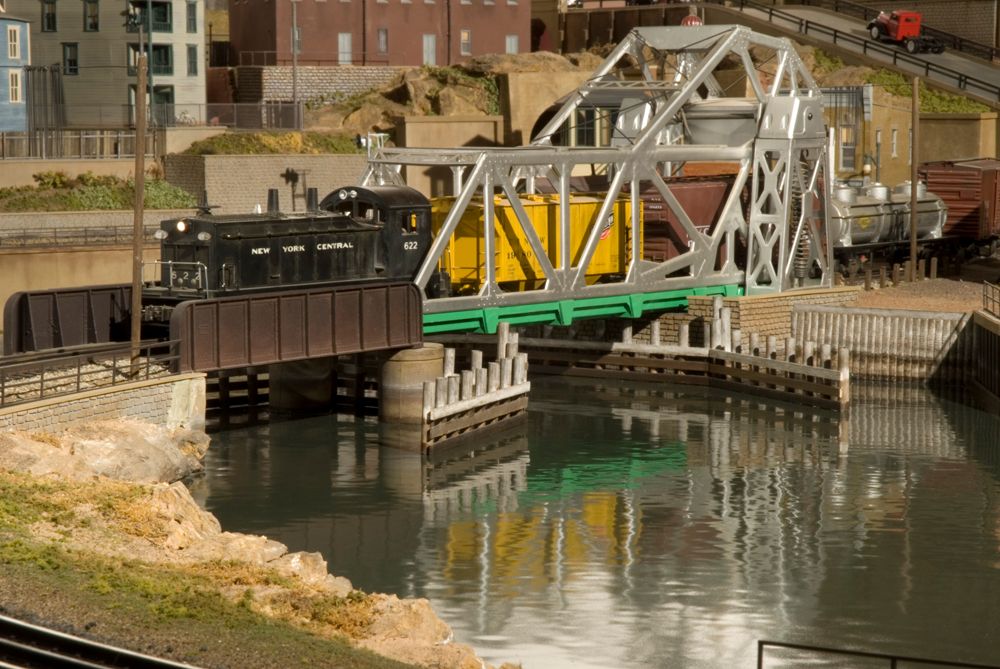
This is Aquatex. The only thing that I did was paint the underside Camouflage Green. The reflections pull everything into the water.
Hi fellows. This is no criticism, but by using the shower door glass, doesn't that make the whole pond, lake, river scene look like someone is throwing lots of pebbles in the water all at one time ?
If a high wind is blowing all the time, the water will look like that; but normally, isn't a body of water pretty flat looking - except a running brook or a river. But that's another look entirely.
Corvettte (Paul)
 All bodies of water have ripples unless it's perfectly calm--which is rare.
Hi Dennis,
I'm learning all the time. After your post, I went on the Internet and Googled "pictures of rivers", and learned something I didn't know.
Most rivers "do" have a rippled look. Some don't, but the majority do.
I stand corrected.
Corvettte (Paul)
Some of these examples are terrific!
One my first ravine I used hydrocast plaster to form a level base. I painted it with acrylic artist colors to give a gradation from dark black green to lighter green and finally tan to simulate a sandy edge. I then poured on W-S Realistic Water. When set I add the realistic water effects paste to form some ripples and eddies behind rocks and the bridge abutment. While I liked the effect, this stuff is expensive and covering the areas you describe wouldn't be wise.

For the next ravine I bought 2-part epoxy bar top coating like Envirotex at The Home Depot. It's $24 for 32 ounces compared to 22 for 16 ounces of Realistic Water. I let you know how this works out.

This is Aquatex. The only thing that I did was paint the underside Camouflage Green. The reflections pull everything into the water.
How do you cut the Aquatex to fit all the structure? Also, how do you float your boats?![]()
I like to use Woodland Scenics "Realistic Water." I pour it is thin layers gradually and it is about 1/2 inch in places. It never really hardens - even after a year it is still a bit plastic and soft and looks liquid. In this photo, you can see I have two guys fishing. I have dropped in some tiny slivers of white plastic - fish - on an early "level", then poured other layers on top of them. They really do look like fish.

Hi Lee,
I like you idea of layering the water, because of your idea of placing something that looks like fish. As you were describing the fish I was thinking about layering in old dead logs, leaf debris, and other objects down in the water.
GOOD IDEA. Will file it away so when I design my 1'x10' river I will work those ideas into the river. Thanks !
Corvettte (Paul)
This is Aquatex. The only thing that I did was paint the underside Camouflage Green. The reflections pull everything into the water.
How do you cut the Aquatex to fit all the structure? Also, how do you float your boats?![]()
Access to this requires an OGR Forum Supporting Membership
