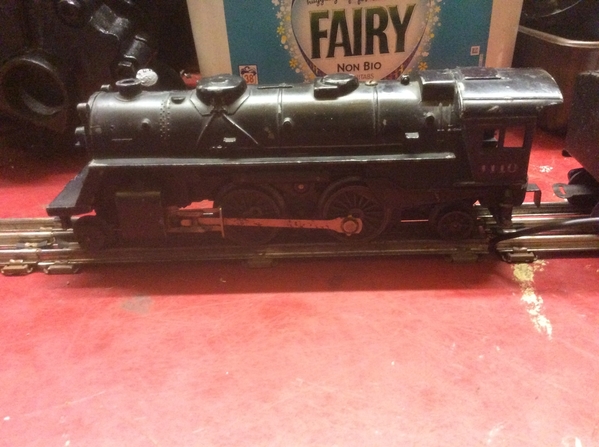
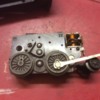
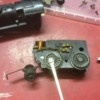
I’ve now set up a test loop on my workbench, and wired up the KW transformer/controller. The postwar Scout 2-4-2 doesn’t start consistently, although it will sometimes start and run quite smoothly, sometimes not run at all. Checking the rails, I have a good voltage showing on the multimeter. 

Next job is to clean the wheels. I’m a bit puzzled by the drill for this, being used to 2-rail DC ... I’m particularly unsure of the best way to clean the rollers? 

Original Post

Replies sorted oldest to newest

Is this a TRUE Scout with a plastic motor body?  Some of the postwar 2-4-2's had a decent-quality parallel plate motor with metal sides, and a traditional 'E-unit' to change direction.  These are much more reliable, easier to work on, and can usually be restored to operation with just a good cleaning.  Some pics would be helpful.

Here she is

CFC98BA0-935A-45CA-A425-D9062F7FE325E926162D-B066-4DB3-8072-E1C28B0AAF0F

Rail voltages seem good, from the meter. 

A couple of things I notice

1) when the power is turned on, it moves forwards (always forwards). No amount of cycling the button will restart it, once stopped.

2) there is a longitudinal (fore-and-aft) slot in the top of the body shell. There are no other slots in the body. I assume this is for the reversing unit, which is lost? 

Attachments

Images (2)
  • CFC98BA0-935A-45CA-A425-D9062F7FE325: Loco
  • E926162D-B066-4DB3-8072-E1C28B0AAF0F: Tender

How about a BETTER picture!?  A well-lit photo of the UNDERSIDE would answer many questions.

I'm going to guess that your 1110 has already been remotored with a 2034-100 metal motor.  There might be a lever up inside the shell, near the last pair of wheels, to control the E-unit.  Or perhaps someone changed the motor, and didn't install an E-unit, in which case it won't reverse.

If the E-unit is stuck or the brush wells are dirty, the loco may not cycle reliably.  A thorough cleaning, or a spritz of electronic contact cleaner ("TV tuner cleaner") on the e-unit and brush wells will work wonders.  More pics please, and we'll go from there.

Last edited by Ted S

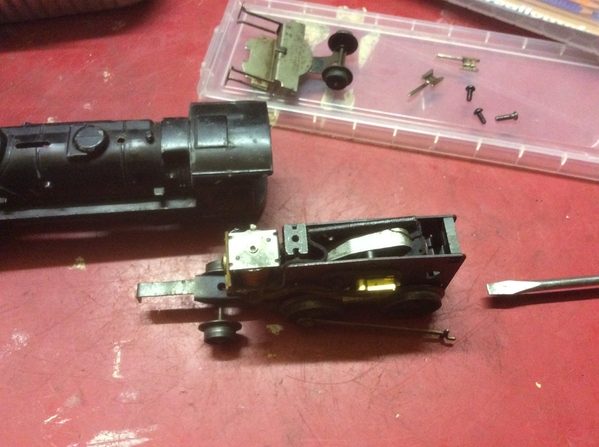
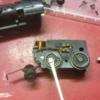
Pictures here, it isn’t easy to take pictures on my workbench because of the lighting. Not at all what I expected to see from my past experience of Hornby and TriAng! 

You will see that it does, indeed, have metal sideplates. There is a small lever at the rear, hidden within the body shell, which appears to have two positions - making, or breaking contact with a brass rivet on a piece of PCB at the back of a solenoid(?)

I also managed to make the loco run in reverse at one point, from the transformer/controller, although I’m unclear how this was achieved. 

4AEB196E-50AE-406A-B718-31F2D32A836149BCAA92-0097-4880-819F-08735A8AD4394E5B5D51-6957-44DE-9631-2D563BCDE6BF60ACDAE4-7D8B-41F4-A73A-30865F40F0D8

Attachments

Images (4)
  • 4AEB196E-50AE-406A-B718-31F2D32A8361
  • 49BCAA92-0097-4880-819F-08735A8AD439
  • 4E5B5D51-6957-44DE-9631-2D563BCDE6BF
  • 60ACDAE4-7D8B-41F4-A73A-30865F40F0D8

Ah ha! You have an "upgraded" motor with the e-unit at the rear. Unfortunately, since your shell shell does not have a corresponding slot, the lever cannot have the range of motion to make contact with the rivet to activate the direction change. You can choose to do a variation on one of the following themes: modify your shell, find another shell, solder a wire to the rivet, or enjoy it as it is!

I don’t fully understand that reply. 

The lever, as dismantled, is in contact with the rivet. 

Is your meaning that the reversing is actuated by the lever either contacting, or not contacting the rivet? If so then does that mean that the unit does not respond to the Direction button, and the occasional reverse running is caused by some fortuitous combination of control movements, which is why I can’t detect any pattern? 

I’d quite happily settle for the loco running consistently and reliably in a forwards direction, but I don’t QUITE seem to be in that position? 


@bmoran4 sorry but you're mistaken.  The 2034 which came out in 1952 used the SAME shell as the 1110, with the same motor and e-unit the original poster has.  The 2034-100 motor was installed by many service centers as an "upgrade" to the plastic scout motor with the finicky rotating brush holders; that's probably what happened here.  On the 2034, the lever is neither visible nor accessible when the loco is on the track.  You have to reach under to throw it, that's just how it is.  Some later 2-4-2's with a two-position E-unit had a horizontal slot on the top just in front of the cab.  Which is not applicable to his cab OR motor.

 @Rockershovel you don't need to modify your shell and shouldn't attempt to do so.  When the lever is contacting the rivet, the E-unit (electro-mechanical transmission) is in the circuit.  When power is applied the coil is energized.  It pulls a solenoid upward, and a pawl catches on a drum, causing it to rotate.  The drum is covered with a copper foil which acts as a double-pole, double throw switch, feeding current to one side of the circuit or the other, which is the only way to reverse a series-wound AC motor.

Sometimes the copper foil on the drum and "fingers" becomes oxidized.  To cure this, spray the drum and fingers with electrical contact cleaner.  Also, spray the brush wells (brass tubes on one side of the motor.)   You can do this without taking the motor/chassis apart.  Allow the fluid to dry (it's flammable!), and then run the train back and forth vigorously under power.  This should burnish off the oxidation and restore normal operation.  Otherwise, your E-unit may need to be professionally rebuilt.

If you haven't already done so, you should clean the wheels with rubbing alcohol to ensure good ground contact.  My first train had a motor very similar to this.  My dad taught me how to take it apart and tune it up when I was ten.  Hope this helps!

Last edited by Ted S
Ted S posted:

@bmoran4 sorry but you're mistaken.  The 2034 which came out in 1952 used the SAME shell as the 1110, with the same motor and e-unit the original poster has.  The 2034-100 motor was installed by many service centers as an "upgrade" to the plastic scout motor with the finicky rotating brush holders; that's probably what happened here.  On the 2034, the lever is neither visible nor accessible when the loco is on the track.  You have to reach under to throw it, that's just how it is.  Some later 2-4-2's with a two-position E-unit had a horizontal slot on the top just in front of the cab.  Which is not applicable to his cab OR motor.

@Ted S, While the 1110 and the 2034 use the same base shell, there were differences. The e-unit control lever of the 1110 behind the sand dome was filled in. On all but the earliest, the motor mounting pin holes along the side of the locomotive that held the motor in place were filled in and were replaced by a screw hole on the top of the boiler right in front of the cab. Anyways, I believed, due to the presence of the e-unit hole behind the sand dome and the cab number, that I was dealing with a 1110. Upon the revelation that there was a standard e-unit within, and knowing variants had an upwards facing e-unit slot just in front of the cab, I came to the conclusion I presented in my prior post. One of the many hazards of dealing with frankensteins. Glad you could politely chime in and collectively keep things progressing.

@Rockershovel, the directions presented in that link are general good locomotive servicing tips. Cleaning the armature, brushes, bursh wells etc will only help your locomotive!

The service documents for the 2034 motor are here:

http://olsenstoy.com/cd/locos/loc2034c.pdf

The brush wells are the cylinders where the brushes sit, pointed to by the red arrows:

Attachments

Images (1)
  • mceclip0
bmoran4 posted:

@Ted S, While the 1110 and the 2034 use the same base shell, there were differences. The e-unit control lever of the 1110 behind the sand dome was filled in. On all but the earliest, the motor mounting pin holes along the side of the locomotive that held the motor in place were filled in and were replaced by a screw hole on the top of the boiler right in front of the cab.

I noticed the non-recessed screw in front of the cab, and what looked like the outside bearing on the gear cluster assembly, so I suspected a conversion right away.  When you install a 2034-100 motor in an 1110 or any Scout, you can't avoid drilling a small hole in the top of the boiler casting for the screw.  That's the only modification that's necessary.  The through mounting pin is not used (but those holes in the firebox area remain.)  The 3-position e-unit with downward facing lever will have enough travel to engage the rivet.  Obviously you have to reach under, or remove the loco from the track to access the lever, which is true of the 2034 and the later, plastic-bodied 250.  All of the 2-4-2's with a lever on top, like the 249, 247, 243, 244 had two-position E-units.  These were the basis for the MPC-era locos as well.

@Rockershovel good find.  Follow the instructions in that article and you should be good!

Ok thanks, that sheds a light on the matter. I’m familiar with Hornby style 3-rail locos, so now I can understand the construction of these units I can progress to cleaning the commutator and brushes. 

If I set the lever so the rivet is NOT contacted, does that mean the reversing unit is disengaged, and the loco controlled directly from the throttle, in FORWARD only? 


If it has the forward-neutral-reverse-neutral e unit, depending on what state you disengage the e unit you might find yourself in one of the two neutrals or forward or reverse. 

Croc clip two wires to the engine and hold it in an upright position so the e unit can function and then power it up/down so it cycles to forward and then power off and disengage the e unit and power up again and see if it stays in forward.

As an experiment see if you can get it to go in reverse and do the same, then you will have an understanding on how the e unit functions .

Last edited by Ukaflyer

Add Reply

Post

OGR Publishing, Inc., 1310 Eastside Centre Ct, Suite 6, Mountain Home, AR 72653
800-980-OGRR (6477)
www.ogaugerr.com

×
×
×
×
Link copied to your clipboard.
×
×