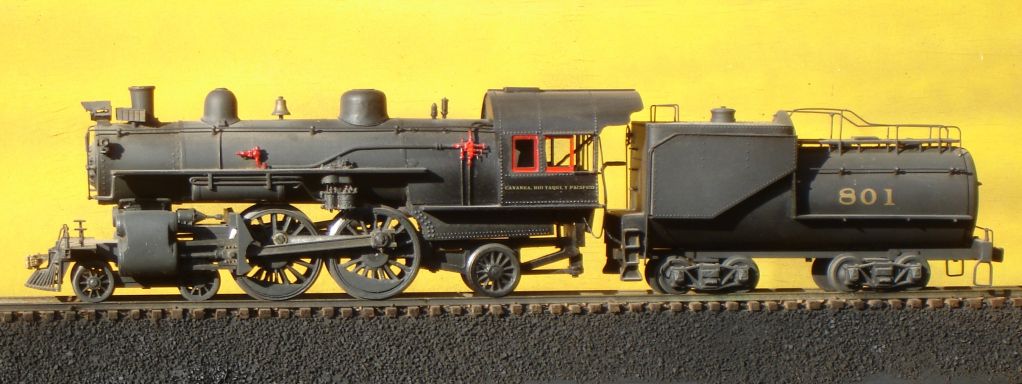
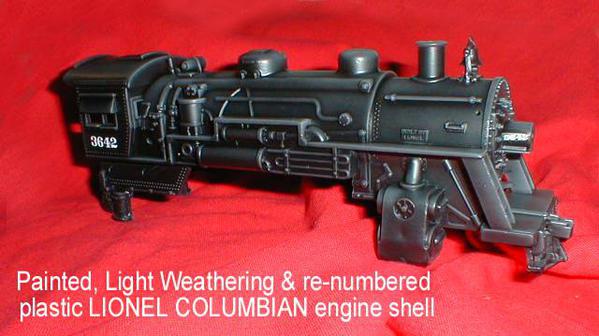
This seems to have really heated up, and sadly I find myself agreeing with everyone.  I think airbrushing will deliver better results than spray cans, BUT, I think the original poster was asking specifically about how to use spray cans.  


To that end I offered what advise I have for using spray cans and prepping the work for them.  If you want to preserve as much detail as possible and have the potential to have a better looking paint job, learning to use an airbrush may be a valuable skill, but when it comes to making a postwar engine presentable, 99 cent Lowes flat black will do the job.


As a second note I want to make clear I am not great at painting, in the car pictured above my role was limited to what we call paint prep.  The sanding, blocking, taping, and especially the cleaning that is rather important just before the car is sprayed.  Please give the credit to B.R. and Steve at XL Customs for laying down a glass-like paint job and all the airbrushing... skills that are beyond my ability.  

Last edited by JohnGaltLine

Joe,

If you can sift through it all. Much good advise has been given here. Currently, I'm following the recommendations given by AMCDave. His technique is a good one. I'm attempting to paint a few pieces of prewar tinplate. On my next piece I will follow the advice given by Lee Willis. I've been painting my trains for more than forty-two years with airbrush. I cannot use my brush anymore. I'm learning to paint all over again using rattle cans. My paint sessions are only thirty-minutes per-day. Any longer, it becomes an almost impossible task. I asked AMCDave for his help. He gave me many helpful tips. I'm giving it my best shot, knowing that I've done much better. I'm suffering from advanced Parkinsons and doing it. Joe, just read through all the BS that's been handed out and you will do a great job. I have faith in you because you have what it takes.

Here's my first try on a trolley, and all with rattle-cans. Rustoleum Pintura based primer on the metal castings and stamped sides. Krylon short cuts on the red surfaces, Rustoleum 2X on the creme windows and Krylon Fusion flat black on the plastic roof with NO primer. I'm happy with the results?? Now for some trucks!!.

Geo.

Streetcar 1

Attachments

Images (1)
  • Streetcar 1
Also the paint o  a actual new locomotive is not Smooth.  Take a look  at this picture and look at where the glare is, you can tell.  Sorry all I have is black to take a picture of.  lol As stated earlier it's all in what you want.  Just thought I'd show a picture of a actual unit fresh out of paint. 20141226_223834

Attachments

Images (1)
  • 20141226_223834

I know Lee and others use Rustoleum with fine results, but personally I much prefer Krylon. Just my personal experience. It seems to me their nozzles are better, and their paint goes on smoother and dries about 5 times faster than Rustoleum, which takes forever to dry. 


That is a quote from a previous page - interestingly, that was my experience too, until about five years ago or so.  Now it is the opposite - Rustoleum dries just as fast as Krylon, and the new Rustoleum nozzles spray like the old Krylon nozzles did.


I use a Paasche model H for really fine work, but for steam I often use a spray can, depending on what I am doing.  I win contests with rattle can models.


Originally Posted by bob2:

I know Lee and others use Rustoleum with fine results, but personally I much prefer Krylon. Just my personal experience. It seems to me their nozzles are better, and their paint goes on smoother and dries about 5 times faster than Rustoleum, which takes forever to dry. 


That is a quote from a previous page - interestingly, that was my experience too, until about five years ago or so.  Now it is the opposite - Rustoleum dries just as fast as Krylon, and the new Rustoleum nozzles spray like the old Krylon nozzles did.


I use a Paasche model H for really fine work, but for steam I often use a spray can, depending on what I am doing.  I win contests with rattle can models.


I'm glad Rustoleum works well for you. But my experience differs, and this was still true last month when I used both Krylon and Rustoleum spray paint (fresh cans) on a project. The Krylon went on better, and dried in a fraction of the time it took the Rustoleum (which came from Home Depot), just as it always has. (The only reason I resorted to the Rustoleum is because the local HD was still open, and my Ace Hardware, where I get my Krylon, was already closed.)


But whatever best suits a person, that's what they should go with. 

Last edited by breezinup
For some items, I airbrush and enjoy it very much.  Other items I use rattle cans.  I have used Krylon Fusion several times and never had any foaming paint.  I only used it to get certain colors and had great results.  Wouldn't use it it on a locomotive or highly detailed item, because it is a thick paint.  On some rolling stock, I'm fine with it.
 
Originally Posted by riki:

after using whatever paint system when painting do you bake it in the oven at 200 or 300 so degrees for 20 or 30 minutes to harden the paint?


I've heard that some people do that.  Any recommendations?


For a diecast locomotive, I bake at 200 for about 30 minutes on a foil lined pan.


This LionMaster A Class was rattle painted and here it is heading into the oven...


Oven a 1


Assembled...


I've a 2

Oven a3


For a plastic piece, I put the item on paint risers, on foil lined pan and "bake" the item under two 60 watt bulbs for several hours....rotating the item every 20-30 minutes.

Last edited by Michigan & Ohio Valley Lines
Originally Posted by riki:

after using whatever paint system when painting do you bake it in the oven at 200 or 300 so degrees for 20 or 30 minutes to harden the paint?


I've heard that some people do that.  Any recommendations?


I do use a food dehydrator to speed paint curing.....they run right at 100 degrees. A oven fluctuates too much. And when it goes to heat cycle will get way to hot.

My dehydrator was $9 at a close out store in 1990....running ever since. Great investment!

After reading a post on the Forum about a similar setup, I took a large cardboard box and lined it with foil to make a paint baking oven. I use a 150 watt heat lamp in a cheap clamp-on reflector for radiant heat. The top is open to keep things from getting too hot. A few hours in the bake oven and it's ready to go. I don't find it necessary to be terribly precise with time; anywhere from a couple of hours to half a day works fine. An hour might be enough, but so far the longer baking time has worked fine. For very large pieces I use two heat lamps. 
 
Using the kitchen oven can be problematical. If you're married, you might run into an objection from the primary user of the oven. Paint stinks. Also, you don't want to bake paint in a gas oven. Paint contains flammable VOC's (Volatile Organic Chemicals), that could conceivably ignite if they come in contact with an open flame. Probably a small risk, but IMHO not one worth running, since the ingredients for a homemade paint oven can be had for ten bucks at the hardware store. 
 
Originally Posted by riki:

after using whatever paint system when painting do you bake it in the oven at 200 or 300 so degrees for 20 or 30 minutes to harden the paint?


I've heard that some people do that.  Any recommendations?


Thanks all for any useful tips.  I'll re-read the thread to glean out the tips and give it a shot.  I do have a cheap airbrush that I've used on a few occasions and have gotten decent results.  I used to have a testors aztek single action air brush.  I used it to paint a model of a Grumman F4F and the yellow details on a Lionel Alaska RR GP7that started out all blue and was very satisfied with the results.  How ever after using an acrylic paint on a third item I apparently didn't clean it out well enough and no matter what I tried I could never it get to work again.  That's when I got the cheap single action I have now.  Seeing some of the very good results many have achieved with spray cans i figured I would give it a try and was just hoping some of the spray can masters would share their knowledge.  Again thank you to those of you who have responded to my original request.  Pappy  sorry to here about the parkinson's.  my grandfather suffered from it and I worked for a man that had it.  Thanks for chiming in and bringing the thread back to where it started.  And thank you for the vote of confidence.  As soon as I can some nice weather here in the northeast my bashed auxiliary water tender is going to meet some spray cans.

Originally Posted by leikec:

The problem isn't baking a loco shell in the oven--it's that you have to baste the silly things constantly to keep them from being tough and hard to slice...


Jeff C

Try N scale, I hear you can just pop them into your mouth.


 Nobody mentioned temperature! 55º+, dry, no sun. Cold will often "cloud" a gloss paint. I used cold so tin Marx repaints didn't outshine the 1930s cars too bad. I spray with black gloss Industrial Rustoleum, wait for a skin to just start, and put it in the old freezer for a few hours in cold, a few hours out, in at night, 3 nights. Few realize it's a repaint. Usually its if they notice the underside/inside has paint    

Pick a paint brand, and type, & stick to it.

Surface prep, Surface prep, Surface prep.

 Most "fails" are bad surface prep, or incompatible layers of paints.


 Some enamels do like baking. But if it doesn't say anything about baking on the can, you likely should not do it over 140º. Not without talking to the maker anyhow.

  The baked result is tougher, but usually more brittle, so your surface prep better be right, or it will chip easy there.

Another baked, or an un-baked layer can top it. A soft final layer can be an advantage on items for overall protection, taking away impact, from sharp blows that could chip the baked coat. Scratches in the soft, often just reveal the harder baked finish. 


 Spray paints are made to air dry, and don't always like real high heat. They can release "bad & nasties" faster, and literally start to boil, and leave trapped bubbles in it if it skins too quick. Some paints could "melt" at 350º too.  


 Nickey, I was poking two fingers with a grin. Please check, I used plurals.

 And I like colors the House of Colors has. You must like house of colors I bet Dave likes House of colors. Everybody likes House of Colors", even if they don't like ice cream

 What did you expect.Two passionate painters, both with good advice, both a little more annoyed than usual. I tried to insert a laugh, sorry I "Fink different".

 The Devil Big Daddymade me do it! Where's my Varmint hat...ah yea


(Sorry, I had to borrow your hat Nichole, Ill put it back now.)


I finally  finished working on the tender that made me start this thread.  I was satisfied with the spray job I achieved using the Krylon Fusion Black Satin.  It was a bit shiny but I think flat may have been too flat.  I would post a picture but my body work converting the coal tender to an auxiliary water tender proved to be less than passable once the unforgiving black was applied and then my application of makeshift N&W decals made the finished product look like a 10 year olds first attempt at modelling.  I've got to get the Dupli-Color Sealer Primer AMCDave recommends because I've got some Patton and Sherman tanks I found in Toys-R-Us that are wild colors and I want to paint them an OD green or similar so I'll need to prime them first.  Then I want to repaint an RMT Beep a dark blue to use on an Air Force train so I'll need to prime that also.

Originally Posted by coach joe:

I've seen quite a few good looking engine repaints and repairs done with rattle cans here on the forum and would like to repaint a tender using the Krylon Fusion flat black rattle can.  I know it needs to be primed first but here is my dilemma.  Last summer I built some Walthers HO Gauge tanks to use around the layout.  I sprayed them with a gray primer from a rattle can.  Yesterday I realized I did a horrible job.  All the tanks feel very rough, like a fine grit sandpaper.  Not earth shattering for layout accessories but very unacceptable for a tender repaint.  Any tips to help out or maybe any ideas on what I did wrong?


Thank you in advance for any help.


Coach Joe


Here is a little know secret that will help everyone using rattle cans.

1. We use KRYLON DUAL Black Satin #8823 ( 2 or 3 very light coats )

2. Then KRYLON Matte Finish #1311 ( 1 light coat )

3. Apply our LBR Enterprises decals as needed following instructions.

4. Last but most important 1 or 2 light coats KRYLON Matte Finish. The Matte finish is the secret to a perfect paint job.


     If you do this you will have a factory finish that all will be very proud of.


Dave, LBR


P.S. - We buy dozens of cases of KRYLON per year for all of our restorations and kit bashing projects.

Last edited by CUSTOM "O" DECALS
I guess i'm old school but i still use an airbrush with trucolor paint now. I could never get the finish i wanted out of a rattler. The pigments always seemed to big.


Originally Posted by CUSTOM "O" DECALS:

       
Originally Posted by 2railguy:
Just post a picture, no matter how good a modeler thinks he is, there is always someone better. Who cares, be proud of what you did,

Here is a little know secret that will help everyone using rattle cans.

1. We use KRYLON DUAL Black Satin #8823 ( 2 or 3 very light coats )

2. Then KRYLON Matte Finish #1311 ( 1 light coat )

3. Apply our LBR Enterprises decals as needed following instructions.

4. Last but most important 1 or 2 light coats KRYLON Matte Finish. The Matte finish is the secret to a perfect paint job.


     If you do this you will have a factory finish that all will be very proud of.


Dave, LBR


P.S. - We buy dozens cases of KRYLON per year for all of our restorations and kit bashing projects.

Originally Posted by 2railguy:
I guess i'm old school but i still use an airbrush with trucolor paint now. I could never get the finish i wanted out of a rattler. The pigments always seemed to big.


20-25 years ago I'd agree......Floquil paints were FANTASTIC and color was always right. And all spray cans, or all common model paints, were a thick enamel. 

Todays synthetic lacquers and auto grade primers have converted me. Losing all the model paints I knew how to use hurried that process.

Trucolor seems like nice paint...but I have yet to learn to get good results and frankly gave up and moved on to a system I fully understand and have mastered to a point I am happy. 

Originally Posted by 2railguy:
We all have our preference, i tried all types of spray paints, all seem designed for 1:1 scale to me. Trucolor has been a blast to spray. Didnt take much practice and to be honest i think it sprays better than floquil when you get the hang of it. But paint with what feels good to you!

The Trucolor seems like good paint.....and I like they are trying to keep the RR paint category alive.....I'm just too old and grumpy to learn new......maybe I'll try again.....Any hints to help out?? I'm not even sure what you thin with or what kind of paint it is!!!

"About half a lifetime ago I won a bet painting a car with rattle cans (Austin Healey in Sherwood Green rattle cans bought from Sears.'


   Haha, I did the same thing to a 1957 Morris Minor woody wagon. Forest green from Orchard Supply Hardware. My finger was sore after finishing the job :>

    A few observations.    I've never used an Azteck brush but you might try cleaning it with household ammonia cleaner, that's how I clean out my Paasche and Badger brushes.

    I agree with Dave on the quality of Tamiya spray cans but they are pricey so I mostly spray acrylic thru my airbrush ( cleaning after acrylic is fast and easy).

    I also agree with the suggestion to use the matte clear over coat.

    When using rattle cans make sure they are warm, set in sun for a while or heat in house if necessary, then learn the quirks of the product, how close to spray, etc before attacking the model.....DaveB 

Originally Posted by rex desilets:

Here is a little know secret that will help everyone using rattle cans.

1. We use KRYLON DUAL Black Satin #8823 ( 2 or 3 very light coats )

2. Then KRYLON Matte Finish #1311 ( 1 light coat )

I thought one was supposed to apply decals over a gloss coat???

Obviously applying ONLY over a gloss coat is a misconception brought about by the big decal companies early on to sell their thicker decals.

Dave, LBR

Originally Posted by daveb:


    A few observations.    I've never used an Azteck brush but you might try cleaning it with household ammonia cleaner, that's how I clean out my Paasche and Badger brushes.

Thanks for the suggestion, but the problem is the airbrush, not the solvent. There are some basic design problems with the Aztek brush that make it much harder to keep clean.The Aztek needle/nozzle is an integral unit with the spring, needle and aperture all in one. You can't just pull the needle like you can on a regular airbrush. There are also some issues with the internal passages in the airbrush head. I've never tried household ammonia for it and probably never will, since I now use a Paasche VLS and I see no reason to use the Aztek ever again. Somebody posted on this board that he used an Aztek airbrush and had no problems - he just stored the needle units soaking in cleaning solvent!

"I thought one was supposed to apply decals over a gloss coat???"


  That's recommended  to ensure a smooth surface,most flat or non gloss paints are more grainy or rough on the surface so they let microscopic pockets of air get below the decal which causes a whitish blush. If the surface is smooth other finishes work, Floquil flat for instance was a matte finish that was great for decaling over. If the car is flat painted and you want to decals on it just spread a drop of Future floor finish over the decal site then apply the decal wet, smooth it out and add a thin layer of Future to the top then let it dry,the Future will fill all the tiny voids and prevent the white blush. Future also works great if one wants to decal a bare plastic car, it makes the decals stick a lot better......DaveB 

Add Reply

Post

OGR Publishing, Inc., 1310 Eastside Centre Ct, Suite 6, Mountain Home, AR 72653
800-980-OGRR (6477)
www.ogaugerr.com

×
×
×
×
Link copied to your clipboard.
×
×