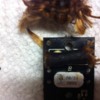
HI all I purchased this engine from a fellow forum member with the intentions of repainting it and rebuilding the smoke unit
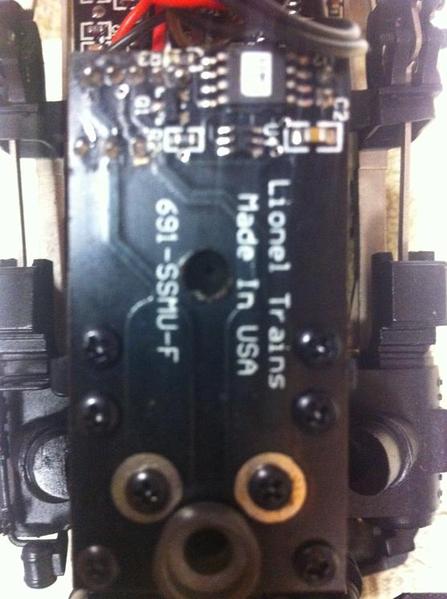
and also the change the chuffs from 2 to 4. So today I rebuilt the smoke unit. first I drilled out the air intake hole just a little,
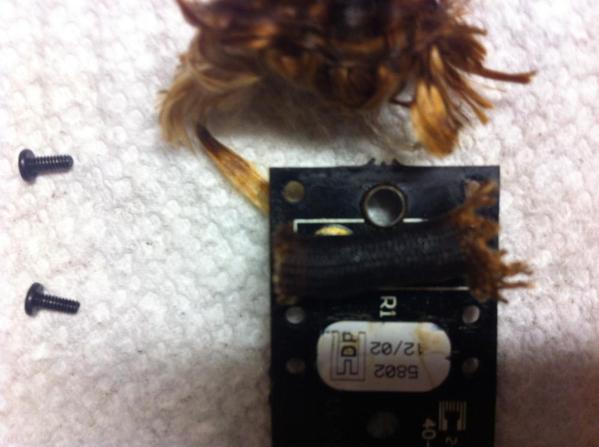
you cant' drill it to large because you will ruin the circuit board. Then I cut off the fiber batting (if thats what it is) off the resistor
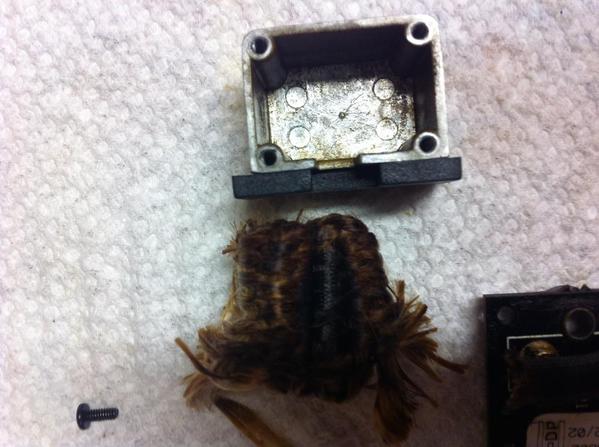
then I clean the resistor with a paper towel. Next I took out the old batting and replaced it with new. I don't have a before video
but I have the after and remember this engine is an older Berkshire and is not Legacy. I think it's from 2005 or 2006.  Before I rebuilt the smoke unit,  it smoked ok.  Had lots of fun doing it. Take a look.

Thanks very much, Alex 
          BEFORE DRILLING
trains 1567

old batting and old fiber cover on the resistor


trains 1569


          AFTER DRILLING OUT
trains 1572
trains 1568

Attachments

Images (4)
  • trains 1567
  • trains 1568
  • trains 1569
  • trains 1572
Videos (1)
trains 1571
Last edited by Alex M
Original Post

Replies sorted oldest to newest

Thanks Roger, Jim, Charles, and Marty for the very nice comments.


Marty I'm sort of a newbie at this and I learned how to do this with the help of all

of you forum members and a friend of mine Mike. R. That's what makes this forum and the members so great. I can't believe what I can do now to these engine's from watching and listening to you pro's on this forum.


THANKS TO ALL, ALEX

Hey Alex...I just saw this and WOW what a BIG difference!  I have a few Lionels I would like to try.  Can you share what sized bit you used when you drilled out the hole and then did you replace the material around the resister or just pack the chamber with new batting?  What did you use for the replacement batting?


Thanks,

Alan

Thanks Alan, I'm pretty sure the air intake openings are different in each engine because the two that I did had different openings. So what I did was just go slightly larger and be careful not to hit the race ways in the circuit board,  you can see the race ways they are slightly raised so just go big enough not to hit them. I just used a drill bit that was one size larger then the opening. As for the covering on the resistor just cut it off and clean the resistor and don't put anything thing back. Just replace the old batting with new. I buy all of my parts from BOXCAR BILL. And if you want evening better performance also put in a new resistor.


P.S. THAT WAS A SHORT VIDEO, THE LONGER I RAN THE ENGINE THE BETTER THE SMOKE GOT. IT SMOKED OUT THE WHOLE TRAIN ROOM.


Thanks to all, Alex

Thanks RickO for your kind words, like you said there's some really nice older 2 chuff

Lionel engines out there, what I really like about them is most of them have Pittman

motor's in them, I don't think any train company is using Pittman motor's anymore

correct me if I'm wrong. Some times I like to pick one of these engines up and do the

smoke upgrade and the 4 chuff upgrade to them and you have yourself a great engine

I'm also going to repaint this engine soon.


Thanks again, Alex


P.S. MAYBE I'LL START A BUSINESS DOING THIS.  LOL LOL

Nice job. I am planning the same on a few myself. I think I will use the Drive wheels instead of the trailing truck just to ensure four chuffs with the drivers in the same position each time. Don't get me wrong, your upgrade is a great improvement. It's just one of those things that bugs me personally. You seem to be getting 3+, but not quite 4 there. But again, that's just my bugaboo. Great job. Where did you get the reed switch and magnets?

Thanks to all,

Alan no problem I'll do it for you.

John your right about the heat shrink I'm changing mine to heat shrink.

Johnny speed, I have experimented with that process you have to be careful with that type of install. First the reed switch is going to be very low and might hit something

on the track. Second if you mount the magnets on the back of the drive wheels the magnets might hit the chassis on a curve and rip the magnets off

Third if you try and mount 4 magnets in the spokes of the drivers you still might not get 4 chuffs because its very hard to get the magnets at 12, 3, 6, 9 o'clock due the spokes. But you are totally correct it's 3 plus chuffs per rev. As for where I purchase my parts, I get them from BOXCAR BILL here on the forum(Modern toy train parts)

Thanks, Alex


You done good Alex!

Thanks so much for posting this,   for as you said:

"I'm sort of a newbie at this and I learned how to do this with the help of all of you forum members and a friend of mine Mike. R. That's what makes this forum and the members so great."


Now you most certainly have become one of the aforementioned group!!

...and your 'community status' is rising.


Boxcar Bill is another...

GREAT JOB Alex!!!

I just scored a K-Line K3270-5343S J1e scale Hudson and can't wait to do some of the mods you did to your engine - cruise, smoke, chuff, etc.  Perhaps when I get up the nerve AND the time, you can assist with part numbers and suppliers that I'm gonna need besides what's in this thread.  Again, super job!!!

Best,

Dave

PS, hope to see you tomorrow... oops, later this morning in Canfield

I have a question for you folks. I have a Lionel PostWar Celebration N and W J Class. It's smoke output is meager unless I load up the consist. I took the shell off, drilled the intake hole larger, repacked it with wadding, put 3M reflective tape under the top plate of the smoke unit. It's a bit better, but I have to have alot of weight in the consist to run it with enough voltage to make it smoke decently. The unit is supposed to be a 6 ohm unit. Do I have any other options to get it to smoke better? I think not as it's probably voltage regulated and requires the 18V of TMCC to make it really puff.


Roger

Sorry guys I didn't see that you guys posted on my thread,


Dave no problem I will help in any way I can and I learned from some of the best on the forum. Believe it or not it's all not to hard to do. Just let me know.


Charlie, thank you


Roger can you give me the item number of this engine, and did you cut off the wrapping around the resistor, and I'm not totally sure but you might be able to put an 8 OHM resistor in. We will need some input from the pro's on this forum.


Thanks, Alex

Actually, if you want to dissipate more power, you'd have to lower the resistance of the smoke unit resistor.  However, 6 ohms seems like you'd dissipate enough power to generate decent smoke.  Exactly how did you pack the wick?  After cutting the smoke resistor sleeve off, I fill the chamber under the resistor with the top of the wick firmly contacting the bottom of the resistor.  Do not cover the whole resistor, allow the top to be open, that seems to work better for me.

GR John,

I repacked it up to the bottom of the resistor so it nestles in it. I leave room for a channel from the fan. It's definitely a voltage issue. Once it's running at above 14V it isn't bad (but not MTH level).  From your description, I pack it the way you do. And then I push a toothpick in there to make sure I've still got a channel.


Roger

This locomotive has synchronized chuffing, but I'd think that you'd need smoke volume before more pulses would do much good.  Have you ever run this TMCC?  How is the smoke output on a TMCC layout?  This appears to be a newer model, it may have the smoke unit regulator, I'll have to see if I can find out.


Looking at the parts list, it looks like it doesn't have a separate smoke unit regulator.  It does indeed say 6 ohms, don't know what to think about that.  I think I must be missing the regulator board, I can't imagine they're driving a 6 ohm resistor directly from the R2LC.

Originally Posted by ROGER1:

John,

I've never run it TMCC, so I don't know how it would look. All I know is, my PW steamers and of course  all my MTH stuff blow away this smoke unit.


Roger

I'd probably consider asking Lionel if they have any tips to improve the smoke.  They have some videos on smoke unit upgrades as well.  I don't have any engines with that particular smoke unit to look at.

John,

I've had very little luck trying to talk to a Lionel tech lately. Their customer service people answer the phone and rarely let you speak with a tech. The few times I've actually spoken to one, I got alot of arrogance and rushed conversations. They've changed the way they handle their phone calls......maybe good for them, but not for the consumer.

Hi guys- I did the cam lobe conversion 5-6 years ago. Since the early scale Berkshire and the scale GS-2 didn't have a tach tape and reader on the flywheels, I suspected they'd have a micro switch and a cam to trigger the smoke unit fan and chuff. I did the Berkshire first, removed the boiler shell and determined that the cam was under one of the large pc boards on the second driver axle. I took a photo of the wiring/plugs before unscrewing and lifting off the pcb. Once the pc board was off, the cam was exposed . I used Q-tips and pipe cleaners with ScaleCoat thinner, and also denatured alcohol, to remove all oil and grease from the cam. I roughed up the 2 hollows in the cam that are between the cast-in lobes, then mixed some Quick JB Weld and installed the goop into one cam hollow at a time with a toothpick, carefully shaping the JB Weld into a lobe. After the JBW hardened, I trimmed the new lobes with a very sharp hobby knife so each looked like a bell curve (best description I can make) and rotated the mechanism by turning the flywheel so the cam rotated and contacted the micro switch, making the switch's contacts close. You have to be very precise to get the JBW lobes exactly opposite each other and the same distance from the cast cam lobes so the chuff is even at 6, 9, 12, and 3 o'clock on the side rods. The peaks of the JBW lobes need to be centered in the hollows of the cast cam, with nicely sloped sides so the micro switch's contacts slide over each lobe peak smoothly. Once the job was done, I replaced the pc boards and wiring, then I ran the engines with the boiler shells off to verify that I'd made the new lobes correctly. There were no adverse effects on the smoke unit and fan pulses; fan pulsed at 4 chuffs per revolution of the drivers and as engine speed increased the fan went into the usual full blowing mode. Once everything worked, I used a bit of grease on the cam lobes. I do recommend getting rid of the woven fiberglass batting that was commonly used a few years ago. I now use part no. 691SMKP008, which is a finely stranded fiberglass rope about 1/4" diameter. This is wound into the smoke unit chamber and the heating resistor is supposed to nestle into the little hollow that results from the winding. Be sure to keep the fan air exit into the smoke chamber unobstructed.


If I'm ever to post a video I'm going to need some instruction. Thanks.
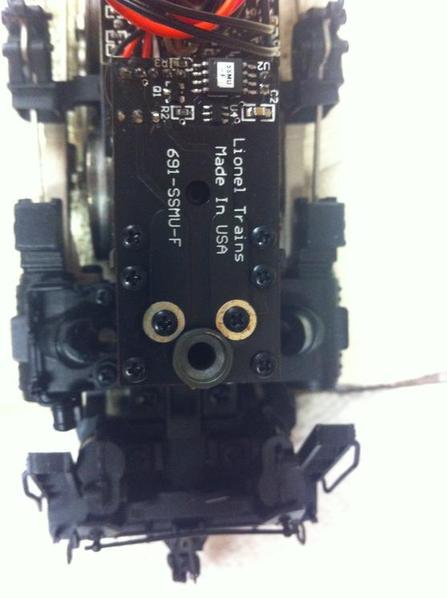
Some great info mtnhi7, I like the whole idea but it sounds like a lot of work and it all must be precise. As for the batting in the smoke unit I use the one that BOXCARBILL

sells, it's a square fiber pad and it holds a lot of smoke fluid. I rest the resistor deep into it without covering the top of the resistor and, as everyone can see theses engines smoke great.


P.S. mtnhi7 you can post a short video, you can do it the same way you post a picture

just make sure the video is less then 100mb. I hope I explained it right if not let me know 


Once again thanks for some great info, Alex

I KNOW THIS WAS POSTED IN ANOTHER THREAD BUT JUST IN CASE YOU MISSED IT 

HERE'S THE OLD BERK ALL DONE IN A NEW ROAD NAME WITH ALL NEW PAINT DECALS

4 CHUFFS AND UPGRADED SMOKE. I KNOW THE NUMBERS ARE NOT CORRECT FOR NEW YORK CENTRAL BUT THAT'S MY FAVORITE ROAD NAME.


HERE'S THE LINK ENJOY AND THANKS TO ALL, ALEX

https://ogrforum.ogaugerr.com/d...ent/8187868188835046

Post

OGR Publishing, Inc., 1310 Eastside Centre Ct, Suite 6, Mountain Home, AR 72653
800-980-OGRR (6477)
www.ogaugerr.com

×
×
×
×
Link copied to your clipboard.
×
×