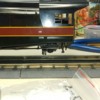
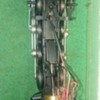
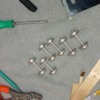
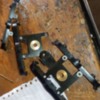
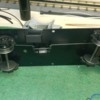
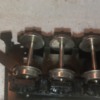
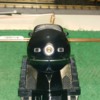
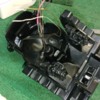
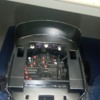
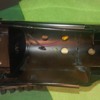
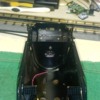
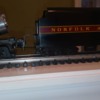
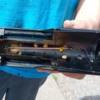
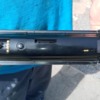
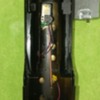
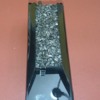
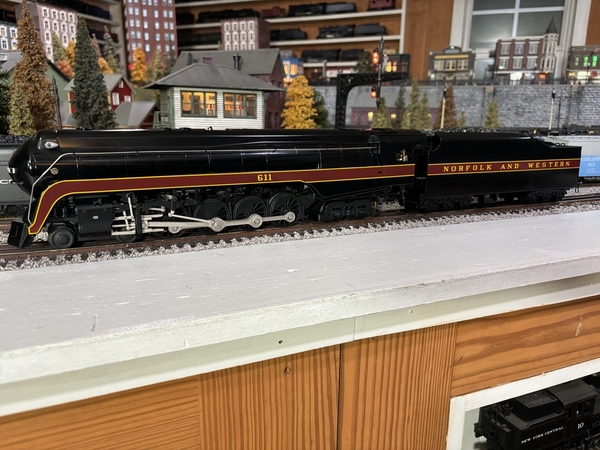
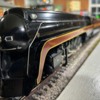
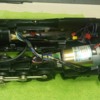
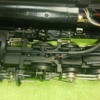
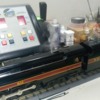
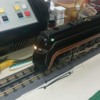
Not going to let Pat have all the fun.  Having resurrected some of my MTH N&W Premier collection. I did have the Brass Wil J that was just on display.  I had re-motored to 555 Mabuchi and added smoke.  Was going to get a TMCC upgrade, but then it sat in the display case for years.

Pat said we should do the gear box swap and I want to do that and see how Pat does it, so I brought it over.

Well Pat is so enthusiastic, he said NO, we need to do a MTH chassis swap!  I said not necessary, and he said.....NO I WANT TO do this, and off we went, starting the Pat & George RR Co. (P&G)

I will update this as we go, but my intentions are true PS-3 steam upgrade, with Whistle steam, and a few other tricks/feature I am working on.

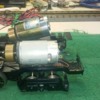
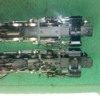
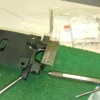
The chassis swap was not as difficult as it may seem.  I did not want to over modify the William shell, nor prevent the MTH chassis from being used again for MTH shell.

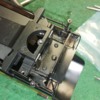
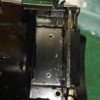
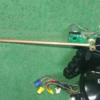
So the MTH chassis which is a 2R-3R version with Draw bar, require Belly pan removed, and the 2 forward pumps.  Also detail pumps on rear of chassis.  The William shell has those detail items.  The MTH chassis is shorter than the Willams, but that is all at the back.  The steam chest and drivers line up perfectly.  To clear the Wil Piping, we angle cut off the rear of the MTH chassis reducing the width.  I made sure Pat preserved the 2 hole used to mount a MTH shell just in case.  Counter bored the center hole under steam chest.  This is the hole centered on smoke unit and sets the reference for rear mounting.  It uses Wil original long 4/40 screw that mounts shell to chassis at the front.  MTH does not use this hole on the J, as they use 2 front side screws that grip the belly pan no longer on the chassis.  Had to counter bore because Pilot truck swivel pin rides over that center hole.

To mount the rear of shell, I originally thought to use the traditional Wil mount at rear where tether is.  But after looking at it I decided to mount into the shell flat under the cab.  I made an angle bracket that mounted to the Chassis rear.  Drilled and tapped 3mm to mount it.  Then precisely transferred hole into the cab with the proper height of bracket to ensure J was level from the measurements we took when we started as a Williams J.  That worked perfectly.

Because the MTH has an open rear, I have option to use draw bar wiring or tether wiring hidden.  So I will make that call later.

Some pictures:  G

Attachments

Images (3)
  • 20240219_101406
  • 20240219_101225
  • 20240219_101207
Original Post

Replies sorted oldest to newest

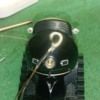
As far as getting Wil shell to fit only two minor mods.  To center correctly on the steam chest hole, the Williams nose cone which comes out of the shell need to be modified with a slight cutout.  The MTH chassis is slightly extended at the front, so Pat did a fantastic job making a form fit cutout.

Motor wise Pat made me one of his CPR Pittman.  This 9234 type but with roller bearings.  I chose the largest flywheel I could fit which is the PS-1 27.8mm x 13mm.  The Wil is 27mm.  The Williams mounts horizontally, and the MTH Pittman is an angle down.

We removed all the back lash in the MTH gear box.  I then fitted motor and removed excess back lash in dog bone.  The parts are standard MTH for the chassis, but I had to file the rounded ends of the dog bone to ensure I had some free play in the dog bone.  The motor has no back lash, as Pat removes that also when building motor.

I wired this up for 3 rail with jumpers on right side wheels to chassis ground.  This is a trick I do for folks that only run 3 rail especially if both rails not grounded on their layout.  I repurpose the wiring to ensure they provide a ground signal back to tender board.

I had to hand modify the wire bracket to mount to unique J gear box and cover, clear shaft.  This normally mounts on belly pan.  It also is going to be my tach mount.  Want tach reading at the rear of fw, at motor.  FW painted black, hoping to ensure you do not see a tach stripe showing when complete.  More work to do here.

The only other shell mode to work with chassis was to widen slightly and move forward the shell flywheel opening.  Did this with jeweler file and fitting.  Go with 27mm might not have to do as much if any.

Attachments

Images (4)
  • 20240219_100934
  • 20240219_151215 (002)
  • 20240219_100223
  • 20240219_100240
Last edited by GGG

So that was the major mods to MTH chassis and the Wil Shell to get it to fit.  Nothing that would not prevent either being reused as original.

The next conundrum was trucks.  The Wil Pilot and trailing truck are not correct.  The MTH Early PS-1 copied Wil and they are not correct.  So we used the MTH later PS-2/3 trail truck as is.  I removed the ground strap as not needed.

Pat built a more scale wheels pilot truck using MTH frame.  Uses bigger axles, center drilled. Scale wheel that actually looks much closer to a real J wheel.  Then blackened.  The pictures we saw don't include brakes on the Pilot, but there is a bracket assembly with nuts exposed.  So Pat is going to make the bracket, I am going to get some 1mm screws and nut and we will replicate it.

Pat made his roller bearing side rod bolts and this pretty much completes the chassis until final wiring.

The tender trucks are more correct with the side frame (certain vintage), the axles are thick, and the wheels are bright.  The frame is brass bolster with cast side frames staked on.  Luckly, they hand nice center holes.  So Pat drilled and tapped for 2mm so we could disassemble.  I blasted the wheels and Pat blackened them and we reassembled.  I installed a cut bar on the tender frame.

Used a PS-2/3 44.5mm coupler.

I previously had modified tender chassis to have coupler slot, drilled and tapped for speaker enclosure, added tool box and brake cylinder at prototypical locations.  Last night I use .025 music wire, drilled into the brake assembly arms and wired in the simulated brake rod.

So this pretty much finish tender chassis until final board and wiring installation.

Next I will explain the additional mods to the Wil shell to support the features I want on this engine.

Attachments

Images (5)
  • 20240225_152315
  • 20240225_152345
  • 20240225_230751
  • 20240219_090431
  • 20240226_102539
Last edited by GGG

Nice work, indeed - but I have to ask the question: if the MTH chassis is so nice - and it is, no doubt - and you want to make sure that it remains backwards-compatible with the MTH boiler shell, why not just run the MTH loco, even if you already have the Williams in your possession? Is the Wms boiler shell more accurate than the MTH? I have neither loco (I do have the Lionel J).

Just curious; I do bashing myself, often involving Wms Samhongsa, though my work is far less snazzy.

@Bill N posted:

Not sure I fully understand what you are doing.  It seems like you are not simply trying to upgrade an old Williams Brass J.  Rather you are trying to create a hybrid from Williams and MTH J parts.  Or am I missing something?

The Williams brass J’s chassis is 44:1 and nowhere’s near as nice as a MTH chassis. Rather than go through the trouble of a gear box swap, and do all kinds of mods to that chassis, We had a spare MTH J chassis on the shelf with no home. It wasn’t overly difficult to land the MTH chassis under the Williams brass boiler. The look is stunning, The Williams boiler & tender best suit the look we’re going for with its slick shiny finish. So it’s not a question of why, but we had the stuff to do it, and it’s a cool undertaking…….

Pat

@harmonyards posted:

The Williams brass J’s chassis is 44:1 and nowhere’s near as nice as a MTH chassis. Rather than go through the trouble of a gear box swap, and do all kinds of mods to that chassis, We had a spare MTH J chassis on the shelf with no home. It wasn’t overly difficult to land the MTH chassis under the Williams brass boiler. The look is stunning, The Williams boiler & tender best suit the look we’re going for with its slick shiny finish. So it’s not a question of why, but we had the stuff to do it, and it’s a cool undertaking…….

Pat

Ah - I get it - the ever-tempting "spare chassis" (or boiler) situation. Got a couple of those myself. The Wms chassis is OK, but the MTH is certainly nicer.

@D500 posted:

Ah - I get it - the ever-tempting "spare chassis" (or boiler) situation. Got a couple of those myself. The Wms chassis is OK, but the MTH is certainly nicer.

Exactly! And since George don’t live too terribly far away from me, it’s a weekend thing for us to get together and have some fun,……That chassis might’ve sat on the shelf for another dozen years …..it didn’t have a home ……..😉

Pat

@Bill N posted:

Not sure I fully understand what you are doing.  It seems like you are not simply trying to upgrade an old Williams Brass J.  Rather you are trying to create a hybrid from Williams and MTH J parts.  Or am I missing something?

As Pat mentioned above, but I will expand.  The Williams are geared high.  40 to 1 ratio.  Toy looking.  The Shell is nice, but does lack some details and in other areas more accurate.  Bottom line I own it.  Making it a better runner for command was what I was after.

Improving it to be more accurate to an original J is also the goal.  Adding command features a definite.

Why do folks build models.  For the enjoyment.  So that is kind of what this is.  Like a resto mod car.  Old body, new suspension and motor with all the modern bells and whistles.  G
Robert, Both actually are:-)

Going to be MTH PS-3 Steam, I think I mentioned that early on.

So here are the features I intend to implement; and I have a few other secret features, but they require some testing and potential mods to work:

Smoke, Steaming Whistle, Bi-color markers, normal light features with Firebox, cab, but also Ground Effect driver lights, and Ash pan glow.  One of the features the Williams did not have is lighted number boards.

At this point it was time to start putting holes in the shell (ouch).  I have added smoke to brass engine before and I had already modified this with a Lionel smoke unit installed.  It requires some grinding and cutting on the body lead weight for fan housing (motor) clearance.  So that work was done, but now getting the MTH smoke unit.

For the LNB, Pat drilled small hole in the nose cone.  He is very proud of this mod and rightly so.  Then using tranlucent 611 lenses, they were cut down to a flat.  These were then epoxied into the original cast number board location ensuring no epoxy at the hole.  We went ith small hole, and in hindsight going larger would be better.   Using 0603 smd LEDs, that fit into the hole, it illuminates well.  I also used these LED double stacked to simulate a Pyle double bulb head light.  We are going to add clear jewels in the marker housing, paint them silver/stainless.

The bi color is based on selecting classification.  Off, White, Green.  I can implement DCS control but I am using up all the outputs on the boiler board and would need to bring a signal off the tender board.  Or it can be manually switched from engine.  Still thinking.  Have a secret thought on this with a tri color too.

The Cab of the Wil is plain with just embossed fire box.  I installed a fire box bulkhead, used triple SMD LED for cab lights, drilled the original bulkhead at fire box for lighting, and installed a bracket for the flickering fire box LED.

Attachments

Images (6)
  • 20240225_230739
  • 20240226_134913
  • 20240226_161632
  • 20240221_205224
  • 20240219_100240
  • 20240221_204957
Last edited by GGG

Shell construction of the J is interesting.  Inside you see what looks like a double hull with the inner section with holes.  That is actually the exterior boiler shell.  The top shroud covers those holes, and it has bulkheads around the relief valves, whistle, bell area.  Alongside the shroud, when the nose cone is off you do have paths that run the full length of the shell to the cab, avoiding the bulk heads in the shroud.

The first hole I drilled for the cab interior light I drill at the joint of the fire box bulkhead.  It came out in the wrong desired location in the cab.  I was safe.  Once I realized it, I drilled a second hole for the IL wire.  Obviously start with the smallest drill bit possible.

For the Whistle steam I drill from the top to see where it came out in the shell.  That is when I learned it is not a double shell.  Made it easy though for piping the whistle steam line.

At this point I am testing smoke units, and piping for the desired smoke effect.  Also need to locate secondary smoke unit (not hard) but making sure there is an easy fill for smoke fluid.  Don't want to fill through exit.  The J whistle is pretty far aft, but I am still exploring options.  Also trying to make the steam leave in a double stream. like a real whistle.  The picture above shows the whistle steam hole from inside (see green towel showing through).  These show the shroud pockets and hole for steam.  The relief valve area is a good location for locating the fill for the smoke unit, but not there yet.  G

Attachments

Images (2)
  • 20240219_100255
  • 20240219_100313
@Big Jim posted:

There are no brakes on the J engine truck.
IMGP1785

George,  show Big Jim the pilot truck we made for use on your Kline shadow rail track, which is basically highly detailed tube track. We found some wheels very close in detail to what’s on the J, and of course we went with larger axles and center drilled them for effect ……This locomotive is Big Jim territory, so to be sure he’ll set us straight with what’s appropriate and what’s not ……

Pat

Last edited by harmonyards

Here are some pictures.  Tender is done less board and final wiring.  Engine still working smoke features.  Final work on chassis shell required filing some room for the toolbox screw and radiusing a flat for the tether.   This is standard stuff on Williams and Weaver brass depending on model.  The Shell has a ledge that can interfere sometimes with speaker mounting, etc and the 10 pin tether is thicker, so you want to ensure shell doesn't pinch it to the chassis. 

Attachments

Images (4)
  • 20240228_095311
  • 20240228_095511
  • 20240228_095523
  • 20240228_095548

Had a big week, and day yesterday at the RR shop.  Swapped and mounted MTH smoke unit for the Lionel one I had in it.  Modified to have steam at the chest.  Finished the whistle steam mod, added jewels and paint to the classification markers, added builder plates, installed cab platform to tender, upper level ladder and extra coal to the tender.  This morning I added the bi-color leds to the classification markers.

Attachments

Images (5)
  • 20240303_124029
  • 20240303_124045
  • 20240303_143957
  • 20240303_184213
  • 20240228_154755
Last edited by GGG

Too many projects.  But I have finished wiring up the shell.  Features include All the normal lights (HL, IL, LNB, FB, and Classification in Wht and Green).  The bi color will be selectable through DCS.  I also have ground lights installed on DCS.  HL, IL, Ground Lights are Rule 17.

The Whistle smoke is installed; I also installed a port on the main smoke unit.  It will bleed off smoke and routed to discharge behind the steam chest.  Initially I wanted to come straight down into the steam chest, but there is not enough room for the tubing without interfering with the shell mounting screw.  Would also make it harder for removing and installing shell.  So instead, I routed thin wall black fuel hose out the back.  It will connect to piping along the chassis.  I will post pictures later on the chassis mod as I finish it.  Part of testing will be how the steam chest steam looks and it's effect on the main smoke stack.  Also how whistle steam stream looks.  I have a small diverter and even thread the output tubing so an orifice could be install.

The PS-3 boiler board is installed on the lead weight.  I did have to cut 5/16" off the front, cut a rear pocket for the small smoke unit in rear. It is a tight fit and in retro spec should have skim cut the top for a little more clearance for wiring.

I have flickering LEDs coming today, they will go on chassis as ashpan lighting.  I do not have any more output controls, so I am figuring out what to do.  Thinking I will have some on Fire box output, and others on the motor.  Kind of a dim effect in neutral and brighter in motions.  Going to have to do some testing to see how they work together.

Last major point will be my tether method.  I already know I will use 10 pin vice 6, but have options on connection point under engine because of the excess opening the chassis has.

The shell has a 10 pin connector for easy removal from chassis like all MTH engines.  G

Attachments

Images (2)
  • 20240312_150836
  • 20240312_150929

Jim, I did look at it, but not sure I could find equivalent parts that would work.  But in this case, I did get White and Green LEDs installed.  So I will have selectable classification lights via DCS.  Off, WHT, GRN.  We did modify the non lighted number board and make them lighted.

I also finished up the boiler to chassis to tether harness.  And have the steam chest steam piping.  Also made the tender tether.

I am using a straight 10 pin harness, this allows the 6 PS-3 wires plus 2 spares to bring over Tender outputs for the boiler (extra class light).

You say 6 plus 2 equals 8 not 10, well the AC and Motor leads on MTH tethers are 22ga, and all the others are 24.  So I doubled up 2 of the 24 gauge for the other 2 signals.  AC Power  Red Black, PV Yel, PCB Grd Wht, 5V Gray/Org, Data, Green/Blue.  That leaves me pin 1 and 2 as spares.

I do have flickering LEDs for ashpan lights and a plan to install them, but want to do some more testing, so have not installed yet.

Attachments

Images (2)
  • 20240318_201450
  • 20240318_201457
@GGG posted:

Jim, I did look at it, but not sure I could find equivalent parts that would work.

Yes, it would be something that would have to be made.
The ones on my 605 drive me crazy looking at them they are so big. I have the plans and materials, I just need to find my "round tuit" in order to get started!

Last edited by Big Jim

WE HAVE FIRE in the Fire Box and Steam in the Boiler.  Completed assembly last night and did an optest.  Checked out pretty well.  The Ground lights and Cab lights using SMD LEDs really came out nice.  Rule 17.   The double SMD type 0805 Head Light LED work really well. You can see two individual light like bulbs.  Whistle steam and Smoke unit work well and a fantastic smoker.  The sounds are really nice with the enclosed speaker and the brass shell.  The Fire Box effect is really sharp and the add bonus is that it reflect like ashpan glow under the chassis.  Because of the gap between shell and chassis it bleeds through.  So don't have to do any additional circuit for ashpan, though I may add some lighting off the motor lead as an added affect when under power.

The initial failures were the White classification markers.  Green worked, but no whites. And the steam chest steam not a good feature.

So this morning I tackled the white classifications.  I had wired them in series like the green.  MTH uses series markers in PS-2 and 3.  Parallel for other LEDs.  Turns out the white did not have enough voltage to run in series on PS-3. So I switched them to parallel.

So now I have 4 state classification on the engine.  Off, Wht, Green and if I turn white and green on together, the forward lens are white and the side lens green.  Probably not prototypical but neat look.

As far as the steam chest, need to work on that some more.  If I block the main stack outlet I get a nice steam effect out of the tubing.  Actually in sync with chuff.  I am going to install a washer with small outlet on main stack and see how that works.  I also need to shorten the path the smoke takes to get to the chest.  Right now the path of least resistance is out the stack. 

Pretty pleased over all.  Thanks PAT for the help with chassis swap and detailing.  G

Added 2 14V red bulbs off the motor leads to enhance the ashpan look in motion.  Added a reduction in the smoke stack to get a much higher and nice main stack plume.  Steam chest smoke at this point is a failure, back to drawing board.  Going to do a mockup at some point.

Engine put into service on main line.

Attachments

Images (5)
  • 20240324_172615
  • 20240324_172637
  • 20240324_173023
  • 20240324_173120
  • 20240324_172444

Add Reply

Post

OGR Publishing, Inc., 1310 Eastside Centre Ct, Suite 6, Mountain Home, AR 72653
800-980-OGRR (6477)
www.ogaugerr.com

×
×
×
×
Link copied to your clipboard.
×
×