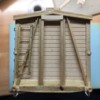
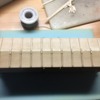
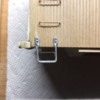
I intend to document my scratchbuilding of a New Haven rebuilt 36' double sheathed boxcar in this thread.  After completing a few craftsman kits (Ambroid and Suncoast), I wanted to try scratchbuilding a prototype I had always wanted.

The New Haven did not own a single steel boxcar until 1941 - before then, the New Haven's boxcar fleet consisted primarily of 36' double sheathed cars built in the 1910s and rebuilt with new superstructures between 1926 and 1929. These rebuilds consisted of two groups - one with steel Dreadnaught ends and Youngstown doors, and one with steel reinforced wooden ends and wooden Camel doors. Over 12,000 cars were rebuilt. The full history of these cars is documented well in the New Haven Historical and Technical Association's 'Shoreliner' magazine, Volume 35 Issue 3, in an article written by John Nehrich and Chris Barkan. A diagram of these cars can also be found online here, under car numbers 160000-164999:

Alphabet Route - New York, New Haven, and Hartford

I want to model one of the cars with the steel Z-bar reinforced wood ends, but with a Youngstown door as some of these cars ended up in late 1930s. I purchased all the wood stock from Northeastern Scale Lumber. I calculated key dimensions from the diagram on the Alphabet Route site, as well as the Shoreliner article.

Like the Craftsman kits, I began by building a rectangular core from Northeastern's freight car floor, end sheet, and freight car inner roof pieces.

Cutting the floor and roof pieces to length:

1 Floor & Uncut Roof

2 Floor & Cut Roof

Building the frame with three pieces of end sheet, cut to the appropriate height:

3 Frame Fixtured

4 Frame Completed

Two pieces of the wood sheathing for the ends, cut to shape and ready to be attached. Before gluing them in place I coated the small ledges of the floor at the ends with Scalecoat sanding sealer and brushed with 00 steel wool. These ledges are on the outside of the car, and will be where the steel Z-bar bracing is applied.

5 End sheathing cut

All I have for now.

~Chris
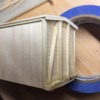
Attachments

Images (5)
  • 4 Frame Completed
  • 5 End sheathing cut
  • 1 Floor & Uncut Roof
  • 2 Floor & Cut Roof
  • 3 Frame Fixtured
Original Post

Replies sorted oldest to newest

I’ll be following your build. There’s a couple of Rutland cars I’d like to build. I’ve done a stock car and an outside braced single sheathed box car. Tried just to get them close to the photos I could find. Nice that you have the plans. I used parts I had accumulated from kits and just freelanced some of it to be closer to the prototype. My one twist in my builds. I want cars that operate and navigate the layout well. Car bodies are all wood. Both of them use Atlas chassis’. Sort of a hybrid approach.

I attended an O scale convention years ago in Worcester. Pretty sure they had a special convention run of a NH 36ft. Car in Resin.

I've seen photos of your Rutland car on here before Dave, and it is very well done. All the single and double sheathed cars readily available in O have steel ends when wood sheathed ends were just as (if not more) common, so your Rutland build and my build here should really stand out.

I think you are also correct on the convention cars - these prototypes were done in resin by a company called East Wind Models. I have been looking for one of these kits on-and-off for about five years now, and I think in that time only one has come up on ebay for well north of $100. I decided I'd rather just make my own at this point, and besides, what better material to make a wood boxcar out of than actual wood?

~Chris

Over the last few days I have added the sheathing to the car.

The end sheathing in my last post was attached first. Then 4 oz of weight were added to the interior of the car, centered over each end.

6 Interior Weights

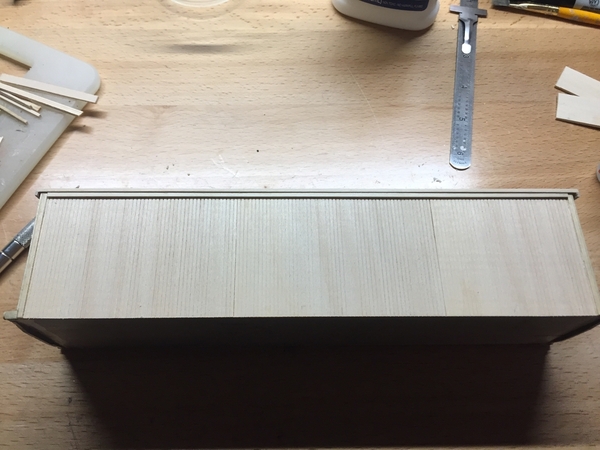
The side sheathing was rough cut and added to the sides. I'm using sheets from Northeastern Scale Lumber. Each side has three pieces. I sand the ends of each sheet to make the joints as inconspicuous as possible on the exterior.

7 Side Sheathing Rough

The side sheathing was then sanded flush to the top and bottom, matching the angle roof profile.

8 Side Sheathing Trimmed

Up next is the bracing for the ends, and then the roof sheets.

~Chris

Attachments

Images (3)
  • 6 Interior Weights
  • 7 Side Sheathing Rough
  • 8 Side Sheathing Trimmed

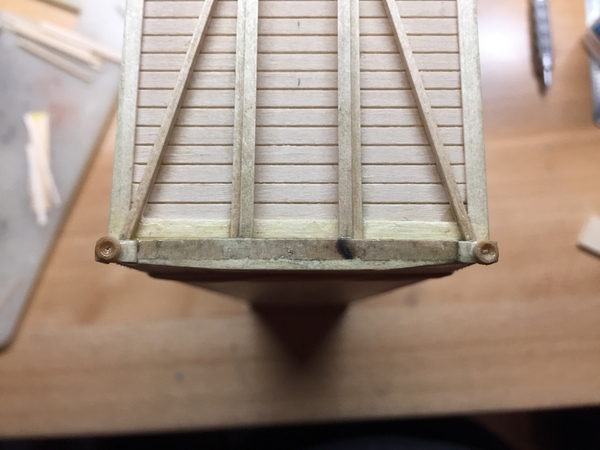
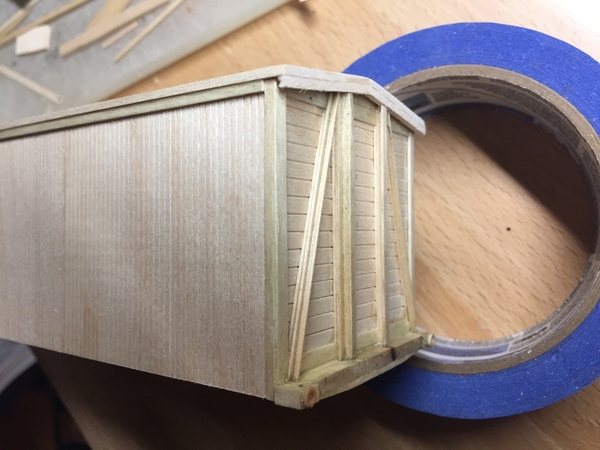
Over the weekend I applied the end bracing. Pieces representing metal sheets for the corner posts, top sheet, and bottom sheet were first applied using .020" thick wood strips. The pattern of the end beams were also added using the same strips, to keep the application surface for the end beams level.

10 End bracing rough

End beams were made out of 1/16" angle pieces for the diagonals, and 3/32" Zee pieces for the verticals. Corner pieces for the polling pockets were added using more .020" strip wood.

11 End bracing finished12 End bracing finished

~Chris

Attachments

Images (3)
  • 10 End bracing rough
  • 11 End bracing finished
  • 12 End bracing finished

I couldn't find any commercial polling pocket castings that I liked, so I decided to roll my own. I cut about 1/8" long pieces off a small wooden dowel, and glued them to the corner pieces - any shorter a length and the dowel began to disintegrate. After the glue was secure, I sanded them down to about 1/16" high. The rounded inside of the pocket was created by drilling a small pilot hole, and then using the tips of increasingly larger drill bits until I neared a size I liked. Sanding of the inside of the pocket was with the tip of a round Dremel polishing tool, and then a coat of sanding sealer was applied.

13 Polling Pockets

~Chris

Attachments

Images (1)
  • 13 Polling Pockets

Tom and Dave, thank you both. Build threads are always my favorite to follow on forums, so I would be remiss if I didn't share my own. The most I could ask for is to inspire someone to build something of their own.

I applied the roof sheets to the car last night (1/16" thick wood sheet), and let the glue set over night. Like the side sheathing, I purposefully cut it rough extending too far out from the sides. I then used a piece of 1/16" scrap sheet, taped to the side of the car, as a spacer and sanded the edge flat and parallel to the car side. I neglected to take a photo before doing this, so I staged the one below to show the concept.

14 Sanding Roof Sheet

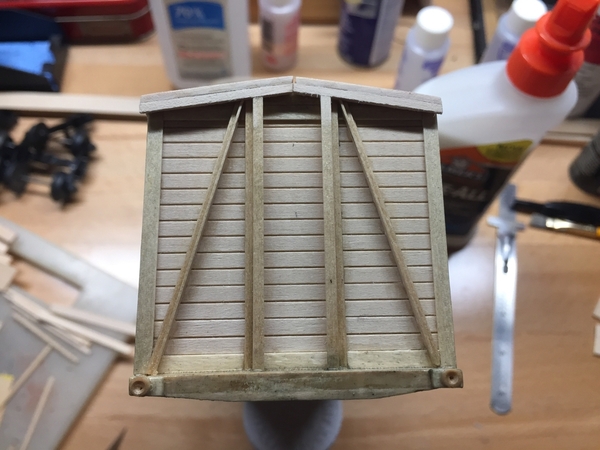
After sanding the roof sheets, I applied the roof trim. On the sides is a scale 2x4, running the length of the car between the corner posts. The end trim was made of 1/16" square stock, sanded flush to the sheets with the sanding block. I had to notch out the Zee bars to fit the end trim.

15 Side roof trim16 end roof trim17 3-4 View roof trim

Next up is some wood filler to cover the seam along the crest of the roof and in the trim pieces, and a coat of sanding sealer.

~Chris

Attachments

Images (4)
  • 14 Sanding Roof Sheet
  • 15 Side roof trim
  • 16 end roof trim
  • 17 3-4 View roof trim

The roof (sans roofwalk) has been completed.

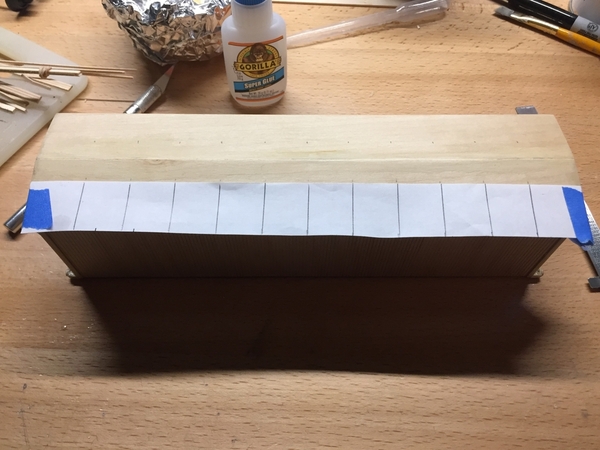
I started by filling in the crest of the roof with wood filler, sanding smooth, and then coating in the usual sanding sealer and 00 steel wool. I cut a strip of paper the length of the roof and laid out the location of the roof panel seams on it, and used it as a guide to mark up the roof itself with a square edge. 18 Roof markings19 Roof markings

The seams themselves were applied in two layers - a 1/8" wide .020" thick strip as the base, with a 1/16" wide .020" strip centered above it. The strips were cut to overhang the sides, and then sanded flush. The photo below shows one seam completed.

20 Roof Seams

Each seam was then beveled from the roof edge in 1/8". The seams were then coated with sanding sealer.

21 Roof seams

I always find the roofwalks on boxcars to be easily marred during construction, so I do them last. I'll work on the underframe next instead.

~Chris

Attachments

Images (4)
  • 18 Roof markings
  • 19 Roof markings
  • 20 Roof Seams
  • 21 Roof seams

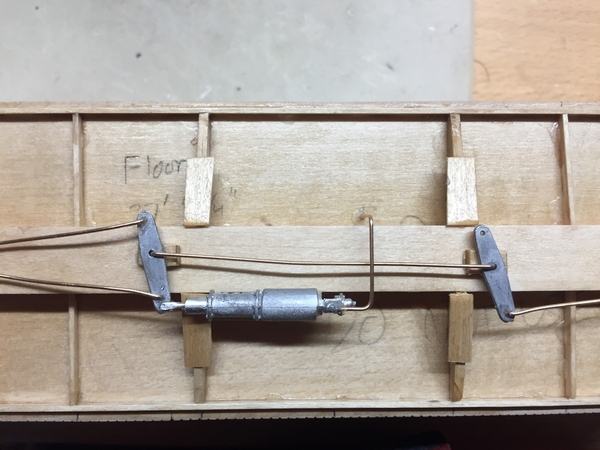
Underframe is in. Bolsters and centersill are pre-shaped parts. The sidesills and outer cross beams are scale 2x4s. The inner cross beams were made from some wood scrap I had lying around. I narrowed the bolster so the 2x4s fit over the sides, and sanded the angle on the top of the bolster flush. I also sanded the top of the bolster down even with the centersill, to lower the ride height with a pair of Weaver 3-rail trucks.

The white metal brake cylinders and brake levers are from Scale City Designs. The piping is from a roll of phos. bronze wire. I only represented the brake rigging that would be visible while the car was right-side up, and cut it back and kept it simple to avoid interfering with the 3-rail trucks again.

23 Underframe

25 Underframe

~Chris

Attachments

Images (2)
  • 23 Underframe
  • 25 Underframe

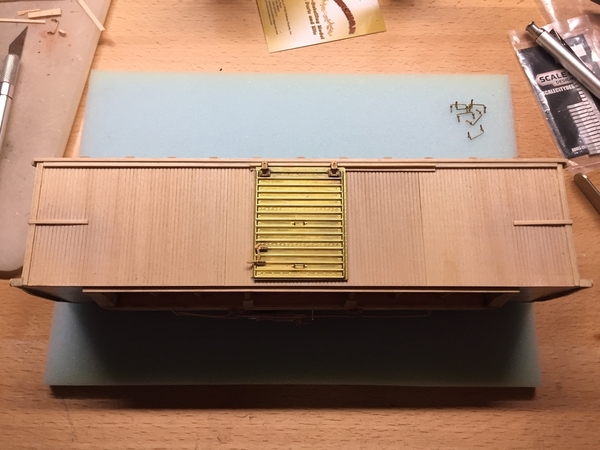
I worked on the sides next. I started by framing out the door and applying the lefthand door stop and running channel. The door frame is made from leftover 1/8" stripwood from the end bracing and roof seams, the lefthand door stop from 1/16" angle, and the running channel from more of the same angle on top of the 2x4 fascia strip and a 1/16" brace below.

26 Door Frame27 Door Frame

I got these beautiful 8' high by 6' wide Youngstown doors from American Scale Models. I had laid out the door channel such that the door was hung loosely from its rollers while the glue to the door frame set, giving it a little tilt from top to bottom like a real hung door.

28 Door

Next up were two end braces, sealed and sanded along with the door frame and running channel.

29 Side with door and end brace

Grab irons are from Tichy Train Group, the right hand door stops and lower door guides from Precision Scale Co, and the strip brass leftover from an Ambroid kit.

30 Side Detail

Now this is starting to look like a boxcar.

~Chris

Attachments

Images (5)
  • 28 Door
  • 29 Side with door and end brace
  • 26 Door Frame
  • 27 Door Frame
  • 30 Side Detail

Thanks John and Roy. I do initial and date my cars - began doing that at the beginning of the pandemic as I was building/painting so many I wanted to keep track.

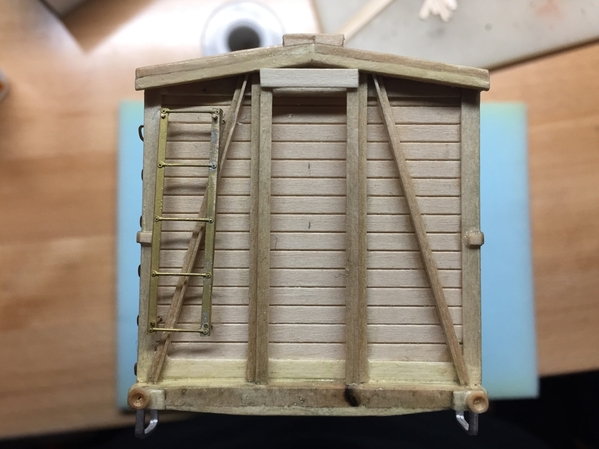
I detailed the ends last weekend. Ladders are precision scale, trimmed and mounted on posts of Phos. Bronze wire. The Ajax handbrake is also precision scale, with a piece of scale chain attached. The rest of the brake rod is more Phos. Bronze wire. The foot board is made out of some scrap wood and brass strip.

31 B End32 A End

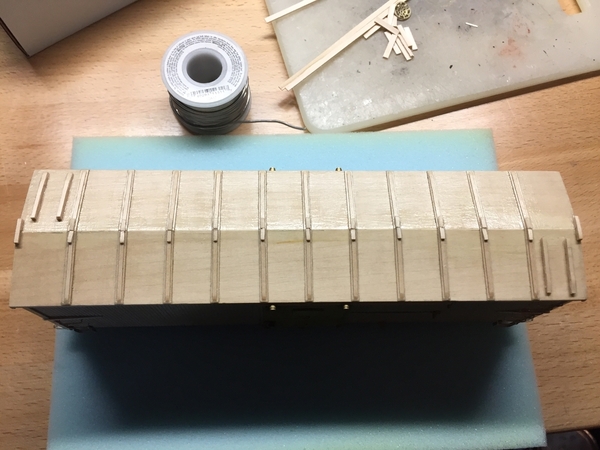
Running board supports were made from 1/16" square stock laid over the battens. Peaks were sanded flat with the large sanding block I used on the roof sheets. The roof walks themselves will be painted separately and added later, as it's hard to paint beneath them.

33 Roof walk supports

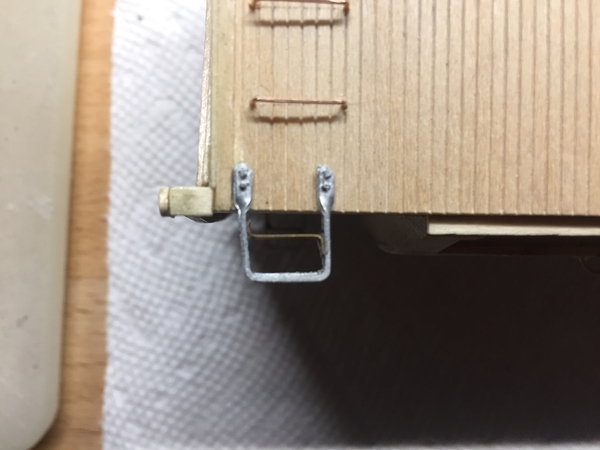
Last detail is the end steps. Scale City Designs provided the closest design to the ones I needed - I needed to add another step.

34 Side steps

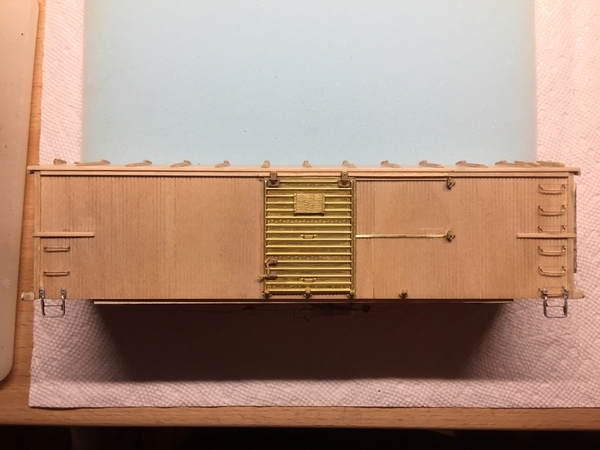
Heavy construction has ended, onto paint.

35 Complete before paint

~Chris

Attachments

Images (5)
  • 31 B End
  • 32 A End
  • 33 Roof walk supports
  • 34 Side steps
  • 35 Complete before paint
@C.Vigs posted:

Thanks John and Roy. I do initial and date my cars - began doing that at the beginning of the pandemic as I was building/painting so many I wanted to keep track.

I detailed the ends last weekend. Ladders are precision scale, trimmed and mounted on posts of Phos. Bronze wire. The Ajax handbrake is also precision scale, with a piece of scale chain attached. The rest of the brake rod is more Phos. Bronze wire. The foot board is made out of some scrap wood and brass strip.

31 B End32 A End

Running board supports were made from 1/16" square stock laid over the battens. Peaks were sanded flat with the large sanding block I used on the roof sheets. The roof walks themselves will be painted separately and added later, as it's hard to paint beneath them.

33 Roof walk supports

Last detail is the end steps. Scale City Designs provided the closest design to the ones I needed - I needed to add another step.

34 Side steps

Heavy construction has ended, onto paint.

35 Complete before paint

~Chris

I'm loving your posts. I want to build a wood model from my area and I appreciate you listing of source material. Beautiful work, Thank you.

Add Reply

Post

OGR Publishing, Inc., 1310 Eastside Centre Ct, Suite 6, Mountain Home, AR 72653
800-980-OGRR (6477)
www.ogaugerr.com

×
×
×
×
Link copied to your clipboard.
×
×