Here's a slice of my corner mountain
Attachments
Images (1)


|
|
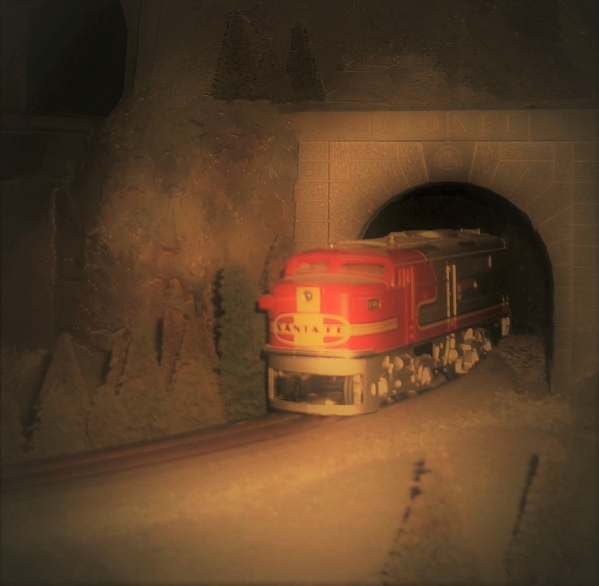
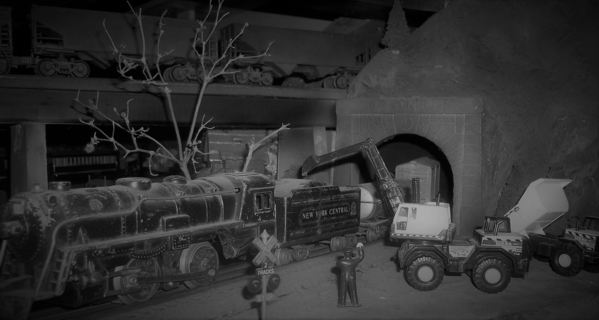
Here's a slice of my corner mountain

Three mainlines on the First Level, so three portals on a left-rear-corner tunnel...
That 3-portals tunnel is the base for a Second Level "plateau," allowing for four closed-loops of track, two of which are contained on the Second Level, and two which reach out across the layout, via bridges and arch-unders, directly at the viewers standing in the main aisle......
 FrankM

very NICE Frank ! looks GREAT !! wonderful scenery !!!
My sincere Thanks to these Forum voices who sent me "Likes" for my three postings:
For my May25 posting: My Thanks to: Arnold D. Cribari; Mayor Magoo; JD2035RR; gandydancer1950; briansilvermustang; BAR GP7#63; Trussman; Tyler P; pennsynut; Matthew Jones; CP BOB; RSJB18; MELGAR; Chugman; Jerry G; Putnam Division; lehighline; Sean007; trumptrain; Mark Boyce; bigtruckpete; mKnight1957;
For my posting on June8: my Thanks to: clem K; W&W; Clarence Siman; play trains;
For my posting on June23: my Thanks to: briansilvermustang (and Thanks for the reply, too!); gandydancer1950; luvindemtrains; trainsrob; Dave Ripp
For my posting on June26: my Thanks to: Mark Boyce; gandydancer1950; briansilvermustang...
I appreciate the approval very much.
FrankM
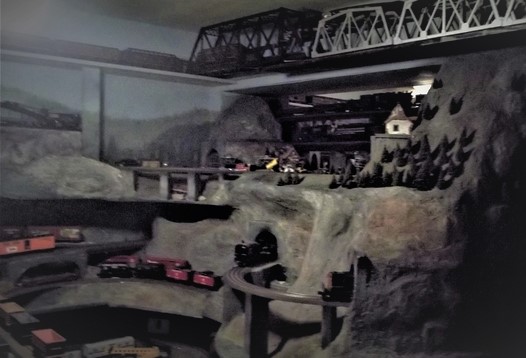
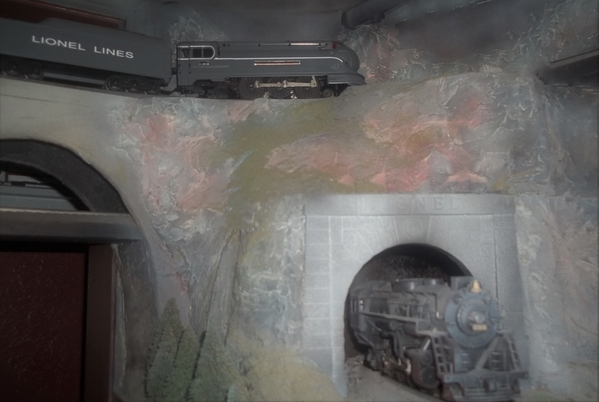
P.S. I suppose we'd have to say that my alleged "mountains" are actually plateaus that have cliff-faces and portals. I didn't slope the hillsides gradually down to the level below because that would have meant surrendering miniature "acreage" I needed for scenery (translate: buildings and village streets, etc.) of which I wanted more and more, as I learned and experimented and grew.
Here are the left 

and right corners
")
 of the valley which is defined on three sides by levels 2 & 3.
")
Frank, thank you for acknowledging our Likes! You are right, your mountains are plateaus, but so are many model layout mountains. We refer to a lot of the Appalachian Plateau region as ‘the mountains’


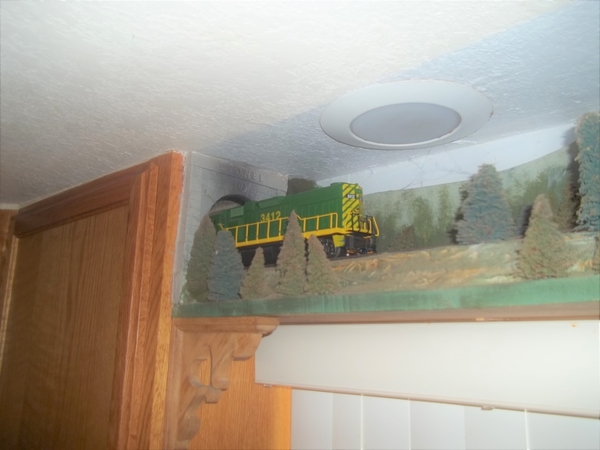
 I built this corner unit to be able to be moved, if needed. Just a bare foam frame and then brown paper and liquid starch to cover. That's the colors it dries to. I might not have to even paint it. Goin for that Southern California look!
John
trumptrain posted:My layout has a large tunnel reaching upward to about a foot from touching the ceiling I call Mt. Randolph. Mt. Randolph covers the southeast corner of my layout.
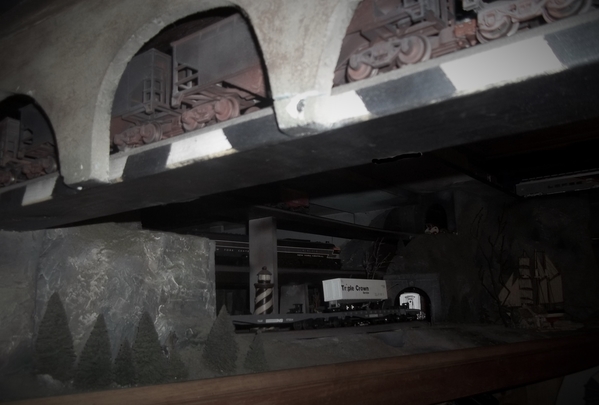
Mt. Randolph is made with 1x2s and 2x4 supports, mechanics wire, chicken wire, and layered plaster cloth dipped in water. The single track line of the Mountain Division runs through Mt. Randolph. There is a vehicle tunnel inserted in the side of Mt. Randolph as well. The vehicle tunnel was needed so that I could access the interior of the tunnel, when needed, for fixing derailments, track cleaning, etc. I made the vehicle tunnel out of stryrofoam. The tunnel roadway is a standard selling item which can be purchased at most hobby shops/train shows. I made the tunnel entrance slightly higher than the intersecting roadway so that it would be easier to slide the tunnel forward for gaining inside tunnel access. The roadway protruding from the tunnel entrance looks sort of like the tunnel is sticking out it's tongue.
This tunnel actually slides forward ( pretty much the same as a file cabinet drawer ) for removal. See photos showing how I made the vehicle tunnel. The vehicle tunnel portal is a HO scale portal. The bottom photos show the finished vehicle tunnel with a mail jeep exiting as the tunnel portal sits in the side of the mountain.
Photos four - eight show the construction of the vehicle tunnel. Photo eight, sideways ... sorry bout that, shows where the tunnel slides in/out of the side of mountain. It also shows the Mountain Division track. Photo nine, again sideways, shows the vehicle tunnel in place and the chicken wire/ newspaper wads stage of the mountain construction.
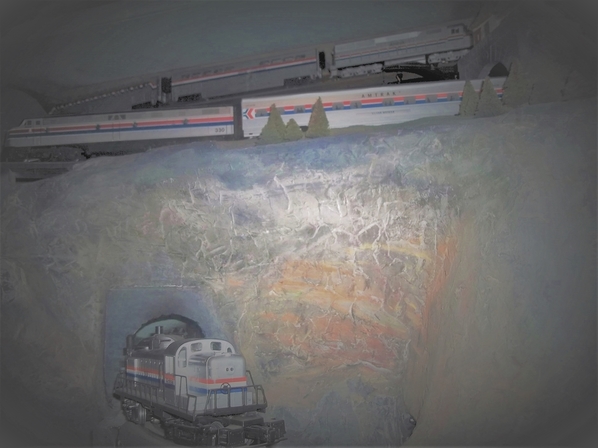
I've included photos of the finished Mt. Randolph as well as some showing the construction phase. I apologize for the sideways photos, however, they will give you an idea of how the mountain was constructed. I did use real stone at various places... hence the rocks climbers and above portals. In the first photo, the walls behind/below and to the right front of the bridge are made with heavy gauge aluminum foil.
Above - Mt. Randolph showing lake Christopher and surrounding scenery. Below - shows vehicle tunnel portal/entrance behind bridge and wooden portal of Mt. Division track.
Patrick, did u make ur portals? If so, out of what material?
Joe Gozzo
Patrick, did u make ur portals? If so, out of what material?
Joe Gozzo
Hi Joe - All portals are from various manufactures. The wooden portal I bought from Scenic Express. The vehicle tunnel portal ( HO Scale ) I purchased at a local hobby shop but can't remember the name of the manufacturer. One other tunnel portal is a MTH single track portal. I weathered each portal.
Sawmill and logging corner .
.
I use a corner mountain to conceal (from my view) an O36 curve. For appearance and operation curves and track switches on the Plywood Empire Route are all O72 except the Northeast corner of the train room. The doorway into the room is just 28" out from the wall so an O72 curve would end on the room access lift-out which was too complicated for my tiny brain so an O36 curve was laid and then hidden in a mountain.
Construction was the familiar hot-glued cardboard strip skeleton covered with plaster cloth and a top layer of Sculptamold:


As an expediency the basic mountain was covered with Joanne fleece:

A recent track-plan tweak increased the size of the East End industrial area by moving Oil Creek North a bit:

So more mountain work was required:
")
Plaster cloth applied:

Sculptamold:

How it is today:

")


and a hallway tunnel... ![]()


A corner mountain with tunnels and a corner plateau with tunnels;


Here's my latest entry. Dealing with not only what to do in corners but also sloped ceilings.
Dave


Luvindemtrains, Those mountain features are really exceptional. Masterful. Apparently, you are a careful observer of nature and the real world, as well as a gifted craftsman. Congratulations on your splendid success with the project.
FrankM
Moonson posted:Luvindemtrains, Those mountain features are really exceptional. Masterful. Apparently, you are a careful observer of nature and the real world, as well as a gifted craftsman. Congratulations on your splendid success with the project.
FrankM
Dave, I can never put my thoughts into words like Frank, but I totally agree with his compliment!!
Before

After


Moonson posted:Luvindemtrains, Those mountain features are really exceptional. Masterful. Apparently, you are a careful observer of nature and the real world, as well as a gifted craftsman. Congratulations on your splendid success with the project.
FrankM
Frank,
Those kind words, from you, just made my day! Thanks my friend.
Dave
Roger, what you did with that corner is really impressive!!
Mark Boyce posted:Roger, what you did with that corner is really impressive!!
Thank you Mark. Stay safe
Mark Boyce posted:Moonson posted:Luvindemtrains, Those mountain features are really exceptional. Masterful. Apparently, you are a careful observer of nature and the real world, as well as a gifted craftsman. Congratulations on your splendid success with the project.
FrankM
Dave, I can never put my thoughts into words like Frank, but I totally agree with his compliment!!
Mark,
Any way you show appreciation and compliment is unique and well appreciated.
Dave
There's not too much you can do in a spare bedroom, but I did my best to create a mountain scene complete with a Plasticville rural shack in one corner of my compact layout.


Great fun!
My mountain is barren and I was worried about that especially when you see Bob Bartezik's foliage covered Central PA mountains. Then I started watching a lot of British crime dramas, two in particular, "Hamish McBeth" which takes place in a place way up in Northern Scotland, and "Vera" which takes place in Newcastle in Norththumberland. All the mountains around there look just like mine. Either they're like that because they just are, or they were deforested eons ago when the English took all the wood for building ships. Regardless, my mountain looks like a perfectly prototypical Scottish Highlands mount. Two tracks penetrate. I scratch-built the portals since my equipment size and curves through them required custom sizes. There is a spring emanating from the mountain leading to a waterfall and then a reservoir in an abandoned quarry. It has a couple of Masonite profiles formers, tons of hot-glued cardboard strips, covered with Gypsolite-soaked Bounty paper towels. Rock molds were from Bragdon. The mountain's big and would be a lot of work and $$$ to cover it with trees.


Access to this requires an OGR Forum Supporting Membership


")
")
")
")
")