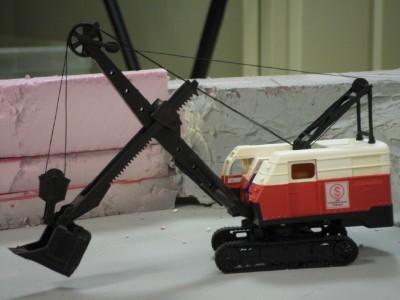
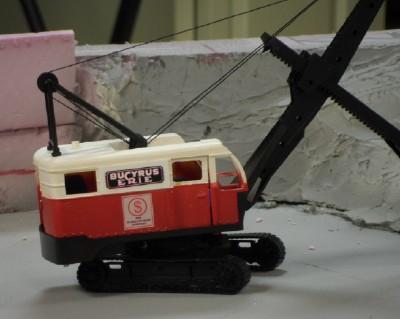
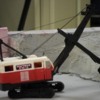
This is my version of Standard Slag in Weirton, WV.  It is a work in progress.


The slag yard is part of an access hatch that will pull away from the layout.


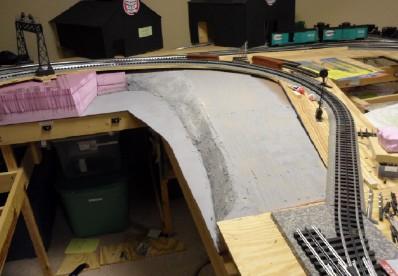
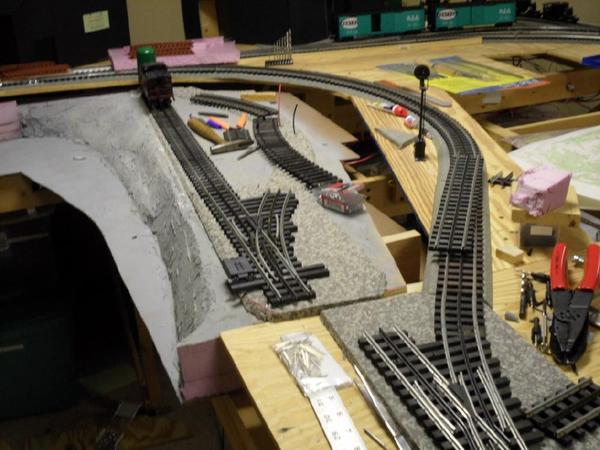
This first photo is an overall shot of the hatch.  To the left (North) is a foam "plug" that will be removed first.  Then electrical harness will be disconnected.  AFter that, the gray portion (slag yard) will slide left and out, allowing me to duck through the exposed benchwork to reach areas to the right.


There will be a track located at the top of the slope (extends from the switch).  Slag cars will be pushed onto this track and "dump" their loads down the slope.  A power shovel will operate in the widest part of the slag pit floor.


Slag3_20001W


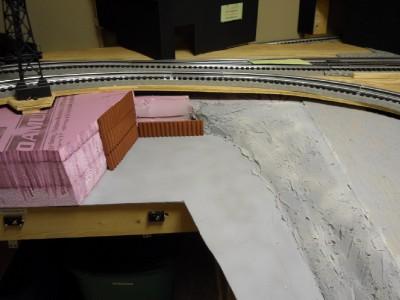
The second photo shows the steel pilings that will form the face of the "plug" as well as the eastern portion of the pit.


Slag3_20002W


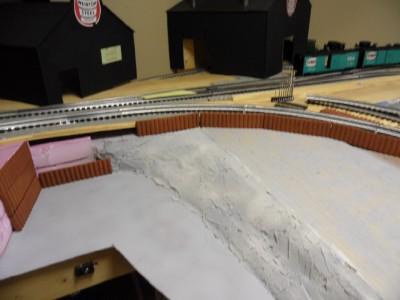
The third photo shows the extension of the steel pilings as they curve around to define the slag yard.  These are all test fittings (nothing has been permanently mounted).  I still have to put these resin castings in warm water and attempt to bend them to fit the curve.


Slag3_20004W


Will post more as soon as I make some more progress.


George

Attachments

Images (3)
  • Slag3_20001W
  • Slag3_20002W
  • Slag3_20004W
Original Post

Replies sorted oldest to newest

Updated 7/26/2012:

Made some progress so far this week:

  • Got the train room cleaned up a bit. That took longer than expected.
  • Began the track installation process on the access hatch. Thought I had plenty of track pins, but had to get some yesterday. I've got the roadbed, switch, and track positioned for the slag dump track.
  • Began the electrical wiring process for the above.
  • Painted all but the last 3 steel pilings yesterday; I'll get to those sometime before the end of the week.
  • Ground off the "Circle L" cast into the plastic on the sides of the power shovel cab. Then I hit both the cab and its doors with 2 coats of white paint.
  • Put together a Plastruct order list for static generator / compressed air tank at the end of the Standard Slag spur (used to dump the slag cars).

More when I get there - maybe another set of photos soon.


George

Last edited by G3750

Updated 8/1/2012:


  • Made a few changes to the Standard Slag logo to reflect the version on the power shovel in the photograph.  The decals are about to be produced.
  • Received the Plastruct order with the static compressed air tank components.  In the real world, this was used to dump the slag cars (not sure of the exact mechanism, but that's what the book says).
  • Picked up a can of dark green paint at Walmart that is close to the shade used by Weirton Steel in this era.  The tank will get this color.  I will eventually assemble and paint a Lionel crane truck with this color as well.


That's it for now.


George

Updated 8/6/2012 - here's the latest:

  • Assembled and painted the static compressed air tank that goes at the end of the slag dump track.  In retrospect, I should have painted the tank components and then assembled them, but the color seems OK and even.  I'll check it in normal daylight.
  • Received the decals for the power shovel and will try to apply them tonight.
  • Did a little more of the wiring for the caboose track.  Will try to get the terminal strips, switch wiring plug, and track feeders installed.
  • Just about ready to fasten down all the track on the access hatch.

If time permits tonight, I'll try to get some photos up.


George

Photos from the 8/6/2012 Update:


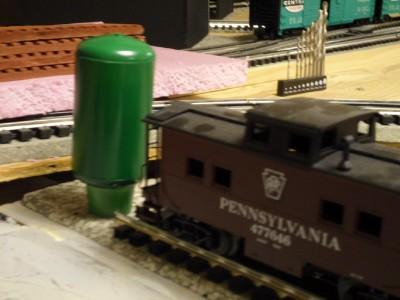
This is the compressed air tank at the end of the slag dump track.  The pedestal is temporary and is too high.  It also needs more paint.

Tank-01W


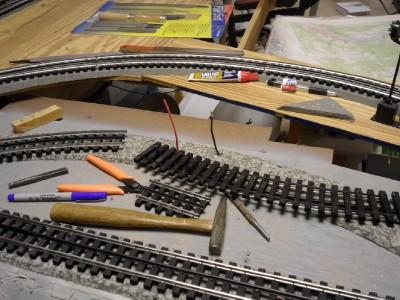
This is the wiring for the cabin car track.  The feeders are sticking out of the Vinylbed, waiting to be stripped and crimped to the spade connectors in the track.  The orange pair of cutters is used to remove the wood under each outside rail of Ross track.  The hammer and punch are used to drive home the spade connectors into the web of the track.


Caboose Track WiringW


Here's a shot of the whole area.  The hatch has been slid to the left about 3" so that I can reach the wires underneath it (from the back / right).


General AreaW


George

Attachments

Images (3)
  • Tank-01W
  • Caboose Track WiringW
  • General AreaW

Updated 8/12/2012:


  • Made an abortive attempt to get the decals on the power shovel during lunch Friday.  Big mistake - "haste makes waste".  The area planned for the Bucyrus-Erie decal had a ridge that I thought was too small to matter - it wasn't.  The Standard Slag logo just didn't look good as designed in its proposed spot; will need to go back to the drawing board.
  • Managed to get the track's electrical work and all but the last piece of caboose track done.  Both Standard Slag and the Caboose track spurs are wired to a 4-position termnal strip, labelled, and connected to the power distribution panel for Power District 6 (Weirton Junction).
  • Pulled the access hatch off the layout to work on the DZ-2500A switch machine wiring.  That is in progress.

Remaining items are finish up the switch machine, cut the foam plug to the correct angle, get gray paint onto the remainder of the access hatch, glue the steel pilings in place (need to bend a few), add ground cover, and glue down slag.


George 

Updated 9/3/2012:


I got the last bit of electrical work done on the access hatch.  The DZ-2502 pushbutton is now mounted in the fascia and connected to a Euro-style terminal strip.  Attached to that are the 6 wire leads for a plug in connector (the other half is attached to the access hatch itself.


The next step is to put the access hatch back on the layout, connect all the wires, and try it out.


If that goes OK, we will make our adjustment cuts to the foamboard plug.  The steel pilings will then be added to the plug. 


After that, we will remove the hatch, finish touching up with gray primer, and add slag to it.  The final step will be to place it back on the layout, bend pilings to fit the circular part, and install.


George

Post

OGR Publishing, Inc., 1310 Eastside Centre Ct, Suite 6, Mountain Home, AR 72653
800-980-OGRR (6477)
www.ogaugerr.com

×
×
×
×
Link copied to your clipboard.
×
×