Gentlemen,

I am building a Steel Mill themed , Lionel 0-31 layout with heavy emphasis on switching. Early TMCC control with a point to point to loop arrangement.

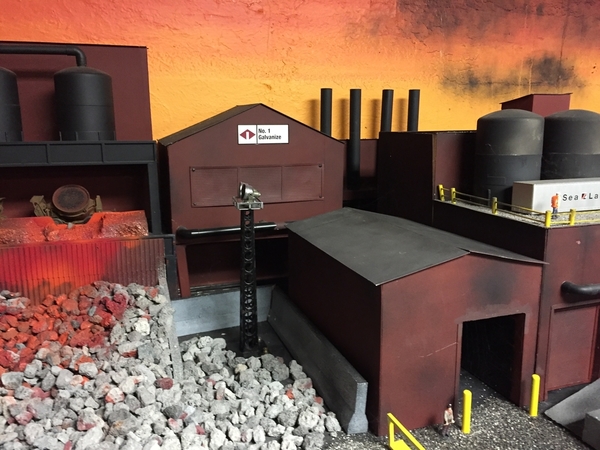
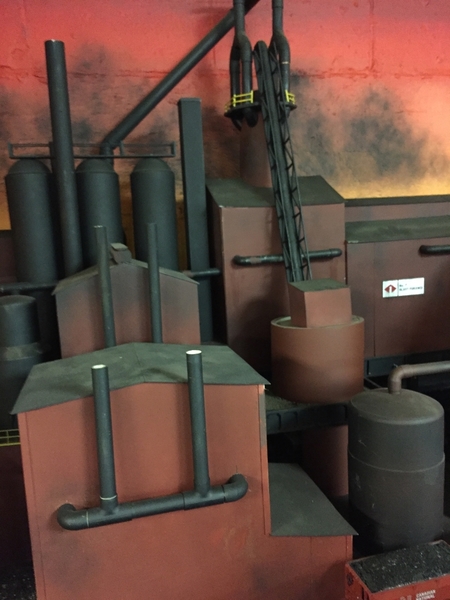
I am scratch building or heavily bashing my structures. I am using 1/8" and 1/4 plywood as a base as well as other mediums. As stand ins, I have used corrugated board (boxes) painted grey stone (splatter paint). They look like concrete buildings..... To cover these with "metal siding" will be a pain and expensive.

I dare ask, how would "masonry" be it brick or concrete structures look to others in a Steel Mill environment?

Chime in with "your" thoughts please.

Thanks In Advance.

Rick


Original Post

Replies sorted oldest to newest

Rick,  I have a steel mill 3d back drop building that is made from plywood with a styrene exterior glued on. You could do that with card stock too.  I think the concrete and brick buildings look great in that environment. If you have not done it yet. Go on over to the 2 rail area on this forum and check out Roo's Action at the Steel Mill postings. Lots of great ideas there.  Actually Roo has posted much good info over the years.


Last edited by Nortonville Phil

Hi Rick.

Lets consider this for an idea.

Iron is made in the Blast furnace it is then transported to a Basic Oxygen Furnace or Electric Furnace to be made into Steel. Why not make the furnace a backdrop and build a BOF you can have a couple of tracks against the Backdrop for the hot metal cars then move them around to the BOF.

Lots of ways to model the Steel industry don't be put off by my photos I have posted them here just to show you what can be done by just an average modeller if you have the passion to do it. The furnace is much more complicated than the BOF the BOF could be built as a flat against the wall and I admit if I could have I would have built a flat but that would have meant Iwould have had to rebuild part of the layout.

There are tools sitting on the baseboard because I am working there and I just snapped those photos right now just for your thread.

Ask me a question I'm an easy goin Aussie bloke I'll try and find an answer for you. Roo.

DSC03307DSC03308

Attachments

Images (2)
  • DSC03307
  • DSC03308

In no particular order steel mill buildings, rolling stock and rubber tire vehicles are:

1/ Heavy Duty - 300 T crane in their forge, 150T cranes in other buildings

2/ Large - batches of steel are large so three or four flat cars or gondolas are almost a small unit train.

3/ Covered with rust, dust and grime - whether brown, tan, gray, black, yellow.

John in Lansing, ILL

Last edited by rattler21

ROO

Holy cow!!! Thanks for the photos and ideas. I have thought about a BOF. But I am modeling (roughly) the post steam to 1968ish era. But, as they say " it's my railroad ". I guess I could have anything I want! 

I checked out your post on the 2 rail page and wow, wow and wow! 

I plan to fab most of my structures from 1/4 plywood which I have available to me. And like a true procrastinator, I plan to start tomorrow! 

Thanks again. 

Rick 

Last edited by Rick Bivins

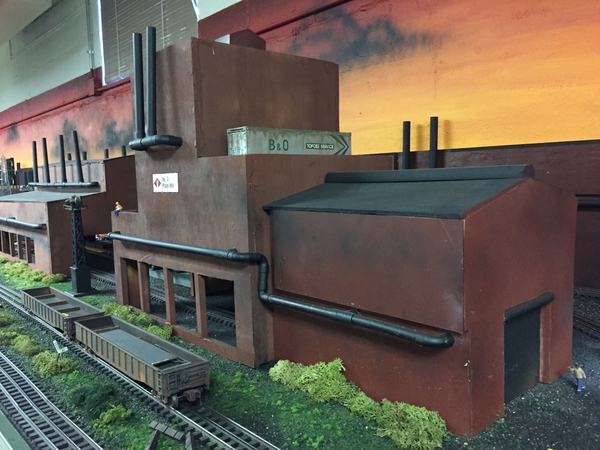
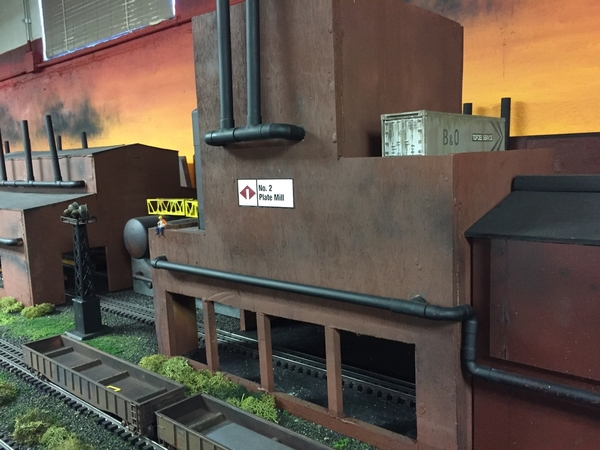
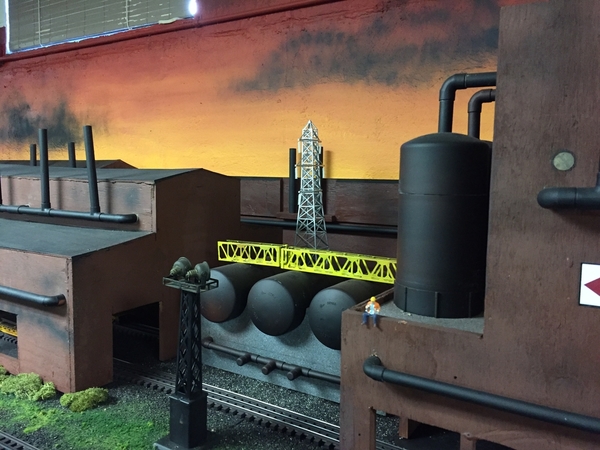
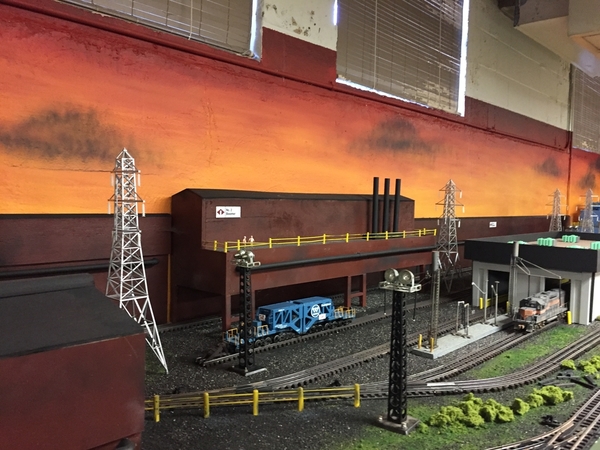
Mark, Thanks for the compliment. Truth be told those are some pictures I took at the HiRail Modular Train club layout in Indiana.  Eventually I will have bigger train room and will add a steel mill complex.I would like to model it after the one from the HiRail Club's. It looks like most of the buildings are 1/4 plywood, some have corrugated siding some just the plain wood. It works. The actual steel mill complex at the club is , I guess 35 feet long, looks to be about 4 feet wide. It really does look neat and yes the backdrop colors really set the mood !

-Tom

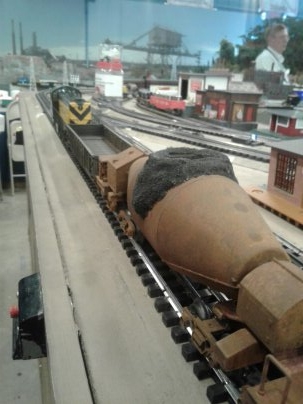
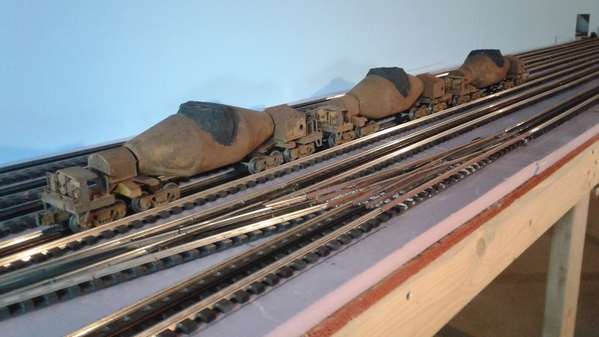
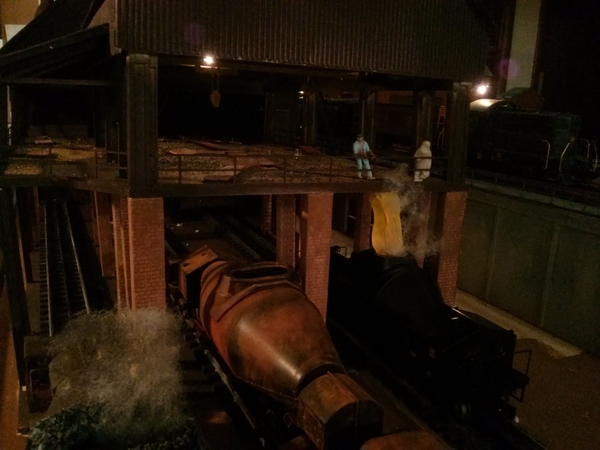
Hello there, I just want to show you a few of my MTH hot metal cars I weathered. I used a product called "sophisticated  finishes rust antiquing finish". It's a simple 2 step process. First you paint on the water based iron powder containing layer. Then when it is dry, paint or spray on the antiquing solution. The solution oxidizes the iron base coat in about 30 minutes. Hit it then with some dullcoat after it is dry to seal the finish. The skull around the spout is colored sand from the craft store. If you have a Blick's art store near you they carry it and other finishes.1533171443709 

Next I will try the same on my Slag cars.Hot metal cars

Attachments

Images (2)
  • Hot metal cars
  • 1533171443709
third rail posted:

Hello there, I just want to show you a few of my MTH hot metal cars I weathered. I used a product called "sophisticated  finishes rust antiquing finish". It's a simple 2 step process. First you paint on the water based iron powder containing layer. Then when it is dry, paint or spray on the antiquing solution. The solution oxidizes the iron base coat in about 30 minutes. Hit it then with some dullcoat after it is dry to seal the finish. The skull around the spout is colored sand from the craft store. If you have a Blick's art store near you they carry it and other finishes.1533171443709 

Next I will try the same on my Slag cars.Hot metal cars

They look great ! Well done that man!

Roo.

Thanks for the compliment on my weathering technique. Here is a photo of a gondola I also did. I dry brushed the weathering on so you can still see the paint and decals underneath. It is a kit bash of 2 O-27 Gondolas cut apart lengthwise and reassembled to make it scale width. I made the decals on my computer using Microsoft Word. Overbeider is the name of my fictional steel mill company. It comes from the answer you get when you ask someone where something is. 20180725_155335

Attachments

Images (1)
  • 20180725_155335

Rick,

See  photos below which I previously have posted on this forum.  All structures are scratch built using basswood, foam core board and in some cases corrugated cardboard from A.C. Moore for the outside walls of some buildings.  The construction crane is the only structure that is a model .  

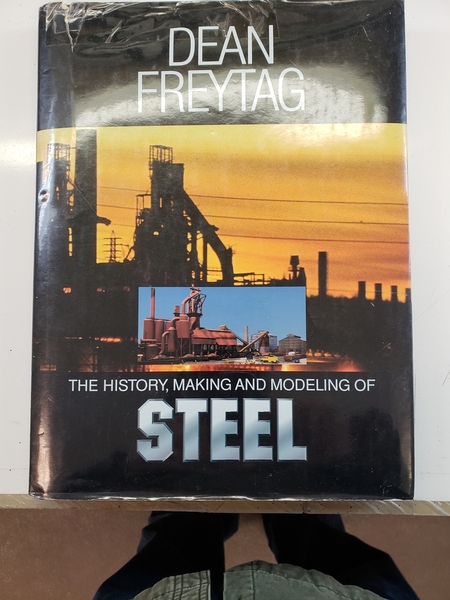
Although I was born and raised in Pittsburgh in the 1950's and weekly saw the J&L Southside steel plant, it was quite another thing to try and scratch build the various structures.   If you have not done so, I would urge you to get the book by Bernard Kempinski, The Model Railroader's Guide to Steel Mills.  Another book is the Cyclopedia of Industrial Modeling by Dean Freytag.  Freytag was a fabulous modeler but I found his book confusing, in part because it is for HO modeling and also because he used Plastruct parts, which I had to try and build out of bass wood.  Still, the photos helped understand the size of various structures in relation to other structures and he makes the point that even though these a large (very large ) structures, they are built sections at a time so they become manageable to do.

Good luck with your project. 

DRC


Attachments

Images (7)
  • 28585: Joe Magarac Foundry at the J&L Southside Works in Pittsburgh around the late 1950s.
  • 28588: Interior of the Electric Arc Furnace.  I purposely left about half the roof and half of each side open so as to better see the interior.  The exterior walls are foam core board covered with plastic corrugated cardboard which I found at A.C. Moore.
  • 1226141456: Hot slag being poured over a cliff.  Behind the slag car is the foundry.  Back left is the blast furnace, with the sides and roof again made of foam core board covered with the corrugated cardboard.
  • 1226141456
  • 1226141502a
  • IMG-1017: View looking into the electric arc furnace.  Construction crane to the left is from Menards.  Ore bridge at far left is scratch built.
  • IMG-1079: Rolling mill at right, again covered with foam core board and corrugated cardboard,  The structures are large and require interior bracing which I did using bass wood of varius sizes.

Dave.

Even your loose ends are great! Ha, Ha.

I would like to see this thread become a sort of "Meeting Place" for O scale Steel modellers I hope we can forget about the two or three rail concept and just concentrate on showing how we go about building Steel Mills big or small I am prepared to show some of my ideas on how I approach building Steel Mill models I have lots of photos/drawings with measurements for O scale never seen before, but I don't want to take over the thread I would like to see others contribute as well I'm sure I will learn something to.

How about it Rick and the rest of you guys.

Rick started the thread can we continue posting here and make it a Steel mill modellers thread ?

If the answer is yes, I will show you how I built my Blast Furnace that anyone can do with a few basic tools.

I should mention this is the only forum I post on in the USA,

Thanks, Roo.

Last edited by Roo

OK Dave we have two starters so far! 

I am going to start the ball rolling with some ideas about building the hardest structure in a Steel Mill.....The Blast Furnace.

But first I have to go to the Gym (it's 6-30AM on Christmas Eve), when I return I will have a shower some breakfast and I will sort through some photos and see what I can come up with. Margaret (my wife) is going Shopping and doesn't need me to tag along looking bored!

Roo.

I've just gave a presentation to the local club about "Railroads and their role in the American steel industry" and a description of how I run my Railroad which is virtually a Steel Mill, it was well recieved by the members. Now that it is over (It took me a month to prepare it!) I can post some ideas here soon.

Also the internet connection has been off and on the last couple of weeks they are doing work in our area that has finished so now there are no more excuses ! Roo. 

Dave's project is a very good representation of a Blast furnace.  Used to take iron ore, coke, and other ingredients to pig iron, liquid iron.    The rail transportation would then move the liquid iron to a BOF,  Basic oxygen furnace, where a large vessel, with no external heat, would be used, with an oxygen lance/supply, to make steel. Oxygen supplied, to the liquid iron, removed carbon, at the same time, alloys were added. This is an exothermic reaction that generates it's own heat. 

Today a lot of melt shop iron come from scrap metal, processed in electric arc furnaces.  

Finished liquid steel (old) was placed in ingot molds to harden.  Molds would then be processed via a two high roll mill after reheat/annealing. 

Finished liquid steel (new) goes to a large, long, vertical building call a continuous caster.     The caster takes the liquid steel and allows it to cool as one very long, curved, piece of steel. Vertical to horizontal. This piece of steel, is much more efficient, eliminating end crop waste, scaling and re-heating. Product goes directly to finish mills. 

 Koppel Steel,  what remains of Babcock and Wilcox Steel, Beaver Falls, PA  Plant,  is a melt shop  that has a continuous caster.

Rail service, primarily,  moves scrap metal to the arc furnaces.   Finish blooms, at the Koppel melt shop, are loaded on trucks, and shipped to the processing plant, Ambridge, PA. 

?? A lot in addition to Dave's  Blast furnace complex ??  IMO.   Mike CT. 

Last edited by Mike CT

This was supposed to be a magazine article but the pressure of picking out photos which number over 100 and writing it up over many pages was just to much for me, posting it here is much easier as there are no deadlines or pressure besides there was always the chance a magazine would not want the article so it would all be for nothing.
A blast furnace in O scale has to be scratchbuilt to do this a reasonable knowledge of how a furnace operates is needed plus the ability to be able to know what to include and what to leave out (unless your building for a museum where every part has to be included) I chose my approach as sufficent for what I wanted on the layout.

After deciding the size I wanted I found the biggest problem in this model was how to build the main barrel of the furnace I finally chose wood, yes, wood turned up on a lathe by a very good wood turner he also turned the Ovens, Dust Precipitator, venturi scrubber and gas cooler. I have drawings of all these items including the pipework and all the sizes so anyone can now build an O scale Blast furnace using these drawings  They were drawn using CAD by a good friend using my measurements, advice and enthusiasm, they are mine so feel free to copy them I won't sue you for copyright they are 100% owned by me.

To start the ball or barrel rolling today here are some photos of the barrel fresh off the lathe, drawings and photos will follow of every item if there is any interest,  please let me know because there are lots of drawings and photos and will take some time to post them and I am a busy man building rolling stock and buildings for the layout and baby sitting nine grandchildren,n I also keep the layout going all the year round (see the 2-rail thread). If this helps someone it's worth it.

Keep in mind I am not a master modeller or a professional modeller just an average bumbling old bloke, so if I can do it you can. Thanks Roo.


DSC01612DSC01614DSC01627 

Attachments

Images (3)
  • DSC01612
  • DSC01614
  • DSC01627

Much of what a steel mill needs for ancillary structures depends on the era.  Some thoughts...

Most of us think of the furnaces and then the shops to forge the steel into ingots and then blooms and then finished products.   Massive brick and stone buildings in the earlier day which morphed into various types of corrugated sheathed structures in the more modern days.

Mills need lots of electric power as well as natural gas for gas blowing engines.    They also need raw materials of iron ore and scrap and coke for carbon in large amounts so plan on lots of neat ore pits and transfer bridges/equipment.

They also need a steady supply of things such as dolomite, in newer mills this is shipped in center flow hoppers.   Not to forget the other "ingredients" of lesser quantities such as manganese or chromium or vanadium.   

And getting the finished steel on the outbound car was of utmost importance because once it hit the car deck and the car moved it was considered sold and shipped for billing purposes. 

Two interesting in-depth reads are Nevin Yeakel's "Bethlehem Steel Railroading" as well as the March 1994 Railpace "Bethlehem Steel Railroads.    The first is by a PB&NE trainmaster that worked the steel and the latter covers much of the mill before it's closure.  Both have lots of good pictures as well as track maps, etc.  

The Nevin Yeakel book can be found with some searching, the Railpace back issue is seldom seen.

Oh, and "steel mill" doesn't just mean someone that produces iron or steel to sell.  Many businesses "rolled their own" in earlier days.  For example, in the steam era Bucyrus Erie in South Milwaukee made their own steel for their heavy equipment from raw materials.

Last edited by Rule292

Here is my furnace body.  I also obtained some blueprints that showed the diameters at different heights.  I started with a dowel rod and placed discs with the correct diameters at the correct elevations.  Wooden stringers were then installed for structural support.  Spray foam was used to fill in the gaps.  The whole structure was finished with fiberglass and body filler.

IMG_0779

IMG_0780

Attachments

Images (2)
  • IMG_0780
  • IMG_0779

Dave and members.

I looked at your furnace body before I started mine and thought about doing the same then a couple of weeks later I went to a wood show and saw this bloke turning down lumps of wood I asked him could he do something for me if I supplied the drawings and sizes I think he thought I was nuts but after visiting him at his home and showing him photos and drawings he took the project on and made a very good job of it. Thanks Roo. 

Question for the group:

Would any of the Walthers HO steel mill buildings be useable in an O scale mill setting? 

Has anyone used them?

I am asking because when I finally get to adding steel complex to my layout I will have to do selective compression and maybe not have all of the buildings, parts of others and some as backdrop/relief.

Thanks

-Tom


Alan, Thank you for your generous offer. I Think I will  try to make compressed versions of the basic mill buildings. I have the pictures I took of the steel mill complex at the Hi Rail Modular Train Club in Griffith Indiana.  I posted some above and have more. I plan to visit the club again in couple of months and will take more pictures and measurements. Also all the ideas presented here on this great thread.

I will be getting new, larger,  area for my layout, not sure at this point how much more space I will have for the mill complex.  

Thank you very much Alan

- Tom

PRR1950 posted:

Roo,

I, for one, am surprised that no one else has replied to your generous offer.  I would love to see pictures and drawings of your mill structures as well as learn any construction tips you might provide.

Chuck

Very kind words Chuck. I am kinda surprised myself it's not often modellers will offer a couple of years of research and building for free or the cost of a postage stamp.

Maybe {and I'm guessing here) some of the members don't like an Australian telling them how to model an American Structure and I don't have any problems with that either, I understand it sometimes takes years before you become accepted as one of the team on forums. I might be an Aussie but modelling to me is a universal thing throughout the world and I would never get involved in 2 or 3 rail discussions I treat the Forum as an "O" Forum I have never seen a 3 rail layout.

Aussies have had close links with the USA in numerous circumstances not only with trains, wars being one of them, I for one was in one where we worked closely with Americans in combat. We had a contact once where we had American Gunships giving covering support while Aussie choppers pulled us out quite a mixture.  I have been to America, I have had Americans visit me, I researched New York Harbour Railroads for ten years and I am into my fourth year of researching the railroads role in the American Steel Industry. I have a whole library of American Railroad books I have a passion for American Railroads.

Of course there may not be the interest in O scale steel mills as there is in HO because of the space I have many, many photos of beautiful HO Steel Mill layouts but not to many O scale.

I'll keep posting drawings and photos I have lots of ideas that have been put into practice. I'm happy, not upset as they say in Australia "No worries mate"!

I love American trains and the guys that sell them to me. Thanks Chuck.  Roo.

Now some photos of the Pouring floor building made out of 3mm styrene sheet and a photo of how I cut the sheet on my work table. I chose to enclose the pouring floor but left an option open if I ever want to detail it. The roofs all lift off and there is a plain sheet of styrene floor sitting inside that is removable to detail the pouring floor on the bench which I doubt I will ever do but the option is there maybe I will live to 120 and have the time who knows.... I will next follow with some photos of the furnace building then the furnace details then the blower house.

Lots more photos just finding the most suitable is the worst part be patient with me if your following this thread this is why i did not want to do a magazine article to time consuming. Thanks Roo.


DSC01357DSC01359DSC01364

Attachments

Images (3)
  • DSC01357
  • DSC01359
  • DSC01364

Blast furnaces and heavy industry needed many stairways here is how I built one type using plastruct parts and my jig that termites got into and I had to throw it away along with all my other wooden jigs broke my heart but i killed all the termites had professionals come in and spray everything to late for the jigs and my lumber lesson learnt the hard way. Thanks Roo.


DSC01680DSC01687DSC01690

Attachments

Images (3)
  • DSC01680
  • DSC01687
  • DSC01690

The blower or compressor house is a simple "box" with some windows and doors and a stairway on one side it's built out of 3mm styrene with brick cladding. I make stands for my glue so I don't knock them over. After this I will show you some of the furnace and oven details and other parts lots of pipes sorry there is no order in the photos but I am busy getting the layout staged for tomorrows session and do this in between jobs on the layout. I'm not perfect by any means I have 100's of photos but not in any proper order I'm afraid. Thanks Roo.


DSC01737DSC01738DSC01734DSC01745DSC01747

Attachments

Images (5)
  • DSC01737
  • DSC01738
  • DSC01734
  • DSC01745
  • DSC01747

Good Morning!

Thanks Chuck and Tom remember feel free to download the drawings and photos if you have not already done that they belong to me only.

Today some photos of how I went about the pipework for the ovens and dust filtration system. Keep in mind these are not scale models just enough detail to make it look something like the real thing I never build scale models everything is just scenery to me, operation is what me and my operators specialise in we like running trains! If you have access to endless Plastruct parts the pipework would have looked better and easier to do, no Plastruct so I had a large Hardware shop where everything from door handles, electrical conduit, reticulation and plumbing became my "Plastruct shop"!  Lots of drilling jigs as you can see some made to drill one hole!    I hope some of the other members join in and maybe build something if anyone needs more photos of a particular item or part of the furnace I have them, just ask and I will find them for you. I will try and write something of how I took on some of the work you see here when I have the time. I am planning and preparing for a long Bushwalk or Hike in April so you have a few weeks yet before I go away. The blokes will be here soon better go now and check the layout for today's session. More photos soon. Thanks again. Roo.


DSC00634DSC00635DSC00639DSC00643DSC00644DSC00645DSC00647DSC00648DSC00650DSC00653DSC00654DSC00656DSC00657

Attachments

Images (13)
  • DSC00634
  • DSC00635
  • DSC00639
  • DSC00643
  • DSC00644
  • DSC00645
  • DSC00647
  • DSC00648
  • DSC00650
  • DSC00653
  • DSC00654
  • DSC00656
  • DSC00657
Last edited by Roo

Roo, Many thanks for the offer of the pictures and pdf's. So very generous of you. This is just amazing to see, step by step how you are doing this project. I really appreciate all the detailed photos. I had no idea how to go about doing all these steel mill buildings. Thanks to you I now have the plans, pictures and step by step "how to".

So very much appreciated!!

-Tom

Roo, fantastic work! I just wanted to thank you for offering your research and PDF’s. I don’t model a steel mill or else I’d be referring to your great work for sure. I’ve seen enough of your posts to know that you’re a seriously talented guy! I don’t care where anyone is from, I just know that I appreciate you sharing your information and talent. 

Andy

Last edited by Steamfan77

0315151111031515111103151511120315151115031515111712261414581226141459IMG-1009Wow!  Talk about great modeling, Roo and Dave!  I wish I had these photos when I started my J & L Steel mill complex 6 years ago.  I also wish I had your modeling skills.  But with what skills I do have, I attempted to do two things in creating my layout.  First, build a steel mill complex on an 8 x 8 foot platform and secondly, try to create the illusion of heated metal in its various stages of production.  I am pretty pleased with how both turned out and I've attached a few photos, though none are recent.  I am having  photos taken by someone who knows how to use a digital camera and will post those when I have them.

For those on this thread who are interested in modeling steel mills,  hopefully the fact that I was able to create one in a very limited space will encourage you to move forward.  

DRC


Attachments

Images (8)
  • 0315151111: Blast furnace with molten steel pouring into a hot metal car.
  • 0315151111
  • 0315151112: High line with cast house floor on the left.
  • 0315151115: Rear view of pipes and stoves attached to the blast furnace.  Red building on left is thee blower house.
  • 0315151117: Silohoutte of blast furnace with blower house in foreground.  In the past couple years an Electric Arc Furnace and ore bridge would be to the left of the blower house.
  • 1226141458: Slag being poured over a cliff.  Blast furnace on left.  Joe Magarac foundry on right.
  • 1226141459: Looking into the cast house floor while molten metal flows into a hot metal car.
  • IMG-1009: Looking through the Joe Magarac foundry to the blast furnace in the distance.
Last edited by OGR CEO-PUBLISHER

Thanks everyone for joining in,great photos, this is going to be a Great Steel Mill Thread lets keep it going, and thanks to the originator of the thread Rick Bivins for letting us use the thread as a base for steel mill modelling. Thanks Rick!  And now getting the formalities out of the way,  Here are some more construction photos. The furnace is really a series of small models that eventually come together as one large model. Dave would agree with that as you can see with his wonderful work and photos. More soon.  Roo.


DSC00679DSC00682DSC00683DSC00684DSC00686DSC00687DSC00695DSC00722

Attachments

Images (8)
  • DSC00679
  • DSC00682
  • DSC00683
  • DSC00684
  • DSC00686
  • DSC00687
  • DSC00695
  • DSC00722
Last edited by Roo

Greetings, all!

Somehow this thread escaped me until recently. I've been reading Action at the Steel Mill right along.

Thank you Roo, and others for sharing your plans and your progress. There's some great stuff here!

Modeling a steel mill has been a long running dream of mine. Seeing the newly constructed model of Sharon Steel on the Carnegie Science Center's Miniature Railroad & Village back in what, 1992? was probably the spark. However, the spark has only smoldered in that time, so my armchair modeling has amounted to some drawings and calculations and wishful thinking. Oh, and an MTH Schnabel car and a Norscot front end loader and some gondolas.


Looking forward to reading lots more about everybody's mills!

Perry

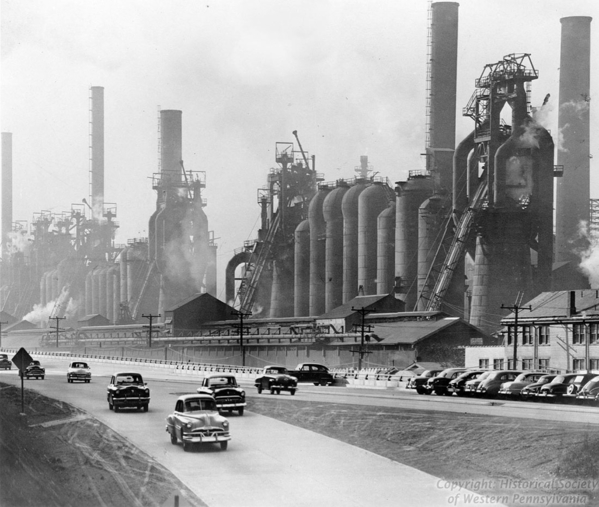
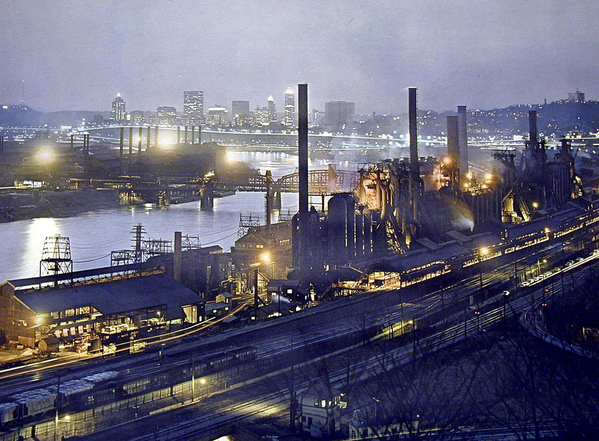
I have such a clear childhood memory of driving past the J&L Eliza Works on the [then new] Parkway into Pittsburgh. I was fascinated and learned to watch for a skipjack to be ascending or descending while we were driving past. I even remember the smoke and red glow from one dumping into the top of the blast furnace. Glad to see people modeling this stuff.

Lew


            joneslaughlin-eliza


              Pittsburgh-JL

Attachments

Images (2)
  • joneslaughlin-eliza
  • Pittsburgh-JL

I often thought about modeling a steel mill since I was raised and lived in western Pa. but was more than I wanted to take on.  Now all yu need are old concrete pad and foundations with weeds growing and the old cold mill to one side still running. I was involved in several mill rebirths. Somewhere in my photo archives are pictures I took of the J&L Aliquipa works being torn down.

David Minarik posted:

Roo,   Your furnace is amazing!

Dave, I think your's is better!

You built your furnace before I started on mine and I downloaded all your photos and studied them and because of that you motivated me to make a start so a genuine thank you to you Dave.

The good thing about scratchbuilding is no two models are ever the same I took a completely different approach to my furnace and tried to keep it as simple as possible a difficult task and like you I had limited space the other problem I had to contend with was that every single part of the furnace is open to viewing it sits in the middle of the room so I knew right from the start I was in for a big job the Basic Oxygen Furnace (BOF) did not have those problems it only can be seen from three sides the back side while not against the wall it still can't be seen I will post some photos of the BOF soon. Thanks. Roo, 


Last edited by Roo
jim pastorius posted:

I often thought about modeling a steel mill since I was raised and lived in western Pa. but was more than I wanted to take on.  Now all yu need are old concrete pad and foundations with weeds growing and the old cold mill to one side still running. I was involved in several mill rebirths. Somewhere in my photo archives are pictures I took of the J&L Aliquipa works being torn down.

Armco Steel in Butler is still going strong. Their "electrical steel" (mostly used for laminated motor rotors and stators) production is as high as ever. Due to automation employment has fallen from a peak of abt 7,000 during the War to less than 1000 now.

If you thought the Blast Furnace was to much work how about a Basic Oxygen Furnace (BOF) You can still run all kinds of trains in and out of it. Here is how I built mine Build a large building first then it's all detail on one side nothing on the other side and instead of filling the inside with lots of detailed furnaces I chose tracks. I will finish the crane off one day. Sorry have to go more soon. Roo. Pipes and fittings from the Hardware store !


DSC02908DSC02923DSC02929DSC02931DSC02935

I have been having trouble posting messages and photos not because of my computer but the network. Australia is in the middle of converting to High speed internet connections and where I live we are having it worked on right now and it's turmoil so it's not the computer's fault but the Internet hopefully it will all be over in a few months who knows. I DON"T have a virus in the computer so we can all relax !

Anyway back to the Steel Mill.

When I was doing the pipework which is simplified considerably compared to the real thing I used five drawings and placed them on a board to work from and also numbered them here they are. I will get back to the BOF when I see my way clear with this abominable on and off connection. I hope this helps if you want the pipework to look realistic but not to complicated of course you can add more pipes till your hearts content this is only a suggestion. Roo.


DSC01349

Attachments

Images (1)
  • DSC01349

OK hopefully we are going to be "on track" for the next message. The Basic Oxygen Furnace (BOF). It's a simple rectangle building with pipework on one long side only the inside is clear as we have filled it with tracks to fit in with our operation plan so lets try and post some photos. I made a wooden spacer to centre the pipe on the ventilator notice the jig required to hold pipe while cutting holes I had to turn down rings for the large pipe but Plastruc have them would save a lot of work but none in Australia.  Roo. More soon.

DSC02908DSC02923DSC02910DSC02911DSC02912DSC02907DSC02929DSC02932DSC02941DSC02948DSC02951DSC02953

Attachments

Images (12)
  • DSC02908
  • DSC02923
  • DSC02910
  • DSC02911
  • DSC02912
  • DSC02907
  • DSC02929
  • DSC02932
  • DSC02941
  • DSC02948
  • DSC02951
  • DSC02953

Awesome work, Roo!  

Those of you interested in Steel Mill modeling should consider joining the Steel Mill Modelers Special Interest Group (SMMSIG).  It is a club under the NMRA auspices, but you don't have to be an NMRA member to join.  The SIG publishes quarterly 32 page color journals annually, provides valuable information for modeling the industry, and holds an annual meet that includes clinics, tours, modeling contests, and tons of fun.  I am an O-gauger but get lots of inspiration and great ideas from the group.  I've been a member since 2013 and last year served on its Board of Directors.

http://www.smmsig.org

Speaking of meets, NMRA Mid-Central Region's annual convention "The Silver Bullet" will be in Boardman, OH from May 2-5.  I will be presenting a clinic called "Modeling Weirton Steel".  For more information:

https://www.div1-mcr-nmra.org/the-acy-bullet-2019

George


Roo/Joe,

I saw the PVC piping also and had the same question Joe had. Typically, PVC piping is too large for anything we do in o-scale other than a silo or tank. In this case, it is a perfect and inexpensive solution for constructing large ducting as in a steel mill.

Roo,

I consider you a true scratch builder. That takes a lot of talent because you are reinventing the wheel every time you do something.

The PVC piping can be cleaned or the printing removed using solvent and very fine wet and dry sand paper about 1000 grade.

The solvent I use and I am hesitant to say this as I think in America it is different going by a previous thread is Isopropanol I suppose rubbing alcohol would do the same job.

More expensive I know but I would rather use Plastruct items if you had unlimited access to their entire range.

Roo.


DSC01361

Attachments

Images (1)
  • DSC01361
Last edited by Roo

Thank you all for the many kind words and Alan G a special thanks because I look at your work all the time and admire it you are a great builder.

George.

I try to stay away from those sites you suggested as I am not a scale modeller I try to research as much as possible for my models, but they are just that models, if you tried to get them to work in real life they would not, they are built as a background for my railroad they are scenery only and I am happy with that. I appreciate your posting though, please don't think I am being ungrateful, indeed that goes for everyone else here I appreciate the interest in Modelling Steel Mills.

Alan A.

I assume your statement above includes me as well as others so for me personally, this is the story in public.

I have already refused another magazine to write an article about modelling a Steel Mill and that still stands but I can't stop you using any thing I post here in OGR it is your Forum if you went ahead I would not want any payment whatsoever as I am on a military disability pension and cannot accept any extra monies without first getting permission and that requires to much paperwork which I don't want to do I am getting on in years and want to enjoy myself in my remaining years I have served my country and almost lost my life doing it. I'm happy to give you permission if you want but only under the conditions above.

I have not finished posting photos here I have found some more last night and I am going away next week for seven weeks so I won't be around for a while I will try and post these before I go. Thanks again. Roo. 

Rick Bivins posted:

Tom Q,

I'm no authority by a long shot, but I recall in recent years an article in one the magazines of a Walthers HO Blast Furnace on an O Gauge layout. The builder raised the structure on a foundation to give it more height. It look good I thought.

Rick.

Not to be a Debby Downer, but I tend to doubt that would look decent.  The problem is that the Walthers HO blast furnace (and most of their buildings) is undersized;  it's more accurately sized for N scale layouts  A real blast furnace (unless you're modeling ones from the very early 1900s) are huge.  The old Oglebay layout had an HO blast furnace on it and it looked waaay too small, IMHO.  

I went through this dilemma with my own layout, PRR Panhandle 2.0.  Initially, I wanted to put a blast furnace on it or even half of one, but it just wouldn't fit in the area I had available for it.  To do what I think is a reasonable representation, you'd need a space at least 36" wide and 60" long.  And it would be 50" tall, minimum.

Of course, Rule #1 is "It's your railroad".  You do what you want.  

George

If you look at the drawings I posted you can get an idea of the size of a reasonable representation of a O scale blast furnace with the high line on one side and the blower house behind the furnace. The space is 8 feet by 3 feet 6 inches. Eight tracks plenty of operation. It fits in well looks good and it's built just needs some fine details and weathering not impossible to do I am nothing special just have a passion for what I do.

See you all in 7 weeks taking some time off going on a long walk in the bush. Roo.

Last edited by Roo

The Walthers Steel Mill kits were definitely on the small side of HO and a lot of it appropriate for N scale. I was a member of NVNtrak when Bernie Kempinski was building the AlKem Steel N-Trak modules and aside from door sizes and other detail bits, a lot fit just fine. Bernie later wrote a book published by Kalmbach called "The Model Railroaders Guide to Steel Mills" (ISBN- 978-D-89024-751-8) which I have found a good compliment. 

Growing up in the Steel Valley, you could not go anywhere without passing by a mill or steel related industry. From my Grandmothers house, I could see the waste gas burn off at Dorothy 6 (Duquesne, PA) and the lights and activity at National Tube Works (McKeesport, PA). I wish I had the space for something big, but continuing to model a small switching layout based on a BOF and roo's build is certainly a great inspiration.  

Don't let our great thread die!

Hi, It's Roo just back from the bush last night lost 7 Kilograms in weight walked 400 kilometres and just a sore back no other injuries. Hope to settle down and do some modelling have lots of ideas but the lure of the wild is still with me I hope I can stay home. Back soon.

Best wishes.

Roo. 

PRR1950 posted:

Roo,

Two questions.  What's a "dugite"?  And, are tiger snakes poisonous?

Chuck

A Dugite is a snake which is in the photo along with the Tiger Snake both venomous get bitten you need hospital treatment within ten hours or less.

Away from snakes and onto tracks I now have the track in position and nailed down next is the feeders and the wiring. Study the photos the top is the new track the lower photo is the old trackwork. We now have an extra dead end siding and more ease for the loco to run around the train to switch the highline.

When my health improves I will post the new control panel that is waiting to be fitted right now I am going back to bed!

Thanks Roo.


DSC03716After (new)DSC03709Before (old)

Attachments

Images (2)
  • DSC03716
  • DSC03709

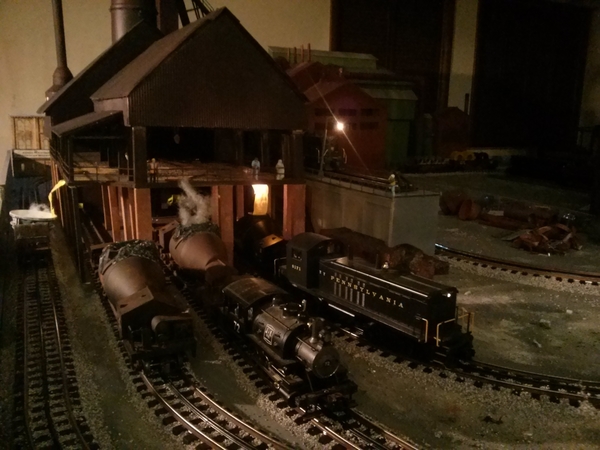
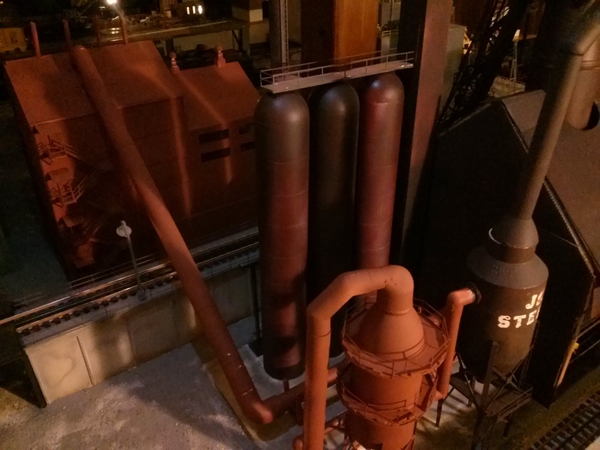
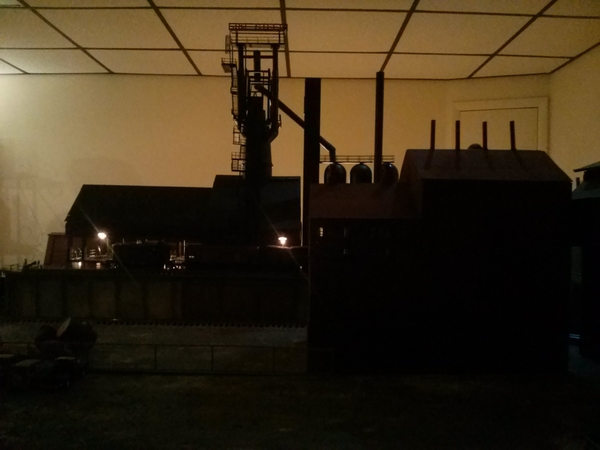
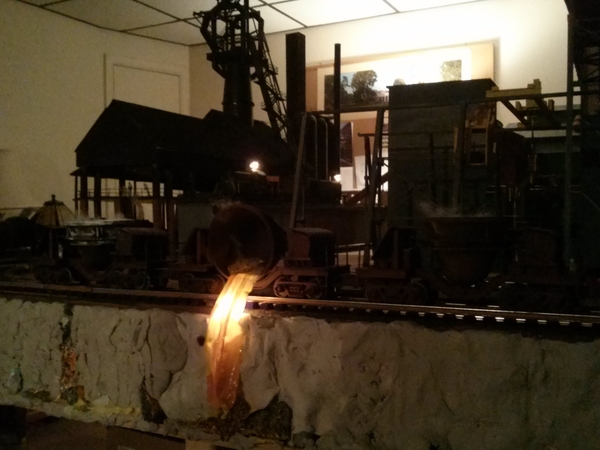
Several months ago I submitted an article and photos to O Gauge Railroading Magazine on my finally completed 8' x 8' steel mill platform. The article was published in the June/July edition and was titled "Hot Metal in Steel City".  In the article I described my attempt to model portions of the Jones and Laughlin (J&L) Southside Works in my hometown of Pittsburgh during the late 1950's and early 1960's, with special emphasis on trying to capture the heat of molten iron and steel in various stages of its production.  Attached are some photos that I had submitted with the article that were not used, but I think turned out pretty well.  Hopefully this post and attached photos will get the discussion going again on modeling steel mills.

Doug Chiado

Attachments

Images (10)
  • 5A3A7306: Early morning light casts shadows across the electric arc furnace onto the rolling mill and an already busy mill scene.
  • 5A3A7322: This photo captures the remelting of scrap steel in the electric arc furnace (blue light ) which is then poured into ingot molds (left front of photo).  The lighted ingots have been stripped from their molds and are starting to cool.
  • 5A3A7355: Inside of electric arc furnace as early morning light shines through the EAF building.
  • 5A3A7332: Hot metal from the blast furnace cast house floor is poured into a hot metal car.
  • 5A3A7271: Maintenance and repair shop in evening light.
  • 5A3A7279: Interior of maintenance and repair shop.
  • 5A3A7282: Hot slag is poured from a slag car over a hillside.  In the backgrtound hot metal pours from the blast furnace into a waiting hot metal car.
  • 5A3A7289: Same picture as before in evening light.  The lower room light better shows off the effect of molten metal being poured.
  • 5A3A7309: To the left are molten ingots loaded onto mill cars, waiting to be moved to thee rolling mill to the right side of the photo.
  • 5A3A7293: Evening view of slag being poured over a hillside.  In the background is the Joe Magarac Foundry.

First. Congratulations Doug on getting your article published. I know as an ex author the amount of work that goes into an article for a magazine. Good stuff mate!

I will keep a lookout for the issue they actually have OGR at my local newsagent here in Perth only 16,000 miles away there is hope for us yet. Ha Ha.

It's a nice touch having the ingots and slabs lit up the engine house or workshop looks good did you snap a photo of the overall layout ?  I'm interested, if you say, yes, it's in the article, I will keep my eye out for that issue maybe even order it. Thanks. Roo.


Doug,

What an amazing job of story telling through your incredible detail and layout. Thanks for the informative labels desribing each photo.

I, too, am interested in an overall shot should the article include one -- your choice of an 8x8 (square and relatively small) base intrigues me.  I can imagine it worked best to fit in the various stages of the steel process?

The ingots and the slag cars are great but I feel for those guys in the "space" suits. 

I grew up in Pittsburgh in your modeling time period had a relative who worked for J&L (Beaver).  Seeing your amazing work was a great way to start the day!

Congratulations on completing your project and congratulations on your article. 

Tomlinson Run Railroad

Pete, Roo and Tomlinson.  Thanks for the kind words.  I've attached a few photos of the 8'x8' platform.  The lalley column in the middle of the platform doesn't help, but I was unwilling to remove it and see the platform crushed as the house fell on it.  As I said in the OGR magazine article, when I first thought of trying to build a steel mill complex on a 8'x8' platform I had real concerns as to whether I could even do it and still maintain the large size of the buildings in relation to each other and to the trains.  It turned out better than I expected.

Doug 

Attachments

Images (3)
  • 5A3A7252: Overview of the Jones and Laughlin Southside Works in Pittsburgh.Looking into the Electric Arc furnaceittsburgh
  • 5A3A7254: Looking into the Electric Arc Furnace with the Blast Furnace in the background.  A former engineer at Bethlehem steel described it as a thunder and lightning storm in a building, and scary as hell.Left to right -
  • 7257: L to R - Blast furnace, Ore Bridge, Joe Magarac Foundry.

Tom,

Thank you for your kind words.  They are much appreciated.  One of the reasons I submitted my article to OGR in hopes they would publish it was because of some of the comments on this thread from fellow O gauge modelers who stated they would like to build a steel mill scene or platform but weren't sure how to do it in a small space.  Hopefully the article and photos along with those I just posted may be of value to them.  Perhaps the best way is to come and view the platform, if you don't mind a drive to Bloomsburg, PA.  If you or anyone reading this is interested in viewing the platform to get ideas, email me at drc1949@ptd.net and I'll give you directions along with other things happening in the area to make the trip worthwhile.   Steamtown National Historic site in Scranton is about an hour drive away and although I have not been there in a number of years, it used to be well worth the drive to anyone interested in railroading.  Also about an hour away is the town of Jim Thorpe, which has train excursions through the Pocono Mountains.


Doug

Doug,

Thanks for the extra photos -- they really make the relationships in the layout clear.  And, yes, the 8x8 works really well for the scale.  An awful lot of research must have gone into this project well before the obviously large amount of building and detailing time.  

Operations are a great way to enjoy the hobby, and this layout has tons of interest :-).  I hope you get in some well earned "play" time now.

TRRR

Roo,

As always your kind words are certainly appreciated.  As I look at photos of your layout, I always think to myself "now these are the results of someone who knows how to model" and wish I had your skills and patience.  And more than a few times after I viewed your photos, I would go back and rework or add to whatever structure I was working on to try and make it more realistic, based on what I could see from your photos.  So I have to thank you and other Forum members who posted photos of their model steel mill scenes that made me go back and make better what I had previously been satisfied with.

The article photos were taken by a coworker, Shane Kiefer,  who is not a professional photographer but who has an eye for photography and produces some great work.  I think the lighting in his first two photos attached to my post of  7/16/19 are so well done, but I have no idea how he did it.  I do know that he simply used the lighting that was in the room (overhead LEDs and spotlights, or floor lamps), turning them on and off to get what he felt looked good.  He also had a very good camera that gave him a lot of options.

Roo, please keep posting photos of your layout progress because even though I say my platform is finished, you never know when one of your photos will send me back to try and make something I thought was good, even better.

Doug


DRC posted:

Roo,

As always your kind words are certainly appreciated.  As I look at photos of your layout, I always think to myself "now these are the results of someone who knows how to model" and wish I had your skills and patience.  And more than a few times after I viewed your photos, I would go back and rework or add to whatever structure I was working on to try and make it more realistic, based on what I could see from your photos.  So I have to thank you and other Forum members who posted photos of their model steel mill scenes that made me go back and make better what I had previously been satisfied with.

The article photos were taken by a coworker, Shane Kiefer,  who is not a professional photographer but who has an eye for photography and produces some great work.  I think the lighting in his first two photos attached to my post of  7/16/19 are so well done, but I have no idea how he did it.  I do know that he simply used the lighting that was in the room (overhead LEDs and spotlights, or floor lamps), turning them on and off to get what he felt looked good.  He also had a very good camera that gave him a lot of options.

Roo, please keep posting photos of your layout progress because even though I say my platform is finished, you never know when one of your photos will send me back to try and make something I thought was good, even better.

Doug


Doug. Thank you for your very kind words but don't under estimate yourself.

One thing I like about this forum the majority of us are "battlers" as far as modelling goes. Yes there are exceptional builders here and we learn from them but I get lots of ideas from the average bloke as well as the "pros" I'm glad I can help others even if it's just for the entertainment of looking at my threads! 

Your OGR article.

Your friend Shane did a very good job on those photos and deserved's to be congratulated of course without your great layout it would not have happened !

I'll keep posting here and keep the members up to date with what's happening of course being a 2-Rail layout I have the added burden of converting rolling stock all the time which interferes with the layout building but that's life, you cop it sweet and keep going mate.

Thanks again. Roo.

Add Reply

Post

OGR Publishing, Inc., 1310 Eastside Centre Ct, Suite 6, Mountain Home, AR 72653
800-980-OGRR (6477)
www.ogaugerr.com

×
×
×
×
Link copied to your clipboard.
×
×