Big_Boy_4005 posted:

After a little fun running on Monday, it was back to work (still fun). My ADD was in full swing today as I got into a bunch of different projects.

One major one is to move the hidden yard control panels (big and small) over to the dispatcher's corner.

This is the current big hidden yard control area. The three components are the monitor, the panel and the track occupancy board. The monitor has already been decommissioned. The track occupancy board is easy to move. It's the control panel that will take work, because of all the wires, 30 to be precise.

IMG_7330

I had some very large old phone cables. This one has 50 pairs. I'm only using less than half the conductors. These will be control lines and throw relays which will handle the track power.

IMG_7317

I cut a grommet into the new desk top.

IMG_7318

This little spread sheet tells me which colored wire is assigned to which function.

IMG_7319

Preparing to build the new relay panel.

IMG_7328

The panel behind the vacuum is where the relays will be mounted, on the other side, under Red Wing.

IMG_7329

Speaking of Red Wing, it has been a long time since I've seen it. It was buried under a blizzard of junk for the last couple years. All gone, and the dust with it!

IMG_7321IMG_7322IMG_7324

Yes, this is just an ordinary room fan...

IMG_7327

and this is an empty box with a furnace filter taped to the bottom. The idea is to place the fan in the opening and have it blow the air through the filter. I'm getting ready to paint rail! Last time there was a huge cloud of over spray. I hope this works.

IMG_7326

I spent an hour last week calling all over the country to get these. Cleaned out two stores and put a dent in the stock of a third. All they are is the non-illuminated plastic bumpers for tubular track. It's weird, because people keep telling me they aren't being made anymore, but they are on page 106 of the brand new Lionel catalog. Go figure!

IMG_7295

All that remain from that pile, is one box of three. They go fast when you put in 8 at a time.

IMG_7320

Making good progress.  Looking forward to an April visit.  Keep up the good pace and work Elliot.  Thanks again for sharing your project.   Always and inspiration to view your posts.

Dave

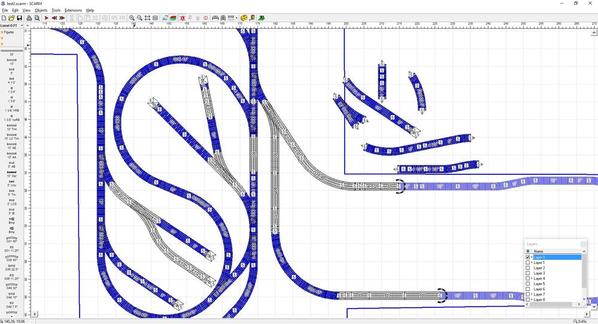
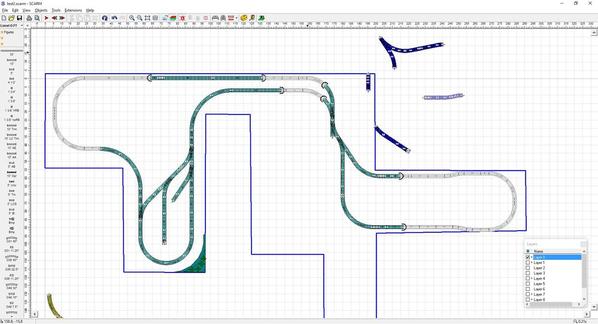
I get off of work, I go upstairs turn the layout on I get one engine running on the loops and I start tinkering build this or that wire this or that. next thing you know it's 11:00 or 12:00 and I got  things accomplished on the layout there is always a train running when I tinker. I want to get back to where there is 2 running at the same time just haven't gotton there yet. right now one of the issues with getting there is both loops have one switch in common so one place for a collision. I want to rework it a little so that I can run continuous without a worry about a collision.

here is the current layout the reversing loop to the right the left hand switch is used on both loops. highlighted in red

collision switches

so here is the proposed new configuration.

switch rework 

Attachments

Images (3)
  • switch current
  • switch rework
  • collision switches
Last edited by Jhainer
mike g. posted:

Lee, You get so much done on so little sleep and everthing comes out looking great! If I missed that much sleep I have no idea what I would end up with. But I am glad it works for you cause it sure is a pleasure for me to read about and see!

I don't suggest this method of progress on a layout. At the risk of getting a heaed start on being an old man and writing about ailments, I'm getting over a 'creeping crud' winter cough that I was RX'd some steroids for sinuses. The night before last, I couldn't sleep (or even lay down in bed) without feeling anxious and I got to bed finally about 1:30 in the morning (having to get up at 6). I was jittery all day yesterday, and a co-worker asked what meds I was on. I looked up the side effects for the steroid and I had half the list! I tried going to sleep last night and the same thing. Gave up and went into the layout room to put static grass in. By 2AM, I still wasn't the least bit tired.

I hope to heck I can start sleeping soon!

Thanks Mike, Mark and Dave as well as all those who just hit the like button. I appreciate all of your support.

As J Hainer points out, there is a lot to be said for diligence when it comes to this hobby. For all practical purposes, I'm retired, even though I'm not quite of that age. This has been a particularly special week, as I have not had to leave the house since Monday when we stocked up on groceries.
I'm getting so excited, I'm spending 4 - 6 hours each day on the layout. Even though February only has 28 days, I may be on pace to set a personal best in terms of hours worked in a month. I'll have to check that stat. It probably goes back a few years to when Patrick was coming over on a regular basis.

Don't forget, this big push is all building up to a layout tour at the end of April, so I really want to have it looking good. It doesn't stop after that, because the National Narrow Gauge Convention is coming to town Labor Day weekend 2018.

Even if you aren't a narrow gauger, it's a good excuse to come for a visit!

Got up this morning and after breakfast got to work. Check the forum first and Mark and Mike g are right. There is a flurry of activity. Maybe because spring is approaching for a lot of us and that will mean yard work over layout time. After breakfast with the paint drying overnight I got track laid down and although I should not of done it yet I added ballast, not glued down yet. I am totally happy with this track configuration. I sure better be I am not going to rip it up again LOL. Going back to add black paint to the plywood where the sidings will be going and hopefully it will be dry so I can start to do that track area after lunch. Couple of pics............Paul

DSCN0162DSCN0163DSCN0164

Attachments

Images (3)
  • DSCN0162
  • DSCN0163
  • DSCN0164

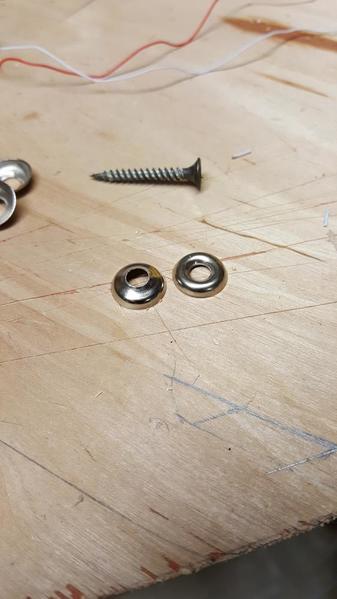
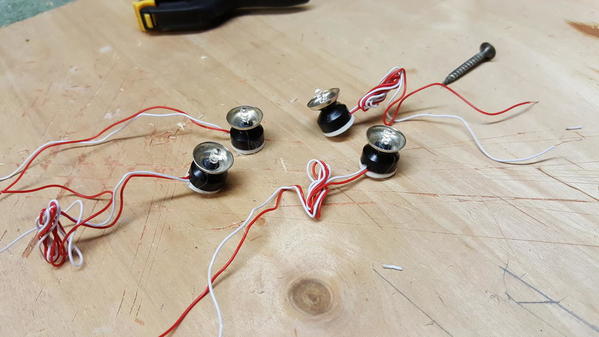
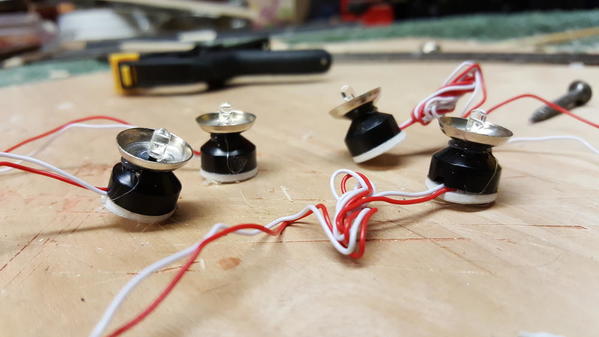
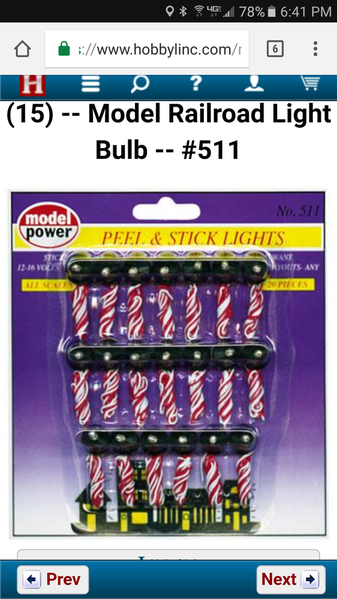
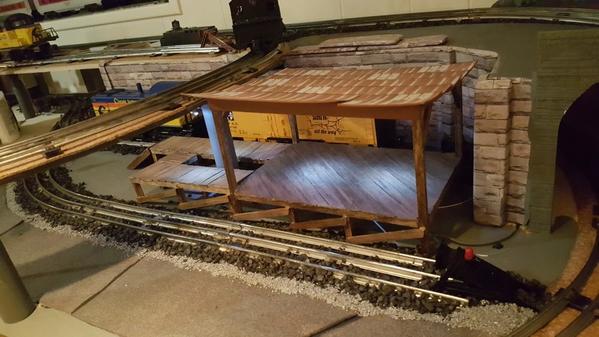
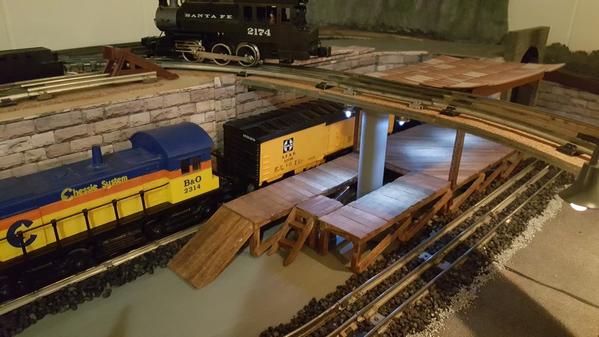
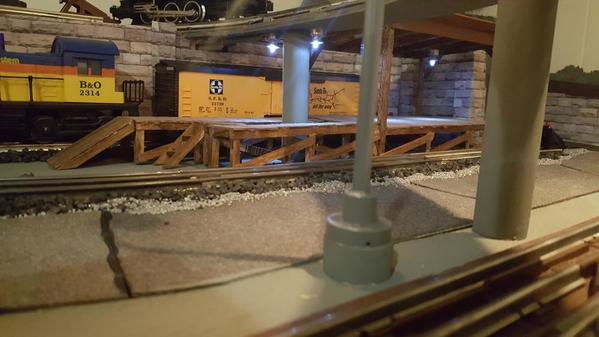
Bought some LED's from Model Power for my freight depot. I wanted to make a hood for them to look like old industrial shop lights. I was looking around my work shop and came across some thin cup washers for drywall screws. Problem is they are cupped the wrong way. I ran a screw through the back side and down onto a piece of scrap wood...Viola! Going to paint them silver. Stained the depot and platforms with a dark oak stain. I will post some pictures of the progress soon.

Here's the lights

Bob

2017-02-15 16.24.372017-02-15 16.31.202017-02-15 16.31.28

Attachments

Images (3)
  • 2017-02-15 16.24.37
  • 2017-02-15 16.31.20
  • 2017-02-15 16.31.28
p51 posted:
mike g. posted:

Lee, You get so much done on so little sleep and everthing comes out looking great! If I missed that much sleep I have no idea what I would end up with. But I am glad it works for you cause it sure is a pleasure for me to read about and see!

I don't suggest this method of progress on a layout. At the risk of getting a heaed start on being an old man and writing about ailments, I'm getting over a 'creeping crud' winter cough that I was RX'd some steroids for sinuses. The night before last, I couldn't sleep (or even lay down in bed) without feeling anxious and I got to bed finally about 1:30 in the morning (having to get up at 6). I was jittery all day yesterday, and a co-worker asked what meds I was on. I looked up the side effects for the steroid and I had half the list! I tried going to sleep last night and the same thing. Gave up and went into the layout room to put static grass in. By 2AM, I still wasn't the least bit tired.

I hope to heck I can start sleeping soon!

I hope you luck with it! Been there done that, after my Chemo treatment started I was up till 2AM and back awake at 4 AM. Things finaly changed, now I am in be at 7 or 8 and up at 3 or 4 am.

mike g. posted:

Paul, that looks like its going to work out great! When do you plan on laying the track behind the power plant and where does it tie back in at?


Bob, great idea with the washers for the leds. What did you use for the black part? They look sweet!

Mike

They came that way from Model power. They are stick on units with the resistors already installed. 

Thanks

Screenshot_20170216-184139Screenshot_20170216-184139

Attachments

Images (1)
  • Screenshot_20170216-184139
mike g. posted:
p51 posted:

I don't suggest this method of progress on a layout. At the risk of getting a heaed start on being an old man and writing about ailments, I'm getting over a 'creeping crud' winter cough that I was RX'd some steroids for sinuses. The night before last, I couldn't sleep (or even lay down in bed) without feeling anxious and I got to bed finally about 1:30 in the morning (having to get up at 6). I was jittery all day yesterday, and a co-worker asked what meds I was on. I looked up the side effects for the steroid and I had half the list! I tried going to sleep last night and the same thing. Gave up and went into the layout room to put static grass in. By 2AM, I still wasn't the least bit tired.

I hope to heck I can start sleeping soon!

I hope you luck with it! Been there done that, after my Chemo treatment started I was up till 2AM and back awake at 4 AM. Things finaly changed, now I am in be at 7 or 8 and up at 3 or 4 am.

Dang, I hope you're doing better now, I didn't know that. Makes my situation seem silly in comparison as what I have isn't even the flu (got tested last week just to be sure).

last night was a bad experience, with the layout work being the only good part. I hate being awake at night like this. I now realize that steroids are NOT for me as I was stressed almost the point of having a day-long panic attack yesterday. I didn't take any more after reading those side effects.

I was exhausted before noon today, and it felt great. I swear I felt like someone rotated a dimmer switch on me to the tired setting. First time I’d felt really tired in over 3 days. Odd as it sounds, I liked the feeling as to me, it meant that MAYBE I’ll be able to sleep tonight. I don’t care how much you’re hacking or bugging out, eventually exhaustion will simply take you out.

RSJB18 posted:
mike g. posted:

Paul, that looks like its going to work out great! When do you plan on laying the track behind the power plant and where does it tie back in at?


Bob, great idea with the washers for the leds. What did you use for the black part? They look sweet!

Mike

They came that way from Model power. They are stick on units with the resistors already installed. 

Thanks

Screenshot_20170216-184139Screenshot_20170216-184139

Thanks for the great information!

p51 posted:
mike g. posted:
p51 posted:

I don't suggest this method of progress on a layout. At the risk of getting a heaed start on being an old man and writing about ailments, I'm getting over a 'creeping crud' winter cough that I was RX'd some steroids for sinuses. The night before last, I couldn't sleep (or even lay down in bed) without feeling anxious and I got to bed finally about 1:30 in the morning (having to get up at 6). I was jittery all day yesterday, and a co-worker asked what meds I was on. I looked up the side effects for the steroid and I had half the list! I tried going to sleep last night and the same thing. Gave up and went into the layout room to put static grass in. By 2AM, I still wasn't the least bit tired.

I hope to heck I can start sleeping soon!

I hope you luck with it! Been there done that, after my Chemo treatment started I was up till 2AM and back awake at 4 AM. Things finaly changed, now I am in be at 7 or 8 and up at 3 or 4 am.

Dang, I hope you're doing better now, I didn't know that. Makes my situation seem silly in comparison as what I have isn't even the flu (got tested last week just to be sure).

last night was a bad experience, with the layout work being the only good part. I hate being awake at night like this. I now realize that steroids are NOT for me as I was stressed almost the point of having a day-long panic attack yesterday. I didn't take any more after reading those side effects.

I was exhausted before noon today, and it felt great. I swear I felt like someone rotated a dimmer switch on me to the tired setting. First time I’d felt really tired in over 3 days. Odd as it sounds, I liked the feeling as to me, it meant that MAYBE I’ll be able to sleep tonight. I don’t care how much you’re hacking or bugging out, eventually exhaustion will simply take you out.

Hi Lee, I know its going to sound funny, but I am glad your tired! I sure hope you get a good night sleep. As for me like I tell my wife, I'm still here and kicking, I tease her and tell her I am not going anywhere till I get the dam layout built and finished. As we all know they are really not finished!

mike g. posted:

As for me like I tell my wife, I'm still here and kicking, I tease her and tell her I am not going anywhere till I get the dam layout built and finished. As we all know they are really not finished!

And I wish you the ability to see multiple layouts completed, if you get my meaning!

Got the track in around the power station. In the back of the station I used pre formed Gar Graves 0-32. I wanted a small radius. My plan is to continue the two tracks down the table at a 45 degree angle after the curves. There will be buildings in front of the tracks hiding them. I did it this way so I could push full hoppers in. And at the other end of the two tracks take them and bring them back to push into the station again. Done for tonight. Pics of the project so far...........Paul

DSCN0165DSCN0166DSCN0167DSCN0169

Attachments

Images (4)
  • DSCN0165
  • DSCN0166
  • DSCN0167
  • DSCN0169

The power station area is looking very good Paul!  Until seeing these photos, I didn't realize there was space behind the Menards station for the tracks to curve around back.  The coved corner may have tricked my eye on earlier photos, and I may have missed reading something you may have written about it.  Somehow I have been catching myself skipping sentences and whole paragraphs and not realizing it right away, or not at all.  Glad I don't have to take any McCalls Crabs reading comprehension tests like we did in school in the '60s.  

PDDMI posted:

Just one day after passing on investing in another Menards building...I received an email from Menards notifying me that the two NYC boxcars and two free box trucks that I had ordered last week, as a ship-to-store, had arrived and were ready for pickup. So I made the trip to the local store yesterday afternoon and on my way to check-out, I walked by the "Toy" aisle again and stopped to take another look at the display building that was on sale at 30% off. Somehow that Herman's Sauerkraut Factory found it's way into my cart. But, with a list price of $99.99, discounted down to $69.99 and then subtract the $13.20 rebate coupon that I had from a previous purchase and the $7.70 11% rebate I'll send for from this purchase...turns into less than $50.00 for this new, to me, building! Really hard to pass up...however, not being a big fan of sauerkraut...the new signage and logo for that building will be modified to read...Dark Horse Brewing Company...which is a very popular local and always expanding brewing facility here in town.

So now with the new building in tow, and of course, having no where to put this on my existing layout...it looked like it was time once again for a little more expansion! Another fine mess I've gotten myself into...

That was yesterday...Well, today, as luck would have it...I found a temporary location on my layout for the new brewery...and it may well become a permanent one!!! The new signage is in place and the power is on...so time to get brewing and of course, make time for whatever it is that follows that?

IMG_3215IMG_3217IMG_3222IMG_3229

Then I erected a fence around the barnyard...those bovines kept trying to cross the road to get to those ever "greener pastures"!!!

IMG_3202

And finally I added a family of deer...no hunting until fall, so they're safe for now...Just sayin

IMG_3213

I like your idea of the brewery.

Thanks Doug...When the SauerKraut Factory was first introduced by Menards, I always thought it would be better viewed as a brewing facility, especially with it's design, architecture and all of the rustic details that it offers. We just happen to have the "real life" version of this brewery in our small town...so as with the various buildings and structures that are spread around my layout, most including the brewery,  have signage that correlates with a real business that is located here. When someone sees the layout...they automatically pickup on those buildings with the familiar names of local businesses and it kind of eases them right down into the Main Street of the layout...everybody thinks its great!!!

I have a sneaking suspicion, that the clues from Mark the Menards Guy this week, might just be leading to a new Brewery Building from them...we'll see next Tuesday the 21st...in any event...I'm happy with mine and will stay the way it is!

IMG_3228

Attachments

Images (1)
  • IMG_3228

Was a little laid back so far today. Was waiting for my Weaver TOFC cars to come. Now that they came and I have open them and put them on the attic layout I am heading down to work some more on the basement layout. Have to clean the tables off where the power plant is so I can layout a track plan. Pics of the cars................Paul

DSCN0171DSCN0175

Attachments

Images (2)
  • DSCN0171
  • DSCN0175

I have been very under the weather lately, along with putting in about 70 hours a week at work, geeze I wonder if being sick is caused by so much work!

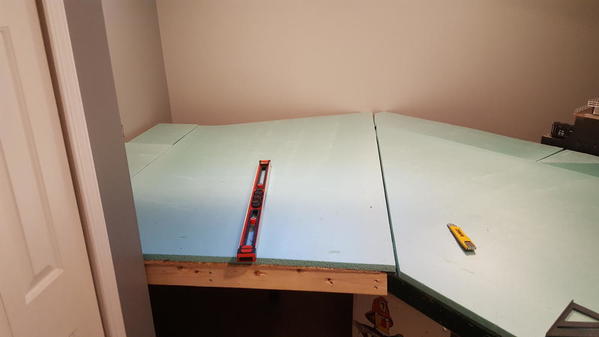
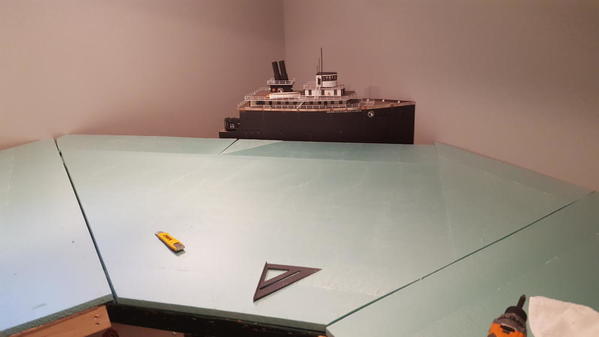
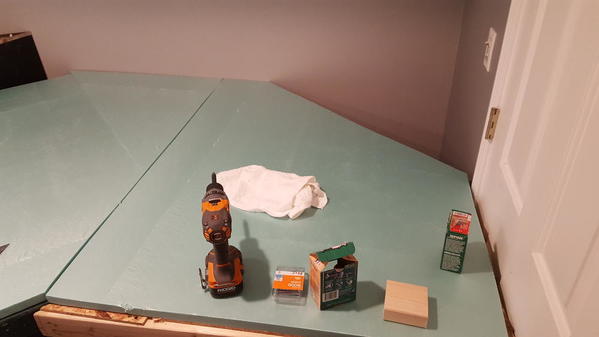
I actually have a 3 day weekend and felt well enough to finish the benchwork!  I also cut all the 1inch foam for the top of the layout.  

Here is my blank canvas! 

20170217_16330120170217_16330420170217_16330720170217_163310


Attachments

Images (4)
  • 20170217_163301
  • 20170217_163304
  • 20170217_163307
  • 20170217_163310

Today I painted a track side shack I purchased from Brad along with a Marine travel car and a coal car.

At first I was just going to put it together and slap it on the layout but then I figured it was about time to start doing some detailing,,,that was after I painted all the first set of trestles. Didn't like the pink color so they are now black, going to do some brown touch ups on them The second set is already black so I'll add some brown to them to show some rust and also the rivet heads.

Just a short note to DJEVLEERJR, enjoy the time you have with your 2yr old,,,somehow mine turned into a 50 yr old in July!

But I do have a silly question I just can't figure out.  How long would an average American car measure on a 027 scale layout....trying to find some that will look appropriate...

Dennis Jansen 010117 posted:

Today I painted a track side shack I purchased from Brad along with a Marine travel car and a coal car.

At first I was just going to put it together and slap it on the layout but then I figured it was about time to start doing some detailing,,,that was after I painted all the first set of trestles. Didn't like the pink color so they are now black, going to do some brown touch ups on them The second set is already black so I'll add some brown to them to show some rust and also the rivet heads.

Just a short note to DJEVLEERJR, enjoy the time you have with your 2yr old,,,somehow mine turned into a 50 yr old in July!

But I do have a silly question I just can't figure out.  How long would an average American car measure on a 027 scale layout....trying to find some that will look appropriate...

Well, since O27 is basically S scale equipment on O scale track, you can get along fine with Matchbox and Hot Wheels cars... 

Mitch

p51 posted:

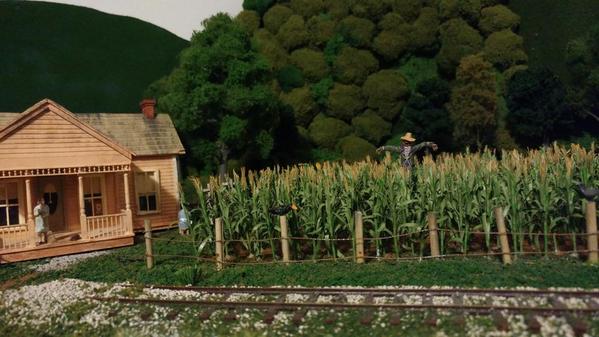
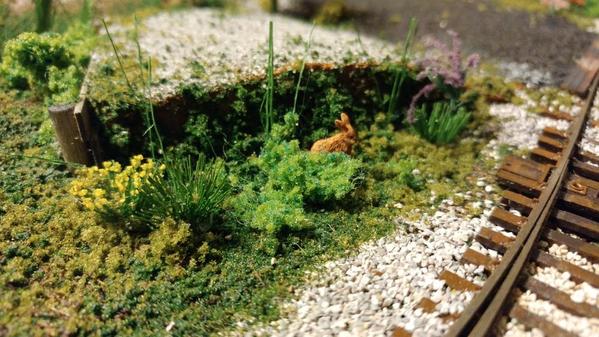
I made a big order to Scenic Express, and it arrived today. I now have three rabbits running free on the layout, and finally a scarecrow for my cornfield. I also bought several sheets of static grass mats, two of which went in place on the layout tonight because I couldn't sleep, and the rest are going to be put on the layout this weekend.

0216170149a_resized0215172249-1_resized0215172235_resized0215172235_Burst17-1_resized0215172237-1_resized0215172238-1_resized

Lee nice work. The scarecrow and animals are a nice touch.  Now you just hope you don't wind up with a rabbit problem as they can multiply rather quickly.    As for working when you cant sleep, been there and done it. 

 Of course my sleep issues weren't caused by the crud( School disease: germs sent home by the school districts to punish parents) but I can understand as finally got rid of it myself.  As for drugs, don't take them if I can avoid it and defiantly stay away from steroids as I do like to sleep.  Docs on base gave me scrips for my back and to help me sleep, with 3 kids I cant afford to be in la la land. So its infantry candy for me as I have done all these years, Docs finally gave up and gave me a permeant scrip with unlimited refills for Bayer Back and muscle pain as I am now immune to motrin.  

Big_Boy_4005 posted:

After a little fun running on Monday, it was back to work (still fun). My ADD was in full swing today as I got into a bunch of different projects.

One major one is to move the hidden yard control panels (big and small) over to the dispatcher's corner.

This is the current big hidden yard control area. The three components are the monitor, the panel and the track occupancy board. The monitor has already been decommissioned. The track occupancy board is easy to move. It's the control panel that will take work, because of all the wires, 30 to be precise.

IMG_7330

I had some very large old phone cables. This one has 50 pairs. I'm only using less than half the conductors. These will be control lines and throw relays which will handle the track power.

IMG_7317

I cut a grommet into the new desk top.

IMG_7318

This little spread sheet tells me which colored wire is assigned to which function.

IMG_7319

Preparing to build the new relay panel.

IMG_7328

The panel behind the vacuum is where the relays will be mounted, on the other side, under Red Wing

Eliot, It looking a lot better, Once again although the panel move went smooth for you I still get a headache when you start talking about wiring.

IMG_7329

Speaking of Red Wing, it has been a long time since I've seen it. It was buried under a blizzard of junk for the last couple years. All gone, and the dust with it!        Did find anything moving or dead?

IMG_7321IMG_7322IMG_7324

Yes, this is just an ordinary room fan...

IMG_7327

and this is an empty box with a furnace filter taped to the bottom. The idea is to place the fan in the opening and have it blow the air through the filter. I'm getting ready to paint rail! Last time there was a huge cloud of over spray. I hope this works.

IMG_7326

I spent an hour last week calling all over the country to get these. Cleaned out two stores and put a dent in the stock of a third. All they are is the non-illuminated plastic bumpers for tubular track. It's weird, because people keep telling me they aren't being made anymore, but they are on page 106 of the brand new Lionel catalog. Go figure!     That explains the nation wide shortage and rumors of price gouging.

IMG_7295

All that remain from that pile, is one box of three. They go fast when you put in 8 at a time.    They maybe old school but still look really good

IMG_7320

   Looking forward to the next instalment.......

M. Mitchell Marmel posted:

Got a delivery from eBay in the mail yesterday:

GEDC2818

Now if I can't get into serious mischief with a small herd of wide eyed innocent looking chibi gi-raffes, well, I'm simply not trying very hard!

GEDC2819

Mitch

From the looks of things and the position of the guy on the roof, mischief has already started.  Attack of the Killer chibi gi-raffes!!!!!!!!

suzukovich posted:

From the looks of things and the position of the guy on the roof, mischief has already started.  Attack of the Killer chibi gi-raffes!!!!!!!!

It gets worse.  Reinforcements arrived in the mail today:

GEDC2821

I don't know about you guys, but *I'M* sleeping with one eye open tonight...

In other news, I've refined the gi-raffe/brakeman choreography a bit.  Turns out the brakemen are happier if they can lie down for a couple carlengths before popping back up: 

This was taken after half an hour or so of continuous operation, to let 50 year old solenoids loosen up and warm up after what is probably decades of snoozing...

Mitch

Attachments

Images (1)
  • GEDC2821
Videos (1)
GEDC2820

I finally got the basement cleaned up and organized.  Taking a break from scenic chores so I can run trains.  I am starting to spot rolling stock in start positions for the freight segment of the first session.  I worked out a somewhat logical sequence for switching manuvers at town businesses with the aide of a schematic of the track, location of businesses and color coded the activity (Drop, Hold, Take) for each car initially spotted.  Then I specified the order of the switching consist in the freight train.  The consists of the passenger train and mail train will pretty much remain the same, as well as the oil tanker train.  The "thought freight" will just be made up of any 8 or 9 cars left over in the yard for sorting. 

I sent one of my switchers off for repair and upgrade.  I have a new legacy switcher to run this weekend.

I just finished taking out my track wiring.  Removing 4 switches and taking the center pin out.   Finding out that two of my manual switches had metal plates on the bottom that are usually only on remote switches.   Had to take out a bunch of tiny screws to get in them and bend the tabs to raise the rail up.  Not bad work but time consuming putting all those tiny screws back in.   So now the center rail is isolated between my two loops.   Wired up two CW-80s using common ground.    Finally can run two trains with two throttles!!   : )   While not paying attention and patting myself on the back,  I didn't notice I left one on the switches set the wrong way.   Big crash!   Wabash passenger car to the floor!  Wheels everywhere!   SHEEEESH!   Just took a few minutes to fix.....grrrrrr

Jim

First off, I apologize for diverging from my catenary build.  The layout required a few preliminary rough ins before I can continue.  Case in point, the workbench went through another morphing , its third, from the original design.  Basically, the legs supporting the layout behind the desk were cut off, the desk pushed up against the back wall with the layout resting directly on the desk, resulting in another 16 sq ft of floor space opened up.  Guest should appreciate things not being so claustrophobic.

I felt it necessary to rough in the future station location before more cat was installed.  That includes the addition of a station spur and the accompanying benchwork involved.  Along with the new spur, I added lower shelving and what will be another spur where repair candidates can be run off and stored.

Here's where I got distracted.  After roughing in raised platforms, I played with the placement of station elements like the enclosed passenger bridge and stairs.  Keeping the components loose until their positioning is finalized, then I can proceed installing cat.  Those familiar with Lancaster station on the old PRR, that's the inspiration for this design. Unfortunately, the cramped quarters won't allow for the station proper...only the pedestrian bridge and platforms.  I spent this evening indulging in some detail work on the stairs...totally distracted from the more important work. 

Bruce

Nice work, Bruce.  I'm eager to see more shots of the overhead wire!  Even better with that GG1 running under it.  Cheers from another wire junkie.

For everyone else, I had the choice tonight of working on the control board circuitry or running a live catenary test at different speeds.  Life is short, so I chose the latter.  I sheepishly admit most of the YouTube views are probably mine.  It was so much fun to watch the pantograph follow the wire at speed.  As soon as I get the chance, I'll post other details.  I just couldn't resist trying a speed run and posting it to the good folks here.

M. Mitchell Marmel posted:
suzukovich posted:

From the looks of things and the position of the guy on the roof, mischief has already started.  Attack of the Killer chibi gi-raffes!!!!!!!!

It gets worse.  Reinforcements arrived in the mail today:

GEDC2821

I don't know about you guys, but *I'M* sleeping with one eye open tonight...

In other news, I've refined the gi-raffe/brakeman choreography a bit.  Turns out the brakemen are happier if they can lie down for a couple carlengths before popping back up: 

This was taken after half an hour or so of continuous operation, to let 50 year old solenoids loosen up and warm up after what is probably decades of snoozing...

Mitch

Better hire this guy quick!

Woke up early and replaced some of the ceiling tiles in the train room.  Some near the back had a bit of water damage from a leak a few years ago.  Don't worry they are not directly above the layout.  

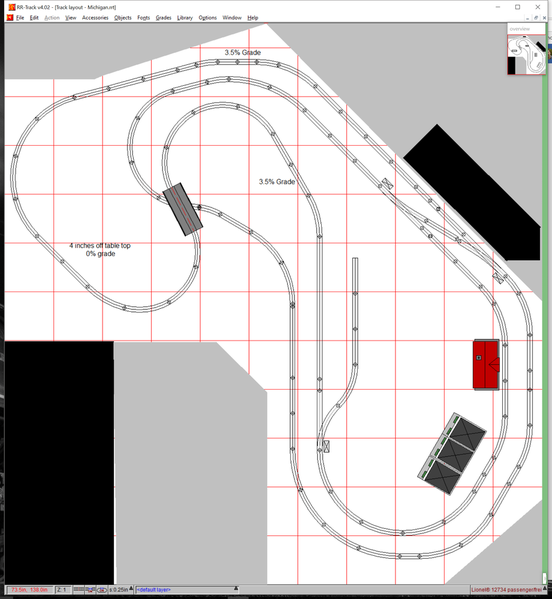
I also stayed up last night and worked on a track plan.  I posted it on my build thread but here it is for those to who follow it.  

Screenshot 2017-02-17 21.09.11

Attachments

Images (1)
  • Screenshot 2017-02-17 21.09.11

Agreed (quote:"Nice work, Bruce.  I'm eager to see more shots of the overhead wire!  Even better with that GG1 running under it. ") Cheers from a GG1 Junkie. my first really heavy O gauge lionel. Its still fun to run her. and, AND, Salute on the Vistadome car in Orange, shes a beauty... Thanks for sharing

Jim,

Nice track plan for you and the kids.  At first I thought it needed a second crossover in the other direction, but then after tracing a train's route in both directions I see I was wrong.  The area in the corner by the boat; is that open for access to the back of the layout?  I didn't quite get what you are doing when I saw your photos on your build topic.  The plan makes it clear except for the access question.  I'm enjoying that topic!

M. Mitchell Marmel posted:

I was updating my "Two Foot Gauge" cars (fastening the rubber feet down with two sided foam tape and running chains from corner to corner), and next thing I knew, I had a tiny kibitzer... 

Mitch

I hope you aren't planning on going dancing with those. You do realize you have two left feet.

First thing I thought of when I saw those was Monty Python.

Big_Boy_4005 posted:
M. Mitchell Marmel posted:

I was updating my "Two Foot Gauge" cars (fastening the rubber feet down with two sided foam tape and running chains from corner to corner), and next thing I knew, I had a tiny kibitzer... 

Mitch

I hope you aren't planning on going dancing with those. You do realize you have two left feet.

First thing I thought of when I saw those was Monty Python.

That's why here isn't allowed to dance at train shows. What's scarier is he puts them on flats when not in use. 

Lot of cool stuff and Spelling on my reply to Elliot's post is another reason I should try to sleep at night.   Really nothing major other than finally got the lash up between my Atlas GP35 and the Lionel GP35 to work. Also made a new video, hopefully we wont see video of Mitch with his two left feet dancing to the music.

https://youtu.be/KojLgaDuTe4


Last edited by suzukovich
suzukovich posted:

Lot of cool stuff and Spelling on my reply to Elliot's post is another reason I should try to sleep at night.   Really nothing major other than finally got the lash up between my Atlas GP35 and the Lionel GP35 to work. Also made a new video, hopefully we wont see video of Mitch with his two left feet dancing to the music.

https://youtu.be/KojLgaDuTe4


Doug, I want to thank you for the best 3 minutes and 28 seconds! It made my day, but most of all it was made special do to the fact that my 2 year old grandson wanted to watch it 3 times in a row while sitting on Grandpa Choo Choo's lap! Thanks again!

mike g. posted:
suzukovich posted:

Lot of cool stuff and Spelling on my reply to Elliot's post is another reason I should try to sleep at night.   Really nothing major other than finally got the lash up between my Atlas GP35 and the Lionel GP35 to work. Also made a new video, hopefully we wont see video of Mitch with his two left feet dancing to the music.

https://youtu.be/KojLgaDuTe4


Doug, I want to thank you for the best 3 minutes and 28 seconds! It made my day, but most of all it was made special do to the fact that my 2 year old grandson wanted to watch it 3 times in a row while sitting on Grandpa Choo Choo's lap! Thanks again!

Mike, Glad he liked it. Most likely the music though after all its eurotrash as us GIs called it in Germany. Song did make to number one on the German top 20 charts  the year I meet my wife.

suzukovich posted:
Big_Boy_4005 posted:
M. Mitchell Marmel posted:

I was updating my "Two Foot Gauge" cars (fastening the rubber feet down with two sided foam tape and running chains from corner to corner), and next thing I knew, I had a tiny kibitzer... 

Mitch

I hope you aren't planning on going dancing with those. You do realize you have two left feet.

First thing I thought of when I saw those was Monty Python.

That's why here isn't allowed to dance at train shows. What's scarier is he puts them on flats when not in use. 

But he could do a serious "Silly Walk" with two left feet. Where's John Cleese!

Mark Boyce posted:

Jim,

Nice track plan for you and the kids.  At first I thought it needed a second crossover in the other direction, but then after tracing a train's route in both directions I see I was wrong.  The area in the corner by the boat; is that open for access to the back of the layout?  I didn't quite get what you are doing when I saw your photos on your build topic.  The plan makes it clear except for the access question.  I'm enjoying that topic!

Marc,

The area your talking about is for several reasons.

1) My arms arn't 10 feet long and I do not want pop up access hatches. I can reach the other side of the layout from back there to work on it or clear a derailed train.

2) There is a water shut off for the outside hose bib right above it.  I need to access it every fall to shut it off and in the spring to turn it back on.  It has also leaked in the past and if it ever leaks again I do not want it over the layout.  It is the only water pipe in that room so I am not worried about the rest of the layout.

3) It will serve as my harbor for the car ferry and possibly another scene.  I might make it my total water front with buildings along the one wall with a dock and some fishing boats.  

suzukovich posted:

Lot of cool stuff and Spelling on my reply to Elliot's post is another reason I should try to sleep at night.   Really nothing major other than finally got the lash up between my Atlas GP35 and the Lionel GP35 to work. Also made a new video, hopefully we wont see video of Mitch with his two left feet dancing to the music.

https://youtu.be/KojLgaDuTe4

(dance) (dance) (crash) (ow)

RSJB18 posted:
suzukovich posted:

That's why here isn't allowed to dance at train shows. What's scarier is he puts them on flats when not in use. 

But he could do a serious "Silly Walk" with two left feet. Where's John Cleese!

MY BRAIN HURTS! 

ObActuallyWorkingOnTrains: If you have a 3535 Security Car or anything else using that shell, and the end tabs break off, a couple of 1/4" brass L channel pieces cut to the proper size and cemented in place (I used ACC gel) will do the job nicely!

GEDC2825

Mitch

Attachments

Images (1)
  • GEDC2825
M. Mitchell Marmel posted:
suzukovich posted:

Lot of cool stuff and Spelling on my reply to Elliot's post is another reason I should try to sleep at night.   Really nothing major other than finally got the lash up between my Atlas GP35 and the Lionel GP35 to work. Also made a new video, hopefully we wont see video of Mitch with his two left feet dancing to the music.

https://youtu.be/KojLgaDuTe4

(dance) (dance) (crash) (ow)

RSJB18 posted:
suzukovich posted:

That's why here isn't allowed to dance at train shows. What's scarier is he puts them on flats when not in use. 

But he could do a serious "Silly Walk" with two left feet. Where's John Cleese!

MY BRAIN HURTS! 

ObActuallyWorkingOnTrains: If you have a 3535 Security Car or anything else using that shell, and the end tabs break off, a couple of 1/4" brass L channel pieces cut to the proper size and cemented in place (I used ACC gel) will do the job nicely!

GEDC2825

Mitch

Repaired just in time for the stand off in the other thread. But now for something completely different a Alligator disguised as a Zebra. A killer chibi gi-raffes worse nightmare.  

1-DSCF6341

Attachments

Images (1)
  • 1-DSCF6341
suzukovich posted:
M. Mitchell Marmel posted:
suzukovich posted:

Lot of cool stuff and Spelling on my reply to Elliot's post is another reason I should try to sleep at night.   Really nothing major other than finally got the lash up between my Atlas GP35 and the Lionel GP35 to work. Also made a new video, hopefully we wont see video of Mitch with his two left feet dancing to the music.

https://youtu.be/KojLgaDuTe4

(dance) (dance) (crash) (ow)

RSJB18 posted:
suzukovich posted:

That's why here isn't allowed to dance at train shows. What's scarier is he puts them on flats when not in use. 

But he could do a serious "Silly Walk" with two left feet. Where's John Cleese!

MY BRAIN HURTS! 

ObActuallyWorkingOnTrains: If you have a 3535 Security Car or anything else using that shell, and the end tabs break off, a couple of 1/4" brass L channel pieces cut to the proper size and cemented in place (I used ACC gel) will do the job nicely!

GEDC2825

Mitch

Repaired just in time for the stand off in the other thread. But now for something completely different a Alligator disguised as a Zebra. A killer chibi gi-raffes worse nightmare.  

1-DSCF6341

If anyone spots a dead parrot we are all doomed

Moved some boxes off the tables but after a few times of hitting my head on a shop light hanging a bit to low I raised that one up and then decided to take a short hiatus from the layout and redo the lighting in the basement. So I went to the Depot and bought all the stuff I need to do that. So that is what I may start later today or wait till tomorrow and get an early start on it. Figured this was the route to go before I start adding any more tables giving me more light to see what I am doing..............Paul

I spent a few hours last night rounding up wire and stuff to wire my layout for isolated loops and buss wiring the two loops.  Finished up that task after a few hours of work this morning. And a bunch of cleaning!   Room cleaning and track cleaning!   I don't know what I dislike the most.  Soldering or cleaning??   Not really, it was fun and I got to learn a few things! 

Jim  

Today I set up a signal and all the wiring from accessory power etc. to test the signal and its relay. I used a slab of florist foam that I use to hold tree trunks when I make trees to set the signal and relay on.  I used long round head pins to hold the signal and relay in place so I could test everything before installing on layout. I will have a pair of signals facing opposite directions. I spent 2 to 3 hours figuring out how to wire everything, splicing wires to the accessory power wires, cutting and splicing, soldering, and wiring everything together and then placing the light beam emitter and the light receiver.  I was surprised when I turned on the accessory power that it worked. I used my hand to act like a train interrupting the beam so as to activate the relay and change the dignal from green to red. Tomorrow, I will go through the same process with the other signal. They will be installed as a pair facing opposite directions. We bought the signals a few years ago, but the layout was not ready for them until now  

IMG_1582 

Attachments

Images (1)
  • IMG_1582
Videos (2)
trim.A625A778-D36B-4D6B-B250-6A00B979C0A4
trim.9E153019-AB26-43DB-BA44-55180F7EC268
Last edited by WP

I bought a set of these over the weekend. Yes, they’re HO, but they make them very large for whatever scale they make them in, I suppose to represent very large potted plans that stand as high as a chair or furniture. I wanted some small potted plants (the kind you can pick up with one hand and can sit in a windowsill) and these seem to be just about right for that. I’ll place them in various places on the layout, just a tiny little detail. A couple will go on the railings at the farmhouse, one or two at the log cabin, and maybe one or two in the cupola at the depot (I still haven’t gotten to building interiors to drop into that and the farm house, and eventually running lights to them), even though it wouldn’t likely be seen there.

paul 2 posted:

Last night got a call from one of the guys from the Tuesday night crew asking if he and a couple of the other guys could come over to see my layout. I said yes so for the next three days I will be cleaning up so there will be some moving around space in my worlds of chaos

Paul,

At least you have the time. A pal of mine who is conducting his own mass experiment in chaos theory (with a model railroad as the basis) got a call from a group of people who wanted to come by and see the layout that evening. He said he took around, knew there was NO way he was going to get stuff cleared away as he described it as “looking like ISIS had just attacked the layout” and presented it as an ‘it is what it is’ situation. He was shocked how well it was taken by those who showed up, as I guess anyone can relate to that.

As for me, a local group does a day-long layout tour in the general area. I’ve gone the last few years to check out everyone else’s stuff. I’d contacted the people running that, asking if they’re want me layout if I could swing it. They jumped at the chance, but I had to remind them I had some issues I needed to figure out. First, that’s my father-in-law’s birthday (they live about an hour south of us). My wife was okay with that as just her and her sisters go down there for that anyway (I don’t mind her parents, they’re actually good folks). Then, I’d be there all day ALONE. I wouldn’t be able to work the door if I’m in that back room with the layout, and wouldn’t be able to keep track of anyone between the door and the layout room. I’m VERY uncomfortable with that part. Third, there’s my aging Dachshund. He is hard of hearing and while I could put him in his kennel in our bedroom at the other end of the house, if he suspected people were in the house while he was kenneled, he’d probably start whining and howling. Still not sure how this is going to go, if at all…

Been busy with grand-kids and working on the paint job for the Lionel ALCO A-A two motor powered set. So not as much layout work as train work.

So I will skip to the end result. The A-A and one Lionel Boxcar re-paint.

The way I look at it is it is a win win,
 I bought a set of Texas Special 210 ALCOs for parts to build the 4 motor ALCO A-B-A set that had trashed shells with no front skirts and the driver unit needed gears. So, I had Hudson John swap out the drive gears and built the A-B-A set. Then I thought maybe I could make something out of what I had. The 4-motor set did not pull much better with 4 than with 3 motors. So I made this into a 2 motor A-A set. Front is a 202 reduced to one winding on the motor so it can run a 3 position E-unit and the last powered B-unit I built for the 4-motor set. This set is the result. Not bad for something that was trash bound.

 A fun project and I did it with things that were going to the trash. 

Had to let them dry good before I did the decals.

Done till I get the Alaska Eskimo guy for the boxcar.


Here is the whole train less a correct caboose that I have not yet got in the mail.

Not perfect but also not bad. The grand-son loves it and the Menards Alaska cars are nice.

 "A fun project and I did it with things that were going to the trash."

"Not perfect but also not bad. The grand-son loves it and the Menards Alaska cars are nice."

Maybe I'm in a minority here, but I think it looks great!! Isn't this what part of the hobby is supposed to be about.. I'm putting Kadees on some post war and MPC stuff that 'nobody' wants.. Adding some minor details, weighting them properly and such.. Will post some pictures when they come out of the Woodson RR 'shop'.. Rivet counters may 'knock' them, but so what..

Woodson posted:

 "A fun project and I did it with things that were going to the trash."

"Not perfect but also not bad. The grand-son loves it and the Menards Alaska cars are nice."

Maybe I'm in a minority here, but I think it looks great!!

I don't you are in the minority.

I think he did a really good job with that!

Thanks guys,

I have learned a lot on this first shot at re-painting and next time I will do better.

Did I forgot to add,,,,I did have fun!

I do have a Lionel Illuminated Alaska square window caboose # 6-16523 from the early 90s on the way to back it all up.

Now to get back to work on the elevated loop.


Mark Boyce posted:

The Alaska Alcos look very good!  Looks like a good match for the cars!  I could hear your grandson in the background.  Sounds like he was having fun!!

Thanks Mark, I am blessed, he makes it all good, for 3 he is a good engineer and every time he comes over he wants something to take home. We stopped at Menards when I took him home today and he picked out a Santa Fe tractor out of their big box of Denver Diecast  $2.99 stuff.

Last edited by KRM
KRM posted:

Been busy with grand-kids and working on the paint job for the Lionel ALCO A-A two motor powered set. So not as much layout work as train work.

So I will skip to the end result. The A-A and one Lionel Boxcar re-paint.

The way I look at it is it is a win win,
 I bought a set of Texas Special 210 ALCOs for parts to build the 4 motor ALCO A-B-A set that had trashed shells with no front skirts and the driver unit needed gears. So, I had Hudson John swap out the drive gears and built the A-B-A set. Then I thought maybe I could make something out of what I had. The 4-motor set did not pull much better with 4 than with 3 motors. So I made this into a 2 motor A-A set. Front is a 202 reduced to one winding on the motor so it can run a 3 position E-unit and the last powered B-unit I built for the 4-motor set. This set is the result. Not bad for something that was trash bound.

 A fun project and I did it with things that were going to the trash. 

Had to let them dry good before I did the decals.

Done till I get the Alaska Eskimo guy for the boxcar.


Here is the whole train less a correct caboose that I have not yet got in the mail.

Not perfect but also not bad. The grand-son loves it and the Menards Alaska cars are nice.

They look great. Nice restoration project.

KRM posted:
Mark Boyce posted:

The Alaska Alcos look very good!  Looks like a good match for the cars!  I could hear your grandson in the background.  Sounds like he was having fun!!

Thanks Mark, I am blessed, he makes it all good, for 3 he is a good engineer and every time he comes over he wants something to take home. We stopped at Menards when I took him home today and he picked out a Santa Fe tractor out of their big box of Denver Diecast  $2.99 stuff.

What a blessing indeed!!

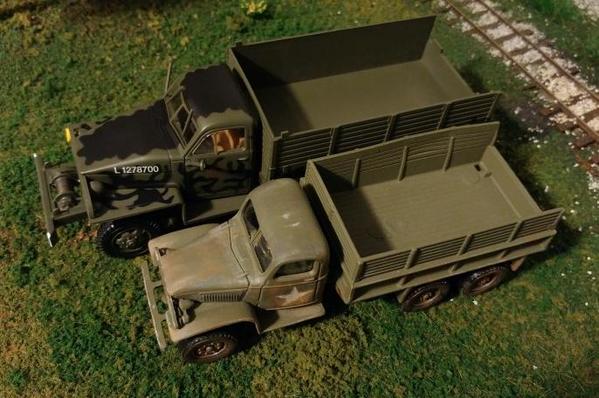
I got that 1:43 scale Studebaker truck in the mail today. It looks really good, but I'm going to have to take it apart to paint it to look like a US one. But you can look at it right next to a 1:50 scale GMC diecast made by solido. Comparing them, you can see the massive difference in size.0220171808-1_resized

The problem is the screws holding it together. They used an odd screw head that looks like a recessed triangle. They're made in Europe I guess but I have no idea what kind of tool to use to take it apart.

Attachments

Images (1)
  • 0220171808-1_resized
Miggy posted:

Hello Woodson, Can I be on your team, sir? I appreciate ya.

(I don't know how many rivets I got - left - loosing a few now-a-days) (not counting, it's about the FUN)

p51 posted:
Woodson posted:

 "A fun project and I did it with things that were going to the trash."

"Not perfect but also not bad. The grand-son loves it and the Menards Alaska cars are nice."

Maybe I'm in a minority here, but I think it looks great!!

I don't you are in the minority.

I think he did a really good job with that!

Thanks folks!! To make myself clear, I wasn't knocking "rivet counters".. The hobby has room for everyone, IMO!! I love all the creativity and information that everyone shares on this Forum!! I appreciate being part of it!!

p51 posted:

I got that 1:43 scale Studebaker truck in the mail today. It looks really good, but I'm going to have to take it apart to paint it to look like a US one. But you can look at it right next to a 1:50 scale GMC diecast made by solido. Comparing them, you can see the massive difference in size.0220171808-1_resized

The problem is the screws holding it together. They used an odd screw head that looks like a recessed triangle. They're made in Europe I guess but I have no idea what kind of tool to use to take it apart.

Lee

Defiantly can see the difference but still cool.   Made in china nothing surprises me anymore.

p51 posted:

I got that 1:43 scale Studebaker truck in the mail today. It looks really good, but I'm going to have to take it apart to paint it to look like a US one. But you can look at it right next to a 1:50 scale GMC diecast made by solido. Comparing them, you can see the massive difference in size.

The problem is the screws holding it together. They used an odd screw head that looks like a recessed triangle. They're made in Europe I guess but I have no idea what kind of tool to use to take it apart.

That's a security screw.  Harbor Freight sells the bits to take those apart.

http://www.harborfreight.com/3...y-bit-set-68459.html

Mitch

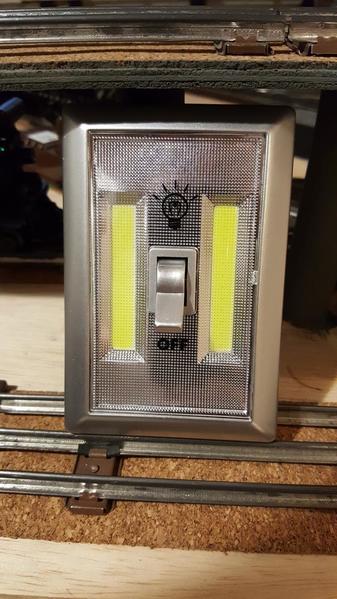
So I'm normally not one to by "As seen on TV" stuff but...

Saw this in a local store yesterday and found a perfect use for it. Got tired of dragging out the drop light every time I was working on the wiring under the table. This was the perfect solution. It has magnets on the back too so I didn't even have to mount it to the table.

2017-02-21 07.01.42

Attachments

Images (5)
  • 2017-02-21 07.01.42
  • 2017-02-21 07.01.57
  • 2017-02-21 07.02.03
  • 2017-02-21 07.02.12
  • 2017-02-21 07.02.16
RSJB18 posted:

So I'm normally not one to by "As seen on TV" stuff but...

Saw this in a local store yesterday and found a perfect use for it. Got tired of dragging out the drop light every time I was working on the wiring under the table. This was the perfect solution. It has magnets on the back too so I didn't even have to mount it to the table.

2017-02-21 07.01.42

LOL I was working under my layout and my wife handed me one of those!!!    Works pretty good and produces a "wider" light than a flashlight!  Cheap too! 

Jim

Miggy posted:

>>Ponders: Where does he get those Awesome ALASKA Decals? very nice!! I need to use the grandson pass to walk through the "Train Detector"... just may help. lol

Is there a decals specialty shop?

Frank,

 They are HO scale Microscale Decals Number 87-480 for Alaska Diesel locomotives, New paint 1980s

 I ordered them not knowing if they would do it or not but they seem to be just fine.

 They would cover the whole side of an HO unit.

http://www.ebay.com/itm/Micros...5:g:YRYAAOxy88lRXzuz

http://www.microscale.com/Merc...low=&range_high=


I like fried spam........................ That being said I did get most of my out of box rolling stock back onto the layout after the "wire your layout" weekend.   May drop a few more feeds down but I checked it and the track voltage is the same all the way around both the inner and outer loops.  Now to come up with more sidings and a place to put my Menards depot with Lionel platforms. 

Add Reply

Post

OGR Publishing, Inc., 1310 Eastside Centre Ct, Suite 6, Mountain Home, AR 72653
800-980-OGRR (6477)
www.ogaugerr.com

×
×
×
×
Link copied to your clipboard.
×
×